


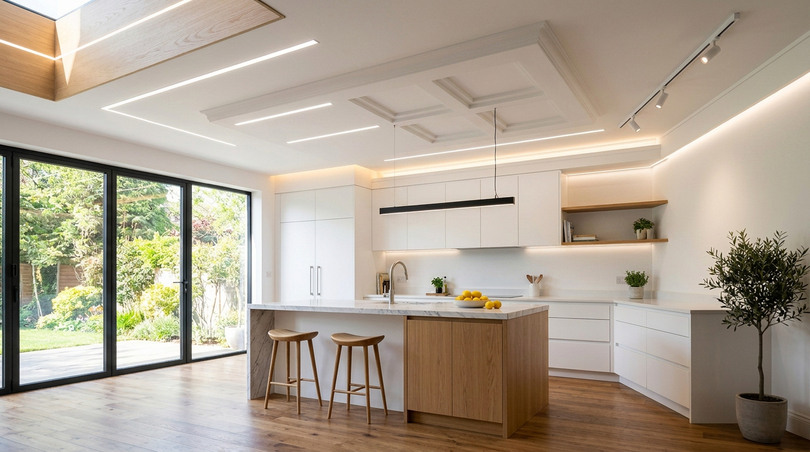
The light cut is, without a doubt, one of the most fascinating, sought-after, and technically challenging architectural lighting techniques in contemporary interior design. When an architect or interior designer speaks of a light cut, they are referring to that thin, precise, and almost magical line of light that emerges from an incision in the ceiling, wall, or floor, transforming the geometry of a space into an extraordinary visual experience. A well-executed ceiling light cut is not merely a source of illumination: it is an architectural element in its own right, capable of redefining volumes, accentuating proportions, creating depth where none exists, and sculpting the perception of space with the same authority as a partition wall or a barrel vault.
Yet, the creation of a professional light cut, free of imperfections, uniform along its entire linear development, and durable over time, requires in-depth technical knowledge of materials, LED technologies, specific profiles, and electronic control systems. It is not enough to simply recess an LED strip into a drywall groove: the result would be disappointing, irregular, with visible hotspots, annoying flicker, and a drastically reduced lifespan. The difference between an amateur and a professional light cut is measured in precise technical details: the choice of the trimless profile, the COB technology of the light source, the quality of the power supply, and the dimming curve of the controller. This guide aims to analyze all these aspects exhaustively, with real technical data, comparative tables, and references to the best products available on the Italian market.
In this guide, we will analyze 8 complete solutions for creating architectural-grade ceiling light cuts, integrating trimless profiles from the PR-DW series, COB LED strips, slim power supplies, and smart controllers. Each solution is described with technical specifications, installation data, indicative costs, and optimal use scenarios, to concretely meet the needs of every professional: from the architect designing a luxury apartment in Milan to the lighting technician who must resolve a perimeter light cove in a gourmet restaurant, from the interior designer seeking absolute emission uniformity to the electrical installer who must correctly size the system according to current CEI regulations.
Before delving into the specifics of the 8 solutions, we will explore in depth the technical and artistic meaning of the light cut, the history of this technique from photography to cinema and then to architecture, the physics of light that determines its visual effectiveness, the most suitable color temperatures for different environments, the differences between available LED technologies, and the most up-to-date market data in the lighting sector. Only by starting from a solid understanding of the fundamentals is it possible to make conscious technical choices and create light cuts that exceed the client's expectations and stand the test of time.
In this article...
1. Definition and meaning of the light cut
To fully understand what is meant by a light cut, it is necessary to start with the technical definition, which in lighting engineering refers to a linear light source integrated into an architectural structure in such a way that only the light is visible, not the source. The term light cut, in its most precise sense, describes the effect of a thin, sharp, and geometrically defined line of light that visually "cuts" a surface, creating a chiaroscuro contrast of great perceptual impact. The term is often used interchangeably with light line, light cove, and cutting light, but technically each of these terms has slightly different nuances that industry professionals recognize with precision.
The light cut, in its most sophisticated form, is an element that belongs to the compositional language of contemporary architecture exactly like a ribbon window, a recessed pillar, or a flush-to-wall door. When a visitor enters a space and perceives a line of light running along the perimeter of the ceiling or geometrically dividing two surfaces, their brain unconsciously registers a sensation of order, precision, and execution quality. This psychological effect is documented by numerous studies in the field of neuroarchitecture, a discipline that studies how the built environment influences brain function and the psychophysical well-being of occupants.
The definition of a light cut in the artistic and photographic context is slightly different: we speak of cutting light (or side light / edge light) to indicate a light source positioned laterally to the subject, which illuminates surface details and creates marked shadows, emphasizing the three-dimensionality of forms. This photographic technique is the foundation of genres such as black and white portrait photography, high-contrast product photography, and expressionist cinematography. Understanding cutting light in photography helps to grasp the physical principle that makes ceiling light cuts so effective in interior architecture: it is always the directionality of the light, its ability to graze surfaces, that creates the perceptual drama distinguishing an ordinary environment from an extraordinary one.
The light cut as a compositional element of architecture
In interior architecture, the light cut is configured as a primary compositional element, capable of generating spatial effects that no other lighting tool can replicate. Architectural light cuts serve at least five fundamental compositional functions, each of which deserves in-depth discussion:
- First function: the definition of planes. A perimeter light cut positioned at the junction between the ceiling and the wall optically separates the two planes, creating a "floating ceiling" effect that perceptually expands the height of the room. This effect is particularly sought after in newly built apartments, where ceiling heights are often lower than the 2.7-meter standard of historic buildings. A well-designed perimeter LED light cut can make a 2.4-meter ceiling feel like it is 2.8 meters or more, simply thanks to the optical separation of the planes.
- Second function: the control of perceptual directionality. A longitudinal ceiling light cut, parallel to the main axis of a rectangular room, accentuates the perspective depth of the space and visually "guides" the visitor toward the back of the environment. This technique is widely used in the corridors of large hotels, museum spaces, and art galleries, where spatial progression has a precise narrative value.
- Third function: the creation of spatial hierarchies. Through light intensity and the arrangement of light cuts, it is possible to create hierarchies among the different functional areas of an open space. A living room with a perimeter LED light cut at 2,500 lm/m and a dining area with a more discreet light cut at 1,200 lm/m immediately communicates to the users of the environment which is the primary space and which is the secondary one, without the need for physical dividers or changes in flooring.
- Fourth function: the amplification of surface texture. A light cut grazing a face-brick wall, wood, travertine, or architectural concrete brings out the texture of the material with an evocative force impossible to achieve with diffuse lighting. The directionality of the cutting light enhances every irregularity, every grain, every pore of the surface, transforming an ordinary finish into an element of great perceived quality.
- Fifth function: the rhythm and modulation of space. A sequence of parallel light cuts, arranged at regular intervals on the ceiling of a nave or a corridor, creates a visual rhythm that scans the perception of space exactly like the arches of a Romanesque cathedral or the columns of a Greek temple. Rhythmic architectural light cuts are one of the most powerful tools available to the designer to transform a functional space into a narrative one.
Light cut: meaning in contemporary Italian design
In the landscape of contemporary Italian design, the light cut has assumed growing importance over the last fifteen years, becoming almost an iconic element of so-called "luxury minimalism", that aesthetic current which privileges the reduction of visible decorative details in favor of exceptionally high material and execution quality. Major Italian architecture studios (from Piero Lissoni to Antonio Citterio, from Michele De Lucchi to Patricia Urquiola) have incorporated light cuts as a grammatical element of their design vocabulary, both in high-end private residences and in commercial, hospitality, and museum spaces.
The influence of Northern European design, particularly Scandinavian minimalism and precision German architecture, has further contributed to spreading the culture of the light cut in Italy, a country that has managed to reinterpret this language with its own material and chromatic sensitivity. If Nordic minimalism tends toward light cuts with 4000K sources on white surfaces and light natural materials, Italian design often prefers warmer temperatures (2700K-3000K) paired with natural stone, noble wood, and Venetian stucco surfaces, creating highly refined chiaroscuro contrasts.
Difference between light cut, light line, and light cove
Although these terms are often confused in common language, it is important for a professional to distinguish precisely between a light cut, a light line, and a light cove, because they correspond to different technical solutions and visual renders:
| Term | Technical definition | Visual characteristics | Typical application |
|---|---|---|---|
| Light cut | Luminous line integrated into a ceiling or wall slit, with light directed downward or laterally | Sharp, precise, high intensity, marked shadow | Ceilings, walls, floors |
| Light line | Linear light source integrated into the architectural structure with emission in one or more directions | Continuous, uniform, can be direct or indirect | Ceilings, moldings, boiserie |
| Light cove | Technical cavity with a curved or angular section that houses the LED source and diffuses light toward the upper or lateral surface | Indirect, soft, atmospheric light | Perimeter ceilings, valances, niches |
| Cutting light | Lighting oriented to graze a surface to emphasize its texture (term predominantly photographic and theatrical) | Marked shadows, texture relief, high contrast | Stone, wood, concrete walls |
| Linear cut structure | Complete system of profiles, LED source, and accessories to create ceiling or wall light cuts | Depends on the chosen source and profile | Any flat surface |
The distinction between these terms is also important from a technical choice perspective: a pure light cut requires high-density LED sources and precision trimless profiles, while a perimeter light cove can be created with lower-density sources integrated into less expensive angular profiles. Understanding this difference is the first step toward making conscious design choices.
2. History of the light cut: from cinema to architecture
The history of the light cut as an expressive tool is fascinating and surprisingly long: its roots are embedded in 17th-century painting, pass through the expressionist cinema of the 1920s and 1930s, cross 20th-century artistic photography, and arrive, starting in the 1980s, in interior architecture thanks to the development of artificial lighting technologies. Understanding this history is not just a cultural exercise: it helps to understand why the light cut produces such a powerful effect on the psychology of the occupants of a space and why it continues to be one of the most sought-after tools by design professionals.
Pictorial origins: Caravaggio and chiaroscuro as cutting light
The principle of cutting light (an intense and directional light source that illuminates the subject laterally, creating dramatic contrasts between light and shadow) is already fully developed in the painting of Michelangelo Merisi da Caravaggio at the beginning of the 17th century. Caravaggio's tenebrism, with its radical use of highly directional light sources emerging from the dark to illuminate only what is essential, is the first visual theorization of what we now call the light cut effect.
17th-century Flemish painters (Rembrandt van Rijn in particular) further developed this technique, using cutting lights to model the faces of portraits and to create that sensation of three-dimensionality and physical presence that still makes their paintings extraordinarily modern today. The so-called "Rembrandt lighting" is still today one of the most studied lighting schemes in professional portrait photography: it is a lateral cutting light that illuminates three-quarters of the face, with the shadowed side showing a small triangle of light on the cheekbone, creating a three-dimensional effect of great intensity.
Expressionist cinema and the dramatic use of the light cut
Early cinema very quickly discovered the narrative and emotional power of cutting light. In German silent expressionist cinema of the 1920s (with works like "The Cabinet of Dr. Caligari" (1920), "Nosferatu" (1922), and "The Golem" (1920)), cinematographers systematically used cutting light to create atmospheres of unease, mystery, and psychological terror. The shadows projected by cutting light sources become autonomous narrative elements, telling moods and dramatic tensions with an effectiveness impossible to achieve through acting alone.
In American film noir of the 1940s (with the masterpieces of Billy Wilder, John Huston, and Orson Welles), cutting light becomes the visual code of the genre: blinds projecting stripes of light and shadow on the protagonists, light cuts penetrating through dark windows to illuminate only a face or a hand, extreme chiaroscuro contrasts that communicate the moral complexity of the characters. Orson Welles, in collaboration with cinematographer Gregg Toland, takes these techniques to their extreme consequences in "Citizen Kane" (1941), a film still studied in film schools worldwide as a manual of cinematic lighting.
Cinematic scene photography teaches a fundamental lesson for interior architecture: the light cut does not illuminate a space, it constructs it. When a cinematographer positions a cutting light source, they are not simply increasing visibility, they are redrawing the perceptual geometry of the space and directing the viewer's attention to what they want to communicate. This same logic applies to the use of light cuts in contemporary interior architecture.
Modern architecture and the integration of the light cut into spaces
The entry of the light cut into interior architecture as a codified and systematic technique occurs starting in the second half of the 20th century, with the rise of the Modern Movement and Minimalism. Architects like Tadao Ando, Louis Kahn, and Carlo Scarpa have used natural light to create light cut effects through slits in roofs, linear skylights, and ribbon windows grazing wall surfaces. Tadao Ando in particular (in the Church of the Light in Osaka (1989) or the Hyogo Prefectural Museum of Art (2002)) elevates the natural light cut to a primary architectural element, capable on its own of defining the spirit and meaning of a space.
With the technological revolution of artificial lighting in the 1980s and 1990s, design professionals began to seek methods to replicate the effects of natural cutting light in artificial lighting. Early solutions (fluorescent tubes hidden in drywall coves) were effective but technically rudimentary, with flickering issues, poorly controllable color tones, and maintenance difficulties. It is only with the advent of high-density LED technologies and precision aluminum profiles that artificial light cuts have reached quality levels comparable to natural light.
Technological evolution: from fluorescent tubes to COB LED
The technological evolution of light cut sources can be summarized in four technological generations, each representing a significant qualitative leap from the previous one:
| Generation | Technology | Period | Main limitations | Light cut quality |
|---|---|---|---|---|
| First | T8/T5 fluorescent tubes | 1975-2000 | 50Hz flicker, greenish tone, bulky shape | Low — source visibility, discontinuity |
| Second | SMD 3528/5630 LED strips | 2005-2015 | Dotting effect, low density, poor CRI | Medium — continuous but with visible dots |
| Third | High-density SMD LED strips | 2012-2020 | Dot visibility still present at close range | Good — dots less visible but still perceptible |
| Fourth | COB (Chip On Board) LED strips | 2018-present | Higher cost, need for quality power supplies | Excellent — perfectly uniform continuous line |
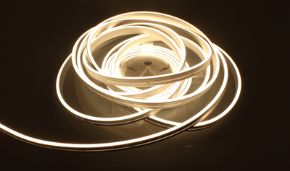
COB (Chip On Board) technology represented the true quality leap for professional light cuts. Unlike traditional SMD LED strips (where individual LEDs are separated by distances visible even to the naked eye when viewed up close), COB strips mount the chips directly onto a continuous substrate, creating a linear light source that shows no dots or discontinuities. The result is a perfectly homogeneous line of light, identical in quality whether viewed from 10 centimeters or 5 meters away.
3. Color temperatures for light cuts: 2700K, 3000K, 4000K, 6500K
The choice of color temperature is one of the most important design decisions when designing a light cut. Each color temperature generates a different emotional and functional perception of the space, and the exact same linear cut structure can create completely different atmospheres depending on whether it is illuminated with a 2700K or a 4000K source. For an architect or interior designer, choosing the right color temperature for a light cut means understanding not only the technical characteristics of the available LED sources, but also the visual psychology of the occupants and the specific functions of the space.
The Kelvin scale: what it really measures
Color temperature is measured in Kelvin (K) and describes the chromatic tone of a light source. Contrary to what the name might suggest, a high color temperature does not produce a "warmer" light but a colder, bluish light. This semantic inversion between "physical temperature" and "emotional perception" of light is one of the first things a professional must internalize:
| Temperature | Denomination | Tone | Emotional sensation | Optimal application for light cuts |
|---|---|---|---|---|
| 2700K | Extra-warm white | Yellow-orange | Intimacy, warmth, deep relaxation | Bedrooms, spa environments, romantic restaurants |
| 3000K | Warm white | Yellow-white | Welcome, comfort, domestic elegance | Living rooms, quality restaurants, luxury hotels |
| 3500K | Neutral-warm white | White with a warm hue | Balance, versatility | Executive offices, showrooms, premium retail |
| 4000K | Neutral white | Pure white | Clarity, concentration, vitality | Operational offices, professional kitchens, retail environments |
| 5000K | Daylight white | Slight blue-white | Attention, precision, energy | Laboratories, medical studios, premium industrial environments |
| 6500K | Cool white | Blue-white | Cold, aseptic, technical | Warehouses, parking lots, industrial areas |
Difference between 2700K and 3000K: which to choose for a residential light cut?
The difference between 2700K and 3000K in light cuts may seem negligible on paper, but in the visual perception of a real space, it is absolutely significant. Both temperatures belong to the warm white light category, but they produce noticeably different atmospheres that influence the perceived quality of materials and the emotional sensation of the occupants.
A 2700K light cut envelops the space in a golden, wrapping light, similar to candlelight or traditional incandescent bulbs. This temperature extraordinarily enhances warm surfaces (wood, travertine, terracotta, wool fabrics) and creates a sensation of intimacy and protection. It is the ideal choice for bedrooms, design bathrooms, luxury apartments with fine finishes, and any environment where emotional comfort is prioritized over operational functionality.
A 3000K LED light cut is slightly more lively and "clean" than 2700K, while maintaining a clearly warm tone. It is the most versatile color temperature for residential and hospitality light cuts: warm enough to create atmosphere, yet bright enough not to sacrifice functionality. The F52-300-320OR2 strip from Ledpoint, available precisely at 3000K, is specifically designed for this application.
The difference between 3000K and 4000K in the professional context
The difference between 3000K and 4000K in light cuts for professional environments is one of the most debated parameters among lighting technicians. The 1000K difference produces a clear perceptual leap: the transition from warm white light (3000K) to neutral white light (4000K) brings with it an emotional code shift from "welcome and warmth" to "efficiency and clarity".
For light cuts in work environments, the choice between 3000K and 4000K depends on the type of activity performed. Executive offices and representative meeting rooms tend to prefer 3000K, as it creates an atmosphere of authority and quality without the coldness of an operational office. Open-plan operational spaces, on the other hand, achieve better productivity results with 4000K LED light cuts, which reduce visual fatigue in reading and writing tasks and maintain a higher level of cognitive alertness.
What light to put in the kitchen: warm or cool?
The choice of color temperature for light cuts in the kitchen is one of the most frequent questions among residential interior designers. The professional answer is not univocal, because it depends on the type of kitchen, its orientation relative to natural light, and how the person living in the space uses it. However, it is possible to indicate some guidelines based on consolidated data and research:
For residential kitchens with a primarily domestic and social function (kitchens open to the living room, representative kitchens), the optimal choice for ceiling light cuts is generally 3000K. This temperature enhances the colors of food, creates a welcoming atmosphere suitable for conviviality, and integrates well with the warm finishes prevalent in residential design (wood, marble, satin surfaces in ivory or beige tones).
For professional kitchens or for those who use the kitchen mainly for food preparation requiring attention to colors (pastry, elaborate cooking), the preference goes to the 4000K strip, which offers better color rendering and allows for precise evaluation of food colors and consistencies. The difference between warm and natural light in the kitchen thus comes down to the predominant function of the space: conviviality vs. performance.
Tunable White light cuts: the solution that eliminates the compromise
The technologically most advanced solution to eliminate the compromise between different color temperatures in light cuts is the use of Tunable White LED strips (adjustable CCT), such as the F52-CCT-240D22. These strips integrate two LED channels on a single substrate (one at 2700K and one at 6500K) that can be mixed in variable proportions via a dedicated controller, producing any color temperature between the extremes of the two channels.
A light cut system based on Tunable White strips and a compatible Skydance controller can automatically switch from warm light at 2700K for morning breakfast (which stimulates melatonin production and facilitates gradual waking) to neutral light at 4000K for afternoon work (which maintains high attention), up to the subdued 2700K light of the evening (which prepares the body for sleep by reducing melatonin suppression). This approach, known as Human Centric Lighting (HCL), is becoming a standard in premium lighting projects for both high-end residences and offices and healthcare environments.
4. LED technologies for light cuts: COB vs SMD and practical differences
Understanding the technological differences between the main types of LED strips is fundamental for anyone wishing to create professional-grade light cuts. Not all LED strips are equal, and the difference between a cheap SMD strip and a high-quality COB strip translates into visual and functional differences that become evident as soon as the strip is installed in a trimless profile and turned on for the first time. Designers who do not know this difference risk compromising a highly curated interior design project with a poor lighting result.
SMD technology: advantages and limitations in light cuts
SMD (Surface Mounted Device) LED strips are the most widespread type on the market and still represent the vast majority of sales in the consumer and semi-professional sectors. In an SMD strip, individual LED chips (in sizes 2835, 3528, 5630, or equivalent) are soldered onto a flexible PCB (Printed Circuit Board) substrate at regular intervals, typically from 60 to 240 LEDs per meter. The distance between the chips varies based on density, and this distance is the parameter that determines the quality of the result in light cuts.
The main limitation of SMD strips in light cuts is the dotting effect (or hotspots): due to the physical distance between individual LEDs, when looking at the illuminated profile (especially up close or at an angle), the bright dots of the individual chips separated by slightly less luminous areas are clearly visible. This effect is accentuated in trimless profiles with a very thin or absent diffuser, where the distance between the source and the observation point is minimal. For high-end architectural light cuts, this effect is unacceptable.
COB technology: excellence in professional light cuts
COB (Chip On Board) technology solves the dotting effect problem at its root. In a COB strip, the LED chips are not separate individual devices but are mounted directly onto a thermally conductive substrate (typically aluminum) in a dense and continuous configuration, with no visible distances between individual emitters. The substrate is then coated with a phosphor layer that converts the blue light of the chips into white light at the desired color temperature, creating a continuous luminous surface that shows no modulation or irregularity.
The visual result in light cuts is extraordinary: the line of light emitted by a quality COB strip is perfectly homogeneous from the beginning to the end of the profile, without hotspots, without modulations, without discontinuities. This uniformity is maintained even in curves, corners, and joints between segments, if the right connectors are used.
| Characteristic | SMD LED Strip (high density) | COB LED Strip |
|---|---|---|
| Emission uniformity | Good (dots visible up close) | Excellent (perfect continuous line) |
| LED density | 60-240 LEDs/m (distinct chips) | 320-600+ chips/m (continuous) |
| Luminous efficiency | 100-140 lm/W | 130-180 lm/W |
| Thermal management | Good, requires aluminum profile | Excellent, integrated metal substrate |
| Typical CRI | 80-90 Ra | 90-95 Ra |
| Flexibility | High | Medium (larger minimum radius) |
| Cost | Low-medium | Medium-high |
| Suitability for light cuts | Medium | Excellent |
| Dimmability | Good | Excellent (linear curve) |
Why CRI is fundamental in quality light cuts
The Color Rendering Index (CRI) is a technical parameter often overlooked by non-professionals but of primary importance for the perceived quality of a professional light cut. CRI measures the ability of a light source to reproduce the colors of illuminated objects faithfully compared to a reference source (sunlight has CRI=100 by definition). A light cut with high CRI (≥90 Ra) makes the materials and finishes of the architectural project appear exactly as the designer intended, while one with low CRI (≤80 Ra) desaturates and flattens them, nullifying much of the design work on surfaces.
High-quality professional COB strips typically reach CRI values of 90-95 Ra, with special R9 (deep red) versions that guarantee faithful rendering even of red tones, particularly critical in the lighting of artworks, fabrics, and noble wood surfaces.
5. LED Market 2025: data, trends, and statistics in the lighting sector
The global LED lighting market is undergoing a phase of sustained growth and profound technological transformation. Understanding market data and ongoing trends is strategic information that allows for more conscious technological and investment choices, anticipating market evolutions and positioning projects on solutions destined to become the future standard, not imminent obsolescence.
The global architectural LED lighting market
According to the most recent estimates available (2024-2025), the global architectural LED lighting market reached a value of over 85 billion dollars in 2024, with a compound annual growth rate (CAGR) of 12.3% projected until 2030. The market share of LED lighting out of total artificial lighting has exceeded 70% globally, with peaks of 85% in more mature markets such as Northern Europe, Japan, and North America.
The specific segment of linear architectural lighting (which includes LED profiles for light cuts, light coves, and trimless systems) is the segment with the most sustained growth, registering rates of 18-22% annually in Western Europe. Italy, with its strong culture of design and interior architecture, is one of the most active European markets in this segment, with growing demand from both the premium residential sector and the hospitality, quality dining, and luxury commercial spaces sectors.
| Year | Global LED lighting market (bn $) | LED share of total lighting | Linear architectural segment CAGR |
|---|---|---|---|
| 2020 | 54.2 | 52% | +14.1% |
| 2021 | 61.8 | 58% | +15.3% |
| 2022 | 68.4 | 63% | +16.8% |
| 2023 | 76.2 | 67% | +18.2% |
| 2024 | 85.3 | 71% | +19.7% |
| 2025 (est.) | 96.1 | 75% | +21.3% |
2025 trends in the LED light cut sector
The main trends characterizing the LED light cut market in 2025 are five, all with practical implications for designers:
- Trend 1: ultra-thin profiles. The demand for increasingly thin and discreet trimless profiles is constantly growing. Designers are asking for light cuts with ever-reduced visible openings (from 15mm to 10mm down to less than 8mm) that make the light source almost invisible, accentuating the "magical" light effect that seems to emerge from nowhere. Profile manufacturers, including those distributed by Ledpoint, are responding with increasingly sophisticated geometries that allow minimal openings while maintaining thermal and optical performance.
- Trend 2: native integration of smart control. Stand-alone light cut systems, controllable only with traditional switches, are giving way to systems natively integrated with smart home protocols (Zigbee, Matter, KNX, DALI). The Skydance controllers available on Ledpoint, with WiFi, Zigbee, and DALI-2 support, are the most accessible example of this trend.
- Trend 3: Human Centric Lighting in light cuts. The integration of Tunable White strips in light cuts to support circadian well-being has moved from a luxury niche to a required standard in premium projects. The market for CCT (tunable white) strips for architectural applications is growing at rates exceeding 30% annually.
- Trend 4: light cuts without drywall. The growing demand for light renovation solutions, which do not require demolitions or the construction of new subframes, has stimulated the development of profiles applicable to existing supports. Light cuts without drywall (achievable with surface-recessed or flush-wall profiles applied directly to concrete, brick, or wood) are rapidly gaining market share.
- Trend 5: sustainability and environmental certifications. Clients in premium segments (luxury hotels, high-end offices, certified residences) increasingly ask for environmental sustainability certifications for lighting systems, including light cuts. Drivers with efficiency over 95%, LED strips with reduced power (<10W/m), and control systems with presence and natural light sensors (daylight harvesting) have become standard elements in premium tender specifications.

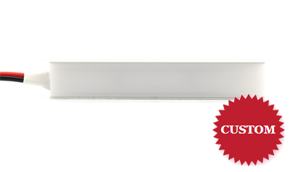
The 8 professional solutions for creating ceiling light cuts
After analyzing the theoretical and technological foundations, we enter the heart of this guide: the 8 complete solutions for creating architectural-grade ceiling light cuts. Each solution is an integrated system of components that work in synergy (profile, LED source, power supply, and controller), and the quality of the final result depends on the coherence between these elements. Presenting "8 solutions" does not mean identifying 8 single products, but 8 systemic approaches, each of which responds to specific design needs, budget constraints, and technical requirements.
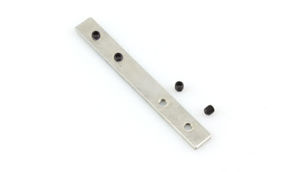
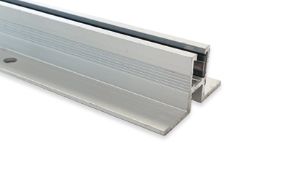
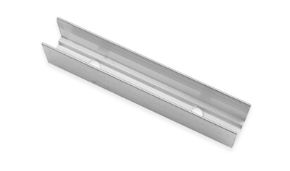
6. Solution 1 — Trimless profiles PR-DW07-01 and PR-DW11-03: the perfect light cut in drywall
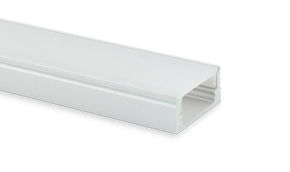
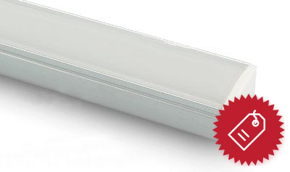
The totally recessed trimless profile represents the mandatory starting point for anyone wishing to create an architectural-grade light cut in a drywall ceiling. The PR-DW (Drywall) series is specifically designed to be recessed into the drywall structure during the board installation phase, so that after skimming and painting, only the very thin luminous opening remains visible in the finished ceiling. The result is a light cut that appears "carved" directly into the ceiling, devoid of any frame, border, or visible element that betrays the presence of the profile.
The PR-DW07-01 profile: the standard for thin linear cuts
The PR-DW07-01 profile with a 62×12mm section is the technical reference for creating standard light cuts in high-end residential and contract environments. With a visible opening of only 7mm and a depth of 12mm, it is compatible with standard 12.5mm drywall boards and allows for the creation of highly elegant LED light cuts without requiring an additional subframe under normal conditions.
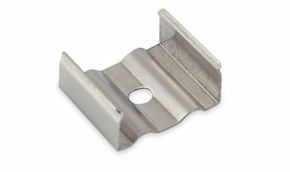
The main technical characteristics of the PR-DW07-01 that make it excellent for ceiling light cuts are: the 6063-T5 extruded aluminum section with high thermal conductivity (allows dissipating the heat of LED strips without overheating even in continuous installations of 10 meters or more), the lateral anchoring wings to the drywall boards that guarantee stability even in environments with thermal excursions, and the internal channel design optimized to house COB LED strips up to 12mm wide.
For this profile, the recommended LED strip is the F52-300-320OR (3000K): 320 COB chips/m, 8.5W/m, 1,250 lm/m. The combination of this strip with the PR-DW07-01 is one of the most requested solutions for premium residential light cuts.
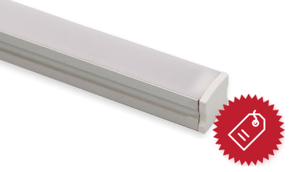
The PR-DW11-03 profile: for high-brightness light cuts
The PR-DW11-03 profile with a 72×31mm section has a wider opening (11mm) and a deeper internal cavity, making it ideal for housing high-power COB LED strips or dual side-by-side strips. It is the choice of excellence when the light cut must also serve a functional lighting purpose in addition to a purely aesthetic one, for example, in a large corridor, in an office open space with a suspended ceiling, or in an exhibition area where the light cut constitutes the primary light source of the environment.
The larger section of the PR-DW11-03 also allows the installation of higher-performing LED strips, such as the Fx2 high-efficiency series, which with its 160+ lm/W allows obtaining significant luminous outputs (up to 2,500-3,000 lm/m) while keeping consumption contained and operating temperatures within normal limits.
Installation guide for PR-DW trimless profiles
The correct installation of a PR-DW trimless profile is fundamental to achieving the expected visual result. The installation phases, which must be coordinated between the drywall installer, the electrician, and the painter, are as follows:
| Phase | Description | Responsible | Critical notes |
|---|---|---|---|
| 1. Positioning | The PR-DW profile is positioned on the primary metal structure of the suspended ceiling in the location planned by the design, before the drywall boards are installed | Drywall installer | Verify perfect alignment with the structural grid and with other profiles in the same sequence |
| 2. Board installation | Drywall boards are installed around the profile, with precise cutting that leaves the profile opening accessible from the outside | Drywall installer | The cut must be perfectly clean; any imperfections will be visible in the final result |
| 3. First skimming | First coat of joint compound covering screws and joints between boards, respecting the profile | Painter | Do not let compound enter the internal cavity of the profile; mask the channel with paper tape |
| 4. Finishing skimming | Second coat of joint compound bringing the drywall boards flush with the profile wings, creating visual continuity between the ceiling and the profile edge | Painter | This is the most critical phase: the profile wing must be perfectly flush with the drywall; use an aluminum straightedge as a guide |
| 5. Painting | Painting of the ceiling including the profile wings, which blend chromatically with the ceiling | Painter | Use a specific primer for aluminum on the profile wings to ensure paint adhesion |
| 6. LED installation | Insertion of the COB LED strip into the profile channel, wiring to the power supply, and functionality test | Electrician | Thoroughly clean the channel of dust and compound residues before inserting the strip |
Most common error: skimming the profile wings is the phase where most inexperienced installers compromise the result. The wings of the PR-DW profile must be perfectly flush with the finished drywall surface: if the wings are raised by even 0.5mm, the light cut will show a border that catches the light and betrays the presence of the otherwise invisible profile; if they are recessed, a shadow will be created that breaks the visual continuity.
7. Solution 2 — PR-DW01-03 profile: light cut in wall-ceiling corners
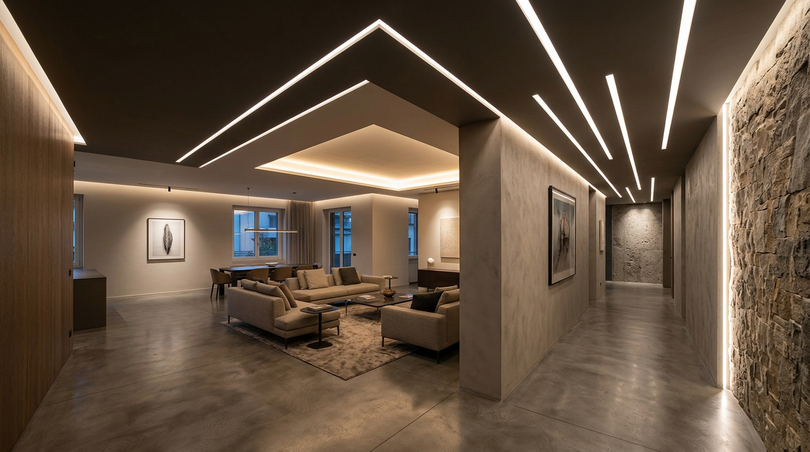
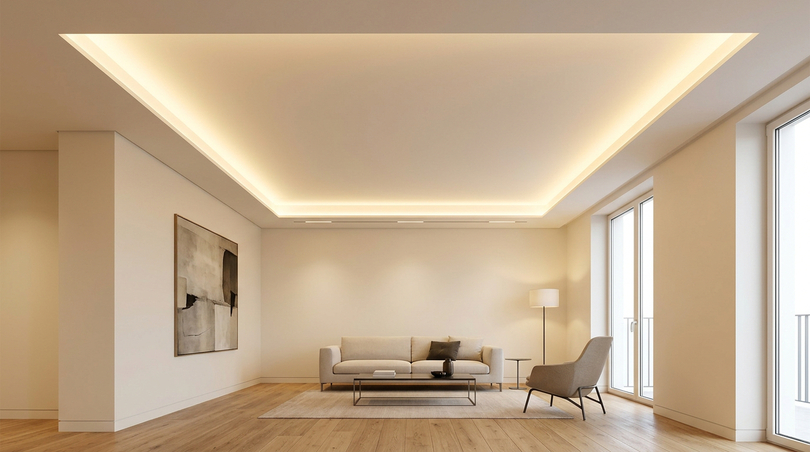
One of the most scenic applications of light cuts in interior architecture is that of the corners between ceiling and wall: a light cut running along the entire perimeter of a room at the wall-ceiling junction creates the so-called "floating ceiling" effect, making the ceiling appear suspended in the air, separated from the wall by a thin blade of light. This effect, of great scenic impact, requires a profile specifically designed for the internal corners of drywall, such as the PR-DW01-03.
The PR-DW01-03 angular profile: characteristics and applications
The PR-DW01-03 profile is an angular aluminum profile designed to be installed exactly in the corner between ceiling and wall during the construction of the drywall suspended ceiling. Its "L" geometry allows integrating the LED strip so that the emission is oriented downward or laterally, depending on the installation orientation, creating the characteristic effect of separating the vertical and horizontal planes.
From the point of view of visual perception, a perimeter light cut created with PR-DW01-03 has a very different effect from a central ceiling light cut: while the latter defines and orients the space from above, the former radically modifies its proportions, creating a "crown of light" that makes the ceiling appear lighter, higher, and more distant. The effect is particularly effective in spaces with low ceilings (under 2.7 meters), where the perimeter light cut will visually compensate for the height limitation, creating a more generous spatial perception.
Sizing the perimeter light cut
To correctly size the brightness of a perimeter light cut created with PR-DW01-03, it is necessary to take into account some fundamental parameters:
Ceiling height
In a room with a 2.7-meter ceiling, to create perimeter lighting with a ceiling luminance of at least 50 cd/m² (minimum value for the "floating" effect), a luminous flux of at least 800-1,200 lm/m of profile is necessary, achievable with the F52-300-320OR COB strip (1,250 lm/m at 3000K).
Ceiling color
A white ceiling (reflectance 0.80) significantly amplifies the effect of an indirect light cut compared to a gray or colored ceiling (reflectance 0.30-0.40). For dark ceilings, it is necessary to increase the source flux by 40-60% to obtain the same visual effect.
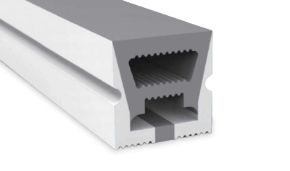
8. Solution 3 — PR-DW16-03 profile: light cuts in coves and valances
The perimeter light cove, one of the most classic and at the same time most sophisticated applications of light cuts, requires a different technical approach than linear cuts in the ceiling. While a trimless profile like the PR-DW07-01 is optimized for direct recessing into the ceiling plane, coves and valances (architectural cavities of variable section developing along the perimeter of the ceiling) require profiles specifically designed to be housed in confined spaces and oriented upward (uplighting) or laterally.
The PR-DW16-03 profile for coves and valances
The PR-DW16-03 is the technical reference solution for indirect light cuts in perimeter light coves. This profile is designed to be inserted inside the drywall cove during the valance construction phase, with the LED strip oriented upward and the body of the profile completely hidden by the valance itself. The result is a soft, uniform, and discontinuity-free indirect light that illuminates the ceiling from above, creating that "ambient" diffuse light effect impossible to achieve with direct sources.
This type of indirect light cut is particularly suitable for residential spaces where warm and enveloping atmospheric lighting is desired, without the harshness of direct sources. In luxury hotels, gourmet restaurants, and spas, light coves with PR-DW16-03 are often the primary source of lighting for relaxation spaces, complemented by accent sources for reading or menu viewing.
| Cove-ceiling distance | Minimum flux (lm/m) | Recommended strip | Expected visual effect |
|---|---|---|---|
| 20-30 cm | 600-800 lm/m | F52-300-320OR (8.5W/m) | Limited illuminated zone, localized spotlight effect |
| 30-50 cm | 800-1200 lm/m | F52-300-320OR or Fx2 (12W/m) | Optimal distribution, uniform "halo" effect |
| 50-70 cm | 1200-1800 lm/m | High-power Fx2 (18-24W/m) | Wide coverage, uniformly illuminated ceiling |
| Over 70 cm | Over 1800 lm/m | Dual Fx2 strip (36+W/m) | Complete ambient lighting from the perimeter |
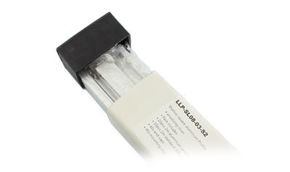
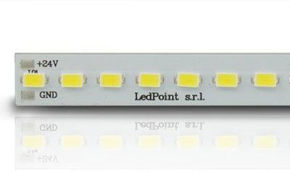
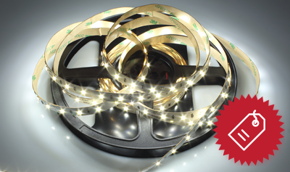
9. Solution 4 — F52-300-320OR2 COB strip: the standard source for professional light cuts
If trimless profiles are the "container" of the light cut, the COB LED strip is its "heart" — the source that determines the quality of the light, its uniformity, its efficiency, and its durability over time. The F52-300-320OR2 COB strip is the base reference of the F52 series, specifically designed for architectural light cut applications where the priority is maximum uniformity of luminous emission.
Technical characteristics of the F52-300-320OR2
The product denomination already contains the key information: F52 identifies the family (range 52), 300 indicates the number of chips per meter per base unit, 320OR2 specifies the configuration with 320 COB chips per meter at 24V with a reinforced aluminum substrate. The complete technical specifications are:
| Parameter | Value |
|---|---|
| Technology | Continuous COB (Chip On Board) |
| Power | 8.5 W/m |
| Luminous flux | 1,250 lm/m |
| Efficiency | 147 lm/W |
| Voltage | 24V DC |
| Color temperature | 3000K (also available in 2700K, 4000K, 6500K) |
| CRI | ≥90 Ra |
| Width | 10mm |
| Emission angle | 120° |
| IP class | IP20 (IP65 available) |
| Lifespan | ≥50,000 hours (L70B50) |
| Dimmability | 0-100% (compatible with PWM, TRIAC, 0-10V) |
| Minimum cut point | 25mm (every LED) |
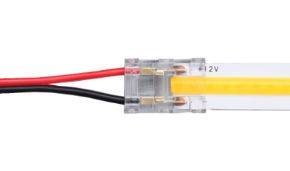
How to cut COB LED strips
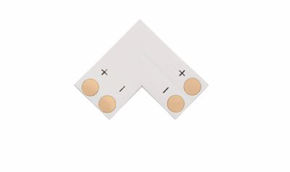
One of the most frequent questions among those approaching COB light cuts for the first time concerns how to cut the LED strips to adapt them to the exact lengths of the profiles. COB strips like the F52 can only be cut at the cut points indicated on the strip itself, which typically correspond to every 25-50mm segment. The cut must be made with scissors or a precision cutter exactly in the center of the exposed copper pad, without damaging adjacent chips.
A common mistake in installing COB light cuts is cutting the strip at the wrong point, damaging the lateral chips or creating a short circuit. To avoid this problem, it is good practice to measure the profile length before starting, calculate which cut point on the strip is closest to the exact required length, and plan the connection joints between segments to minimize losses.
Luminous flux calculation for a light cut
To correctly size the amount of light cut necessary in a project, it is useful to have a simple but reliable calculation method. The power and luminous flux required for a ceiling light cut depend on three main factors: ceiling height, room function, and the target illuminance level expressed in lux (lx).
For a light cut serving as primary lighting in a 1.2-meter wide corridor with a 2.4-meter height, with a target illuminance of 200 lux on the floor plane, the approximate calculation is: required power ≈ E(lux) × A(m²) / (efficiency lm/W × UF), where UF is the utilization factor (typically 0.35-0.55 for a direct light cut). With an efficiency of 147 lm/W and UF=0.45, for 200 lux on 1.2m²/m linear, we obtain about 6.5W/m — compatible with the F52-300-320OR2 at 8.5W/m with a safety margin.
10. Solution 5 — Fx2 high-power series: light cuts for large surfaces
When a light cut project requires high luminous fluxes (for large open spaces, for hotel corridors with high ceilings, for showrooms and exhibition spaces where the LED light cut must be the only functional source in the environment), the standard 8.5W/m COB strip may not be sufficient. The Fx2 series of high-power COB strips is specifically designed for these applications, offering powers between 15W/m and 30W/m with efficiencies exceeding 160 lm/W.
The Fx2 series: reference performance for high-power architectural light cuts
The Fx2 series strips represent the top of the range of COB sources for professional architectural light cuts. The efficiency exceeding 160 lm/W, a value considered unattainable for LED strips just a few years ago, allows obtaining very high luminous fluxes (over 2,500 lm/m) with contained consumption (<24W/m), with a direct advantage on the electrical system (reduced cable sections, easier power supply sizing) and on the containment of energy consumption during the system's life cycle.
Thermal management in high-power Fx2 strips
The increase in power in COB LED strips brings with it a fundamental technical challenge: thermal management. The heat generated by a 24W/m strip is significantly greater than that of an 8.5W/m strip, and if not effectively dissipated, it accelerates the degradation of LED chips, reducing their lifespan and causing a shift in color temperature that over time makes the light line perceptibly different from how it was at the time of installation.
For installations with Fx2 strips in trimless profiles, it is fundamental to ensure that:
- The aluminum profile is adequately sized (minimum section 72×31mm like the PR-DW11-03) and has good thermal contact with the ceiling structure
- The strip is fixed with thermal glue or high-quality thermal double-sided tape to ensure heat transfer from the COB substrate to the profile body
- The junction temperature of the profile does not exceed 60°C under continuous operating conditions, verifiable with a thermal camera during the commissioning phase
- The power supply sizing includes a 20% margin over the nominal power of the strip, to avoid running the drivers at their nameplate limits
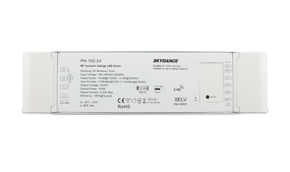
11. Solution 6 — F52-CCT-240D22 Tunable White strip: the light cut that adapts to life
The F52-CCT-240D22 Tunable White strip is the most advanced solution for light cuts intended for environments where occupant well-being is a design priority. This COB strip integrates two LED channels on a single substrate, one at 2700K (warm white) and one at 6500K (cool white), independently manageable via a dedicated controller to obtain any color temperature between 2700K and 6500K with very fine adjustment steps (typically 100K).
Human Centric Lighting (HCL) and circadian light cuts
The concept of Human Centric Lighting (HCL) has revolutionized the approach to lighting design in recent years. HCL starts from a fundamental biological fact: light is not only a tool for visibility, but a powerful regulator of the human circadian system, the complex hormonal and neuronal mechanism that synchronizes the organism's physiological functions with the day-night cycle.
Scientific research has demonstrated that light with a strong blue component (5000-6500K) effectively suppresses melatonin production and increases cortisol levels, promoting states of alertness and cognitive activity. Conversely, light with a low blue component (2700-3000K) favors melatonin production in the evening hours, facilitating falling asleep and improving sleep quality. A light cut system based on F52-CCT-240D22 Tunable White strips and a Skydance controller with circadian programming can automatically follow this natural biological cycle, changing color temperature throughout the day.
LED light therapy: applications in light cuts
LED light therapy is a rapidly growing application field that exploits the biological properties of light to treat disorders such as Seasonal Affective Disorder (SAD), sleep disorders, and chronic fatigue. In the context of architectural light cuts, LED light therapy does not refer to certified medical devices but to the conscious use of Tunable White sources to optimize occupant well-being in a non-intrusive way, perfectly integrated into the aesthetics of the space.
The most interesting applications of the F52-CCT-240D22 strip in light cuts are:
- Wake-up lighting: the system gradually brings the color temperature from 2700K to 4000K in the 30 minutes before waking up, simulating dawn and facilitating natural awakening without light shock
- Focus lighting: during work or study hours, the system keeps the light cut at 4000-5000K to sustain concentration and reduce cognitive fatigue
- Evening transition: in the 2 hours before rest, the system gradually lowers the color temperature toward 2700K, preparing the body for sleep
- Circadian boost: in environments devoid of natural light (underground offices, windowless spaces), the system replicates the solar light cycle during working hours, maintaining the circadian synchronization of the occupants
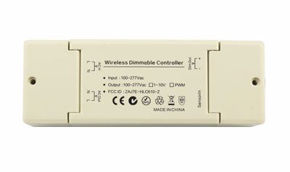
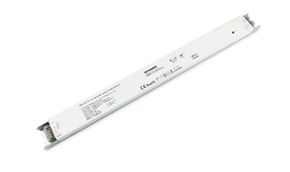
12. Solution 7 — Power supplies: the silent foundation of every perfect light cut
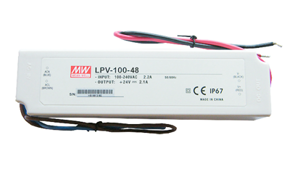
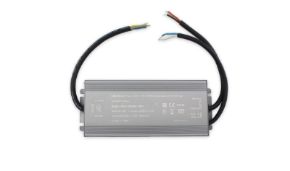
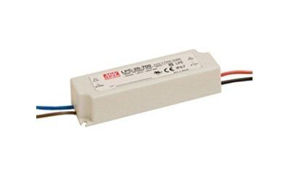
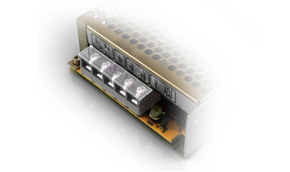
An aspect often underestimated by less experienced professionals in light cut design is the quality of the power supply. The most performing LED strip, the most precise trimless profile, and the most sophisticated controller are useless if the power supply providing voltage and current to the source is not up to the other components of the system. The SLD Mean Well series power supplies are the reference choice for professionals who do not want to compromise the final quality of their light cuts with a low-level technical component.
The SMART series: slim design for reduced technical spaces
The physical characteristic that distinguishes the SMART series from traditional driver families is the format: ultra-thin, with a rectangular section profile of just 25-30mm in height and variable width based on power. This format, which gives the series its name: Slim Linear Design, allows housing the power supply inside the technical cavity of the suspended ceiling even when this is minimal (starting from 30mm), without needing to prepare specific accessible technical compartments or resort to power supplies separated from the light cut path.
The SK-PBH-60-24 (60W) and SK-LN-150-24-RF (150W) models are the most commonly used in professional light cut installations. The selection criterion is simple: the power supply power must be at least 20% higher than the nominal power of the served LED strip. A 5-linear-meter light cut with an F52-300-320OR2 strip (8.5W/m) absorbs 42.5W nominal: the correct power supply is the SLD-50, which thus works at 85% of its maximum power, in the optimal efficiency range and with ample thermal margin.
Flicker-free: why it is essential in light cuts
Flicker is one of the most insidious technical problems in LED lighting systems: insidious because it is often not consciously perceived by the observer, yet it produces documented physiological effects such as headaches, visual fatigue, irritability, and, in predisposed subjects, even serious neurological disorders. Low-quality power supplies produce flicker frequencies of 50-120Hz, slow enough to be perceived, even unconsciously, by the human visual system.
Mean Well XLN/XLG drivers are certified Flicker-Free according to the IEEE 1789-2015 standard, which specifies flicker limits for safe light sources. With a modulation index (flicker index) typically lower than 1%, compared to values of 20-40% in uncertified power supplies, they guarantee a perceptually stable light even in residential environments where light cuts are the primary source of illumination.
Lifud also offers a wide range of constant current and constant voltage drivers designed to eliminate flicker:
- LF Series (0/1-10V): includes models. CCT control versions are also available, such as LF-12A-2, LF-20A-2 and LF-40A-2.
- LN / LNC Series (0/1-10V): models like LN-12A (H/L) and LNC-12A (H/L) are indicated as flicker-free.
- PT Series (RF 2.4GHz): constant current drivers with radio frequency control, including PT-10A (H/L), PT-12A (H/L), PT-15A, PT-20A-2, PT-25A, PT-36A, PT-40A-2 and PT-50A.
- TF Series (Triac): phase-cut dimming solutions free from flicker, such as models TF-15A, TF-30A and TF-40A.
- DA Series: This line of DALI 2.0 drivers is certified for stable, flicker-free lighting. Specific models include DA-12, DA-20A, DA-30A, DA-40A, DA-30A-2 and DA-40A-.
- Visual comfort: the absence of flicker reduces eye strain and headaches.
- Suitability for video recording: the high stability of the light makes them suitable for environments where recordings are made with cameras or smartphones.
- Smooth dimming: they often integrate digital PWM dimming that maintains color and luminous flux quality down to minimal levels (0.1% or 1% depending on the model).
Power supply sizing: practical guide
| Light cut length | F52-300-320OR2 Strip (8.5W/m) | Fx2 Strip (18W/m) | Recommended power supply |
|---|---|---|---|
| Up to 3m | ≤25.5W | ≤54W | PW-LF45-24-GHY (45W) |
| 3-5m | 25.5-42.5W | 54-90W | MW-XLN60-24B (60W) / PW-LF100-24-GHY (100W) |
| 5-8m | 42.5-68W | 90-144W | PW-LF100-24-GHY |
| 8-12m | 68-102W | 144-216W | PW-LF150-24-GOE (150W) |
| Over 12m | Multi-power supply | Multi-power supply | 2× PW-LF150-24-GOE or higher |
Important technical note: for light cuts longer than 5 linear meters powered from a single point, it is necessary to consider the voltage drop along the LED strip path. 24V COB strips have a voltage tolerance of ±5%, but drops exceeding 3% can already cause a perceptible difference in brightness between the beginning and the end of the light cut. For lengths exceeding 8 meters, it is advisable to power the strip from both ends, dividing the total length into two autonomously powered segments.
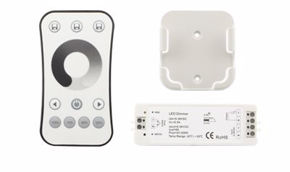
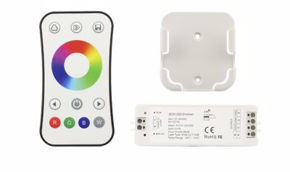
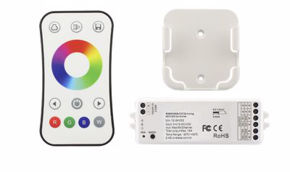
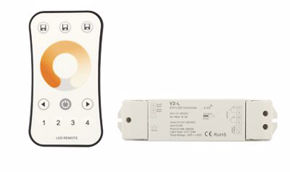
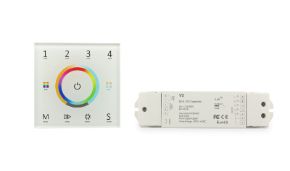
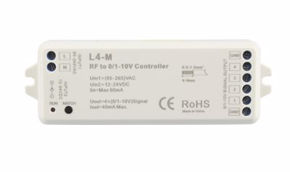
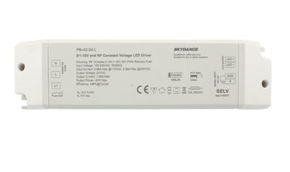
13. Solution 8 — Skydance WiFi, Zigbee, and DALI-2 controllers: intelligent control of light cuts
The control system is the element that transforms a light cut from a static installation into a dynamic architectural element, capable of changing personality in response to the different usage situations of a space. An LED light cut with fixed intensity, even if technically impeccable, offers only one lighting scene. A controlled light cut system can offer dozens of programmed scenes, perfectly smooth dimming, smart home integration, and professional protocols like DALI-2.
The logarithmic dimming curve: why it is fundamental
Human perception of brightness follows a logarithmic law (Stevens' power law), not a linear one. This means that lowering an LED from 100% to 50% of its electrical intensity does not produce the visual sensation of halving the brightness: the eye perceives only a 30-35% reduction in brightness. To achieve a linear perceptual variation, where each "step" of the knob or slider corresponds to an equivalent perceived brightness variation, the controller must apply a logarithmic (or gamma-corrected) dimming curve instead of a linear one.
All Skydance controllers implement a proprietary logarithmic dimming curve that faithfully replicates the perceptual response of the human eye. The practical result for those using light cuts in daily life is a perceptually smooth dimming from 100% to 0.1% (or even less), without that annoying "jump" between low levels that characterizes controllers with a linear curve and that transforms dimming from an elegant experience into a mechanically annoying one.
WT series WiFi controllers: the smart solution for residential light cuts
The Skydance WT series controllers with WiFi connectivity are the most accessible solution for integrating light cuts into a residential smart home ecosystem. Compatible with the Tuya Smart protocol, they allow controlling LED light cuts via smartphone app, Alexa and Google Assistant voice commands, and automations based on schedules or environmental triggers (sunset, sunrise, natural light level).
WZ series Zigbee controllers: mesh network for large installations
For light cut installations in medium-sized spaces (apartments with many controlled zones, offices, boutique hotels), the Zigbee protocol offers significant advantages over WiFi: negligible consumption (the Zigbee module in stand-by absorbs a few milliwatts), mesh network that allows devices to act as mutual relays expanding coverage without the need for repeaters, lower latency compared to WiFi (important for scene transitions), and greater robustness against radio interference.
DALI protocols: professional control of light cuts
The DALI (Digital Addressable Lighting Interface) protocol is the international standard for the professional control of lighting systems in large contract environments such as hotels, shopping centers, corporate headquarters, and museum spaces. Unlike WiFi and Zigbee systems, DALI is a bidirectional protocol: each DALI device not only receives commands but can transmit return data to the control system (current dimming level, operating temperatures, operating hours, fault states).
For architectural light cuts in large installations, DALI-2 offers the possibility of individually addressing and controlling every single segment of the system, creating logical groups of light cuts independent of the physical architecture of the installation, and integrating the lighting system with the building's Building Management System (BMS) via standardized gateways.
The DA series DALI decoders are designed for professional installations where the precision of control and remote diagnostics of the light cut system are requirements of the tender specification.
14. Light cuts without drywall: solutions for renovations and existing surfaces
One of the most frequent questions professionals receive from their clients concerns the possibility of creating light cuts without resorting to drywall. The answer is affirmative: there are complete technical solutions for installing light cuts without drywall, applicable directly to existing ceilings in concrete, brick, solid wood, or OSB panels, without having to build new subframes or lower the ceiling. These solutions are particularly valuable in renovation projects where reducing the floor-to-ceiling height is unacceptable, or where an existing prestigious ceiling (wooden beams, brick vaults, industrial concrete floors) is to be enhanced while maintaining its visibility.
Surface profiles for light cuts on flat surfaces
Surface-type profiles are designed to be fixed directly to the underside of the ceiling via screws, rivets, or structural adhesives. Unlike trimless profiles that disappear into drywall, Surface profiles are visible once installed, but high-quality models have such reduced thicknesses (from 8mm to 15mm in height) and such linear designs that they integrate into the architecture of the space with great discretion.
The choice of fixing method for Surface profiles in light cuts without drywall depends on the nature of the support:
| Support type | Fixing method | Technical notes |
|---|---|---|
| Reinforced concrete | M4/M5 expansion anchors + stainless steel screws | Max spacing 400mm for profiles up to 3m |
| Brick (hollow brick) | Nylon expansion anchors + screws | Avoid mortar joints; drill in the center of the brick |
| Solid wood/beams | 4×25mm self-tapping wood screws | Pre-drill to avoid splitting the fibers |
| OSB/plywood panels | Self-tapping screws + local reinforcement | Verify panel thickness ≥18mm |
| Plaster/stucco | Two-component structural adhesive | Only for light profiles; verify adhesion at 48h |
Semi-recessed profiles: the middle ground
Semi-recessed profiles represent an intermediate solution between totally recessed trimless profiles and completely surface-mounted profiles. These profiles require only partial milling of the ceiling (a groove 8-15mm deep) which can be executed even on existing ceilings in wood, finished drywall, or various types of panels. The profile is recessed halfway into the groove and halfway protrudes from the surface, with a result of discreet architectural integration.
Semi-recessed profiles are particularly suitable for light cuts without drywall in:
- Wood or OSB panel ceilings (frequent in industrial lofts and contemporary style renovations)
- Already finished and painted drywall ceilings that one does not want to demolish and rebuild
- MDF or High-Pressure Laminate (HPL) panel ceilings typical of commercial environments
- Walls where a horizontal or diagonal light cut is desired as a decorative element
15. How to illuminate low ceilings with light cuts: techniques and solutions
Low ceilings (conventionally those with a height of less than 2.6 meters, but which in the experience of professionals become "perceptually low" already below 2.8 meters in large rooms) are one of the most common challenges a designer must face. The light cut, if used correctly, is one of the most effective tools to make a low ceiling appear higher: not because it physically raises it, of course, but because it exploits precise perceptual mechanisms to "trick" the observer's visual system.
The perimeter light cut for low ceilings
The most effective technique to make a low ceiling appear higher with light cuts is the perimeter profile with upward emission (indirect uplighting). When an indirect LED light cut is positioned 15-25cm from the ceiling along the entire perimeter of the room, the light illuminating the ceiling from above creates a diffuse brightness effect that visually "erases" the junction between ceiling and wall — the line that most clearly defines the perceived height of a room. The brain, no longer able to precisely identify where the ceiling ends, tends to overlay its own height estimate, producing a perception of greater spaciousness.
To maximize this effect in environments with low ceilings, it is important to:
- Use 2700K or 3000K sources for the perimeter indirect light cut, because warm tones amplify the sensation of envelopment and reduce the perception of "suffocation" in low spaces
- Paint the ceiling pure white or warm white (reflectance ≥0.80) to maximize the diffusion of indirect light
- Avoid other elements that draw attention to the ceiling (low pendant lamps, dark exposed beams) which would contradict the visual message of the indirect light cut
- Consider combining a downward direct light cut (for functional lighting) with the indirect perimeter one (for the spatial effect), managing the two circuits separately
Ultra-slim trimless solutions for low ceilings
In low ceilings, every millimeter of height subtracted from the suspended ceiling construction has a much greater specific weight than in a high ceiling. For this reason, in renovations with low ceilings, ultra-slim trimless profiles requiring minimal ceiling lowering are preferred. The PR-DW series profiles with a 62×12mm section allow creating professional light cuts with a ceiling lowering of just 3-4cm relative to the floor slab, compatible even with starting heights of 2.4 meters.
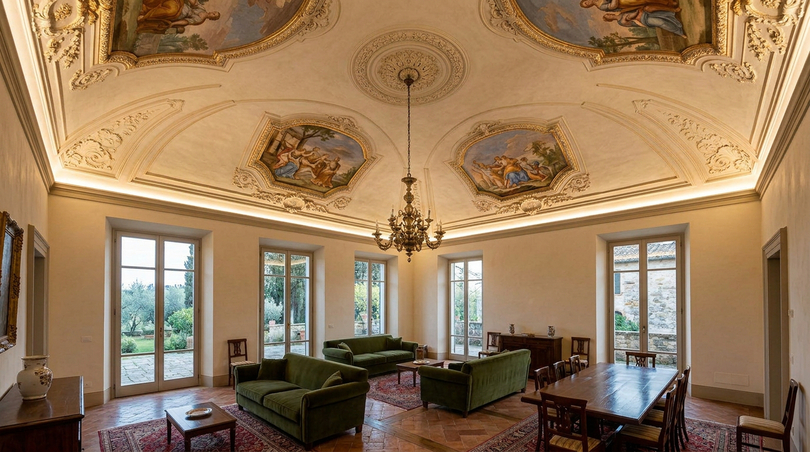
16. High and vaulted ceilings: light cuts that enhance historical architecture
If low ceilings require strategies to amplify vertical perception, high ceilings (typical of historic Italian buildings, industrial lofts, and prestigious villas) pose challenges of an opposite nature: how to visually govern a space with excessive height, how to create intimacy in environments with imposing proportions, and how to enhance the original architecture of the ceiling (frescoed vaults, wooden floors, metal trusses) without competing with it.
Grazing light cuts for vaulted ceilings and frescoes
For frescoed vaults, decorated ceilings, and prestigious architectural surfaces, the grazing light cut technique (with an LED source positioned at the foot of the vault and oriented upward) is the most effective and respectful tool for enhancing architectural and pictorial details. The cutting light grazing the surface of the vault enhances stucco moldings, brings out decorative reliefs, and highlights the pictorial details of frescoes with a three-dimensionality impossible to achieve with diffuse lighting.
For this type of application, it is fundamental to use sources with CRI ≥95 Ra, preferably with high R9 (deep red) to guarantee faithful reproduction of historic pictorial pigments, and with a color temperature of 2700K-3000K to respect the warm tone of the frescoes and gilding typical of historic Italian interiors.
Light cuts in industrial lofts: high ceilings and exposed beams
The industrial loft, with its metal trusses, exposed concrete floors, and heights of 4-6 meters, is one of the environments where light cuts without drywall find their most natural and scenic application. In these spaces, Surface or semi-recessed profiles applied directly to the metal beams or concrete floor create LED light cuts that dialogue with the industrial geometry of the architecture without denaturing it.
17. Light cut in the kitchen: lighting design for the most lived-in space
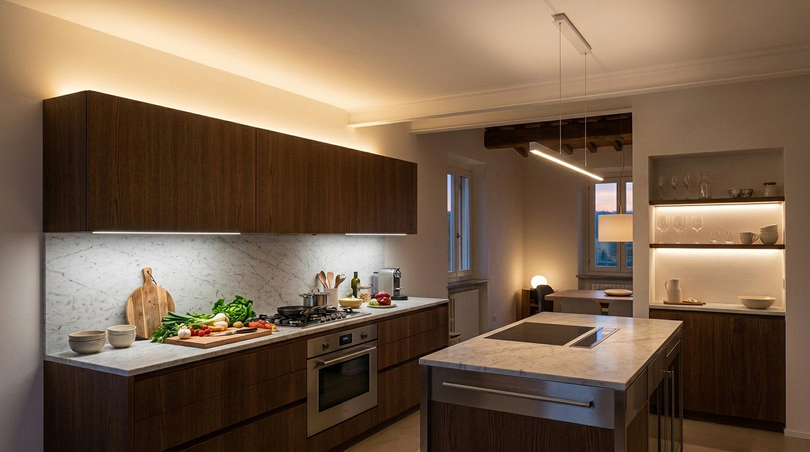
The kitchen is the domestic space where lighting requirements are the most articulated and often contradictory: intense functional light is needed for food preparation, warm ambient light for the conviviality of breakfast and dinner, accent lighting to enhance prestigious materials (marble countertop, noble wood fronts, brushed steel top), and sometimes light specifically designed to favor the color rendering of food.
The light cut above cabinets: technique and sizing
One of the most widespread and appreciated applications of light cuts in the kitchen is the LED profile positioned above the cabinets, which illuminates the ceiling from above with indirect light, creating a "floating" effect of the upper modules. This technique, which requires a Surface or angular profile to be applied to the upper part of the cabinet, is technically simple but produces a visual result of great elegance.
The sizing of this light cut above the cabinets depends on the distance between the top of the cabinet and the ceiling: with a distance of 30-40cm, a 3000K COB strip (1,250 lm/m) produces a ceiling luminance of about 200-300 cd/m², sufficient for a well-visible "halo" effect. For greater distances (50-70cm), it is advisable to switch to the high-power Fx2 series to maintain the visual effect with the same intensity.
Light cut for kitchen worktop: functionality first
Unlike the light cut above the cabinets (which has a primarily aesthetic function), the light cut under the cabinets for worktop illumination has a primarily technical function: to provide sufficiently intense and well-oriented lighting for food preparation without annoying shadows produced by the user's figure.
For this application, the recommended color temperature is 4000K, a neutral white that guarantees the best color rendering of food and maximum visibility of details during preparation, with an illuminance on the worktop of at least 300-500 lux (standard EN 12464-1 for domestic kitchens). With the F52 strip at 8.5W/m and 1,250 lm/m positioned 30cm from the worktop, typically 400-600 lux are obtained on the work surface, within the optimal range.
18. Step-by-step installation guide for a light cut
The creation of a complete light cut system is a process that requires the coordination of at least three professional figures, namely the drywall installer, the electrician, and the painter, and careful planning in the preliminary phases. The most common problems in poorly executed light cuts almost always derive from errors in the design and coordination phases, not in the actual installation phase.
Phase 1: design and layout
The design phase of a light cut system must address and resolve at least seven fundamental questions before any activity begins on site:
- Planimetric layout: where are the light cuts located in plan? Parallel to the long axis of the room, perpendicularly, perimetrically, or with a more complex geometry? The layout must be coherent with the load-bearing structure of the floor slab (to avoid crossing beams with profiles) and with the grid of the suspended ceiling metal structure.
- Electrical system path: where do the power cables for the LED strips run? Where are the power supplies located? Where are the controllers? The electrical path must be planned concurrently with the light cut layout, not as an afterthought.
- Circuit zoning: how many independent electrical circuits are needed? Each autonomously controllable zone requires its own circuit. A living room with a perimeter light cut + central light cut + accent lighting has at least 3 distinct circuits.
- Power supply sizing: the power of each power supply must be calculated based on the power of the served LED strips, with the 20% safety margin already discussed. Power supplies must be positioned in accessible locations for maintenance.
- Type of profile and LED strip: the choice of profile (PR-DW07-01, PR-DW11-03, PR-DW01-03, PR-DW16-03, or Surface) and LED strip (F52-300-320OR2 standard, Fx2 high power, F52-CCT-240D22 Tunable White) must be made in this phase, before ordering materials.
- Control system: WiFi (Skydance WT series), Zigbee (Skydance WZ series), or DALI-2 (DA series decoders)? The choice must be compatible with the existing or planned smart home ecosystem.
- Coordination with other works: the drywall installer must know exactly where the profiles go before starting the structure, the electrician must know where the junction boxes and power supply enclosures go. This coordination, if done well, avoids costly revisions during the work.
Phase 2: structure and positioning of profiles
The physical positioning of the profiles is the second critical phase. The PR-DW series profiles are fixed to the primary metal structure of the suspended ceiling with the included mounting brackets, before the drywall boards are installed. In this phase, it is fundamental to:
- Verify perfect alignment of the profiles with a plumb line and laser level
- Check that all profiles of the same light cut are exactly at the same level (maximum ±0.5mm)
- Leave the ends of the profiles accessible for subsequent electrical wiring
- Verify that the metal structure of the suspended ceiling is sufficiently robust at the profile anchoring points (add studs or reinforcing crosspieces if necessary)
Phase 3: finishing and painting
As already discussed, skimming the wings of the trimless profile is the most critical phase of the entire process. A practical suggestion for drywall installers approaching the installation of trimless light cut profiles for the first time: use a 2-meter aluminum straightedge as a guide for the final skimming. The straightedge resting on the profile wing and the adjacent drywall guarantees perfect continuity of the two planes and the linearity of the skimming edge.
Phase 4: LED strip installation and wiring
The insertion of the LED strip into the profile must occur only after the ceiling is completely finished and painted. This is a critical point that many inexperienced installers overlook: installing the strip before painting exposes the electronic components to drywall dust and paint spray, reducing their lifespan and creating potential reliability problems.
The correct strip installation procedure is: cleaning the channel with compressed air or a soft brush, verifying the absence of compound or paint residues in the channel, applying thermal double-sided tape (if not pre-applied) to the bottom of the channel, inserting the strip with uniform pressure along the entire path, soldering or connecting the cables to the power supply, and testing functionality before closing the cavity.
19. Costs and prices of light cuts: complete project budget guide
One of the most requested and least easily accurately retrievable pieces of information on the web concerns the costs of a light cut per linear meter, including everything necessary for a complete professional realization. The honest answer is that prices vary greatly depending on the quality of the components, the complexity of the installation, and the required level of finish. However, it is possible to identify three indicative price ranges that cover the vast majority of real situations.
| Range | Components | Material cost €/m | Labor cost €/m | Total €/m | Typical application |
|---|---|---|---|---|---|
| Economy | Basic Surface profile + SMD 2835 strip + standard power supply | 20-35 | 25-45 | 45-80 €/m | Budget renovations, secondary environments |
| Standard | PR-DW trimless profile + F52 COB strip + Mean Well power supply + WiFi controller | 45-75 | 35-70 | 80-145 €/m | Quality residential, offices, retail |
| Premium | PR-DW precision trimless profile + Fx2 COB strip + Mean Well power supply + Skydance DALI-2 + Tunable White | 90-140 | 55-105 | 145-245 €/m | Luxury residential, 5-star hotels, museum spaces |
Note: the indicated prices refer only to linear light cuts and do not include supporting drywall works (if necessary), the general electrical system, or the cost of design. In construction sites where light cuts are integrated from the design phase of the drywall structure, labor costs are significantly reduced because the works are coordinated without duplications.
How much does a perimeter light cut cost in a typical apartment?
To give a concrete idea of the total cost of a real installation, let us consider a typical case: a 25m² living room (5×5 meters) with a 2.65-meter ceiling, where a standard perimeter light cut is to be created with a PR-DW01-03 profile, F52-300-320OR2 strip at 3000K, Mean Well SLD-50 power supply, and Skydance WiFi controller.
The perimeter is 20 linear meters. With a "Standard" cost of 110 €/m (midpoint of the range), the total cost of materials + labor is about 2,200 euros for the perimeter light cut alone. If a 4.5-meter central linear light cut is added (+495 euros), the total for the living room LED light cuts is around 2,700 euros, an investment compatible with quality renovations.
20. Light cut in photography, cinema, and theater: origins and techniques
Cutting light in photography and cinema is a topic of great technical and artistic depth that would deserve a dedicated guide. Here we limit ourselves to the fundamental elements that help to understand why the light cut has such a strong impact on visual perception, both in photography and in interior architecture.
Cutting light in portrait photography
In professional portrait photography, cutting light (side light) is positioned at 90° to the camera-subject axis. This extreme positioning illuminates half of the face, leaving the other half in deep shadow, enhancing the bone structure, expression lines, and three-dimensionality of the subject with unique dramatic force. The most used variant, known as "split lighting" or "Rembrandt lighting", is a cornerstone of black and white portraiture from the early 20th century to today.
The physical principle of photographic cutting light is identical to that of architectural lighting: a highly directional light source illuminating a surface at an almost grazing angle of incidence produces marked shadows that "sculpt" the volumes. In photography, this effect is deliberately sought for its expressive capacity; in interior architecture, the same effect is used to enhance the textures of materials.
The light cut in theater and stage lighting engineering
In professional theater, the light cut is one of the most powerful technical tools of the stage lighting engineer. Light cut sources in theater, typically ellipsoidal reflector spotlights with precision optics positioned at the wings of the stage or in the lighting grids, illuminate the actors laterally, creating marked shading on the face and body that accentuates the plasticity of the acting and makes expressions visible even from the back rows.
The transition from incandescent lamp technology to LED in the theatrical sector has had a direct impact on the quality of architectural LED light cuts: theater professionals have developed sophisticated know-how on the management of directionality, color, and light intensity that LED architectural system manufacturers have progressively incorporated into their products.
21. Light and well-being: HCL, circadian rhythm, and smart light cuts
Scientific research on the relationship between artificial light and human well-being has made giant strides in the last two decades, with profound implications for the design of light cut systems in inhabited spaces. The 2017 Nobel Prize in Medicine, awarded to Jeffrey C. Hall, Michael Rosbash, and Michael W. Young for the discovery of the molecular mechanisms controlling the circadian rhythm, conferred scientific authority to an approach to luminous design that chronobiology researchers had been promoting for years.
The human circadian system is synchronized primarily by light, through specific photoreceptors in the retina called intrinsically photosensitive retinal ganglion cells (ipRGCs), which contain the photopigment melanopsin with maximum sensitivity at a wavelength of about 480nm (blue). Light rich in blue component (such as 5000-6500K) strongly stimulates these cells, suppressing melatonin and promoting alertness. Light poor in blue (such as 2700-3000K) does not stimulate melanopsin and allows the nighttime production of melatonin necessary for sleep.
A Tunable White light cut system, which automatically varies the color temperature throughout the day following a programmed HCL protocol, is the most advanced lighting solution to support the circadian well-being of occupants. Typical programming provides: 5000-6000K in the early morning hours (wake-up stimulus), 4000-4500K during working hours (maintaining alertness), 3000K in the late afternoon (transition), 2700K in the evening hours (preparation for sleep). This chromatic variation, if managed with very gradual transitions (tens of minutes), is perceived by occupants not as a abrupt change but as a natural evolution of light throughout the day.
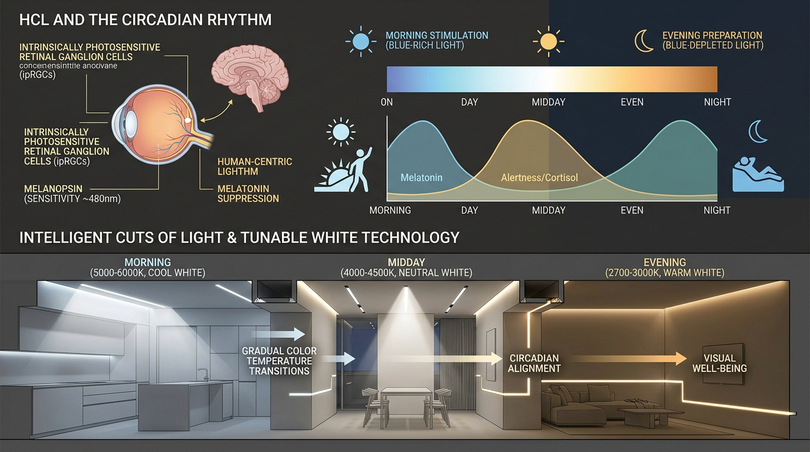
22. Dimming of LED light cuts: TRIAC, 0-10V, PWM, and DALI-2
Dimming, the ability to vary the luminous intensity of a light cut, is one of the most complex and at the same time most important technical aspects for the quality of the final experience. There are four main dimming technologies applicable to LED light cuts, each with specific technical characteristics, advantages, and limitations that the professional must know to make correct choices based on the type of project.
| Technology | Operating principle | Dimming range | Advantages | Limitations | Optimal application |
|---|---|---|---|---|---|
| TRIAC | Cutting of the 220V sinusoidal waveform | 1-100% | Compatible with existing dimmers, low cost | Possible buzzing, compatibility not guaranteed | Residential retrofit with existing dimmers |
| 0-10V | 0-10V DC analog control signal | 1-100% | Professional standard, reliable, no buzzing | Requires additional dedicated wiring | Offices, retail, contract environments |
| PWM | Pulse Width Modulation (1-2kHz frequency) | 0.1-100% | Excellent dimming depth, stable color | Possible flickering at low frequencies | Applications where deep dimming is required (<10%) |
| DALI | Bidirectional digital protocol on a dedicated bus | 0.1-100% (16 bit) | Individual addressing, diagnostics, open standard | Higher cost, requires gateway | Large contract installations, hotels, executive offices |
For light cuts in high-end private residences, the PWM control system paired with Skydance WT or WZ controllers offers the best ratio between dimming quality, depth of regulation, and ease of use. For large contract projects, DALI with Ledpoint DA decoders is the professional standard that allows precise control and remote diagnostics of every single segment of the light cut system.
23. Comparative table of the 8 light cut solutions
The following table summarizes the main characteristics of the 8 solutions presented in this guide, to facilitate choice based on the specific needs of the project:
| Solution | Key component | Visible opening | Flux (lm/m) | Cost range | Ideal for |
|---|---|---|---|---|---|
| 1 — PR-DW07-01 | Slim trimless profile | 7mm | 1,000-1,500 | Standard | Premium residential, design hotels |
| 2 — PR-DW11-03 | Wide trimless profile | 11mm | 1,500-3,000 | Standard-Premium | Open spaces, high corridors, contract |
| 3 — PR-DW01-03 | Angular profile | — | 800-1,500 | Standard | Wall-ceiling junction, floating ceiling |
| 4 — PR-DW16-03 | Cove profile | — | 600-2,000 | Standard | Perimeter light coves, valances |
| 5 — F52-300-320OR2 | Standard COB strip | n/a | 1,250/m | Standard | High-quality basic light cut |
| 6 — Fx2 Series | High-power COB strip | n/a | 2,500-3,000/m | Premium | Large surfaces, functional lighting |
| 7 — F52-CCT-240D22 | Tunable White strip | n/a | 1,100/m | Premium | HCL, luxury residential, wellness |
| 8 — Skydance Controller | Control system | n/a | n/a | Variable | Smart home, professional DALI-2 |
24. Guide to choosing the light cut system by project type
The choice of the most suitable light cut system depends on variables that vary significantly from project to project. The following table guides the choice based on the type of space and design priorities:
| Type of space | Priority | Recommended profile | Recommended strip | Temperature | Controller |
|---|---|---|---|---|---|
| Residential bedroom | Atmosphere, wellness | PR-DW07-01 perimeter | F52-CCT (Tunable White) | 2700-4000K variable | Skydance WiFi WT |
| Residential living room | Aesthetics, versatility | PR-DW07-01 + PR-DW01-03 | F52-300-320OR | 3000K | Skydance WiFi WT |
| Residential kitchen | Functionality, color rendering | PR-DW07-01 or Surface | F52-300-320OR | 3000K or 4000K | PWM Dimmer |
| Operational office | Efficiency, EN 12464 | PR-DW11-03 | Fx2 high-power series | 4000K | Skydance DALI-2 |
| Boutique hotel | Luxury, customization | PR-DW07-01 + PR-DW16-03 | F52-CCT or Fx2 | 2700-3000K | Skydance Zigbee WZ |
| Gourmet restaurant | Atmosphere, food | PR-DW01-03 perimeter | F52-300-320OR | 3000K (CRI≥95) | 0-10V analog dimmer |
| Retail showroom | Product, impact | PR-DW11-03 linear | Fx2 series | 3500-4000K | Skydance DALI-2 |
| Spa and wellness | Well-being, relaxation | PR-DW16-03 (cove) | F52-CCT Tunable White | 2700K base | Skydance WiFi WT |
| Museum space | Color rendering, CRI | PR-DW07-01 grazing | F52 CRI≥95 R9 | 3000K (R9>90) | Professional DALI-2 |
25. The 10 most common mistakes in creating light cuts
Experience from those who have worked with light cuts for years teaches that the most frequent problems repeat with great regularity and derive almost always from avoidable errors with better technical knowledge. Knowing them and learning to prevent them is one of the most useful knowledge investments for a professional.
Error 1 — Using SMD LED strips instead of COB for high-quality light cuts. The dotting effect is the most common visual defect in poorly designed light cuts. The solution is always a quality COB strip like the Ledpoint F52 series: the additional cost compared to the SMD strip is amply justified by the superior visual result.
Error 2 — Undersizing the power supply. A power supply working at 100% or above its nominal power overheats, reduces its useful life, and can cause instability in the light cut emission. The rule of +20% margin on nominal power is non-negotiable.
Error 3 — Using power supplies without flicker-free certification. The invisible but physiologically annoying flicker produced by low-quality power supplies is a problem that emerges in customer reports weeks or months after installation, when chronic headaches begin. Only certified power supplies like Mean Well SLD guarantee the absence of flicker.
Error 4 — Not coordinating the drywall installer, electrician, and painter. The trimless light cut requires the coordinated contribution of all three professional figures. Lack of coordination almost always produces the need to redo part of the work, with additional costs and delays.
Error 5 — Installing the LED strip before painting. LED chips and the COB substrate are irreversibly damaged by contact with drywall dust and paint splatters. The strip must be installed only when the ceiling is completely finished.
Error 6 — Ignoring voltage drop on lengths exceeding 5 meters. A 24V LED strip running 8-10 meters with power at only one end will show visibly lower brightness at the end farthest from the power supply. Bidirectional power or the choice of 48V strips for long lengths is the solution.
Error 7 — Choosing the wrong color temperature. A 6500K light cut in a bedroom is a serious design error. The choice of color temperature must be coherent with the function and mood of the space, not dictated by warehouse availability.
Error 8 — Neglecting thermal management in high-power installations. High-power Fx2 strips in very thin profiles without adequate heat dissipation degrade rapidly and can cause chromatic shift within the first few months of operation.
Error 9 — Using controllers incompatible with the strip's dimming curve. A TRIAC controller paired with a strip requiring PWM can cause flickering, buzzing, and emission instability. Compatibility between controller and source must be verified before purchase.
Error 10 — Not planning for maintenance. A professional light cut with quality COB strips lasts over 50,000 hours, but the power supply and controller may require replacement sooner. Designing technical access to the power supplies is an investment that pays off over time.

26. Regulations and certifications for LED light cuts: CEI 64-8 and CE marking
The creation of a light cut system is an electrical installation work in its own right, subject to the technical regulations in force in Italy and the European Union. Knowing these regulations is not only a legal obligation for the installer, but also a safeguard for the client who wants to ensure that their investment is carried out to a high standard and is insurable.
The CEI 64-8 standard: electrical utilization systems
The CEI 64-8 standard is the main reference for the design, realization, and verification of electrical systems in Italian civil and industrial buildings. For LED light cut systems, the most relevant requirements concern: the sectioning and protection of circuits (each circuit powering LED strips must be protected by an appropriately sized magnetothermal circuit breaker), the choice and positioning of power supplies (which must be accessible for maintenance and comply with EN 61347 product standards), and the insulation class of components (all electrical components of the system must be Class II or have effective grounding if Class I).
CE marking of components
All components of a professional light cut system (profiles, LED strips, power supplies, controllers) must be CE marked, which attests to the product's conformity to applicable European directives (Low Voltage Directive 2014/35/EU, EMC Directive 2014/30/EU, Ecodesign Directive 2009/125/EC).
27. Maintenance and longevity of light cut systems
One of the most frequent questions from clients concerns the lifespan of an LED light cut system and the frequency of maintenance required. The good news is that a light cut system designed and installed correctly with professional-quality components has a very long operational life, measurable in decades, with minimal maintenance needs.
The technical reference parameter for the lifespan of COB LED strips is L70B50: it indicates the number of hours in which 50% (B50) of the tested samples still maintain at least 70% (L70) of the initial luminous flux. Ledpoint's F52-300-320OR2 strips have an L70B50 life of ≥30,000 hours. Operating 8 hours a day, this equates to over 10 years of operational life with a 30% luminous flux degradation; in practice, the strip will remain perfectly functional and the human eye will hardly perceive the difference compared to the original installation.
The component of the light cut system with the shortest life is typically the power supply: professional-quality LED drivers like the Mean Well series have an MTBF (Mean Time Between Failures) exceeding 100,000 hours, but under real use conditions (high temperatures in the suspended ceiling cavity, frequent switching on and off) the actual average life settles at 40,000-60,000 hours, or 14-21 years at 8 hours/day. Planning technical access to the power supplies from inside the suspended ceiling is therefore an important design aspect that the client should be aware of.
28. Case studies: 4 real light cut projects
Case study 1 — Luxury residential apartment, Milan
A 180m² apartment in a historic building in central Milan, with original 3.2-meter ceilings. The client requested the home stager to provide a ceiling light cut system that would enhance the historic architecture without hiding it, with full smart home integration into the already installed ecosystem (Apple HomeKit via Matter).
Adopted solution
PR-DW07-01 profiles positioned perimetrically in three main rooms (45m² living room, 30m² dining room, 28m² master bedroom) for a total of 52 linear meters. F52-CCT-240D22 Tunable White strips at CRI≥95 Ra. Mean Well SLD-100 power supplies. Skydance Zigbee WZ series controllers integrated into the Matter hub. Color temperature programmed from 2700K in the evening to 4000K in the morning. Total investment for materials + labor: about 13,500 euros.
Result
The perimeter light cut enhanced the stucco moldings of the historic ceiling, creating a scenic effect highly appreciated by the client. Integration with the HCL system received positive feedback, particularly from the homeowner, who reported a perceived improvement in sleep quality in the first weeks of use.
Case study 2 — Executive offices, Rome
An 800m² corporate headquarters on two floors in Rome EUR, with an existing 60×60 cm panel suspended ceiling to be replaced. The client requested the architect a system of linear light cuts that met the requirements of the EN 12464-1 standard (500 lux on the work plane) with DALI-2 control for integration with the existing BMS.
Adopted solution
PR-DW11-03 profiles installed in the new drywall structure (12cm lowering relative to the floor slab), with a layout of parallel linear light cuts at 2.4-meter centers. Fx2 series strips at 4000K CRI≥90 Ra, 18W/m, 2,500 lm/m. Mean Well SLD-150 power supplies. Ledpoint DA series DALI-2 decoders with presence and natural light sensors for daylight harvesting. Total of 340 linear meters of LED light cuts.
Result
The objective of 500 lux on the work plane was achieved across the entire office surface. The daylight harvesting system reduced lighting energy consumption by 38% compared to initial projections with a presence-only system. LEED Gold certification was also achieved thanks to the efficiency of the light cut system.
28.3 Case study 3 — 4-star superior Boutique Hotel, Venice
A boutique hotel in Venice, with 22 rooms of different types and common areas (lobby, restaurant, bar). The client requested an engineering studio to provide light cuts that would enhance the prestigious finishes (Carrara marble, Murano silk, briccola wood) with absolute emission quality.
Adopted solution
In the rooms, PR-DW01-03 perimeter profiles with F52-300-320OR2 strips at 2700K ("standard" room) and F52-CCT strips at 2700-4000K (suites). In common areas, a combination of PR-DW16-03 for the light coves of the coffered ceiling and PR-DW07-01 for accent light cuts on artworks. CRI≥97 Ra on all exhibition points. Skydance Zigbee controllers for the rooms (integration with hotel PMS via Tuya API) and DALI-2 for common areas. Total of 180 linear meters of light cuts in common areas + 22 rooms.
28.4 Case study 4 — Retail showroom, Florence
The showroom of a luxury fashion brand in the heart of Florence, with a surface area of 350m² on two levels. The light cut had to enhance the clothing with absolute color rendering, particularly for silk fabrics, leathers, and the brand's natural dyes.
Adopted solution
A mixed system of fixed light cuts (PR-DW11-03 profiles with F52 strips CRI≥97 Ra at 3500K) and a magnetic track lighting system (for flexibility in repositioning accent lights with seasonal changes). The fixed light cut provides uniform ambient lighting at 500 lux on the sales floor; the track accent lighting provides spotlights to enhance the displayed garments. DALI-2 controller for centralized management with programmed scenarios (opening, standard sales, special event, closing).
29. Sustainability and energy savings of LED light cuts
The transition from traditional lighting systems (fluorescent, halogen, incandescent) to new generation LED light cuts entails significant and measurable energy and environmental advantages. Considering a typical installation of 100 linear meters of LED light cuts (medium-sized office scenario):
| Parameter | Existing T5 fluorescent system | New F52 COB LED light cut | Savings |
|---|---|---|---|
| Installed power (100m) | 2,800 W | 850 W | -70% |
| Annual consumption (8h/day, 250 days) | 5,600 kWh | 1,700 kWh | -3,900 kWh/year |
| Annual energy cost (0.25 €/kWh) | 1,400 € | 425 € | -975 €/year |
| Annual CO₂ emissions (0.4 kg/kWh) | 2,240 kg CO₂ | 680 kg CO₂ | -1,560 kg CO₂ |
| Average system life | 12,000-15,000 hours | 50,000+ hours | 3-4× longer |
| Payback period (9,000€ investment) | — | — | ~9 years |
30. Future trends: light cuts in 2026 and beyond
The lighting sector regarding light cuts is undergoing rapid technological evolution. The trends that will shape the market in the next 2-5 years include:
- Li-Fi in light cuts: data transmission through LED light (Li-Fi) is moving out of the experimental phase and is beginning to be proposed for commercial applications. In the future, LED light cuts could also serve as wireless access points, transmitting data at gigabit speeds through the invisible modulation of the emitted light.
- MicroLED chips for ultra-thin light cuts: MicroLED technology, currently dominant in the display sector, is about to reach production maturity for architectural lighting as well. Future MicroLED light cuts will have visible openings of 2-3mm (compared to the current 7-11mm) with luminous flux densities up to 5 times higher than current COBs.
- AI and automatic circadian adaptation: next-generation control systems will use artificial intelligence algorithms to automatically adapt the color temperature and intensity of light cuts not only based on the time of day but also based on the biometric data of the occupants (heart rate, activity level, sleep rhythm detected by wearables), creating truly personalized luminous environments.
- Circularity and recycling: light cut system manufacturers are developing modular design solutions that allow replacing only the LED chip or strip, keeping the aluminum profile intact for decades. This approach significantly reduces electronic waste and long-term maintenance costs.
31. Advanced light cut design: compositional principles and lighting engineering
The design of a professional-grade light cut system requires not only knowledge of technical components but also a deep understanding of the compositional principles of lighting engineering applied to architecture. A well-designed light cut is never an isolated element: it fits into a comprehensive lighting system that includes natural light, background lighting, accent light, and functional light, and its specific role within this system determines the most appropriate technical choices.
Relationship between light cut luminance and background luminance
In lighting engineering, the visual effectiveness of a light cut depends decisively on the contrast between the luminance of the source (the perceived brilliance of the luminous line) and the luminance of the background (the surrounding ceiling or wall). The Weber-Fechner law states that the perception of a luminous contrast is not linear with respect to the absolute difference in luminance, but proportional to the logarithm of the ratio between the two luminances. This principle has important practical consequences: to obtain a visually "powerful" light cut, it is not necessary to endlessly increase the brightness of the source, but it is sufficient to maintain a contrast ratio of at least 10:1 between the luminance of the light cut and that of the surrounding ceiling.
In an environment with a white ceiling (reflectance 0.80) and a general illuminance level of 200 lux, the ceiling luminance is about 50 cd/m². To obtain the 10:1 contrast, the luminance of the light cut must be at least 500 cd/m², a value easily achievable with the F52-300-320OR2 strip installed in a PR-DW07-01 profile with a 7mm opening. The most common technical error in designing light cuts is sizing the source in terms of lux on the work plane without considering the contrast with the ceiling, obtaining an LED light cut that "gets lost" in the background and does not produce the desired scenic effect.
The rule of thirds applied to light cuts
The rule of thirds (one of the fundamental compositional principles of photography, painting, and architecture) also applies to the arrangement of light cuts in a space. Instead of positioning the light cut in the exact center of the ceiling (which produces a static and uninteresting composition) or in the center of the room, a disposition at 1/3 or 2/3 of the width produces a visually more dynamic and interesting composition, which naturally guides the gaze through the space. This technique is widely used in boutique hotel and design restaurant projects, where the layout of light cuts contributes to the overall spatial narrative.
Orientation of light cuts and visual path
The orientation of light cuts relative to the main axis of the space has a direct effect on the perception of proportions and the direction of the perceived flow of movement. A light cut parallel to the long axis of a corridor or a rectangular room accentuates depth and "pushes back" the back wall, creating a sensation of greater length. A light cut perpendicular to the axis of movement, on the other hand, "cuts" the space into segments and creates a sensation of slowing down that can be useful in contexts where the user is to be invited to linger (exhibition halls, premium waiting areas, hotel lounge zones).
A particularly effective case of using the orientation of light cuts to modify spatial perception is that of vaulted or domed ceilings: a light cut following the profile of the vault from the impost to the keystone emphasizes the architectural form and transforms the vault from a simple "covering" into a narrative element of the space. This technique has been used with great efficacy in restoration and conversion projects of historic buildings (churches, noble palaces, industrial shed buildings) where the light cut becomes the way to "dialogue" with the original architecture using a contemporary language.
Rhythmic sequences of light cuts
One of the most refined compositional applications of light cuts in interior architecture is the rhythmic sequence, a series of parallel LED light cuts arranged at regular intervals that scan the space, creating a visual rhythm similar to that of the arches of a nave or the columns of a pronaos. This technique is particularly effective in hotel corridors, commercial galleries, and corporate headquarters where the goal is to communicate order, precision, and quality through the visual experience of the luminous sequence.
The optimal pitch of a rhythmic sequence of light cuts depends on the ceiling height and the width of the space: an empirical rule widely used in lighting design projects is the "golden ratio" applied to the center-to-center distance of the light cuts: center-to-center = height × 1.618. In a hotel corridor with a 2.8-meter ceiling, the optimal center-to-center distance between light cuts would be about 4.5 meters, a value that produces a visually balanced and pleasant sequence.
Combination of direct and indirect light cuts: layered lighting
The most sophisticated professional approach to space lighting design (known as "layered lighting") involves the combination of at least three levels of light: ambient light (for the luminous background), accent light (to highlight specific objects and surfaces), and functional light (for practical activities). Light cuts can participate in all three levels, but their compositional quality is highest when used as an ambient or accent light element, leaving functional light to guarantee the illuminance levels required by the standard.
An example of "layered lighting" combination with light cuts: in a luxury residential living room, the 2700K perimeter light cut with a PR-DW01-03 profile creates the luminous background and the "floating ceiling" effect (ambient light); the central ceiling linear light cut with a PR-DW07-01 profile and an F52 strip at 3000K contributes to the central ambient lighting; grazing light cuts on the walls clad in stone or wood create the accent light that enhances the materials. The three levels are managed by three independent circuits controlled by the Skydance system, which allows creating combined scenes programmed for different usage situations: breakfast, reading, evening, cinema, dinner.
Light cuts and materials: how to enhance architectural finishes
One of the least discussed but highly important practical aspects in light cut design is the relationship between the type of light source and the materials on which the light falls. The exact same line of light produces completely different visual effects on a polished white marble wall, a walnut wood cladding with marked grain, a smoothed plaster wall, or a lacquered boiserie. Understanding this relationship, and choosing the light cut source most suited to the dominant material of the project, is a professional competence that distinguishes mediocre results from excellent ones.
Light cuts and marble: enhancing the veins
Marble is the material that more than any other benefits from the grazing light cut technique. Its internal crystalline structure, with veins of different minerals that reflect light differentially, emerges in all its three-dimensional complexity when illuminated with a high-quality directional source. A light cut with a COB strip at CRI≥95 Ra positioned to graze a wall of Carrara, Calacatta Oro, or Marquina black marble produces a visual effect of extraordinary chromatic richness that cannot be appreciated under diffuse lighting conditions.
For white or light marble, the optimal color temperature for the grazing light cut is 3000K: the warm-white tone enhances the gray, golden, or green veins without denaturing the cold purity of the white background. For dark marble (black, green, blue), the 3000K light cut produces a very effective luminous contrast. Alternatively, 4000K can be used to maintain the chromatic neutrality of the material in a modern architectural context.
Light cuts and wood: enhancing texture with cutting light
Wood is the quintessential organic material of interior architecture, and its natural variability in texture, grain, and color makes it extremely sensitive to the quality of the light illuminating it. A grazing light cut on a wall clad in solid wood with horizontal grain brings out the three-dimensionality of every single fiber line, transforming an apparently flat surface into a texture rich in perceptual depth.
For light wood (ash, maple, beech, white oak), a 2700K light cut adds warmth and softness without altering the natural tones. For dark wood (walnut, wengé, teak), a 3000K light cut produces a more marked contrast that enhances the golden and amber reflections of knots and veins. The CRI of the source must never drop below 90 Ra for prestigious wood finishes: a low CRI desaturates the warm tones of the wood, reducing it to an anonymous gray-brown surface.
Light cuts and architectural concrete
Architectural concrete, the dominant material of contemporary brutalist and neo-brutalist architecture, is a material that requires a specific approach for light cut design. The rough texture of exposed concrete, with its irregularities, air bubbles, formwork marks, and localized chromatic variations, is one of those materials that "lives" thanks to cutting light: in diffuse lighting, exposed concrete appears flat and anonymous, but if illuminated by a well-designed grazing light cut, it reveals a tactile and chromatic complexity of great richness.
For architectural concrete, the most effective color temperature is generally 4000K-5000K: the neutral-white or cool-white tone enhances the natural grayish-blue of the concrete and creates sharp, modern chiaroscuro contrasts, coherent with the brutal aesthetic language of the material.
Light cuts and reflective surfaces: steel, mirror, glass
Reflective surfaces (brushed steel, polished mirror steel, transparent glass, frosted glass, glossy lacquered surfaces) interact with the light cut in a peculiar and often unpredictable way. The reflection of the line of light on these surfaces creates visual multiplications of the effect that can be desired or undesired depending on the project.
On brushed steel, the light cut produces a directional reflection (non-specular) that creates an elongated luminous "halo" in the direction of the brushing, an effect highly appreciated in restaurant counters and design steel kitchen tops. On glossy lacquered or mirror surfaces, the LED light cut reflects as a precise and defined luminous line, potentially creating spatial multiplication effects (a mirror reflecting a light cut seems to double the dimensions of the space). Industry professionals deliberately use this technique in narrow corridors, entrance halls, and design bathrooms where space is limited.
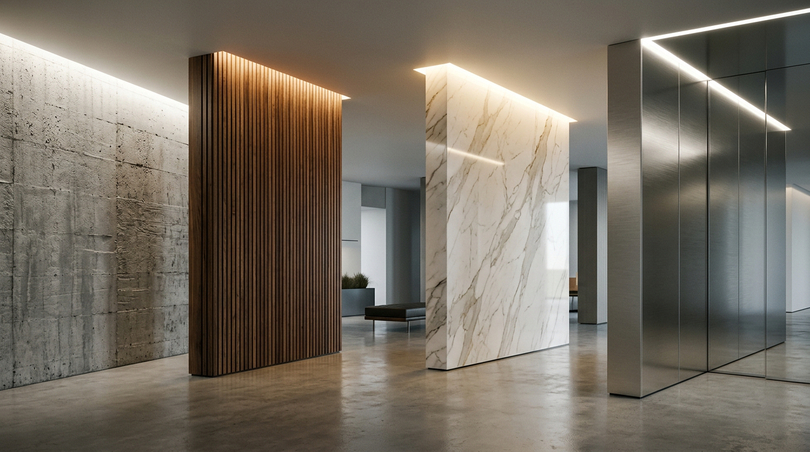
Light cuts in commercial and contract spaces: strategies and best practices
Commercial spaces (shops, showrooms, boutiques, premium shopping centers) represent one of the most dynamic markets for architectural light cuts. In this context, the light cut is not just an aesthetic element but a true visual marketing tool, capable of influencing brand perception, consumer behavior, and the enhancement of displayed products.
The light cut as a brand identity tool
For luxury brands (fashion, jewelry, cosmetics, high-end furniture), the light cut has become almost a visual code of the segment. The extreme formal cleanliness of a luminous line integrated into the ceiling, devoid of any frame or explicit decorative element, communicates exactly those values of essentiality, perfection, and material quality that these brands want to associate with their identity. It is no coincidence that almost all new luxury stores, from Paris to Milan to Tokyo, have trimless light cuts as the dominant element of their lighting.
The light cut in luxury retail follows precise design rules: color temperatures between 3000K and 3500K to enhance the chromatic range of textile products and leathers, CRI ≥95 Ra (with high R9 values for red product tones) to guarantee color fidelity, illuminance levels of 800-1,500 lux on display areas to create the visual "pop" that attracts the customer's attention, fine dimming of lighting scenes to differentiate the experience in different areas of the store (entrance, product area, fitting room, cash desk).
Light cuts in restaurants: from functional lighting to atmosphere
The restaurant is the space where the light cut performs the most emotionally complex function: it must be bright enough to allow reading the menu and visually evaluating the dishes, but discreet and atmospheric enough to create that sensation of intimacy that is part of the quality gastronomic experience. This delicate balance requires sophisticated lighting design that goes far beyond the simple installation of LED light cuts.
The most effective technical solution for restaurants is the combination of indirect perimeter light cuts (PR-DW16-03 in light coves at 2700K, for atmosphere) with accent lighting on the tables (adjustable track spotlights at 3000K CRI≥95, for dish enhancement) and grazing light cuts on the cladding walls (for the texture effect). All three levels are dimmable and separately controllable, allowing the creation of differentiated scenes for lunch (brighter), dinner (more intimate), and special events (scenic).
Light cuts in hotels: creating memorable experiences
In the hospitality sector, the light cut is one of the elements that contributes most significantly to the formation of the guest experience that the client memorizes and communicates. The most awarded hotels for interior design quality (from international luxury chains to independent boutiques) use light cuts as narrative elements that create the characteristic atmosphere of each structure, that unmistakable visual sensation that the client recognizes and associates with the brand.
In high-end hotel rooms, the typical light cut system includes: a perimeter light cut at the height of the bed headboard (for the visual well-being of the resting client), a linear light cut above the desk (for functional work lighting), a light cut in the bathroom above the mirror (for shadow-free face illumination) and, in higher-level suites, a programmed variable Tunable White light cut system that follows the client's circadian rhythm, adapting to their time zone of origin.
Advanced technical aspects of the light cut: photometry and lighting calculation
For professionals who want to approach the light cut with rigorous lighting engineering methods, there are calculation tools and reference standards that allow precisely predicting the luminous result before installation. Photometry applied to light cuts is a specific discipline that combines the photometry of LED sources with the optics of aluminum profiles and the reflection models of architectural surfaces.
Photometric curves of light cut profiles
Professional-quality profiles are accompanied by photometric data, the light intensity distribution (LID) curves that mathematically describe how light distributes in space starting from the source. This data, typically provided in IES (Illuminating Engineering Society) or LDT (EULUMDAT) format, can be imported into professional lighting calculation software (DIALux, Relux, AGI32) to precisely simulate the result of the light cut before installation.
The photometric curve of a light cut with a PR-DW07-01 profile and a COB strip is typically asymmetric batwing: the 7mm opening directs the luminous beam downward with a semi-opening angle of about 45-55° on each side, with the peak intensity at 0° (vertical) and a residual lateral intensity that contributes to illuminating the adjacent walls. This distribution produces an illuminated "corridor" on the floor with a width proportional to the ceiling height, with progressively less luminous margins toward the edges.
The utilization coefficient method for light cuts
The utilization coefficient (UC) method is the most used simplified method for quickly sizing a light cut system. The UC represents the fraction of the source's luminous flux that actually reaches the target work plane, taking into account the geometry of the space, the emission angle of the source, and the reflection properties of the surfaces. For a direct light cut (downward emission) in a room with a white ceiling (R=0.80), white walls (R=0.70), and medium floor (R=0.30), the typical UC is between 0.40 and 0.55, values used in calculating the luminous flux necessary to reach a given illuminance level.
Simulation software for light cuts: DIALux and Relux
The lighting calculation software DIALux (free, developed by DIAL GmbH in Germany) and Relux (Relux Informatik AG, Switzerland) are the professional references for simulating light cut systems in 3D. Both allow importing the photometric data of the profiles, inserting 3D models of architectural environments with their reflection properties, and precisely calculating the distribution of illuminance, luminance, and uniformity of the designed light cut system.
The use of these tools is strongly recommended for all medium-to-high complexity light cut projects such as contexts with variable ceiling heights, non-standard geometries, regulatory illuminance requirements to be demonstrated (EN 12464-1 for offices, EN 12193 for sports facilities), or energy optimization needs (LEED, BREEAM). For simple residential projects, the UC method is generally sufficient.
Answers to the most frequent technical questions from professionals about light cuts
Over the years, the technical team at Ledpoint.it has received hundreds of technical queries from architects, interior designers, electricians, and installers on specific aspects of light cut realization. In this section, we gather the answers to the most technically interesting and frequent questions, which integrate and deepen what has already been discussed in the previous sections.
Is it possible to create a light cut with 230V power supply instead of 24V DC?
Technically, COB LED strips for light cuts also exist in 230V AC versions, which do not require a separate external power supply and connect directly to the mains via a transformer integrated into the strip itself. However, for professional architectural light cut applications, 24V DC strips with an external power supply are almost always preferable for several technical reasons: better dimmability (230V strips have significant limitations in deep dimming), greater flexibility in length management (24V strips can be cut with a minimum pitch of 25mm compared to 50-100mm for 230V versions), better thermal management (the external 24V power supply is physically separated from the strip, reducing heat in the cavity). 230V strips are suitable for very simple installations or rapid retrofits, while for a professional light cut, the 24V DC system is the standard.
How is the joint between two light cut segments managed in a 90° internal corner?
The 90° angular joint in a perimeter light cut is one of the most aesthetically critical aspects of the installation: if poorly executed, the corner shows a visual discontinuity that compromises the elegance of the result. The professional solution provides three approaches depending on the type of profile:
- 45° cut: both profiles are cut at 45° and joined in the corner. Requires a precision miter saw and care in alignment, but produces the cleanest visual result. Suitable for PR-DW07-01 and PR-DW11-03 profiles.
- Dedicated angular connector: some manufacturers offer aluminum angular connectors that insert between the two profile segments, creating a precise mechanical joint. Easier to install than a 45° cut but with a slightly more visible joint.
- Intentional interruption: in projects where discontinuity in the corner is aesthetically acceptable, the two light cut segments stop 2-3cm from the corner, leaving a small "breathing" space that in practice is hardly perceived by the observer.
How to calculate the number of power supplies needed for a perimeter light cut?
For a perimeter light cut of total length L (in meters) with an F52-300-320OR2 strip (8.5W/m), the power supply calculation follows these steps:
1. Total strip power = L × 8.5W/m
2. Total power with 20% safety margin = L × 8.5W × 1.20
3. Number of power supplies = Total power / Single power supply power
4. For each power supply, verify that the length of served strip does not exceed 5-6 meters (to avoid excessive voltage drop)
Concrete example: living room perimeter 20 meters, F52-300-320OR2 strip, SLD-100 power supplies (100W).
- Total power: 20 × 8.5 = 170W
- With margin: 170 × 1.20 = 204W
- Number of power supplies: 204W / 100W = 2.04 → 3 SLD-100 power supplies (for safety and to limit the length per power supply to about 6-7 meters)
How much does ambient temperature influence the efficiency of the light cut?
Operating temperature is one of the most important parameters influencing the efficiency, life, and luminous flux maintenance of COB LED strips in light cuts. LED chips are semiconductor devices whose efficiency decreases as the junction temperature increases: at the same supply current, a strip at 25°C emits 100% of the nominal flux, at 50°C about 90%, at 75°C about 80%, at 100°C about 70%. This means that in hot technical cavities in summer (which can easily reach 40-50°C), a light cut with a poorly sized power supply or a profile with insufficient thermal dissipation can lose 20-30% of its luminous flux compared to the installation value.
The technical solution to minimize this effect is twofold: use aluminum profiles with an abundant section that guarantee good thermal dissipation toward the ceiling structure, and use Mean Well SLD power supplies that operate efficiently even at high temperatures (maximum operating temperature 70°C for the SLD series).
Outdoor light cuts: external applications and resistance to atmospheric agents
The light cut is not a technique confined to interiors: outdoor applications of LED light cuts are growing constantly, especially in the luxury residential sector (terraces, pools, representative gardens) and commercial architecture (facades, porticoes, bioclimatic pergolas). The technical challenges for outdoor light cuts are, however, significantly different from indoor ones, and require components specifically designed to withstand atmospheric agents.
IP protection classes for outdoor light cuts
The fundamental technical parameter for choosing components for an outdoor light cut is the IP (Ingress Protection) class, defined by the IEC 60529 standard. The IP class is expressed with a two-digit code: the first digit indicates protection against solid bodies and dust (from 0 = no protection to 6 = total protection against dust), the second digit indicates protection against liquids (from 0 = no protection to “8 = continuous immersion).
| Outdoor application | Recommended minimum IP | Protection description | Recommended LED strip |
|---|---|---|---|
| Covered porch and loggia | IP44 | Protected against water splashes from all directions | F52 IP44 or IP65 |
| Terrace exposed to rain | IP65 | Protected against low-pressure water jets | F52 IP65 with silicone sheath |
| Pool (outer edge) | IP67 | Protected against temporary immersion up to 1m | Specific IP67 strip |
| Cornices and gutters | IP65 | Protected against water jets | F52 IP65 |
| Profiles recessed in the floor | IP67-IP68 | Prolonged immersion | Specific IP68 floor strip |
Thermal resistance in outdoor light cut applications
In addition to protection against water and dust, outdoor light cuts must withstand much wider thermal excursions than indoor applications. In Italy, a light cut installed on a south-facing facade can undergo operating temperatures ranging from -15°C in winter to +70°C in the height of summer, with the direct effect of the sun on the aluminum profile. Profiles and LED strips for outdoor applications must be specified with extended operating temperatures (-20°C to +80°C) and manufacturers must guarantee performance stability across the entire thermal range.
An aspect often overlooked in outdoor LED light cut installations is the phenomenon of condensation: the alternation of temperatures that causes humid air inside the profile to condense water on the internal walls can damage the LED strip and connectors in a few weeks, even if the strip is IP65 certified. The professional solution is to seal all ends of the profile with appropriate caps and butyl tape, and to use strips with a silicone sheath that protect not only against external water but also against internal condensation.
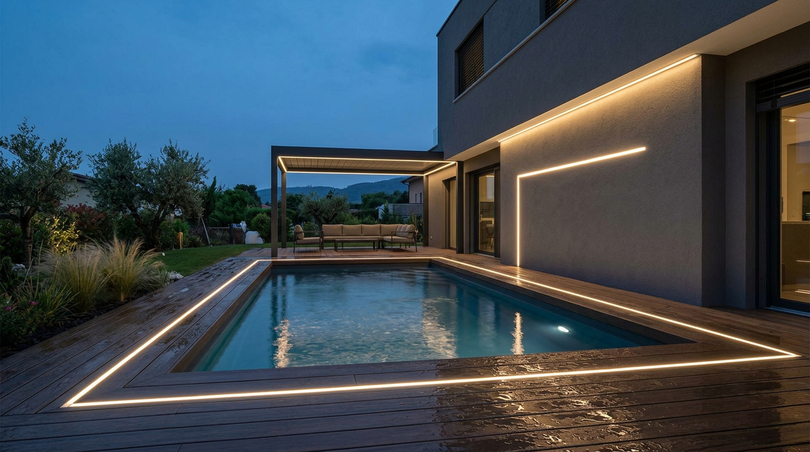
The light cut in the bathroom: functional lighting and well-being
The bathroom is one of the domestic spaces where light cuts can make the most significant difference between a banal environment and one of high quality. The specific challenge of the bathroom is twofold: on the one hand, functional needs require precise, shadow-free lighting for face and body care, and on the other, aesthetic and well-being needs ask for warm, enveloping, and relaxing light for the moment of bathing or showering.
The mirror light cut: the anti-shadow solution
The main lighting engineering problem in the bathroom is face illumination in front of the mirror: sources positioned above the mirror (like traditional ceiling spotlights) project hard shadows under the eyes, on the nose, and on the chin, and these are the same shadows that film studios call "mortuary lighting" and that professional makeup artists carefully avoid. The professional solution is the lateral light cut on the mirror: two vertical PR-DW07-01 profiles positioned on the sides of the mirror emit light from the same height as the eyes, illuminating the face with frontal-lateral light free of hard shadows.
The most sophisticated version of this solution, used in the bathrooms of luxury hotel suites and premium residences, integrates F52-CCT Tunable White strips in the lateral light cuts of the mirror, with a controller that allows choosing the color temperature based on use: 2700K for the evening routine (warm, relaxing light), 4000K for applying makeup (neutral light for color evaluation), 6500K for "daylight simulation" (the light closest to natural midday light, ideal for applying makeup before going out in full daylight).
IP class for light cuts in the bathroom
The CEI 64-8 standard divides the bathroom into electrical risk zones (from 0 to 3, depending on the distance from water) and specifies the minimum IP protection classes for electrical equipment in each zone. For light cuts in the bathroom, it is important to respect these prescriptions:
- Zone 0: inside the bathtub or shower, almost all conventional light cut systems are prohibited (SELV 12V with minimum IP67)
- Zone 1: above bathtub/shower up to 2.25m from the floor, minimum IP45, only SELV 12V or 24V
- Zone 2: up to 60cm beyond zone 1, minimum IP44, SELV or PELV preferable
- Zone 3: rest of the bathroom, no specific IP requirement but IP45 minimum is recommended
LED strips for light cuts in zones 1 and 2 of the bathroom must be powered at safety voltage (SELV, typically 24V DC) with a Class II power supply installed outside the risk zone. 230V AC strips are excluded from zones 0, 1, and 2. Ledpoint's F52 IP65 series is suitable for zones 1 and 2 of the bathroom, guaranteeing both 24V safety voltage and protection against water jets.
32. FAQ — Frequently asked questions about light cuts
Answers to the most frequent questions asked by professionals and clients about LED light cuts:
What is a ceiling light cut and how is it realized?
A ceiling light cut is a continuous luminous line integrated into the ceiling through an aluminum profile (called a trimless profile) that houses a COB LED strip. The profile is designed to be recessed into the drywall during the construction of the suspended ceiling, so that after skimming and painting, only the thin luminous slit remains visible in the finished surface. The realization requires coordination between the drywall installer, electrician, and painter, and the use of professional components (PR-DW profile, F52 COB strip, flicker-free Mean Well power supply, controller). The result is a line of light that appears "carved" into the ceiling, of great architectural impact.
What is the difference between COB and SMD LED strips in light cuts?
The main difference is in the uniformity of luminous emission. SMD strips mount individual LED chips at visible distances, producing a "dotted" effect that is clearly seen in the finished light cut, especially up close. COB (Chip On Board) strips mount the chips on a continuous substrate with no visible distances between one chip and another, producing a perfectly homogeneous line of light. For quality architectural light cuts, the COB strip is the only acceptable choice: Ledpoint's F52-300-320OR2 strip with 320 chips/m is the base reference for this type of application.
How to create a light cut without drywall?
Light cuts without drywall are created using Surface (surface-mounted) or semi-recessed profiles, applicable directly to existing ceilings in concrete, brick, wood, or panels. Surface profiles are fixed with screws, anchors, or structural adhesives and remain visible (albeit very discreet), while semi-recessed profiles require only partial milling of the existing surface. These solutions are ideal for renovations where one does not want to lower the ceiling or demolish existing structures.
What is the cost of a light cut per linear meter?
The cost of a complete light cut (materials + labor) typically varies between 45 and 245 euros per linear meter depending on the quality range: economy (45-80 €/m), standard with PR-DW trimless profile + F52 COB strip + Mean Well power supply + WiFi controller (80-145 €/m), premium with top-of-the-range components and DALI-2 control (145-245 €/m). For a 25m² living room with a perimeter light cut (20 linear meters) in the standard range, the total cost is around 2,000-2,500 euros.
What color temperatures to choose for a light cut in the living room?
For the residential living room, the most indicated color temperature for the light cut is 3000K (warm white). This temperature creates a welcoming and high-quality atmosphere, enhances warm materials (wood, fabrics, natural stone), and integrates naturally with the accent lighting typically used in design living rooms. Those wanting maximum versatility can opt for a Tunable White system (F52-CCT strip) that allows varying the temperature from 2700K (evening relaxation) to 4000K (operational morning).
How are LED light cuts dimmed?
LED light cuts are dimmed through four main technologies: TRIAC (compatible with existing dimmers, suitable for retrofit), 0-10V (reliable professional standard), PWM (excellent dimming depth, ideal for premium residential), DALI-2 (addressable digital control for large installations). The choice depends on the type of project: Ledpoint's Skydance WiFi and Zigbee controllers use PWM and are ideal for residential and medium-sized contract; DALI-2 decoders are the standard for large professional installations.
How to illuminate a low ceiling with light cuts?
For low ceilings (under 2.6-2.7m), the most effective technique with light cuts is the perimeter profile with upward emission (indirect uplighting). The light cut positioned 15-25cm from the ceiling along the perimeter of the room illuminates the ceiling from above, visually erasing the wall-ceiling junction and creating the sensation of a higher "floating" ceiling. PR-DW01-03 angular profiles at 2700-3000K are used, with the ceiling painted pure white to maximize the reflection of indirect light.
How long does a COB LED strip last in a light cut?
A professional-quality COB LED strip like Ledpoint's F52 series guarantees over 50,000 hours of operation at 70% of the initial flux (L70B50 parameter). At 8 hours of use per day, this equates to over 17 years of operational life. In practice, the strip will remain functional much longer: it is expected that at 50,000 hours the brightness will be at 70% of the initial value, which is hardly perceptible in daily life. The component with the shortest life in the system is typically the power supply (10-15 years), which is however easily replaceable if technical access has been planned.
Are LED light cuts compatible with Alexa and Google Assistant?
Yes, the Skydance WT series WiFi controllers available on Ledpoint are natively compatible with Alexa, Google Assistant, and the Tuya Smart protocol, which also supports Apple Siri via bridge. Voice control of light cuts (on/off, intensity variation, color temperature change for Tunable White systems) is therefore fully available without the need for additional hubs in most smart home ecosystems.
What is the difference between a light cut, a light line, and a light cove?
Light cut: luminous line integrated into a ceiling slit with precise emission directed downward or laterally, sharp and high-contrast effect. Light line: linear integrated source that can emit in one or more directions, more generic term. Light cove: perimeter architectural cavity housing the LED source with upward emission (indirect light), soft and atmospheric effect. The first is used for technical lighting; the third for perimeter atmospheric lighting; "light line" is the more generic commercial term that encompasses them all.
Is a permit required to install light cuts in an apartment?
In Italy, the creation of a light cut system is an electrical installation work that must be performed by a qualified electrician in accordance with D.M. 37/2008 (formerly Law 46/90). At the end of the work, the installer must issue the Declaration of Conformity (DoC) of the system, a mandatory document attesting compliance with current CEI regulations. Urban planning authorization is not necessary if the works do not modify the load-bearing structure of the building; however, it is advisable to notify the condominium in advance if the works affect common parts (ceilings owned in common, condominium cavities).
Is it possible to create curvilinear light cuts?
Curvilinear light cuts are technically feasible but require specific flexible or custom-curved aluminum profiles, and COB LED strips with a compatible minimum bending radius (typically >100mm for COBs, compared to 20-30mm for SMD strips). For wide radii of curvature (over 500mm), it is possible to approximate the curve with a series of straight segments joined at an angle. For projects with complex curvilinear light cuts, it is advisable to contact specialized manufacturers that offer aluminum profiles bendable to specific geometries.
33. Choosing the right components for your light cut
After this in-depth analysis of the 8 solutions for professional light cuts, some fundamental principles emerge clearly and deserve to be synthesized as definitive takeaways for anyone preparing to design or realize an architectural LED light cut system:
The quality of components is non-negotiable: a light cut that will last for decades and maintain its elegance over time is the result of using professional-level technical components, PR-DW trimless profiles with precise construction tolerances, F52 COB LED strips with CRI≥90 and L70B50 life ≥50,000 hours, flicker-free Mean Well power supplies, Skydance controllers with a logarithmic dimming curve. The cost difference compared to low-level components is real but modest compared to the total cost of a quality interior design work.
Coordinated design is more important than execution: 70% of problems in poorly executed light cuts derive from design and coordination errors, not execution. Investing time in the design phase (precise layout, correct sizing of power supplies, coordination among the professional figures involved) is the investment with the highest qualitative return.
Color temperature defines the soul of the space: no other parameter of light cuts has an emotional impact on the space comparable to color temperature. Before choosing the profile and the LED strip, choose the right color temperature for the space: 2700K for intimacy, 3000K for versatile elegance, 4000K for efficiency, Tunable White for maximum flexibility.
Smart control is an investment, not a luxury: Skydance WiFi, Zigbee, and DALI-2 controllers have an additional cost compared to a simple switch, but they transform the light cut from a static installation into a dynamic architectural element capable of enhancing every moment of the day and every usage situation of the space. In a high-level project, smooth dimming and scene variation are minimum requirements, not optional extras.
Creating a perfect light cut is the fruit of conscious choices, guided by technical knowledge and respect for those principles that separate an anonymous luminous effect from a memorable spatial experience. Every chosen component, every verified design dimension, every set dimming curve contributes to drawing not just a luminous margin on the ceiling or wall, but the very character of the architecture you will inhabit every day. Investing in quality, coordination, and control means building light that is not seen but without which, the space simply would not be the same.
Recommended products for your light cuts — available on Ledpoint.it
- PR-DW series profiles — PR-DW07-01, PR-DW11-03, PR-DW01-03, PR-DW16-03 for every light cut application in drywall
- F52 series COB LED strips — F52-300-320OR2 (standard) and Fx2 series (high power) for high-quality LED light cuts
- Tunable White strips — for HCL and circadian well-being light cuts
- Mean Well power supplies — for any sizing requirement
- Skydance WiFi and Zigbee controllers — for smart home and advanced control of light cuts
- DA series DALI decoders — for professional control in large contract installations
For personalized technical consultation on choosing components for your project, you can contact the technical team at Ledpoint.it, specialists in professional architectural lighting.