





Anyone who has ever searched for a light bulb or an LED strip has sooner or later run into the same seemingly simple question: how many watts do I need? It's a legitimate question, a habit inherited from decades of incandescent and halogen bulbs, where the watt was practically synonymous with the amount of light. With LEDs, this equivalence no longer holds true, and continuing to think in "watts" often leads to choosing fixtures that are undersized, oversized, or simply wrong for the intended use.
In this guide, we tackle the topic of power in LED lighting in a comprehensive and practical way: what it really means, how it relates to luminous flux and efficiency, how to calculate the correct power for a room, an office, a shop, a warehouse, or a garden, what mistakes to avoid, and how to correctly read a technical data sheet. We do this with data, reference tables, real calculation examples, and references to industry technical standards, so that by the end of the reading you have the tools to choose wisely, without having to blindly trust the largest number written on the packaging.
If you work in the lighting design sector, manage a commercial business, or simply want to renovate your home lighting with solid technical criteria, this guide is designed to give you concrete, verifiable, and immediately usable answers, with direct links to the Ledpoint products best suited to each described need.
In this article...
What is power in LED lighting (and why it's not enough on its own)
Let's start with the point that generates the most confusion among those buying LED lighting for the first time: power, expressed in watts (W), does not measure the amount of light produced. Instead, it measures the electrical energy absorbed by the fixture to operate. This is a precise technical distinction that has very practical consequences, because choosing a fixture by looking only at the number of watts written on the label, as was done with incandescent bulbs, today leads to even serious evaluation errors.
Electrical Power (Watts) vs Luminous Flux (Lumens)
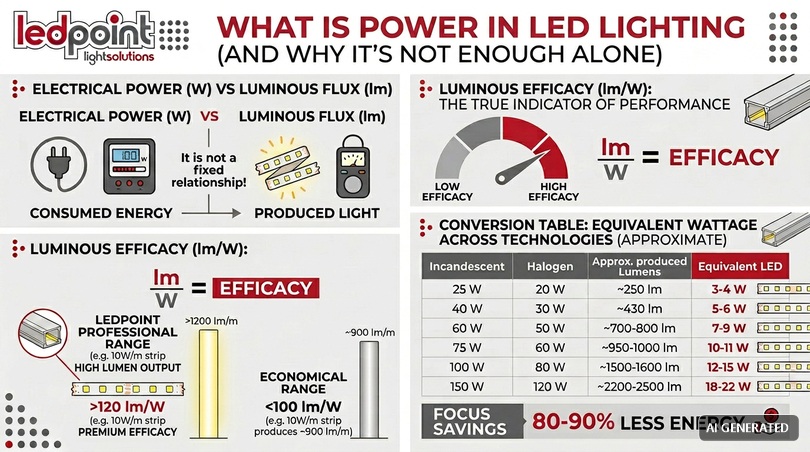
The watt (W) is the unit of measurement for electrical power: it indicates how much energy the fixture consumes every second of operation. The lumen (lm), on the other hand, is the unit of measurement for luminous flux, that is, the total amount of visible light emitted by a source in all directions. They are two different physical quantities, which describe different aspects of the same fixture: one is the energy input, the other is the light output.
With old incandescent bulbs, this distinction mattered little in practice, because the technology was substantially unique and the relationship between watts and lumens was almost fixed: a 60W incandescent bulb always produced, with minimal variations, about 700-800 lumens. It was therefore enough to use the watt as a proxy for brightness. With LEDs, this shortcut no longer works, because luminous efficacy varies enormously from one product to another, even with the same absorbed power.
Luminous efficacy: the true indicator of useful power (lm/W)
The parameter that links the two quantities and allows an honest comparison between different fixtures is luminous efficacy, expressed in lumens per watt (lm/W). It indicates how much light is produced for each unit of energy consumed. The higher this value, the more efficient the fixture: it produces more light for the same consumption, or the same level of light with lower consumption.
On the current market, professional-grade LEDs reach efficacies between 120 and over 160 lm/W, while economy or older products often stop between 80 and 100 lm/W. This means that two 100W floodlights can produce, one, 16,000 lumens, and the other just 9,000: almost half the light, with the same energy consumption and electricity bill cost. This is why, when comparing products, the efficacy data in lm/W is more informative than the simple power value, and should always appear in the technical data sheet of a serious fixture.
Conversion table: equivalent watts between technologies
One of the most frequent requests when replacing an old system is understanding "how many LED watts correspond" to a traditional bulb that is about to be replaced. The following table reports indicative equivalence values, useful as a general reference (real values vary based on the individual model and manufacturer):
| Incandescent | Halogen | Approx. Lumens produced | Equivalent LED |
|---|---|---|---|
| 25 W | 20 W | ~250 lm | 3-4 W |
| 40 W | 30 W | ~430 lm | 5-6 W |
| 60 W | 50 W | ~700-800 lm | 7-9 W |
| 75 W | 60 W | ~950-1000 lm | 10-11 W |
| 100 W | 80 W | ~1500-1600 lm | 12-15 W |
| 150 W | 120 W | ~2200-2500 lm | 18-22 W |
As can be seen, the savings ratio between halogen and equivalent LED is stably between 80% and 90% less energy for the same amount of light produced. This is a figure that will be useful later, when we talk about energy savings and investment payback times.
A brief history of the evolution of power in LED technology
To fully understand why today the relationship between power and light produced is so different from the past, it is worth briefly recounting how LED technology has evolved over the last twenty years. Knowing this evolution helps to understand why apparently similar fixtures, perhaps purchased a few years apart from each other, can have very different efficiencies for the same declared power.
The first LEDs for general lighting (2005-2010)
The first high-power LED diodes designed for general lighting applications, and not just for signaling or backlighting, began to spread commercially between 2005 and 2010. The luminous efficacies of that generation were contained, typically between 40 and 70 lm/W, values that we consider low today but which already at the time represented a clear improvement compared to incandescent bulbs (about 10-15 lm/W) and a value comparable to that of the first compact fluorescent lamps.
In this phase, moreover, production costs were still high and the color rendering often modest, with cold and unnatural light tones that contributed, for some years, to a negative perception of LEDs among the general public, a perception that the market then completely reversed with subsequent progress.
The efficiency leap (2011-2018)
In the following decade, there was a progressive and constant improvement in the efficiency of LED chips, driven both by industrial investments in research on semiconductor materials and by growing market demand linked to increasingly stringent regulations on energy consumption (in Europe, the progressive phase-out of incandescent and then halogen bulbs). In this period efficiency went from the initial 70 lm/W to exceeding 120-130 lm/W in high-end products, almost doubling the light produced for the same absorbed power in less than a decade.
The current generation (2019-today)
The most recent LED chips, mounted on current professional products, reach efficiencies that commonly exceed 150-160 lm/W, with peaks over 200 lm/W in laboratory conditions for very specific applications. At the same time, other parameters related to light quality have also improved significantly, such as the color rendering index (now commonly available above CRI 90 even on mid-range products) and the stability of the luminous flux over time, thanks to more sophisticated drivers and better thermal management of heat sinks.
The practical result of this evolution is that a LED fixture today can produce the same amount of light as one from ten years ago with less than half the power, a fact that has direct consequences even for those evaluating the replacement of a "first generation" LED system installed between 2012 and 2016: in many cases, replacing it with current products involves further significant energy savings, in addition to that already obtained by switching from traditional technologies to LED.
How to calculate the power needed for an environment
Once it is clear that the starting data is not the watt but the required illuminance level, calculating the necessary power becomes a step-by-step process: you start from how much light is needed in the environment (in lux), convert it to total lumens required, and finally, knowing the efficiency of the chosen fixture, you trace back to the actual watts. Let's see the method step by step.
The lumen per square meter method
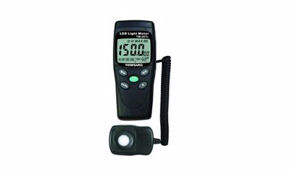
The lux (lx) is the unit of measurement for illuminance: it represents the luminous flux (lumens) that hits a surface of one square meter. The basic formula is:
| Total lumens required = Required Lux × Surface area in m² |
This calculation provides a rough estimate, valid for a quick quote; for professional lighting projects (offices, warehouses, sports facilities) it must be integrated with a photometric calculation that takes into account ceiling height, wall reflectance, type of optics, and maintenance factor, but it remains an excellent starting point for understanding the order of magnitude of the power required.
Recommended lux table by room type (ref. UNI EN 12464-1)
The technical standard UNI EN 12464-1 defines the recommended maintained average illuminance levels for different activities in indoor workplaces. Here is an indicative summary of the most consulted values:
| Room / activity | Recommended lux |
|---|---|
| Corridors, passageways | 100-150 lx |
| Warehouses, simple storage areas | 100-200 lx |
| Living room / domestic living area | 150-300 lx |
| Goods handling areas | 200-300 lx |
| Domestic kitchen | 300-500 lx |
| Offices, reading and writing | 500 lx |
| CAD workstations, technical drawing | 750 lx |
| Sales areas / retail | 300-750 lx |
| Quality control areas, precision work | 750-1500 lx |
| Sports facilities (amateur use) | 200-300 lx |
| Sports facilities (TV competitions) | 750-2000 lx |
Example of practical calculation
Let's take a concrete case: a 400 m² warehouse, installation height of 8 meters, for which the standard indicates a recommended illuminance of 200 lux in handling areas. The calculation proceeds as follows:
| Total lumens required | 200 lux × 400 m² = 80,000 lumens |
| Efficiency of chosen LED high-bay | 150 lm/W |
| Total power required | 80,000 / 150 = approx. 533 W total |
| Example of distribution | 4 LED high-bays of 150W (efficiency 150 lm/W, 22,500 lm each) |
This calculation is simplified and does not replace a lighting study with photometric calculation software (essential on complex projects or with stringent regulatory constraints), but it gives a realistic estimate on which to base a quote or a comparison between suppliers.
Step-by-step guide to lighting design
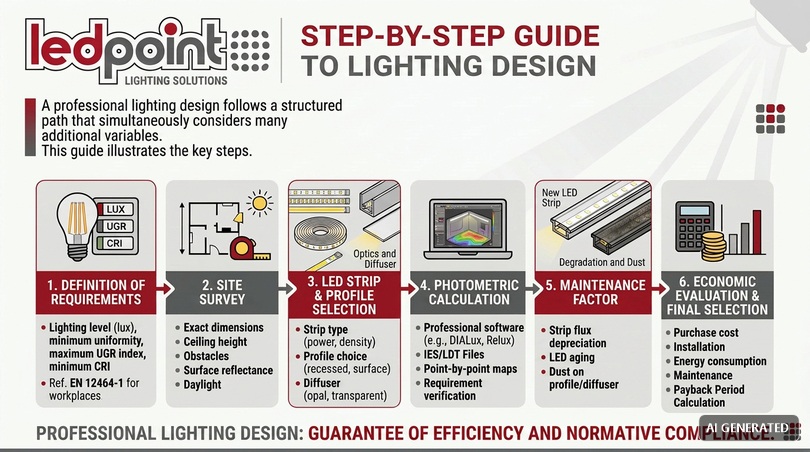
The simplified lumen/m² calculation seen in the previous paragraph is useful for initial orientation, but a professional lighting project follows a more structured path, which takes into account many more variables simultaneously. Let's see the main steps, so as to understand when a quick estimate is sufficient and when it is instead necessary to turn to a designer or use dedicated calculation software.
Step 1: definition of lighting requirements
The first step consists of precisely defining the required illuminance level (in lux), the minimum acceptable uniformity (the ratio between the minimum and average illuminance value on the surface), the maximum tolerable glare index (UGR, Unified Glare Rating) and the minimum CRI required for the activity carried out. For work environments, these values derive directly from the UNI EN 12464-1 standard, while for residential or scenic environments they are often the result of a freer design choice, guided by the desired effect.
Step 2: room survey
The second step is the punctual survey of the room to be illuminated: exact dimensions, ceiling height or installation points, presence of obstacles (beams, ducts, shelving), color and material of surfaces (which determines reflectance), presence of natural light and its variations during the day. Each of these elements enters as a parameter in the final calculation of the required power.
Step 3: choice of fixture type and optics
Based on the first two steps, the most suitable type of fixture is identified (panel, ceiling light, strip) and the optical opening angle most consistent with installation height and area to be covered. As seen previously, the same power distributed with different optics produces very different illuminance results on the reference surface.
Step 4: photometric calculation
In professional projects, at this point a photometric calculation software (the most widespread in the sector are DIALux and Relux) is used, which, starting from the IES or LDT photometric files provided by the fixture manufacturer, simulates the distribution of light in the real three-dimensional environment, returning point-by-point illuminance maps, uniformity and glare values. This step allows you to verify, even before physically installing the fixtures, if the project meets the requirements defined in the first step, and is particularly important in complex environments, with irregular geometries or stringent regulatory constraints (sports facilities, industrial areas with double-level shelving, museum environments with conservative constraints on the exhibited works).
Step 5: application of the maintenance factor
A step often neglected in "DIY" calculations but always present in professional projects is the application of a maintenance factor, which takes into account the decrease in luminous flux over time (due to LED aging, accumulation of dust on the fixtures, possible decrease in surface reflectance). A commonly used value for clean indoor environments is 0.8, while in dusty industrial environments it drops to 0.65-0.7. This means that the project must be sized not on the minimum lux value required at the time of switching on, but on a higher value, to ensure that even after some years of use the illuminance remains compliant with the required requirements.
Step 6: economic verification and final choice
Only at this point, with a technically validated project, does it make sense to compare the different solutions available from an economic point of view: purchase cost, installation cost, estimated energy consumption over time, expected maintenance costs and investment payback time, according to the logic of payback period calculation that we will see in the paragraph dedicated to energy savings later in this guide.
Power and LED fixture type
The correct power does not depend only on the environment to be illuminated, but also on the construction type of the fixture: a narrow and concentrated spotlight distributes power very differently from a diffuse ceiling light or a linear strip. Understanding how each product category "uses" its power helps to avoid wrong choices even when the calculation of total lumens is correct.
LED spotlights and floodlights
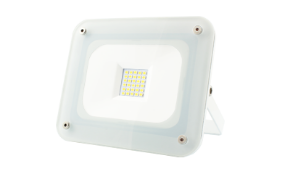
LED floodlights are designed to concentrate large quantities of luminous flux on large areas or over long distances: facades, squares, sports facilities, outdoor industrial areas. For this reason, their power tends to be higher than other categories (from 10W for small decorative floodlights up to 500W and beyond for sports or industrial applications), but it must always be evaluated together with the beam opening angle: a 200W floodlight with narrow optics (10°-15°) illuminates at a great distance with great punctual intensity, while the same fixture with wide optics (60°-90°) distributes the same power over a much larger surface, with a lower average illuminance level.
LED bars and strips
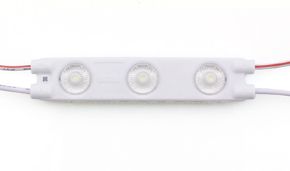
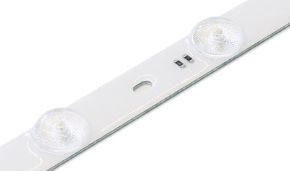
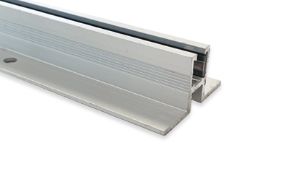
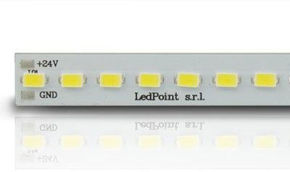
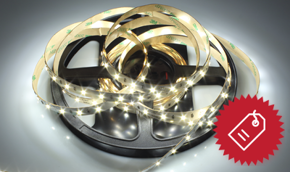
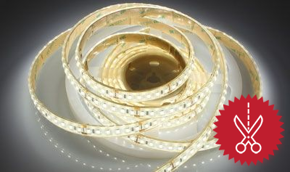
LED strips work with a logic of "distributed" power: the relevant data is not so much the total power of the reel, but the power per linear meter (typically expressed in W/m), which determines the brightness and, indirectly, also the longevity of the product. The LED strips by power from Ledpoint catalog category is organized precisely according to this criterion: low-density strips (4.8-9.6 W/m) are suitable for accent and decorative lighting, while high-density strips (14-24 W/m and beyond) are necessary for functional applications, such as lighting a kitchen worktop or an exhibition shelf in a store. Heat dissipation also plays a role: high powers on strips not correctly housed on aluminum profiles significantly reduce the useful life of the LEDs.
LED ceiling lights and panels
LED ceiling lights and panels distribute light diffusely over a larger area than a punctual spotlight, and their power must always be related to the surface of the panel itself. A 60x60 cm LED panel of 40W with 130 lm/W efficiency produces about 5,200 lumens, a value adequate for a medium-sized office if distributed on a grid of multiple ceiling panels according to a regular spacing, as expected in lighting projects for open spaces.
Industrial lighting and high powers
Fixtures for high-altitude installations, typically between 6 and 15 meters, work with powers between 100W and 300W, in some cases up to 500W for warehouses with very high ceilings or high illuminance requirements. At these heights, an optic with the correct opening angle (often 90°-120°) is as decisive as the power itself: a fixture that is too powerful but with the wrong optic can generate areas of strong glare and others in shadow, with a poorly uniform distribution of light on the work plane.
Factors influencing the choice of power
The theoretical calculation of the necessary lumens is only the starting point. In practice, several physical and environmental factors significantly modify how much power is really needed to obtain the desired result, and this is where sizing or oversizing errors often lurk.
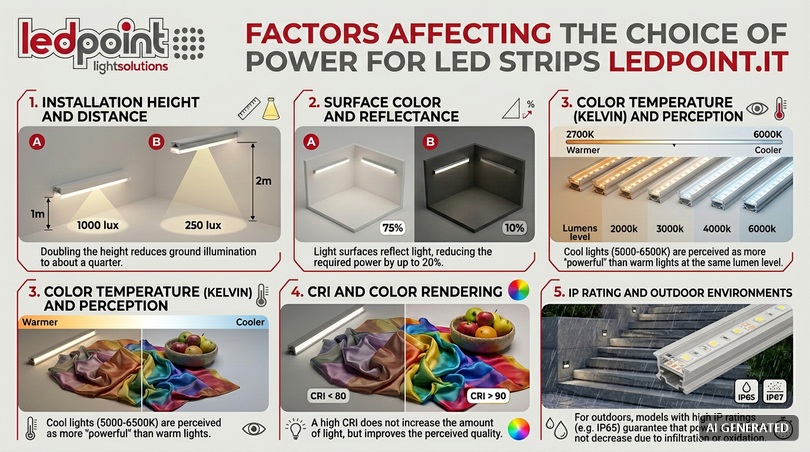
Installation height
The illuminance level on a surface decreases with the square of the distance from the light source (inverse square law). In practice, doubling the installation height of a fixture involves a reduction in ground illuminance of about a quarter, for the same luminous flux and opening angle. This means that a projector installed at 10 meters in height requires significantly higher power compared to the same fixture installed at 5 meters, if you want to maintain the same lux level on the ground.
Surface color and reflectance
Light-colored walls, ceilings, and floors reflect a significant part of the incident light, contributing to the general illuminance of the environment, while dark surfaces absorb it. In environments with light-colored walls and ceilings (reflectance 70-80%) it is possible to reduce the installed power by even 15-20% compared to an identical environment but with dark finishes, for the same perceived result. It is a factor often neglected in "eyeball" quotes, but relevant in professional design specifications.
Color temperature (Kelvin) and power perception
Even if the color temperature (expressed in Kelvin) does not modify the physical quantity of light emitted, it strongly influences the subjective perception of brightness. Cold lights (5000-6500K) are perceived as more "powerful" and bright compared to warm lights (2700-3000K) for the same actual lumens, a phenomenon known as the Kruithof effect. This explains why two rooms illuminated with the same number of lumens, but with different color temperatures, can give a very different subjective sensation of brightness.
CRI and color rendering
The Color Rendering Index (CRI) measures how faithfully a light source reproduces the real colors of objects compared to natural light. A high CRI (above 90) does not increase the amount of light, but significantly improves the perceived quality of the lighting, a central aspect in areas such as retail, catering, art galleries, and museums, where a slightly lower power but with high CRI can be visually more effective than higher power with low CRI.
IP rating and outdoor environments
In outdoor or humid environments, the IP protection rating (e.g., IP65, IP66, IP67) does not directly concern power, but indirectly affects performance over time: a fixture with an IP rating inadequate for the installation environment can suffer from infiltration, oxidation of components, and a much faster performance drop (and therefore of real luminous flux) than the data declared in the technical data sheet. For outdoor installations, the catalog includes models with a high IP rating designed to guarantee the declared power and luminous flux over time, even in difficult climatic conditions. For outdoor LED strips, the IP acronym appears directly in every sheet of the LED strips category.
LED Drivers: types and impact on real power
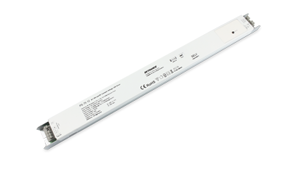
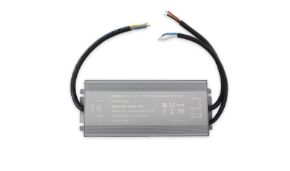
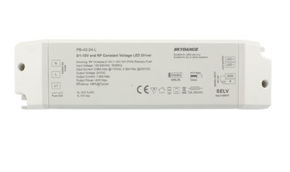
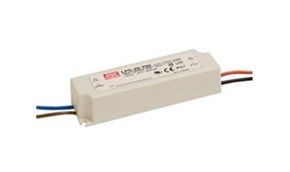
A technical aspect often ignored by those who buy LED lighting, but decisive for understanding why the power declared on the label sometimes does not exactly correspond to the real measured consumption, is the driver: the electronic component that powers the LED chips by converting the AC mains current into stabilized DC current. The driver is not a simple accessory, but largely determines the reliability, efficiency, and life of the entire fixture.
Constant current and constant voltage drivers
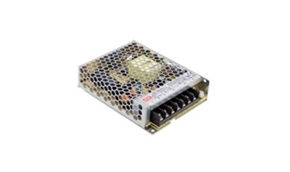
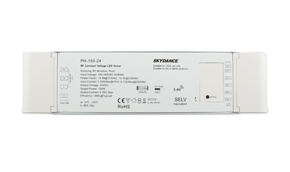
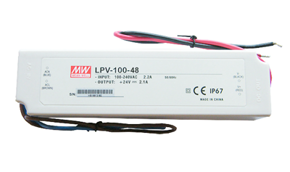
LED drivers are mainly divided into two families: constant current drivers (Ledpoint catalog: constant current power supplies), which keep the intensity of the current supplied to the LEDs constant regardless of voltage variations (typical of high-power projectors and spotlights), and constant voltage drivers (typically 12V, 24V or 48V — see the categories 12V power supplies, 24V and 48V), used mainly to power LED strips and modular systems, where multiple segments are connected in parallel. The choice between the two types is not interchangeable: connecting a component designed for a constant voltage driver to a constant current driver, or vice versa, can irreparably damage the LEDs.
Driver efficiency and conversion losses
Every driver, in the process of converting current, dissipates a part of the energy as heat: this is the so-called driver efficiency, expressed as a percentage, which in good quality products is typically between 90% and 95%. This means that, for the same power absorbed from the mains, a more efficient driver transfers more useful energy to the LEDs, with a consequent greater quantity of light produced. This is one of the reasons why two fixtures with the same LED chip can have different final performances: the difference is often played precisely on the quality (and cost) of the driver installed.
Power factor and power factor correction
Another technical parameter to know is the power factor (Power Factor, PF), a value between 0 and 1 that indicates how effectively the fixture uses the electrical energy drawn from the mains. A power factor close to 1 (quality professional drivers commonly exceed 0.9) indicates efficient use of energy and reduces disturbances on the electrical network; a low power factor, typical of cheap drivers without active correction (Active Power Factor Correction, APFC), involves a greater absorption of reactive current, with possible penalties on industrial meters that also measure reactive energy.
Dimmable drivers and their compatibility
As mentioned in the paragraph dedicated to dimming, dimmable drivers represent a separate category, designed to gradually modulate the output power while keeping the color stable and without perceptible flicker. A concrete example for strips powered directly at 230V are the anti-flicker 230V drivers from the Ledpoint catalog, designed precisely to reduce the perceptible flicker to which strips powered directly from the mains voltage are more subject. The compatibility between driver and control system (phase-cut dimmer, 0-10V, DALI, wireless) must always be verified before installation, as it is one of the most frequent causes of malfunctions reported by installers.
Power per room: in-depth sector case studies
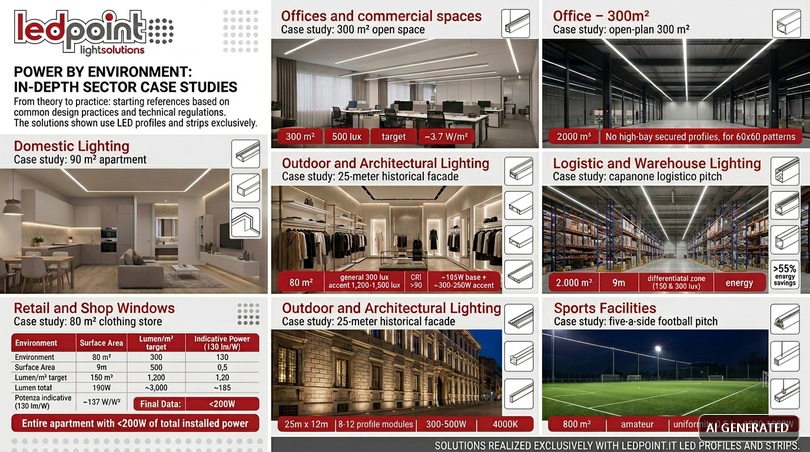
After seeing the theory and influence factors, it is useful to translate everything into practical indications for the most common contexts. The values that follow are starting references based on current design practice and the lux levels recommended by technical regulations; a specific lighting project may deviate from them based on particular needs.
Residential lighting
In the residential sector, power must always be calibrated by room and function: a living room intended for relaxation requires fewer lux than a kitchen where you cook and read. As a general reference, a living room needs about 300-400 lumens per square meter overall (summing general light and accent light points), a kitchen 400-500 lumens/m² concentrated mainly on worktops, a bedroom 150-200 lumens/m² with the possibility of dimming, a bathroom 300-400 lumens/m² with particular attention to the mirror area.
Case study: 90 m² apartment
Let's take a real 90 m² apartment divided into a living room (28 m²), eat-in kitchen (14 m²), two bedrooms (16 and 12 m²), bathroom (7 m²) and corridor (5 m²). Applying the criteria described above, the overall sizing is as follows:
| Room | Surface | Target lumens/m² | Total lumens | Indicative power (130 lm/W) |
|---|---|---|---|---|
| Living room | 28 m² | 350 | 9,800 lm | ~75 W |
| Kitchen | 14 m² | 450 | 6,300 lm | ~48 W |
| Bedroom 1 | 16 m² | 180 | 2,880 lm | ~22 W |
| Bedroom 2 | 12 m² | 180 | 2,160 lm | ~17 W |
| Bathroom | 7 m² | 350 | 2,450 lm | ~19 W |
| Corridor | 5 m² | 150 | 750 lm | ~6 W |
| Total | 90 m² | - | ~24,340 lm | ~187 W |
An interesting fact: the entire apartment, correctly illuminated according to these criteria, requires a total installed power of less than 200W, less than two 100W halogen bulbs from the old generation, in return for a significantly higher and differentiated illuminance level for each room.
Offices and commercial spaces
For offices, the UNI EN 12464-1 standard indicates 500 lux as a reference for standard writing and reading workstations, which rise to 750 lux for precision activities such as technical drawing. In terms of power, a 100 m² open space with standard ceiling height (2.7-3 meters) and fixtures with 130 lm/W efficiency requires an overall installed power of approximately 350-450W, distributed on 60x60 LED panels positioned according to a regular grid.
Case study: 300 m² open space
A 300 m² open space office, ceiling height 2.8 meters, intended for VDT workstations (500 lux required), is typically sized with 36-40W 60x60 LED panels each, 140 lm/W efficiency (about 5,400 lm per panel). The calculation proceeds as follows: total lumens required = 500 lux × 300 m² = 150,000 lumens; number of panels required = 150,000 / 5,400 ≈ 28 panels, for a total installed power of about 1,120W over the entire surface, equal to 3.7 W/m², a value in line with good energy efficiency practices for offices (the legal reference on the energy performance of buildings for offices generally indicates values between 3 and 6 W/m² depending on the target energy class).
Retail and shop windows
In retail, power must be managed on multiple levels: general lighting (300-500 lux), accent lighting on featured products (up to 1000-1500 punctual lux, often with adjustable spotlights) and shop window lighting, where intensity and color temperature become visual marketing tools as well as simple visibility. The combination of high CRI (>90) and targeted power on the most important sales points is generally more effective, in terms of commercial impact, than uniform but flat lighting throughout the store.
Case study: 80 m² clothing store
In an 80 m² clothing store, the most effective strategy is not to distribute power uniformly, but to layer it: general lighting at 300 lux over the entire surface (indicative power 185W with 130 lm/W fixtures), plus an accent layer with 15-20 adjustable spotlights of 15-20W each pointed at featured garments and displays, for a local peak of 1,200-1,500 lux on strategic sales points. The additional power for the accent layer (about 300-350W) represents a contained investment compared to the potential impact on sales of featured products, a cost/benefit ratio that in retail almost always justifies this multi-level approach.
Industrial lighting and warehouses
As seen in the previous calculation example, industrial warehouses require an approach based on installation height and intended use of the different areas: 100-200 lux for simple storage, 200-300 lux for handling, up to 500-750 lux for quality control areas or precision machining. LED high-bays remain the most widespread and efficient solution for these applications.
Case study: 2,000 m² logistics warehouse
A 2,000 m² logistics warehouse, 9 meters high, with high shelving aisles and ground-level picking areas, is typically divided into two illuminance bands: 150 lux in deep storage aisles (where transit is occasional) and 300 lux in picking and control areas (where staff operates stably). With 150W LED high-bays and 150 lm/W efficiency (22,500 lm each), the overall requirement is approximately 24-28 high-bays for the entire surface, for a total installed power of about 3,600-4,200W, compared to the 8,000-10,000W that would have been necessary with equivalent old-generation metal halide fixtures: an installed power saving of over 55%.
Outdoor and architectural lighting
In outdoor facilities and the architectural lighting of facades, monuments, or gardens, power must always be evaluated together with the distance from the subject to be illuminated, the beam angle, and the purpose (functional security lighting vs scenic lighting). For a security square, an indicative 5-20 lux is estimated, while for the scenic lighting of a historical facade the value strongly depends on the desired effect and must be designed on a case-by-case basis, often with multiple low-power projectors rather than a few very powerful fixtures, for a more uniform and less aggressive result.
Case study: 25-meter historical facade
For the scenic enhancement of a historical facade 25 meters long and 12 high, a typical approach involves the use of 30-50W LED projectors with narrow optics (15°-25°) positioned at a distance from the facade, in sufficient numbers to cover the entire length with contained overlaps of the light beams, for a total indicative of 8-12 projectors and a total power between 300 and 500W. The choice of color temperature (often 3000K for buildings in warm stone, 4000K for buildings in light stone or marble) affects the final perception as much as the power itself, an aspect to always be agreed with the designer or the conservation authority in the case of protected buildings.
Sports facilities
Sports facilities represent one of the most demanding cases in terms of power: you go from 200-300 lux for a field for amateur use or training, up to 750-2000 lux for facilities hosting competitions filmed on TV, where the uniformity of illuminance over the entire playing field is a technical as well as regulatory requirement. For this type of application, the choice of power is always accompanied by a dedicated lighting project, with verification of light distribution via photometric calculation software.
Case study: 5-a-side football field for amateur use
A 5-a-side football field of regulatory dimensions (about 800 m² of playing surface), intended for amateur evening use, requires an average illuminance of about 200-300 lux with a minimum uniformity of 0.5. Using 200-300W LED projectors with medium optics (60°-90°) installed on four-six perimeter floodlight towers at a height of 8-10 meters, the total installed power is typically between 1,200 and 1,800W, a value that with metal halide systems of equal performance would have easily exceeded 4,000-6,000W, with a consequent very significant impact on the management costs of a sports facility used for hundreds of hours a year.
Energy savings: LED power vs traditional technologies
One of the most concrete arguments in favor of the conversion to LED is measurable energy savings, not just declared. Let's see with quantitative data what it means in practice to switch from halogen or fluorescent to LED in terms of absorbed power and electricity bill costs.
Comparative table of consumption and ROI
| Technology | Power for ~1500 lm | Typical hours/year (commercial) | Annual consumption | Indicative annual cost (0.25 €/kWh) |
|---|---|---|---|---|
| Halogen | ~100 W | 3000 h | 300 kWh | 75 € |
| Compact fluorescent | ~25 W | 3000 h | 75 kWh | 18.75 € |
| LED | ~13 W | 3000 h | 39 kWh | 9.75 € |
On a single light point, the savings in absolute value may seem modest, but multiplied by dozens or hundreds of light points in a commercial or industrial context, the difference quickly becomes significant: a warehouse with 40 150W LED high-bays instead of equivalent 400W metal halides involves a saving in installed power of 10 kW, which over a use of 4000 hours/year equates to about 40,000 kWh saved every year.
Payback period calculation
The investment payback time (payback period) is calculated by dividing the cost of the investment by the annual savings generated:
| Payback period (years) = Investment cost / Annual savings on the bill |
In most commercial and industrial applications with intensive use (more than 3000-4000 hours/year), the investment payback time in LED lighting is placed between 1 and 3 years, to which further savings are added linked to the drastic reduction in maintenance: a quality LED has a declared useful life (L70, the point at which the luminous flux drops to 70% of the initial value) that commonly exceeds 50,000 hours, compared to the 1000-2000 hours of a traditional halogen.
Dimming and intelligent power management
One of the most interesting advantages of LED lighting is the possibility of modulating the absorbed power according to the real needs of an environment at a given moment, further reducing consumption compared to a system always on at full power. For this to work correctly, however, compatible components are needed.
Dimmable drivers
Not all LED fixtures are dimmable: the possibility of gradually reducing power depends on the driver installed, which must be explicitly certified as dimmable and compatible with the regulation system used (phase-cut dimmer, 0-10V, PWM). Using a non-dimmable fixture with a generic dimmer is one of the most common causes of malfunction: flickering, driver buzzing, jerky switching on, or reduction of the component's useful life.
DALI systems and home automation
In more structured commercial and industrial contexts, power management is often entrusted to digital communication protocols such as DALI (Digital Addressable Lighting Interface), which allows you to individually or group-control every fixture, program different lighting scenarios for time slots, and integrate presence and natural light sensors to automatically regulate the power supplied based on the real conditions of the environment. This type of intelligent management can generate, in addition to the "structural" energy savings given by the switch to LED, a further saving of 20-40% linked to the dynamic optimization of the power actually needed moment by moment.
Common mistakes in choosing power
In the daily practice of sales and technical consulting, some mistakes in the choice of power repeat themselves with great frequency. Knowing them in advance avoids unnecessary expenses or, worse, an unsatisfactory final result despite an adequate investment.
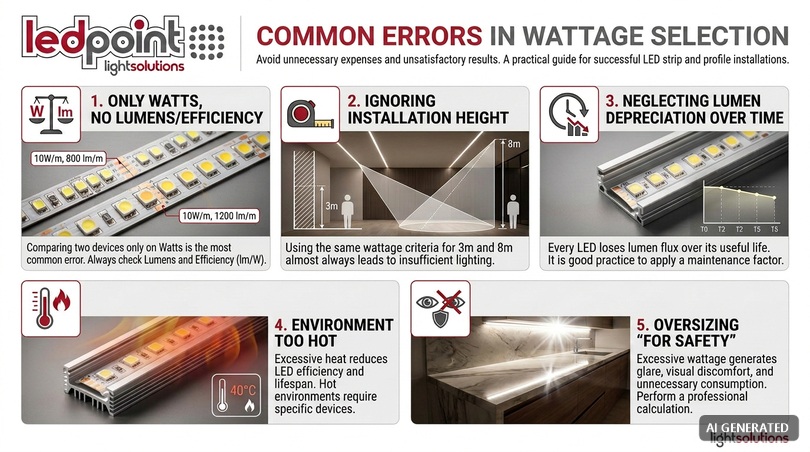
- Looking only at the watt, ignoring lumens and efficiency: this is the most widespread error, and the very reason why we wrote this guide: comparing two fixtures only on the basis of the declared power, without verifying luminous flux and efficiency in lm/W, leads to wrong comparisons and sometimes to choosing the least convenient product.
- Underestimating the installation height: applying the same power criterion used for a 3-meter ceiling to an 8-10-meter installation almost always leads to an insufficient illuminance result, due to the aforementioned inverse square law.
- Not considering the flux drop over time: every LED source gradually loses part of its luminous flux over its useful life. A project that sizes the power exactly to the regulatory minimum, without a safety margin, risks dropping below the required values after a few years of use. It is good professional practice to apply a maintenance factor that takes this decay into account.
- Ignoring the ambient installation temperature: excessive heat reduces the efficiency and life of LED components. Installations in very hot environments (ovens, industrial areas with high temperatures) require fixtures specifically designed for these conditions, with reinforced heat dissipation.
- Oversizing "for safety": the opposite error, equally common, i.e., installing power well above what is necessary generates glare, visual discomfort, superfluous energy consumption and, in many cases, a worsening of the perceived quality of the environment rather than an improvement.
Regulations and technical references
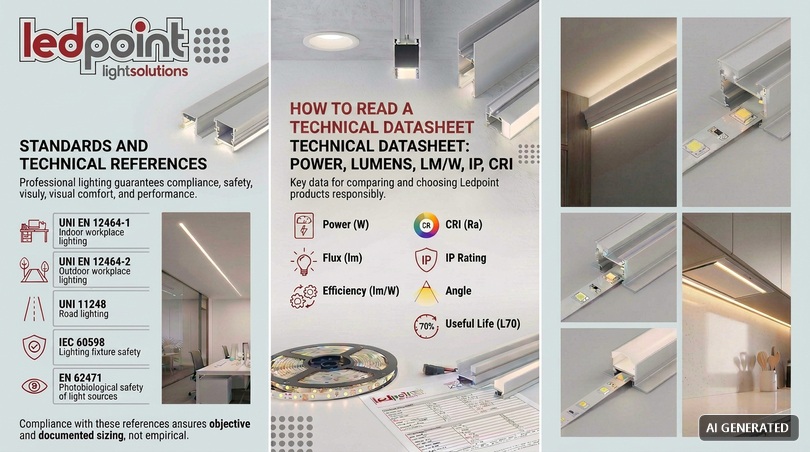
Those who deal with lighting at a professional level refer to a set of technical standards that, while not exclusively concerning power, indirectly condition its correct sizing. The main ones are:
| Standard | Scope |
|---|---|
| UNI EN 12464-1 | Lighting of indoor workplaces: recommended illuminance levels |
| UNI EN 12464-2 | Lighting of outdoor workplaces |
| UNI 11248 | Street lighting: selection of lighting categories |
| IEC 60598 | Safety of lighting fixtures |
| EN 62471 | Photobiological safety of light sources |
Compliance with these references is not just a matter of formal conformity: it guarantees that the sizing of the power responds to objective criteria of safety, visual comfort, and performance, verifiable and reproducible, rather than undocumented empirical evaluations.
How to read a technical data sheet: power, lumens, lm/W, IP, CRI
Let's now apply everything seen so far to the practical reading of a technical data sheet. The main data to check, in the order in which it is useful to evaluate them, are the following:
| Data in sheet | What it indicates | Why it is important |
|---|---|---|
| Power (W) | Energy consumption of the fixture | Determines the cost on the bill and the sizing of the electrical system |
| Luminous flux (lm) | Quantity of light actually emitted | It is the data to use for calculating lux in the environment |
| Efficacy (lm/W) | Ratio between light produced and energy consumed | Allows an honest comparison between different fixtures |
| Color temperature (K) | Tone of the light (warm, neutral, cold) | Affects visual comfort and subjective perception of power |
| CRI (Ra) | Fidelity in color rendering | Crucial in retail, catering, exhibition environments |
| IP rating | Protection from dust and water | Essential to guarantee the declared performance over time in outdoor or humid environments |
| Beam opening angle | Width of the illuminated area | Determines how power is distributed on the surface |
| Useful life L70 (hours) | Duration before dropping to 70% of initial flux | Affects maintenance and replacement costs over time |
All Ledpoint product technical data sheets report these data in an explicit and verifiable way, precisely to allow a direct comparison between different models without having to rely exclusively on the nominal power value.
Glossary
For those approaching the technical language of lighting for the first time, we report a mini synthetic glossary of the most used terms in this guide and in the Ledpoint product data sheets, useful as a quick reference for consultation.
| Term | Definition |
|---|---|
| Watt (W) | Unit of measurement of the electrical power absorbed by a fixture. |
| Lumen (lm) | Unit of measurement of luminous flux, the total quantity of visible light emitted by a source. |
| Lux (lx) | Unit of measurement of illuminance: quantity of luminous flux hitting one square meter of surface. |
| Luminous efficacy (lm/W) | Ratio between luminous flux produced and electrical power absorbed; indicates how efficient a fixture is. |
| CRI / Ra (Color Rendering Index) | Color rendering index: measures how faithfully a source reproduces real colors compared to natural light, on a 0-100 scale. |
| CCT (Correlated Color Temperature) | Correlated color temperature, expressed in Kelvin (K): defines whether the light appears warm, neutral, or cold. |
| IP rating (Ingress Protection) | Two-digit code indicating the level of protection of a fixture from dust (first digit) and water (second digit). |
| L70 | Conventional value indicating the number of hours of operation after which the luminous flux drops to 70% of the initial value. |
| UGR (Unified Glare Rating) | Unified glare rating, used to evaluate visual comfort in work environments. |
| LED Driver | Electronic component that powers the LEDs, converting and stabilizing the incoming electrical current. |
| Power Factor (PF) | Power factor: indicates how effectively a fixture uses the electrical energy drawn from the mains. |
| DALI (Digital Addressable Lighting Interface) | Digital communication protocol for addressable control of lighting fixtures. |
| Maintenance factor | Coefficient used in the design phase to take into account the drop in performance over time of a lighting system. |
| Photometric file (IES / LDT) | Digital file describing the spatial distribution of light emitted by a fixture, used in lighting calculation software. |
| Beam opening angle | Angular width, expressed in degrees, within which a fixture distributes most of its luminous flux. |
Frequently asked questions about LED power
What is the right LED power to illuminate a room?There is no single value valid for all rooms: it depends on the square footage, ceiling height, wall color, and use of the environment. As a general reference, about 300-400 lumens per square meter are estimated for a living room and 400-500 lumens per square meter for a kitchen, values to then be translated into watts based on the luminous efficacy of the chosen fixture. |
Why shouldn't you look only at watts when choosing an LED lamp?Because the watt measures electrical consumption, not the light emitted. For the same wattage, fixtures with different luminous efficacy (lm/W) produce very different quantities of light. The truly relevant data to understand how much light you will have is the luminous flux, expressed in lumens. |
How many lumens are equivalent to a 100W halogen bulb?A 100W halogen produces about 1500-1600 lumens. An equivalent LED, having a much higher efficacy, reaches the same luminous flux with about 12-15W, with an energy saving that exceeds 85%. |
What is the difference between nominal power and actual absorbed power?Nominal power is the value declared in the technical data sheet by the manufacturer under standard test conditions. The actual absorbed power can vary slightly based on mains voltage, ambient temperature, and driver quality, generally remaining within a tolerance of 5-10% compared to the nominal value. |
Does higher LED power always mean better light quality?No. High power only indicates greater consumption and, if efficacy is high, greater luminous flux, but it does not guarantee light quality. For that, the color rendering index (CRI), color temperature, uniformity of illumination, and the optics used also matter. |
How is energy savings calculated when switching from halogen to LED?You multiply the difference in absorbed power (in kW) between the two technologies by the annual hours of operation and by the cost of electrical energy per kWh. The result is the annual economic saving, which in most domestic and commercial cases repays the initial investment in 1-3 years. |
Is it possible to reduce the power of an LED with any dimmer?No, you need a dimmable LED driver compatible with the protocol of the dimmer used (phase-cut, 0-10V, DALI, or similar). A non-dimmable LED connected to a generic dimmer may flicker, have a reduced lifespan, or not work correctly. |
What is the minimum recommended power for an industrial warehouse?The UNI EN 12464-1 standard indicates a reference illuminance level of 100-200 lux for simple storage areas, up to 300 lux for handling and goods control areas. The necessary power in watts depends on the installation height of the LED high-bays and their luminous efficacy. |
Not the watts you buy, but the light you get
Power remains an important data point in choosing an LED fixture, but on its own it doesn't tell the whole story. The correct way of reasoning starts from the result you want to obtain (how many lux are needed in a given environment, for which activity, with what color rendering and what visual comfort) and arrives at power only as the final consequence of the calculation, after having considered luminous flux, efficacy, installation height, surface reflectance, and environmental conditions.
Applying this method, even in a simplified way, allows you to avoid the most common mistakes: undersized systems that generate dark and poorly functional environments, or oversized systems that waste energy and money without really improving the quality of the light. With the data, tables, and calculation examples reported in this guide, you now have the tools to face any choice with technical criteria, from the single light bulb at home to the design of an industrial warehouse or a sports facility.
To delve into the technical characteristics of individual products, compare power, lumens, and efficacy, or request personalized advice for your project, you can contact the Ledpoint technical team for a tailor-made evaluation.
This article was developed with the support of artificial intelligence and subsequently reviewed, corrected, and validated by the Ledpoint.it technical team, which guarantees its reliability and compliance with official sources.