LED neon tube: sections, bending radii, and cutting
An LED neon tube is a linear light source that replaces the fluorescent tube or glass neon with low-consumption LEDs. It comes in two families: the rigid LED tube (T8/T5, G13 or G5 base) and the flexible silicone neon flex, which is chosen based on section, minimum bending radius, and cutting pitch. It consumes up to 50-60% less, contains no mercury, and requires no starter.
For decades, the fluorescent tube was the “default” light for offices, shops, warehouses, apartment garages, and basements. Today that era is over: European regulations have pushed most linear fluorescent tubes out of the market, energy costs have made the waste of old ballasts obvious, and above all, LED technology has reached levels of efficiency, color rendering, and reliability that make retrofitting not only convenient but technically superior. However, those working in the industry - electricians, designers, lighting designers, maintenance staff - face a very practical question: which LED neon tube exactly replaces that tube, in that system, for that environment?
This Ledpoint technical guide answers in an orderly manner all the questions we receive every day from professionals: from neon tube sizes (T5, T8, T12, circular) to G13 and G5 bases, from lumen and watt equivalences between neon and LED up to the three parameters that determine the success of a neon flex installation: section, bending radius, and cutting. You will find comparative tables, measured Ledpoint catalog data, three interactive configurators, wiring diagrams, mistakes to avoid, and a comprehensive FAQ section. It is a long guide, but it is designed to be consulted: use the index below to jump directly to the point you need.
Before talking about sections and curvatures, a clarification of language is needed, because in the market the expression “LED neon tube” indicates different things. The customer asking to “replace the neon” almost always means the fluorescent tube in the ceiling fixture; the designer asking for “an LED neon” for a luminous sign instead means a flexible profile that mimics the glass neon of signs. Understanding which object is being discussed is the first step of any correct quote.
Fluorescent tube, glass neon, and LED neon tube: three different objects
The actual neon is a glass tube filled with noble gas (neon, argon) that lights up thanks to a high-voltage discharge: it is the historic technology for signs, powered by transformers working at thousands of volts. The fluorescent tube, improperly called “neon” by everyone, instead uses low-pressure mercury vapor: the discharge produces ultraviolet radiation which the fluorescent powders on the inner glass wall convert into visible light. To turn on, it needs a ballast (magnetic or electronic) and, in traditional circuits, a starter.
The LED neon tube, finally, abandons gas and discharge: light is produced by light-emitting diodes mounted on a circuit, powered by low DC voltage (12 V or 24 V) or directly at 230 V via an integrated driver. There is no mercury, no electrode heating, no ignition time: ignition is instant even at low temperatures.
The two families of LED neon tubes
Rigid LED tube (T8, T5)
It is the “LED tube instead of neon” in the strict sense: same diameter and length as the fluorescent, same G13 or G5 bases, but inside an LED bar with an integrated driver. It is inserted into the existing fixture, possibly after modifying the wiring. It is the fastest solution but binds the project to the old fixture, with its optical, sealing, and geometry limits.
Flexible LED neon tube (neon flex)
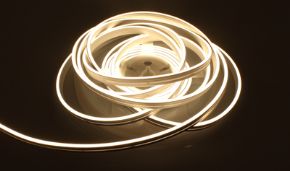
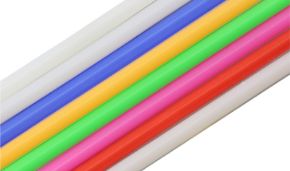
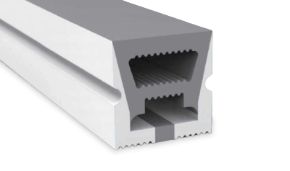
It is an LED strip inserted into a silicone, PVC, or polyurethane extrusion that diffuses light continuously, without visible dots. It is cut to size, bent, fixed with clips or profiles and becomes an architectural light line, sign, light cove, marker, or replacement for a fluorescent tube in an existing cavity. The Ledpoint neon flex flexible LED tubes are made of extruded silicone with an internal monochromatic strip, with versions also in IP67 polyurethane for heavy-duty applications.
There is also a third way, widely used by professionals: the combination of LED strip and aluminum profile with diffuser, which effectively builds a “custom LED tube”. We explore this in chapter 8.
How a flexible LED neon tube works
Every flexible LED neon tube consists of three functional layers. The first is the flexible printed circuit (FPC) on which the LEDs are soldered, generally SMD 2835 or 5050, with resistors or current regulation ICs. The second is the extruded body, which acts as a mechanical enclosure and water protection. The third is the diffuser layer, the milky part that transforms the sequence of light points into a uniform line. The thickness and opacity of the diffuser determine uniformity but also flux loss: it is a compromise that every designer must know, and which we quantify with real data in the chapter dedicated to equivalences.
Table 1 – Fluorescent tube, glass neon, and LED neon tube compared
Feature
Fluorescent tube
Glass neon
LED neon tube
Principle
Discharge in mercury vapor + fluorescent powders
Discharge in noble gas
Semiconductor (LED)
Operating voltage
230 V with ballast
2,000–15,000 V (transformer)
12/24 V DC or 230 V with driver
Mercury
Yes
Possible (blue/green colors)
No
Ignition
Delayed, initial flicker, worsens in the cold
Immediate
Immediate, even below zero
Fragility
Glass
Glass
Polycarbonate, silicone, PVC: unbreakable
Shape
Rigid, standard lengths
Shapeable only in a laboratory
Rigid or flexible, cuttable on site
Dimming
Only with dedicated ballasts
Limited
PWM, 0-10 V, DALI, DMX
2. Retrofit: what it means to replace neon with LED
The word retrofit indicates the technological upgrade of an existing system without redoing it from scratch. In the case of lighting, it means moving from neon to LED by reusing, when it makes sense, fixtures, electrical lines, junction boxes, and light points. It is a topic that is no longer optional today, for regulatory reasons even before economic ones.
Why retrofit has become inevitable
With the delegated directive (EU) 2022/284, which amends the annexes of the RoHS directive, the European Union has eliminated the exemption that allowed mercury in the most common linear fluorescent tubes: since August 24, 2023, standard T5 and T8 tubes (60, 120, and 150 cm) can no longer be placed on the market. Depleted stocks are not replaced, and maintenance staff notice when a 58 W tube becomes unobtainable or costs three times as much. Added to this is the Ecodesign regulation (EU) 2019/2020, which sets minimum efficiency and flicker requirements for all light sources.
The three paths to transform neon into LED
Path A – T8 LED tube in the existing fixture
Only the lamp is replaced. It is the fastest solution, suitable when the fixture is intact and the geometry is fine as it is. It requires attention to compatibility with the ballast and, in most cases, a wiring modification (ballast bypass) that transforms the fixture into a new luminaire, with responsibility falling on whoever performs the modification.
Path B – Transform the neon fixture to LED with a linear system
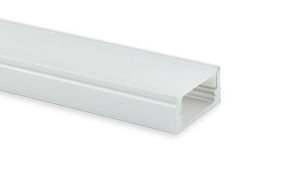
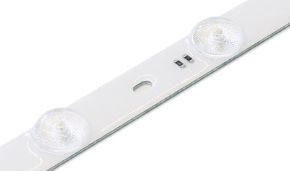
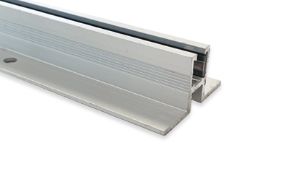
The fixture or cavity (cove, valance, drop ceiling) is emptied and a system consisting of a Ledpoint aluminum profile, LED strip, and dedicated power supply is installed. You gain freedom in length, wattage, color temperature, and control, and obtain a continuous light without the shadow zones between one tube and the next.
Path C – Neon flex instead of glass neon or exposed fluorescent tubes
For signs, lettering, architectural lines, counters, niches, facades, and humid environments, the flexible LED neon tube is the natural choice: it follows curves, is cut on site, and is protected up to IP65–IP67.
Table 2 – The three retrofit paths compared
Criterion
A – T8 LED Tube
B – Profile + LED strip
C – Neon flex
Intervention time
Very low
Medium
Medium
Length freedom
None (60/120/150 cm)
Total, at the strip cut
Total, at the cutting pitch
Line uniformity
Interrupted between tubes
Continuous with opal diffuser
Continuous, “dotless”
Curves
No
Only with bendable profiles
Yes, within the minimum radius
Typical IP rating
That of the fixture
IP20–IP67 depending on strip and profile
IP65–IP67
Control (dimmer, DALI, DMX)
Rare
Complete
Complete
Ideal for
Quick maintenance
Offices, shops, kitchens, laboratories, design
Signs, decor, outdoors, humid environments
3. Neon tube sizes: diameters, lengths, and bases
You cannot choose an LED neon tube without knowing precisely the tube to be replaced. Neon tube sizes follow established international standards: the code, wattage, and base already tell almost everything you need to know. Here is how to read them.
What T8 means (and T5, T12)
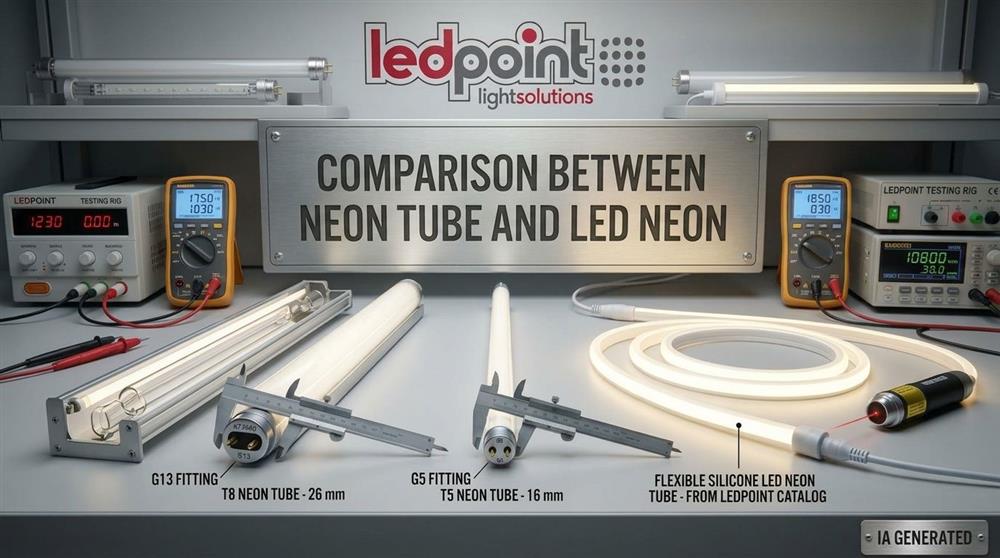
The letter T stands for tubular and the number indicates the diameter in eighths of an inch. Therefore T8 means 8/8 of an inch, which is about 26 mm; T5 equals 5/8 of an inch, about 16 mm; T12 is 12/8 of an inch, about 38 mm. The same convention applies to circular T9 tubes (about 29 mm). To delve deeper into the complete nomenclature, the page on fluorescent lamp formats is useful.
Difference between T8 and G13 base
It is one of the most frequent questions and stems from a misunderstanding: T8 is not a base, it is the tube diameter; G13 is the base. The G13 is a bi-pin base with the two pins spaced 13 mm apart, used on both T8 and old T12 tubes. The T5 instead uses the G5 base, with pins at 5 mm: this is why a T5 tube will not fit into a T8 lampholder and vice versa. Circular tubes use the four-pin G10q base, compact ones 2G11 or G24.
Neon tube lengths table
The length of the neon is linked to the wattage. This is where the classic question “how long is a 58 W neon?” arises: the answer is 1500 mm (about 1514 mm with the pins). The 36 W neon measures 1200 mm, the 18 W one 600 mm.
Table 3 – Neon tube sizes: wattage, length, and base
Type
Diameter
Base
Wattage
Nominal length
Actual length with pins
T8
26 mm
G13
15 W
450 mm
≈ 451 mm
T8
26 mm
G13
18 W
600 mm
≈ 604 mm
T8
26 mm
G13
30 W
900 mm
≈ 909 mm
T8
26 mm
G13
36 W
1200 mm
≈ 1213 mm
T8
26 mm
G13
58 W
1500 mm
≈ 1514 mm
T5 HE
16 mm
G5
14 W
550 mm
≈ 563 mm
T5 HE
16 mm
G5
21 W
850 mm
≈ 863 mm
T5 HE
16 mm
G5
28 W
1150 mm
≈ 1163 mm
T5 HE
16 mm
G5
35 W
1450 mm
≈ 1463 mm
T5 HO
16 mm
G5
24 / 39 / 54 / 49-80 W
550 / 850 / 1150 / 1450 mm
Same as T5 HE
T12
38 mm
G13
20 / 40 / 65 W
600 / 1200 / 1500 mm
Same as T8
Circular T9
29 mm
G10q
22 / 32 / 40 W
Outer Ø ≈ 216 / 311 / 413 mm
–
Practical tip for the installer: always measure the internal distance between the lampholders and note the type of ballast reported on the fixture's nameplate. These are the two pieces of data that decide whether you can install a direct T8 LED tube or if it is better to switch to a custom linear system.
Is it possible to replace a circular neon with an LED?
Yes. There are two paths: a dedicated circular LED module, or – a more flexible solution highly appreciated in shops and venues – a ring built with flexible LED neon tube bent over a base or inside a round profile. With an Ø 300 mm the radius is 150 mm, well above the minimum bending radius of the most common neon flex; the circumference of about 940 mm must be rounded to the nearest cutting pitch. We discuss this in chapters 6 and 7.
Fluorescent T8 (G13), T5 (G5), and flexible LED neon tube: diameters and bases compared.
4. Lumen and watt equivalences between neon and LED
Wattage measures how much energy a source consumes, not how much light it produces. To compare a neon with an LED you must think in lumens, i.e., luminous flux, and in luminous efficacy (lm/W). It is the only serious way to build an LED conversion table that holds up on the job site.
Lumens of an 18 W, 36 W, and 58 W neon
A good quality triphosphor T8 tube (color code 840) emits about 1,350 lm at 18 W, 3,350 lm at 36 W, and 5,200 lm at 58 W. These values are “when the lamp is new”: after 10,000–12,000 hours the flux drops by 10–20%, and in cheaper halophosphate tubes the starting point was already lower. Then there is a detail that is often overlooked: the actual system consumption includes ballast losses. With a magnetic ballast, a 36 W neon draws about 45 W from the mains, a 58 W one about 70 W.
Table 4 – LED neon equivalence: lumens and system consumption
Neon tube
Typical flux (lm)
Consumption with magnetic ballast
Consumption with electronic ballast
Equivalent T8 LED tube
Equivalent LED strip (in profile)
T8 18 W – 60 cm
1,350
≈ 24–26 W
≈ 19–20 W
8–10 W
0.6 m at ≈ 2,000–2,500 nominal lm/m
T8 36 W – 120 cm
3,350
≈ 44–46 W
≈ 36–38 W
16–20 W
1.2 m at ≈ 2,800–3,200 nominal lm/m
T8 58 W – 150 cm
5,200
≈ 68–71 W
≈ 55–60 W
22–26 W
1.5 m at ≈ 3,500–4,000 nominal lm/m
T5 HE 28 W – 115 cm
2,600–2,900
–
≈ 31–32 W
14–16 W (T5 LED)
1.15 m at ≈ 2,500–2,800 lm/m
T5 HO 54 W – 115 cm
4,450–5,000
–
≈ 59–60 W
24–26 W (T5 LED)
1.15 m at ≈ 4,500 lm/m (double strip or high power)
Note: the “nominal” flux of the strip must be reduced by the profile diffuser losses (typically 10–30% with opal) to obtain the useful flux. Indicative values to be verified on the single product's data sheet.
How many lumens does an LED have? The catalog data that makes the difference
“How many lumens does an LED have” does not have a single answer: it depends on the chip, current, temperature, and above all what is in front of the LED. A real example from the Ledpoint catalog demonstrates this better than any theory. The NS04 6x12 mm, 2700 K, 24 V, 11 W/m, 140 LED/m, IP65 neon flex mounts an internal strip that produces about 1,050 lm/m, but the flux measured at the output of the silicone body is about 239 lm/m. In other words, in neon flex with small sections and very soft diffusion, over three-quarters of the strip's flux is sacrificed to obtain a perfectly uniform line.
This is the key point of the chapter: a flexible LED neon tube is born to draw with light, not to illuminate a work area like a 58 W T8. If the goal is to deliver 500 lux on a desk, the correct solution is a profile with a high-efficiency strip; if the goal is a continuous light line, a sign, or a scenic effect, neon flex has no rivals.
900 lumens, 1,500 lumens, 3,000 lumens: how to navigate
To give an immediate reference: 900 lumens correspond more or less to an old 75 W incandescent bulb or a “tired” 60 cm T8 tube. A new 120 cm tube reaches 3,350 lm. The actual amount of lux on the work surface, however, depends on mounting height, optics, wall color, and number of fixtures: this is why a lighting calculation remains the most professional choice.
5. LED neon tube sections: sizes, materials, and emission
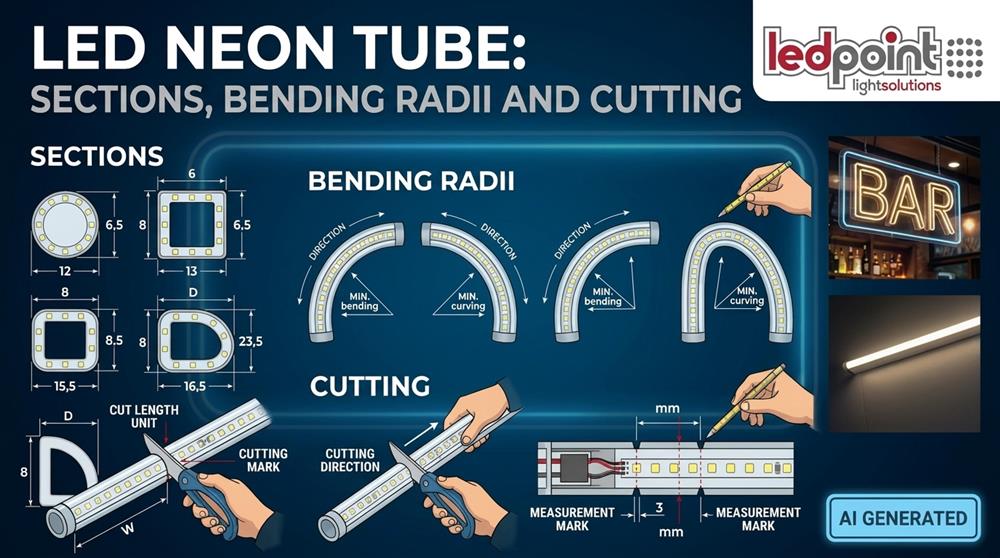
We enter the heart of the title. When designing with flexible LED neon tube, the first choice is the section: width and height of the extruded profile, shape (rectangular, square, round, domed), and emission direction. The section decides the appearance of the line, its luminance, how it bends, and the fixing system.
How to read the section code
Sections are indicated with two numbers in millimeters: width × height. A 6x12 neon flex is 6 mm wide and 12 mm high; an 8x16 is 8 mm wide and 16 high; a 10x20 or 16x16 belongs to the category of “important” sections for facades and large signs. The wider the section, the softer the light appears and the less the single LED is perceived; the thinner the section, the more graphic and precise the line, suitable for lettering and furniture details.
Top, side, and 360° emission
Frontal emission (top bend)
Light exits from the narrow top face. The profile bends on the horizontal plane, “on edge”, and is the typical solution for contours, coves, ceiling perimeters, and lettering viewed from the front.
Side emission (side bend)
Light exits from the long face, and the profile bends on the vertical plane like a ribbon. It is ideal for lettering and logos to be applied to a wall, where the LED neon tube needs to bend following the drawing on the installation surface.
360° emission (round)
The cylindrical body emits in all directions: it is the most faithful replacement for the appearance of an exposed fluorescent tube or glass neon. In the Ledpoint catalog there is also a rigid approach to the same effect: the 75 mm round aluminum profile for LED strips, with housing for up to 5 strips (PCBs up to 12 mm), designed for 360° suspension lighting. You can find it in the Ledpoint aluminum profiles range.
Materials: silicone, PVC, or polyurethane?
The body material is decisive for lifespan and field of application. Silicone guarantees UV resistance, no yellowing over time, and more effective heat dissipation: for this reason it is the preferred choice in quality projects and outdoors, and it is the material of the Ledpoint NS series neon flex. PVC costs less but tends to yellow and stiffen in the cold. Polyurethane offers excellent mechanical resistance and IP67 waterproofing: Ledpoint uses it in the NEO10ES/ET versions intended for the most heavy-duty applications.
Table 6 – Typical flexible LED neon tube sections
Section (W × H)
Typical emission
Appearance
Recommended applications
Fixing
4x10 / 5x12
Top
Very thin, graphic line
Furniture, display windows, furniture details
Clips, track, gluing
6x12
Top / side
Precise line, excellent for lettering
Indoor signs, lettering, logos, shelves
Clips, dedicated profile
8x16
Top / side
Full line, very uniform
Contours, coves, bar counters, retail
Clips, aluminum profile
10x20 / 12x20
Top
Wide line, “classic neon” effect
Facades, outdoor perimeters, large signs
Profile, stainless steel clips
16x16 / 20x20
Top / 3 sides
Luminous volume
Architecture, steps, pathways
Recessed profile
Ø 16–25 mm
360°
Continuous luminous tube
Suspensions, replacing exposed tubes, decor
Suspensions, brackets
6. Bending radii of the LED neon tube
The minimum bending radius is the smallest radius with which an LED neon tube can be bent without damaging the internal circuit, detaching the LEDs, or creating shadow zones. It is the parameter most often ignored in drawings and most often causes early failures. Knowing it before drawing lettering or a contour is mandatory.
Why a bending limit exists
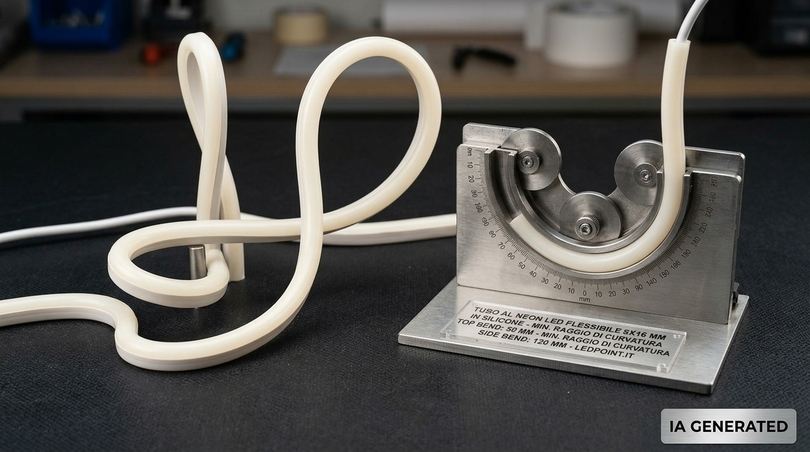
Inside the tube there is a flexible copper and polyimide printed circuit. The circuit only accepts bending in one direction: along its own plane. This is why a top bend neon flex only bends horizontally and a side bend only vertically. If forced in the wrong direction, or with too tight a radius, the tracks crack, the LED solder joints fail, and the classic dark or intermittent segments appear after a few weeks, often after the first thermal cycles.
Indicative minimum radius values per section
The exact value is always the one indicated in the single product's data sheet. As a design reference, quality neon flex roughly respects these values:
Table 7 – Indicative minimum bending radii (to be verified on the product data sheet)
Section
Bending in the allowed direction
Indicative minimum radius
Recommended radius for lettering
Minimum circle diameter
6x12 top
Horizontal
30–50 mm
≥ 60 mm
≈ 100 mm
6x12 side
Vertical
15–30 mm
≥ 40 mm
≈ 60 mm
8x16 top
Horizontal
50–80 mm
≥ 100 mm
≈ 160 mm
8x16 side
Vertical
30–50 mm
≥ 60 mm
≈ 100 mm
10x20 / 12x20
Horizontal
80–120 mm
≥ 150 mm
≈ 240 mm
Round Ø 16–25
Any (FPC arranged specifically)
100–150 mm
≥ 200 mm
≈ 300 mm
Ledpoint practical rule: in the absence of data, consider a minimum radius of at least 5 times the section dimension in the bending direction and design with a 30% margin. A curve slightly wider than the minimum costs nothing in design and is worth years of operational life.
Curves, right angles, and edges: how to solve them
Wide curves
They are executed directly, fixing the tube with close clips (every 10–15 cm in curves, every 25–30 cm in straight lines) or inside a flexible profile or a milled base.
90° angles
A sharp angle is not obtained by bending the tube, but by cutting it and connecting the two pieces with an angle connector or a short cable joint, or by making a slightly rounded minimum radius joint. In signs, a small joint is accepted; in architectural lines, cutting with a blind end cap and restarting is preferred.
Closed letters and logos
For letters with loops (O, B, P, R) it is advisable to draw the path on a plexiglass or expanded PVC base with a milled groove exactly the width of the section: the LED neon tube is “guided” by the groove and maintains the expected radius even during thermal expansion.
Bending mistakes that cause failures
The three most frequent mistakes are: bending in the non-allowed direction, bending close to the cut point or end cap (where the circuit is most stressed and the seal weakest), and bending at low temperatures, when silicone and especially PVC are stiffer. In winter, outdoors, it is advisable to leave the roll in a heated environment for a few hours before installation.
Top bend and side bend: the LED neon tube only bends in the plane of the internal circuit.
7. Cutting the LED neon tube: pitch, joints, and sealing
The ability to cut to size on site is the advantage that has made the flexible LED neon tube so widespread. But cutting is also the point where an IP65 or IP67 product can become, due to a mistake of a few millimeters, a product that fails at the first rain or wash. Let's see the correct procedure.
What is the cutting pitch
The internal strips are divided into repeated electrical modules: a group of LEDs with its own resistor or IC. You can only cut between one module and the next, on the points indicated by a mark (scissors, line, copper pads). The pitch depends on the voltage and LED density. The Ledpoint catalog data shows this clearly:
Table 8 – Cutting pitch and electrical data: examples from the Ledpoint neon flex catalog
Code
Section / material
Voltage
Wattage
LED/m
Cutting pitch
Notes
NEO10-300-120811-50
Neon flex
12 V
9.6 W/m
120
2.5 cm (3 LEDs)
400 lm/m, warm white, 50 m reel
NS04-270-1408Z2-30F3
6x12 mm, silicone, IP65
24 V
11 W/m
140
5 cm (7 LEDs)
2700 K, 239 lm/m output, 30 m reel
NS01-300-1808Z2-10F3
Silicone
24 V
10 W/m
180
Indicated on data sheet
Warm white, 239 lm/m, dimmable
NEO11-DMX-56512-10S
RGB DMX
24 V
12 W/m
56 (5050)
12.5 cm (7 LEDs)
DMX512 compatible, addressable
NEO10ES / NEO10ET
Polyurethane, IP67
24 V
Indicated on data sheet
–
Indicated on data sheet
Heavy duty, waterproof
The cutting pitch becomes a design constraint: a 1,213 mm line, for example, cannot be obtained with a 5 cm pitch; you will choose 1,200 mm (24 modules) or 1,250 mm (25 modules). In products with a 2.5 cm pitch, adaptation to existing cavity sizes is much more precise. In DMX neon with a 12.5 cm pitch, on the other hand, the length must be planned upstream.
Correct cutting and closing procedure
Identify the cut point by looking at the tube against the light or turning it on at low intensity: in Ledpoint products with light signaling, the LEDs themselves help show the cut point.
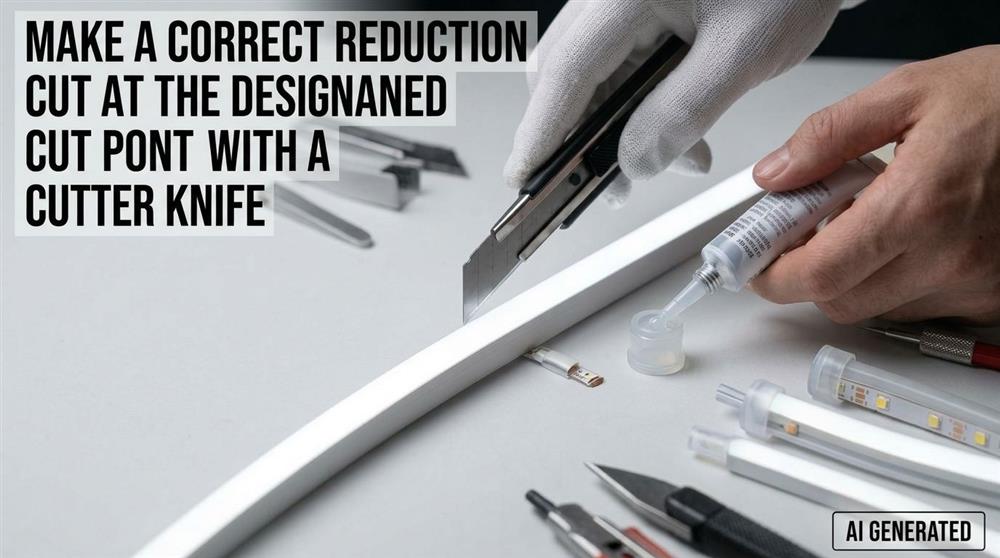
Cut with a sharp blade, perpendicularly, in a single movement. Avoid electrician's scissors that crush the body and deform the circuit.
Clean the end of silicone residues and degrease with isopropyl alcohol.
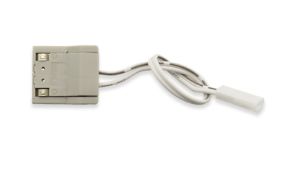
Connect the power cable via a dedicated connector or soldering on the pads, respecting polarity.
Seal with a silicone end cap and compatible silicone adhesive, completely filling the cavity. This is the step that restores IP65/IP67.
Close the opposite end with a sealed blind end cap.
Wait for the sealant to crosslink (usually a few hours) before exposing the tube to water or humidity.
Joints: when to join two pieces
Joints between pieces are possible, but every joint is a potential water entry point and a small luminous discontinuity. Outdoors, it is always preferable to power separate pieces with cables starting from a waterproof junction box, rather than daisy-chaining segments with connectors. Indoors, where IP is not critical, quick connectors greatly speed up installation.
Maximum length powerable from one side
Beyond a certain length, the voltage drop along the circuit causes brightness to drop towards the end of the line. As an order of magnitude, with 12 V strips you stay under 5 m per power feed, with 24 V you typically reach 5–10 m; beyond that, you power from both sides or at multiple points. The configurator in chapter 14 calculates power feeds and power supply wattage for you.
8. LED strips and aluminum profiles: the “custom LED tube”
When the goal is to truly illuminate – a desk, a workbench, a warehouse aisle, a display window – the solution we at Ledpoint most often recommend to professionals is not the T8 LED tube, but the combination of high-efficiency LED strip and aluminum profile with diffuser. It is, in effect, a custom-built LED neon tube: same linear appearance, but with wattage, length, optics, and color temperature chosen project by project.
Why the aluminum profile is essential
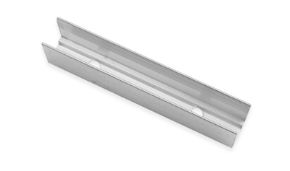
LEDs fear heat: every extra degree at the junction accelerates flux decay. The aluminum profile dissipates the strip's heat, protects it mechanically, and holds the diffuser that uniformizes the light and reduces glare. Over the years, Ledpoint has built a range of Italian-designed aluminum profiles for LED strips – surface, recessed, corner, suspension, 360° round – that allows you to replace practically any neon ceiling fixture configuration.
Which LED strip to choose
24 V LED strips: the professional standard
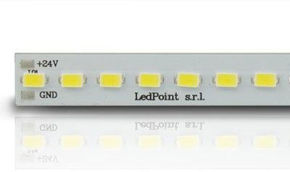
Ledpoint 24V LED strips are the basis of almost all retrofits: lower currents than 12 V, longer runs per power feed, wide choice of watts per meter. They are the natural choice to replace a row of T8s in an office or shop.
COB LED strips: the dotless line
COB LED strips have chips arranged so densely that they produce a continuous line even with shallow diffusers. They are perfect where the profile is thin or exposed and where you want the “neon” effect with higher efficiency than neon flex.
CRI 95 LED strips: when colors matter
Clothing stores, delicatessens, jewelry stores, design studios, dental laboratories: here the color rendering index makes the difference between a product that sells and one that stays on the shelf. Ledpoint CRI95 LED strips are designed exactly for this.
220 V LED strips: long lengths without a power supply
220V LED strips connect directly to the mains via a special cable and allow very long runs with a single power point: useful in warehouses, storage facilities, galleries, and cornices, where you want to eliminate distributed power supplies. They require state-of-the-art installation and adequate protections, as they involve mains voltage parts.
RGB and RGBW LED strips: dynamic light
For bars, restaurants, lobbies, signs, and displays, RGB and RGBW LED strips allow colored scenes and, in RGBW versions, a “true” white for functional use.
Opal, frosted, or transparent diffuser
The diffuser is the rigid version of the layer that, in neon flex, makes the light uniform. Opal guarantees maximum uniformity and minimum glare, with a greater flux loss; frosted is a compromise; transparent maximizes lumens but leaves the single LEDs visible. To replace an exposed fluorescent tube, opal or frosted are almost always the right choice. It is also the answer to designers' questions about the aesthetic differences between opaline and transparent LED tubes: opaline “disappears” into a homogeneous line, transparent is brighter but more technical in appearance.
9. Comparative tables: which Ledpoint product for each neon tube
Here is the most operational part of the guide: the tables we use with installers and designers to decide, in a few seconds, with which Ledpoint solution to replace each type of neon tube. The indicated wattages are design references: the final choice must always be confirmed on the data sheet and, for work environments, with a lighting calculation.
Replacing 18 W, 36 W, and 58 W neon tubes with LED
Table 9 – Replacing T8 tubes with Ledpoint linear systems
Retrofitting a row of 58 W neon tubes with an aluminum profile and double 24 V LED strip.
10. Configurator: find the LED replacement for your neon
Select the tube you want to replace, the environment, and the result you are looking for: the configurator indicates the most suitable Ledpoint solution, the meters of strip, the indicative wattage, and the power supply to provide.
Ledpoint Configurator – From neon to LED
11. Neon vs LED: the complete comparison
“Is neon or LED better?” is a question that in 2026 has a clear answer, but it is useful to know the technical reasons to explain them to the end customer. The comparison between neon and LED does not only concern consumption: it touches light quality, safety, maintenance, control, and regulatory compliance.
Which consumes more, neon or LED?
Neon consumes more. A T8 fluorescent tube has a system efficiency between 70 and 90 lm/W, while a quality LED system easily exceeds 120–150 lm/W. For the same light, consumption is generally reduced by 40–60%, and the reduction is even greater when a magnetic ballast is eliminated, which alone can account for 20–25% of the lamp's consumption.
Difference between a neon tube and an LED tube
Table 11 – Neon vs LED: technical comparison
Parameter
Neon tube (fluorescent)
LED neon tube / LED system
System efficiency
70–90 lm/W
120–160 lm/W (quality strips and tubes)
Typical lifespan
10,000–20,000 h
30,000–50,000 h (L70/L80, depending on product)
Frequent switching
Reduces life
No significant effect
Cold ignition
Slow, reduced flux
Instant, full flux
Flicker
Visible with magnetic ballast
Negligible with quality driver
UV emission
Present in small part
Negligible
Mercury
Yes (hazardous waste)
No
Dimmability
Complex
Simple (PWM, 0-10 V, DALI, DMX)
Market availability
Depleting (RoHS)
Full
How to tell if a neon is LED
At a glance it is not always simple, but there are reliable clues: instant ignition without flicker, absence of the starter in the fixture, “LED” writing and reduced wattage on the silkscreen (e.g. 18 W for 120 cm instead of 36 W), half-opaline half-aluminum polycarbonate body, ends with the indication of the power side. The fluorescent tube, on the other hand, has blackened ends with use and a light that takes a few moments to stabilize.
12. Starters, ballasts, and compatibility with existing systems
This is the most important chapter for the installing electrician, because this is where it is decided whether the retrofit will be quick and safe or whether it will become a source of callbacks and disputes. Is the LED neon tube compatible with existing fluorescent systems? The honest answer is: it depends on the type of ballast, the type of LED tube, and the quality of the intervention.
What the starter does in fluorescent tubes
In the traditional circuit with a magnetic ballast, the starter is a small thermal switch that at ignition closes the circuit through the tube's filaments, preheats them, and then opens abruptly: the interruption of current in the ballast generates the voltage peak that triggers the discharge. Without a starter, the fluorescent tube with a magnetic ballast will not turn on.
Do LED tubes need a starter?
No: LED tubes do not need a starter to work. When a T8 LED tube is installed in a fixture with a magnetic ballast, the original starter must be removed and replaced with an “LED starter” (or dummy starter), which is actually a simple jumper with a fuse: it permanently closes the circuit and lets current pass to the tube. Here is how the LED starter works: it triggers nothing, it just short-circuits the old ignition point. In direct 230 V mains-powered LED tubes, on the other hand, the starter and ballast are completely eliminated.
The three types of LED tube regarding the ballast
Type A – Compatible with electronic ballast (plug and play)
It is inserted in place of the fluorescent tube without modifications. It is the simplest to install, but its efficiency and lifespan depend on the existing ballast: if the ballast fails, the system fails. Furthermore, not all electronic ballasts are compatible, so the manufacturer's compatibility list must be verified.
Type B – Direct 230 V mains power (ballast bypass)
The ballast is disconnected or removed and the tube is powered directly from the mains. It is the most efficient and durable solution, but it transforms the luminaire: whoever performs the modification takes responsibility for it, and the fixture must be labeled to prevent someone from inserting a fluorescent tube in the future.
Type C – External driver
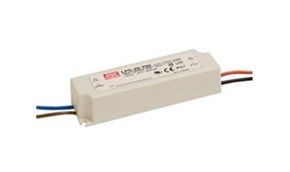
The tube is powered by a dedicated driver, mounted in place of the ballast. It is the logic of professional systems, and it is exactly the same logic as the profile + LED strip + Ledpoint power supply system: correctly sized electronics, possible dimming, maximum lifespan.
Table 12 – LED tube compatibility and ballast type
Existing system
Type A LED Tube
Type B LED Tube (230 V)
Profile + strip + driver system
Magnetic ballast + starter
Only specific models with LED starter
Yes, with bypass and starter removal
Yes, by removing components
Electronic ballast
Yes, if on compatibility list
Yes, with bypass
Yes
Dimmable ballast (1-10 V / DALI)
Rarely
Loses dimming
Yes, with dimmable power supply
Emergency circuit
To be verified
Requires dedicated kit
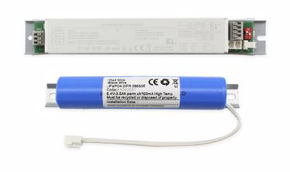
DC emergency kit
Is it necessary to remove the ballast before installing an LED tube?
Not always, but in most professional retrofits it is advisable to do so: a magnetic ballast consumes power even when the tube is LED, heats up, ages, and represents an extra failure point. Eliminating it improves efficiency, power factor, and reliability. Those who choose to transform the neon fixture to LED with a linear system solve the issue at the root: the ballast is removed along with the rest.
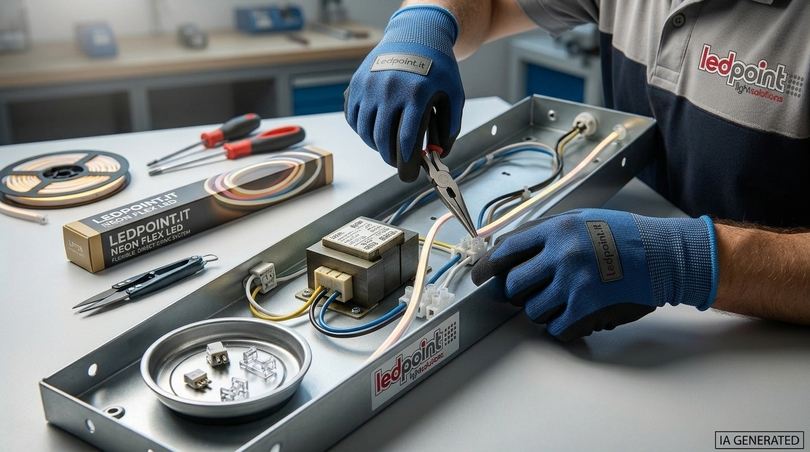
Ballast bypass: the step that makes the retrofit more efficient and durable.
13. Installation and electrical connection of the LED neon tube
Whether it is mounting LED tubes in place of neon or installing a custom linear system, the work sequence is always the same: safety, verification, preparation, connection, testing. In Italy, interventions on electrical systems in buildings fall under D.M. 37/08 and must be carried out by authorized companies, in compliance with the CEI 64-8 standard. The following indications are aimed at professionals.
How to replace a neon tube with an LED tube: step-by-step procedure
Turn off power from the panel, not just the switch, and verify the absence of voltage with an instrument.
Remove the fluorescent tube by rotating it 90° and dispose of it as WEEE waste (it contains mercury).
Identify the circuit: magnetic ballast with starter, electronic ballast, emergency circuit.
Perform the modification required by the type of LED tube: replacing the starter with an LED starter, or bypassing the ballast and connecting phase and neutral to the lampholders indicated by the manufacturer (single-ended or double-ended power).
Apply the label of modified-for-LED luminaire, to prevent re-insertion of fluorescent tubes.
Insert the LED tube respecting the power side indicated on the tube.
Restore power and test: ignition, absence of flicker, temperature of the lampholders after 30 minutes.
Electrical diagram from neon to LED: single-ended and double-ended power
In single-ended power LED tubes, phase and neutral both arrive on a single G13 base, while the other only serves as mechanical support. In double-ended power tubes, phase arrives on one base and neutral on the other. Confusing the two diagrams is one of the most frequent mistakes in connecting LED tubes: in the best case the tube does not turn on, in the worst case the driver is damaged. The correct diagram is always the one printed on the tube or in the manufacturer's data sheet.
How to transform a neon fixture to LED with profile and strip
When the linear system path is chosen, the intervention changes nature and becomes more like a new installation. In summary:
Remove tubes, lampholders, ballasts, and starters from the fixture (or remove the fixture itself).
Fix the aluminum profile with the supplied brackets, surface, recessed, or suspended.
Cut the LED strip at the cutting pitch closest to the profile length and glue it to the clean and degreased bottom.
Connect the strip to the constant voltage power supply, placed in a box or in the drop ceiling, respecting polarity.
Insert the diffuser and closing end caps.
Test at full load, checking the voltage at the last section of the line.
What tools are needed to mount an LED neon tube
For a clean installation you need: voltage tester and multimeter, wire strippers and crimping pliers, insulated screwdrivers, sharp blade cutter for neon flex, fine-tip soldering iron (if connectors are not used), compatible neutral silicone sealant, hacksaw or aluminum blade saw for profiles, tape measure, and laser level. For those working in a garage or home laboratory a clear warning applies: replacing a plug and play tube is within everyone's reach, modifying a 230 V wiring is not. In that case the advice is to rely on an electrician.
Connecting LED tubes in series and parallel
Multi-tube fixtures in old systems sometimes use series connections (e.g. 2 × 18 W on a 36 W ballast with two starters). 230 V LED tubes must always be connected in parallel, each with its own power feed. Constant voltage LED strips are also connected in parallel to the power supply: for long lines, a power backbone with multiple injection points is created, instead of daisy-chaining segments one after the other.
How many types of connections exist for LED tubes
In practice, five are encountered: single-ended 230 V power, double-ended 230 V power, electronic ballast compatible (type A), hybrid (A+B), and external driver power. In strip systems, low voltage connections are added: soldering, quick clip connectors, IP67 screw connectors for outdoors, and dedicated connectors for neon flex.
14. Configurator: power supply, lines, and power injection points
Enter total length, watts per meter, and voltage of the strip or neon flex: the configurator calculates the power supply wattage with the recommended safety margin, the minimum number of power injection points, and the current per line.
Ledpoint Configurator – Strip and neon flex power supply
15. Color temperature and color rendering: which light for each environment
Two LED neon tubes with the same lumens can produce completely different environments. What makes the difference is the color temperature, expressed in kelvin, and the color rendering index (CRI or Ra), which measures how faithfully the light returns the colors of objects compared to a reference source.
Warm, natural, or cool light
2700–3000 K (warm light) creates a welcoming atmosphere: it is the light of dining rooms, hotels, homes, wine bars. 4000 K (natural or neutral light) is the standard for offices, shops, schools, laboratories: it promotes concentration without being clinical. 5000–6500 K (cool light) finds space in warehouses, workshops, cold rooms, and technical laboratories where detail perception prevails over comfort. The old fluorescent tube codes help in the conversion: 830 = CRI 80 at 3000 K, 840 = CRI 80 at 4000 K, 865 = CRI 80 at 6500 K, 930/940 = CRI 90.
How to choose the color rendering index
For an office or corridor a CRI ≥ 80 is sufficient and consistent with UNI EN 12464-1. For shops, restaurants, design studios, and laboratories you go up to CRI ≥ 90. Where color is the product - clothing, fabrics, jewelry, fresh food, works of art - CRI ≥ 95 with a good R9 value (saturated reds) is the choice that sells: this is why we recommend Ledpoint CRI95 LED strips to clothing store owners.
Table 13 – Recommended light per environment (UNI EN 12464-1 references)
Environment
Indicative average illuminance
Color temperature
Recommended minimum CRI
Typical Ledpoint solution
Office, writing and reading
500 lx
4000 K
80
Profile + 24V strip
Shop, sales area
300–500 lx (higher accents)
3000–4000 K
90–95
Profile + CRI95 strip
Professional kitchen
500 lx
4000 K
80–90
Waterproof profile + IP65 strip
Dining room, bar
150–300 lx
2700–3000 K
90
Dimmable CRI95 strip, neon flex for counter
Warehouse, shelving
150–200 lx
4000–5000 K
80
Profile + 220V or 24V strip
Workshop, fine work
500–750 lx
4000–5000 K
80–90
Profile + high power strip
Corridors, apartment stairs
100–150 lx
3000–4000 K
80
Profile + strip with sensor
Garages and parking lots
75 lx (aisles)
4000 K
80
IP65 profile or IP67 neon flex
Flicker and visual comfort
A uniform and flicker-free light is a quality requirement, not a luxury. The Ecodesign regulation (EU) 2019/2020 sets limits for flicker parameters (Pst LM) and stroboscopic effect (SVM). In practice, the quality of the power supply counts as much as that of the LEDs: a good quality constant voltage driver and high-frequency PWM dimming eliminate the problem even in video recordings and environments with rotating machinery.
Retail: CRI 95 and 3000–4000 K to enhance fabrics and colors.
16. Applications of the LED neon tube by sector
Every environment has different needs for light, protection, maintenance, and control. In this chapter we answer, sector by sector, the real questions we receive from electricians, merchants, maintenance staff, designers, restaurateurs, apartment building managers, and DIY enthusiasts.
For the installing electrician: simplicity and reliability
Which LED neon tube is the simplest to install? The type A LED tube (compatible with electronic ballast) is the fastest, but not the most reliable. For a professional who must guarantee the work over time, the most “simple” solution is the one that eliminates variables: profile + 24 V LED strip + quality power supply, with standard components always available and simple spare parts. For signs and curved lines, neon flex with dedicated connectors drastically reduces installation times. Ledpoint provides professionals with a dedicated area: Ledpoint services for professionals.
For the clothing store: faithful colors and a lighter bill
In fashion retail, light works like a silent salesman. The LED neon tube that best enhances the colors of clothes is the one with CRI ≥ 95, combined with a temperature of 3000 K for warm collections, denim, and leather, or 4000 K for sportswear lines, whites, and cool colors. Many shops adopt a mix: general light at 3500–4000 K and accents at 3000 K on mannequins and walls. Regarding wattage: in the sales area you think about 300–500 average lux, with accents up to 3–5 times the background value on the windows. To choose the right length in existing luminaires, you measure the inside of the fixture or cove and choose the strip length closest to the cutting pitch; with profiles the problem does not exist, because they are cut to size.
For the industrial warehouse: robustness and continuous operation
In warehouses, fluorescent tubes suffer from dust, vibrations, cold, and prolonged switching. LED neon tubes work well in environments with dust, humidity, and low temperatures, provided you choose the correct protection rating: IP65 for dusty environments or those subject to water jets, IP66–IP67 for intensive washing or outdoor areas. In case of continuous ignition (24/7), lifespan depends mainly on the operating temperature: aluminum profiles with a good dissipating section and non-overdriven strips are the key. Replacing a row of old fluorescent tubes typically takes 10–20 minutes per light point with LED tubes, while transformation with profiles takes more time but reduces future interventions almost to zero. For large quantity supplies and professional prices it is possible to contact the Ledpoint team.
For the interior designer: aesthetics, dimming, and scenes
In interior design, the LED neon tube becomes an element of architectural language: lines that draw the ceiling, light cuts in the walls, tubular suspensions, niches, and luminous shelves. There are dimmable LED models to create customized light scenes: Ledpoint strips and neon flex are dimmable with PWM controllers, 0-10 V signals, DALI protocols, and, for RGB versions, DMX512. The solutions that reduce consumption without sacrificing light quality are those that combine high efficiency, high CRI, and dimming: you design with a margin and adjust the level based on use. Decorative installations with neon flex – lettering, graphic signs, luminous works – are today one of the most appreciated tools in contemporary interior design.
For bars and restaurants: atmosphere in the dining room, efficiency in the kitchen
In the dining room, 2700–3000 K with CRI ≥ 90 creates the welcoming atmosphere that keeps customers and makes dishes appetizing. Under the counter and along the bottle shelves, neon flex gives continuity and character. In the kitchen and laboratories the priority is different: LED tubes are suitable for humid environments if the system has an IP65 or higher protection rating and smooth surfaces that are easy to clean. A closed profile with a polycarbonate diffuser, without cracks where grease accumulates, is the most hygienic solution. The savings are significant because the operating hours are many: 12–16 hours a day in a venue are not rare.
For the apartment building manager: garages, basements, and corridors
In common areas, neon lights stay on longer than necessary and often break down, generating maintenance calls. LED retrofit solves both problems. LED neon tubes turn on instantly even in cold environments, such as underground garages and basements in winter, where fluorescents take time to reach full flux. For corridors, stairs, and basements, profiles or LED fixtures with motion sensors or connected to automatic ignition systems are indicated: LEDs, unlike fluorescents, do not lose useful life with frequent switching. The expected lifespan of a quality system exceeds 30,000 hours, with maintenance practically limited to periodic cleaning.
For DIY and the home laboratory
To illuminate a workbench you think about at least 500–750 lux on the surface. With a 2 m bench it is advisable to install two parallel lines of profile with 24 V strip at 4000–5000 K, spaced and slightly advanced from the edge of the bench, so as to reduce the shadows produced by the body and hands. Is a cool light better for a laboratory? A neutral-cool light (4000–5000 K) helps detail perception; beyond 5000 K the light can cause fatigue in long sessions. To avoid shadows and poorly lit areas: multiple distributed sources instead of a single very powerful one, opal diffuser, an orientable accent light on the work point. Replacing a plug and play tube independently is simple; for 230 V wiring modifications an electrician is needed.
Signs, display windows, and visual communication
The preferred field of the flexible LED neon tube remains communication: shop signs, wall lettering, company logos, display windows, trade fair stands. Compared to glass neon, neon flex works at low voltage, does not break, consumes a fraction of the energy, is repaired by replacing the single section, and is produced in much shorter times. RGB DMX versions allow programmed animations and color changes.
17. Consumption, savings, and return on investment
“How much do you save by replacing neon with LED?” is the question that decides many quotes. The answer is easily calculated, provided you use the real system consumption - ballast included - and the actual operating hours.
The calculation method
The annual saving is given by: (neon system wattage − LED system wattage) × annual hours × energy cost. Example: an apartment garage with 40 58 W neon tubes on a magnetic ballast (≈ 70 W real each) turned on 12 hours a day. Replacing them with LED systems of about 28 W real: (70 − 28) × 40 = 1,680 W saved; × 4,380 hours = 7,358 kWh/year; × 0.25 €/kWh = about 1,840 € per year, to which are added lower maintenance interventions and the replacement of broken tubes. With presence sensors, the operating hours can drop drastically and the savings increase even more.
How much does a 150 cm LED neon tube consume
A good quality 150 cm T8 LED tube typically consumes 22–26 W and replaces a 58 W neon which, with the ballast, draws about 70. A profile + double 24 V strip system for the same length generally draws between 25 and 50 W depending on the required flux, and can provide more light than the original neon.
Ledpoint Calculator – Savings from neon to LED
Luminous efficacy: the number to look at
When comparing LED products, wattage alone says nothing. The data to compare is the efficacy in lm/W, together with the useful flux output from the diffuser. A product with 10% more efficacy consumes 10% less for its entire life: over 50,000 hours it is a difference worth much more than the initial price gap.
18. Safety, certifications, IP rating, and compliance
A professional LED neon tube is not evaluated only in lumens and watts. Markings, compliance with safety standards, and protection rating are what distinguish a product installable in an inspected business from a product that exposes the installer to liability.
What certifications must a professional LED neon tube have
The bare minimum is the CE marking, which certifies compliance with the Low Voltage (2014/35/EU), Electromagnetic Compatibility (2014/30/EU), and RoHS (2011/65/EU) directives. The reference technical standards are IEC/EN 60598 for luminaires, IEC 62776 for double-capped LED tubes intended to replace fluorescents, EN 62471 for photobiological safety (blue light risk), and, for strip systems, the standards on power supply units (EN 61347). Voluntary marks like ENEC add third-party verification. The label must also show the energy class according to regulation (EU) 2019/2015.
IP rating: how to read it and which to choose
The IP protection rating (IEC 60529) is formed by two digits: the first indicates protection against solids (6 = total against dust), the second against water (5 = water jets, 7 = temporary immersion).
Table 14 – Recommended IP rating per environment
IP Rating
Protection
Typical environments
IP20
None against water
Offices, shops, homes, dry indoors
IP44
Splashes
Bathrooms (outside zones 0-1), porches
IP65
Total dust, water jets
Professional kitchens, garages, warehouses, sheltered outdoors
IP67
Total dust, temporary immersion
Exposed outdoors, facades, intensive washing areas
IP68
Prolonged immersion
Fountains, pools (with specific products)
For an industrial installation the recommended rating is at least IP65; in the presence of pressure washing or outdoors you go up to IP66–IP67. For impacts, the IK rating (EN 62262) should also be considered, important in gyms, warehouses, and parking lots.
Electrical safety and low voltage
One of the most underestimated advantages of neon flex and 12/24 V strips is the extra-low safety voltage on the usage side: the 230 V part remains confined to the power supply, which must be chosen with an IP rating adequate for the environment and installed in an inspectable and ventilated position. Compared to the high-voltage transformers of glass signs, the safety leap is enormous.
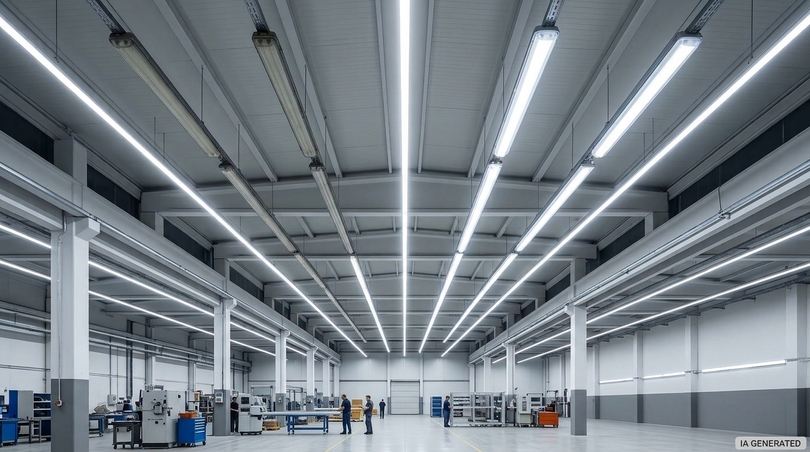
Industry and logistics: IP65–IP67, instant ignition, and continuous operation.
19. Lifespan and maintenance of the LED neon tube
Lifespan is one of the most used - and abused - sales arguments in the LED world. For a professional it is important to know how to truly read a lifespan data point and what conditions make it realistic.
How long does a neon (fluorescent) tube last
A triphosphor T8 fluorescent tube has an average life between 10,000 and 20,000 hours with an electronic ballast, less with a magnetic ballast and frequent switching. The ends blacken, the flux drops, and ignition becomes uncertain long before the “death” of the tube.
How long does an LED neon tube last
A good quality LED neon tube typically declares 30,000–50,000 hours. The serious data, however, is expressed with the codes L70 or L80 and B10 or B50: L70 B50 at 50,000 hours means that, after 50,000 hours, half of the products retain at least 70% of the initial flux. At 12 hours a day, 50,000 hours correspond to over 11 years of service. The decisive condition is temperature: the same LED, at 40 °C ambient instead of 25 °C, can lose a significant portion of its useful life. This is why dissipating aluminum profiles and non-undersized power supplies are worth more than any label promise.
Maintenance and cleaning
Maintenance is reduced to three actions: periodic cleaning of the diffusers with a soft cloth and neutral detergent (never solvents on silicone, PVC, and polycarbonate), visual inspection of end caps and seals in outdoor installations, and verification of the power supplies, which are the most stressed components. In dusty environments or with greasy vapors, cleaning every 6–12 months keeps the flux close to the design values.
LED tube failures: most common causes
Table 15 – Quick fault diagnosis
Symptom
Probable cause
Solution
LED tube does not turn on
Wrong single/double-ended diagram, starter not replaced, incompatible ballast
Verify diagram, install LED starter or bypass
Flicker
Incompatible electronic ballast, poor power supply, unsuitable dimmer
Ballast bypass, quality power supply, compatible dimmer
End of line less bright
Voltage drop, run too long
Power from both sides, larger section cables
Dark section in neon flex
Bending below minimum radius, bending in wrong direction
Replace section, respect radius
Oxidation at the end
Incorrect cut sealing
Redo cut and end cap with compatible sealant
Rapid flux decay
Overheating, absence of dissipating profile
Mount in aluminum profile, reduce W/m
Insufficient light
Comparing watts instead of lumens, ignoring diffuser losses
Recalculate in useful lumens
20. Disposal and environmental impact
Retrofitting from neon to LED is also an environmental choice, and correct waste management is an integral part of the professional intervention.
Fluorescent tubes: a waste to manage carefully
Fluorescent tubes contain mercury: they must never be broken or thrown into general waste. They are WEEE waste (group R5, light sources) and must be taken to municipal collection centers or distributors, according to D.Lgs. 49/2014. In case of accidental breakage, the room is aired, fragments are collected without a vacuum cleaner, and kept in a closed container.
LED tubes, strips, and neon flex at end of life
LED products are also WEEE and must be taken to the dedicated separate collection, but they do not contain mercury and a significant part of the materials – primarily the aluminum of the profiles – is recyclable. The lower replacement frequency further reduces the amount of waste over time. The switch to LED also lowers consumption and therefore the indirect emissions associated with energy production.
21. Mistakes to avoid in selection and installation
After years of technical support for professionals, the mistakes we see most often are always the same. Avoiding them means saving time, money, and complaints.
Selection mistakes
1. Comparing watts instead of lumens
An “18 W” LED tube is not automatically equivalent to a 36 W neon. You always compare useful lumens, net of the diffuser.
2. Using neon flex as functional light
The flexible LED neon tube is perfect for lines, signs, and atmospheres, but with output fluxes of a few hundred lumens per meter it does not replace a row of 58 W T8s in a warehouse. In that case, a profile + high-efficiency strip is needed.
3. Neglecting CRI and color temperature
Choosing 6500 K in a restaurant or CRI 80 in a clothing store compromises the result even when the lux are correct.
4. Ignoring the IP rating
An IP20 product in a damp garage or a professional kitchen is a scheduled failure.
Installation mistakes
5. LED tube not compatible with the ballast
It is the main cause of failed ignitions and flickering. When in doubt, bypassing the ballast eliminates the problem.
6. Bending below the minimum radius or in the wrong direction
The internal circuit cracks and the defect emerges weeks later, when the installation has already been delivered.
7. Cutting outside the cut point or sealing badly
You lose an entire module or, worse, open the way to humidity.
8. Undersizing the power supply
A power supply working at 100% heats up and lasts little. The recommended minimum margin is 20%.
9. Lines too long from one side
The result is uneven light, with the tail of the line darker and warmer than the head.
10. Forgetting the modified luminaire label
Whoever intervenes later might re-insert a fluorescent tube into a fixture wired for direct 230 V.
Cutting on the indicated point and complete sealing: the guarantee of IP tightness.
22. Prices and purchasing criteria
“How much does a 120 cm LED neon tube cost?” or “how much do LED tubes cost?” are legitimate questions, but the purchase price is only a part of the real cost. A professional thinks about the total cost of ownership: price, installation, energy consumed, maintenance, and lifespan.
What determines the price of an LED neon tube
The main factors are: quality and binning of the LED chips (color uniformity between batches), efficacy in lm/W, CRI, body material (quality silicone costs more than PVC but does not yellow), IP rating, quality of the driver or power supply, certifications, and warranty. A silicone neon flex with a fine cutting pitch and declared output flux costs more than a generic product, but the price per useful lumen and per year of life is often lower.
How to compare offers
Table 16 – LED neon tube purchasing checklist
Item
What to verify
Why it matters
Luminous flux
Output lumens, not just the internal strip
Avoids underlit systems
Efficacy
System lm/W
Determines consumption for the entire life
CRI and R9
CRI ≥ 80, ≥ 90, or ≥ 95 depending on use
Perceived light quality
Lifespan
Hours with L70/L80 and B10/B50
Honest comparison between products
Cutting pitch and bending radius
In millimeters, on the data sheet
Project feasibility
IP rating and material
Real IP after cutting, silicone/PU/PVC
Sealing and UV resistance
Certifications
CE, EN 60598, EN 62471, energy class
Installer liability
Warranty and support
Years, conditions, technical support
Protection over time
To purchase in large quantities, receive professional price lists, or get design support, you can consult the Ledpoint catalogs or write to us from the contacts page. Further technical insights are available on the Ledpoint blog.
Frequently asked questions about the LED neon tube
We have collected the questions that installers, designers, and end customers ask us most often. Click on each question to read the answer.
Can I replace a neon tube with an LED?
Yes. You can install a T8 or T5 LED tube in the existing fixture, replacing the starter or bypassing the ballast, or transform the fixture with an aluminum profile, LED strip, and power supply. The second solution offers more freedom in length, wattage, and color temperature, and a longer lifespan over time.
What does T8 mean?
T8 indicates a tube with a diameter of 8/8 of an inch, which is about 26 mm. The letter T stands for “tubular” and the number expresses the diameter in eighths of an inch: T5 measures about 16 mm, T12 about 38 mm. T8 is not a base: the T8 tube uses the G13 bi-pin base.
What is the difference between the T8 and G13 base?
They are not the same thing: T8 is the tube diameter (26 mm), G13 is the two-pin base spaced 13 mm apart. T8 and T12 tubes use the G13 base, while T5s use the G5 with pins at 5 mm. This is why a T5 will not fit into a lampholder designed for a T8.
Do LED tubes need a starter?
No. LED tubes do not use a starter to turn on. In fixtures with a magnetic ballast, the original starter must be replaced with an LED starter, which is essentially a jumper with a fuse. In direct 230 V mains-powered LED tubes, the starter and ballast are completely eliminated from the circuit.
How long is a 58 W neon tube and how many lumens does it produce?
A 58 W T8 neon measures 1500 mm nominally, about 1514 mm with the pins, and produces about 5,200 lumens with a new triphosphor tube. With a magnetic ballast, the actual system consumption reaches about 70 W. An equivalent LED tube consumes 22–26 W.
What is the minimum bending radius of an LED neon tube?
It depends on the section and bending direction: approximately 30–50 mm for a 6x12 top bend, 50–80 mm for an 8x16, and over 80 mm for 10x20 sections. The binding value is always the one on the technical data sheet. It should only be bent in the plane of the internal circuit, never in the opposite direction.
Where do you cut a flexible LED neon tube?
Only on the indicated cut points, between one electrical module and the next. In Ledpoint neon flex, the pitch ranges from 2.5 cm (12 V versions) to 5 cm (24 V) up to 12.5 cm in RGB DMX versions. After cutting, the end must be sealed with an end cap and compatible silicone to maintain the IP rating.
Which consumes more, neon or LED?
Neon consumes more. For the same light output, an LED system generally reduces consumption by 40–60%, because it has an efficiency of 120–160 lm/W compared to the 70–90 lm/W of fluorescent, and eliminates ballast losses, which with magnetic models can reach 20–25% of the tube's wattage.
How long does an LED neon tube last?
A quality product declares 30,000–50,000 hours, expressed as L70 or L80: the residual flux after that time is at least 70–80% of the initial. At 12 hours a day, that's over 11 years. The actual lifespan depends mainly on the operating temperature and the quality of the power supply.
Which color temperature to choose for office, retail, and home?
For the office 4000 K with CRI ≥ 80; for retail 3000–4000 K with CRI ≥ 90, or ≥ 95 in clothing stores; for homes, bars, and restaurants 2700–3000 K. In workshops, warehouses, and technical laboratories you can go up to 4000–5000 K to improve detail perception.
Does the LED neon tube work in humid or cold environments?
Yes, if you choose the correct protection rating: IP65 for kitchens, garages, and warehouses, IP67 for exposed outdoors and intensive washing. Unlike fluorescents, LEDs turn on instantly and at full flux even at low temperatures, making them ideal for garages and basements.
Is it possible to replace a circular neon with an LED?
Yes. You can use a dedicated circular LED module or bend a neon flex over a base or inside a round profile. With a diameter of 30 cm the radius is 15 cm, which is above the minimum bending radius of the most common neon flex; the length should be rounded to the nearest cutting pitch.
Are there dimmable LED neon tubes?
Yes. Constant voltage LED strips and neon flex are dimmable with PWM controllers, 0-10 V signals, or DALI protocol via dedicated power supplies; RGB versions can be managed in DMX512. Traditional T8 tubes, on the other hand, are rarely dimmable: to create scenes, a linear strip system is preferable.
What certifications must a professional LED neon tube have?
CE marking (Low Voltage, EMC, and RoHS directives), compliance with EN 60598 for luminaires, IEC 62776 for double-capped LED tubes, and EN 62471 for photobiological safety. The label must also show the energy class, flux, wattage, color temperature, and IP rating.
The right LED neon tube is born from the design
Replacing neon with LED is no longer a fashion choice, but a mandatory step: fluorescent tubes are leaving the market and every hour of operation with an old ballast is wasted energy. The difference between a generic retrofit and a professional retrofit lies in the method: identify the tube to be replaced, think in useful lumens, choose between LED tube, profile + strip, and neon flex based on the purpose, and respect the three technical constraints of the flexible LED neon tube – section, bending radius, and cutting pitch.
With the tables and configurators in this guide you have all the tools to set up the project. When technical advice, a feasibility check, or a supply for a construction site is needed, the Ledpoint team is available: explore the Ledpoint neon flex, aluminum profiles, and 24V LED strips, or request a quote.
This article was developed with the support of artificial intelligence and subsequently reviewed, corrected, and validated by the Ledpoint.it technical team, which guarantees its reliability and compliance with official sources.
From neon to LED, a step forward at every construction site
Subscribe to the Ledpoint newsletter: receive data sheets, updated conversion tables, new neon flex, profiles, and LED strips, real retrofit cases, and installation tips from our technicians. Content designed for electricians, designers, and lighting designers who want to work faster, reduce customer consumption, and stay updated on regulations and technologies. A useful email, never spam.