






Living room lighting: the complete technical guide to designing, sizing, and installing light with LED strips and profiles
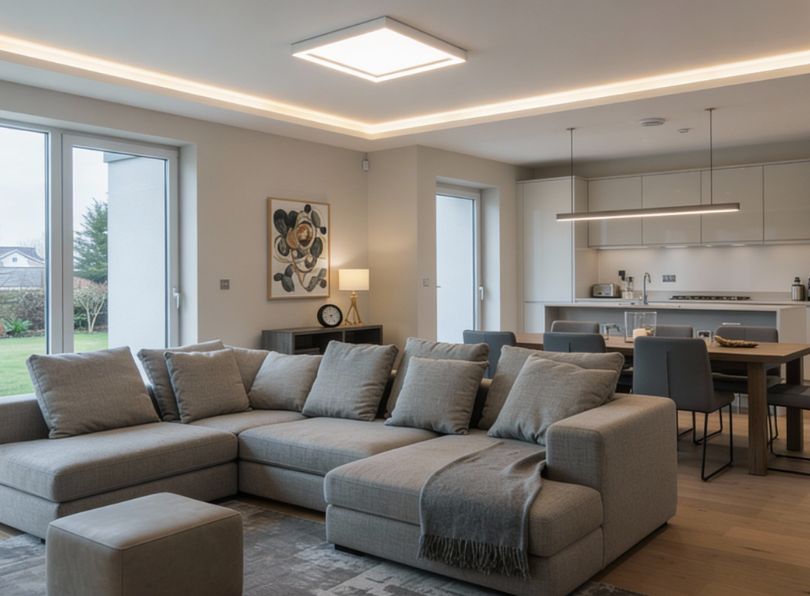
Living room lighting is the light distribution project for living environments, based on three overlapping levels (general, functional, accent), with a load of 200–300 lumens per square meter and a dominant color temperature between 2700K and 3000K. With LED strips and aluminum profiles, you achieve diffuse, uniform light free from glare.
This guide stems from a concrete need reported to us almost every week by installers who purchase from Ledpoint.it: there are dozens of articles on living room lighting that discuss atmosphere, style, and trends, but almost none provide electricians with the actual numbers needed on-site, such as: how many lumens per linear meter? What is the voltage drop over ten meters of 24V strip? What cable cross-section? How much to oversize the power supply? What recess depth should be left in the drywall so the light cove doesn't "streak" the ceiling?
So, we wrote an article as we would have wanted to find it ourselves: an operational manual, full of conversion and sizing tables, that can be kept open on a tablet while laying out the system. Each chapter starts with the lighting principle, translates it into a number, and the number into a product actually in the catalog. It applies to the 18-square-meter living room of a historic center renovation as well as the 60-square-meter open space with an open kitchen, to drywall ceilings as well as exposed beams, and takes into account the regulatory and taste differences you will encounter working in Italy, Germany, France, the United Kingdom, the Emirates, or the United States.
In this article...
1. The three levels of living room lighting: ambient, task, accent
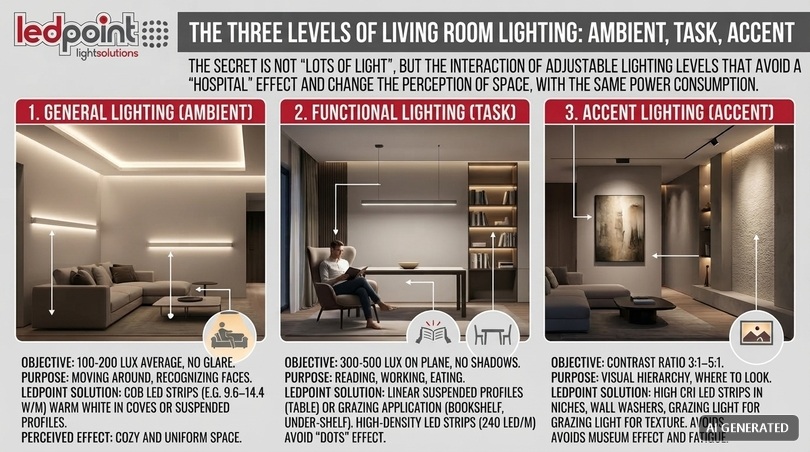
Before talking about products, it is advisable to establish the method, because it is the only thing that never changes. A successful living room lighting project is not a living room with "lots of light": it is a living room where at least two independent light levels coexist, adjustable separately. This is the difference between a system that works and one that, however expensive, leaves the feeling that something is not right.
The reason is physiological before aesthetic: the human eye does not read absolute luminance values, it reads the ratios between adjacent surfaces. A room lit by a single zenithal source produces very high luminance ratios between the horizontal plane and the vertical walls: the perceptual result is an environment that seems low, cold, and vaguely hospital-like even when the measured lux level is perfectly adequate. Distributing the same amount of flux over three levels completely changes the reading of the space, with the same absolute wattage installed.
General lighting (ambient)
This is the base layer, the one that allows movement, face recognition, and perception of the room's volume. In contemporary living room lighting, general light is rarely direct: it is obtained by reflection on the ceiling and walls, typically with LED strips mounted in light coves, perimeter frames, or suspended profiles. The goal is an average illuminance of 100–200 lux on the plane at 0.85 m from the floor, with high uniformity and no glare points in the field of view of someone sitting on the sofa.
The typical choice for this layer is a medium-density strip with excellent color rendering, for example, a COB LED strip of 9.6–14.4 W/m in warm white, which does not produce spotting on the ceiling even a few centimeters from the reflecting surface. If the space is small and the ceiling needs to remain clear, suspended aluminum profiles flush with the wall work well.
Functional lighting (task)
The second layer of living room lighting is the light needed to do something: read, work on a laptop, play music, sew, play cards. It has much stricter photometric requirements than the ambient layer: 300–500 lux on the work plane, controlled directionality, absence of shadows cast by the dominant hand. In a living room, task spaces are generally two or three: the reading armchair, the dining table when the area is integrated, and any desk.
Here the LED strip works in two ways. Either in a linear profile suspended above the plane, with an opal diffuser and high LED density to avoid the "dot" effect on a shiny table. Or in indirect radial application, for example inside a bookshelf or under a shelf, when the visual task is searching for a title on a book spine. 240 led/m LED strips are the correct choice when the distance between source and diffuser is less than 10 mm.
Accent lighting (accent)
In living room lighting, accent is the layer that makes the perceived difference and is almost always the first to be cut from the budget, which is a mistake. Accent serves to build visual hierarchy: it tells the eye where to look. A painting, a stone wall, a niche, the profile of a staircase, the texture of a textured plaster. The lighting criterion is the contrast ratio between the accented object and its background, which should be between 3:1 and 5:1 to be legible without appearing theatrical.
Below 3:1 the accent is not perceived and money is wasted; above 10:1 the effect becomes museum-like and tiresome in a domestic environment within a few weeks. For the accent layer in the living room, high CRI strips work very well, because the eye judges the quality of accent light almost exclusively on the color fidelity of the illuminated object.
| Level | Target Illuminance | Share of total flux | Source type | Circuit | Control |
|---|---|---|---|---|---|
| General (ambient) | 100–200 lux | 50–60% | Indirect LED strip in cove or suspended profile | C1 | Dimmer 1–100% |
| Functional (task) | 300–500 lux localized | 20–30% | Suspended linear profile, under-cabinet, floor lamp | C2 | Dimmer or on/off |
| Accent (accent) | 3:1–5:1 on context | 10–20% | Strip in niche, linear wall washer, grazing light | C3 | Dimmer, scenes |
| Night / orientation | 1–5 lux | <2% | Baseboard strip, under-furniture | C4 | Sensor + dimmer |
Practical site rule: if the living room electrical panel provides only one lighting line, the installation is already compromised regardless of the quality of the luminaires. Three independent lines are the professional minimum; four if a night path is planned.
Living room, lounge, living, hall: terminology matters
It is worth clarifying the vocabulary, because on-site and in quotes it generates costly misunderstandings. Soggiorno (Living room) indicates the room as a whole, often including the dining area. Salotto (Lounge) strictly designates the conversation area, organized around sofas. Sala and salone are used for representative rooms or large areas. Living is the term used in design language to indicate the entire open day area.
When a client asks for advice on lounge lighting they are almost always talking about just the sofa area, with requirements for low and enveloping light, whereas when they ask for living room lighting they mean the entire room, including functional areas. Clarifying this on the first call avoids sizing the system for the wrong surface area.
How the project changes between lounge and complete living room
| Scope | Typical Area | Avg Lux | CCT | Number of circuits | Typical sources |
|---|---|---|---|---|---|
| Lounge (sofa area only) | 8–14 m² | 100–150 | 2700K | 2 | Indirect profile, linear applique, floor lamp |
| Living room with dining area | 18–30 m² | 150–200 | 2700–3000K | 3 | Perimeter cove, table suspension, accents |
| Hall / representative salon | 30–50 m² | 200 | 3000K | 4 | Perimeter, suspended islands, wall washing, accents |
| Open plan living with kitchen | 35–60 m² | 150–500 per zone | 2700–4000K | 4–6 | Complete zoning with variable CCT |
Decorative lamps and fixtures: where they fit in the project
Living room lamps in the traditional sense (floor lamps, table lamps, appliques, pendants, chandeliers) are not in competition with linear LED lighting: they occupy a different level. The strip in profile builds the ambient base and architectural accents; the decorative fixture adds the visual focal point and localized functional light.
There is only one integration criterion: the color temperature of decorative lamps must match the dominant temperature of the linear system. A 2700K floor lamp next to a 4000K perimeter cove produces exactly the chromatic chaos that the chapter on errors identifies as the fourth most frequent problem. If the client already owns lounge lamps they are fond of, the project adapts to them, not the other way around: the temperature of existing sources is measured and everything else is aligned.
When it is convenient to give up the central chandelier
The chandelier remains legitimate in two cases: when it is an object of value or identity, and when the ceiling is high enough not to make it a visual obstacle. In all other cases, the question "how to light a home without chandeliers" has a technically favorable answer: light distributed over multiple linear sources produces superior uniformity, softer shadows, and greater scenic flexibility, with equal or lower installed power. If the chandelier remains, it must still be dimmed and accompanied by at least one indirect level, because alone it is never sufficient.
2. Lighting calculation: from square meters to lumens to watts
This is the chapter that most popular articles skip, and it is exactly what is needed to not make mistakes in ordering material. The calculation path for living room lighting is always the same and has three steps: starting from the desired illuminance in lux, deriving the total necessary flux in lumens, translating the flux into linear meters of strip and installed watts. Only at the end is the power supply chosen.
The basic formula and the utilization coefficient
The necessary luminous flux is calculated as:
Φ (lumens) = E (lux) × S (m²) ÷ (Cu × Md)
where E is the maintained average illuminance you want to achieve, S the surface area, Cu the utilization coefficient, and Md the maintenance factor. In residential settings, with light ceilings and walls painted in neutral tones, a Cu of 0.45–0.60 is assumed for indirect light and 0.70–0.85 for direct light, while the maintenance factor for LEDs in a clean domestic environment is taken as 0.85.
Translated into practice: if you design a living room lighting system entirely indirectly, you must install between 40% and 70% more lumens than a direct system, because a significant part of the flux is absorbed by the rebound surfaces. This is the most frequent sizing error we see on carts: the client calculates lumens as if the strip were pointing downwards, then mounts it in a cove and the environment results under-lit by 40%.
Quick table: lumens required for living room area
The following table is already corrected with real coefficients: these are the lumens to install, not theoretical ones. Use it directly during the ordering phase.
| Living room area | Target avg lux | Theoretical lumens | Lumens to install (direct light) | Lumens to install (indirect light) | Indicative LED Watts (@130 lm/W) |
|---|---|---|---|---|---|
| 12 m² | 150 | 1,800 | 2,500 | 3,900 | 20–30 W |
| 16 m² | 150 | 2,400 | 3,350 | 5,200 | 26–40 W |
| 20 m² | 150 | 3,000 | 4,200 | 6,500 | 32–50 W |
| 25 m² | 175 | 4,375 | 6,100 | 9,500 | 47–73 W |
| 30 m² | 175 | 5,250 | 7,350 | 11,400 | 57–88 W |
| 40 m² (open plan) | 200 | 8,000 | 11,200 | 17,400 | 86–134 W |
| 50 m² (open plan) | 200 | 10,000 | 14,000 | 21,700 | 108–167 W |
| 60 m² (open plan) | 200 | 12,000 | 16,800 | 26,100 | 129–200 W |
Important note on height: the above values apply to ceilings between 2.70 and 3.00 m. For every additional 50 cm of height, add about 12% more flux; for ceilings under 2.50 m you can reduce by 10%, but you must increase attention to glare because the source is closer to the eye.
Watt-lumen conversion table: from old bulb to LED
This conversion is useful in every living room lighting quote and is needed every time you renovate and the client still thinks "in watts". It is the table that is convenient to keep printed in the van.
| Incandescent (W) | Halogen (W) | Compact Fluorescent (W) | Equivalent LED (W) | Indicative Flux (lm) | Required LED Efficiency |
|---|---|---|---|---|---|
| 25 W | 18 W | 6 W | 2–3 W | 230–250 lm | ≥90 lm/W |
| 40 W | 28 W | 9 W | 4–5 W | 430–470 lm | ≥95 lm/W |
| 60 W | 42 W | 12 W | 6–8 W | 720–810 lm | ≥100 lm/W |
| 75 W | 53 W | 15 W | 9–11 W | 930–1,050 lm | ≥105 lm/W |
| 100 W | 70 W | 20 W | 12–15 W | 1,300–1,520 lm | ≥110 lm/W |
| 150 W | 105 W | 30 W | 18–22 W | 2,100–2,450 lm | ≥115 lm/W |
| 200 W | 140 W | 40 W | 24–30 W | 2,900–3,300 lm | ≥120 lm/W |
Conversion table: linear meters of LED strip per environment
Here is the step missing from almost all living room lighting guides: knowing how many lumens are needed is not enough, you need to know how many meters of strip to buy. It depends on the power per meter and the real efficiency of the chosen model.
| Strip Power | Typical Flux | Meters for 3,000 lm | Meters for 6,000 lm | Meters for 10,000 lm | Meters for 18,000 lm | Recommended Application |
|---|---|---|---|---|---|---|
| 4.8 W/m | ~500 lm/m | 6.0 m | 12.0 m | 20.0 m | 36.0 m | Accent, niches, under-cabinet |
| 9.6 W/m | ~1,000 lm/m | 3.0 m | 6.0 m | 10.0 m | 18.0 m | Light cove, perimeter frame |
| 14.4 W/m | ~1,500 lm/m | 2.0 m | 4.0 m | 6.7 m | 12.0 m | Main ambient, high ceiling |
| 19.2 W/m | ~2,000 lm/m | 1.5 m | 3.0 m | 5.0 m | 9.0 m | Task, suspensions, open plan |
| ≥24 W/m | ~2,600 lm/m | 1.2 m | 2.3 m | 3.8 m | 6.9 m | Large volumes, double height |
Attention to thermal derating: above 14.4 W/m, mounting in an aluminum profile is not an aesthetic option, it is a technical necessity. A 19.2 W/m strip installed bare on drywall can exceed 75°C junction temperature and lose over 30% of its declared useful life.
Lux table: reference values for functional zones
| Zone / activity | Min lux | Optimal lux | Max useful lux | Uniformity (Uo) | Max UGR |
|---|---|---|---|---|---|
| Circulation and orientation | 50 | 100 | 150 | 0.40 | 28 |
| Conversation, sofa area | 100 | 150–200 | 300 | 0.40 | 22 |
| Prolonged reading | 300 | 500 | 750 | 0.60 | 19 |
| Dining table | 150 | 300 | 500 | 0.60 | 22 |
| Desk / PC work | 300 | 500 | 750 | 0.60 | 19 |
| Kitchen worktop (open plan) | 300 | 500 | 750 | 0.60 | 22 |
| Precision hobbies | 500 | 750 | 1,000 | 0.70 | 19 |
| TV viewing / home cinema | 10 | 30–50 | 100 | — | — |
| Night path | 1 | 3–5 | 10 | — | — |
UGR (Unified Glare Rating) values are not mandatory in residential settings, but they are a useful reference: UNI EN 12464-1, although referring to work environments, remains the most solid methodological basis available even when designing living room lighting for a private home, especially in areas where prolonged activities take place.
3. Color temperature and color rendering: 2700K, 3000K, 4000K
In living room lighting, the correlated color temperature (CCT) is the decision that the end user perceives more than any other, and it is also the one that generates the most post-installation complaints. A system perfect from a photometric point of view but with the wrong tone is judged "ugly" within three seconds. It is worth dedicating a serious chapter to it, because the question "what is the difference between 2700K and 3000K" is one of the most searched on the topic.
What Kelvin really measures
Kelvin does not measure the quantity of light and does not measure quality: it describes the position of the source's color point along the Planckian locus, i.e., the color a black body would assume at that temperature. Low values correspond to emissions shifted towards amber, high values towards blue. Counterintuitively, in Italian we call low color temperature light "warm" and high temperature light "cold", because the reference is emotional, not physical.
The perception of "warmth" has a biological basis. Low CCT light contains little component in the 460–490 nm band, to which melanopsin in intrinsically photosensitive retinal ganglion cells is sensitive, responsible for melatonin suppression. Translated: a 2700K light in the evening interferes much less with falling asleep than a 4000K light of the same intensity. It is not suggestion, it is a measurable effect documented by literature on circadian rhythms.
The concrete difference between 2700K and 3000K
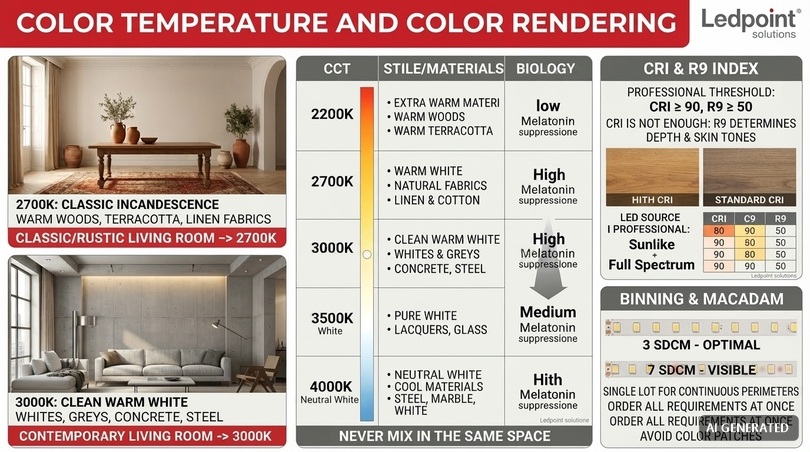
They are 300 Kelvin, they seem few in a living room lighting project and yet they are very noticeable when side-by-side. 2700K is the tone of classic incandescence: evident amber, it beautifully renders warm woods, terracotta, brass, sand-colored fabrics and terracotta, tends to mute blues and cold greens. 3000K is already a "clean" warm white: it maintains welcomingness but better returns whites, grays, and contemporary finishes like concrete, bleached oak, and brushed steel.
The rule we use internally during consultation is simple: if warm and natural materials prevail in the living room, go for 2700K, while if whites, grays, and contemporary opaque surfaces prevail, go for 3000K. Mixing them in the same field of view is always wrong, because the difference becomes evident precisely through simultaneous contrast.
The difference between 3000K and 4000K
Here the jump is net and the choice is functional, not aesthetic. 4000K is neutral light, perceived as daylight. In a pure living room it is almost always excessive and produces that office feeling that no client wants. It becomes correct instead in three specific cases: the kitchen area within an open plan, a workstation actually used for many hours, and climates or cultures where neutral light is the expected domestic norm.
Complete table of color temperatures
| CCT | Denomination | Perception | Enhanced Materials | Use in living room | Time of day | Ledpoint Product |
|---|---|---|---|---|---|---|
| 2200K | Extra warm / amber | Flame, candle | Brass, terracotta, warm stone | Only accent and evening scenes | After 9 PM | Warm White |
| 2400–2700K | Warm white | Intimate, enveloping | Wood, natural fabrics, terracotta | Ambient and accent, classic and rustic style | Evening | 2200–3500K |
| 3000K | Neutral warm white | Welcoming but crisp | Light oak, concrete, matte white | Reference ambient in modern style | All day | 2200–3500K |
| 3500K | White | Balanced | Grays, lacquers, glass | Living-kitchen transition | Day | 3800–5300K |
| 4000K | Neutral white | Diurnal, activating | Steel, light marbles, pure whites | Only task zones and visible kitchen | Morning and afternoon | 3800–5300K |
| 5000–6000K | Cool white | Clinical, technical | — | Not recommended in living areas | — | 5500–8700K |
| >6500K | Ice white | Scenic | — | Only special effects | — | 9000–15000K |
CRI, R9 and TM-30: the quality that Kelvin doesn't tell
In living room lighting, two strips both at 3000K can return colors in completely different ways. The index that describes this is the CRI (Ra), the average of fidelity on eight desaturated test colors. The limit of CRI is known: it does not include saturated reds, which are absent in the Ra average and which instead determine the appearance of skin, wood, and fabrics. For this reason, R9 is looked at separately.
For a living room, the professional threshold is CRI ≥ 90 with R9 ≥ 50. Below these values, faces appear grayish, burgundy fabric sofas turn brown, and parquet loses depth. The cost difference between a CRI 80 strip and a LED strip with CRI greater than 90 impacts the total site cost marginally, but radically changes the judgment of the final client.
| CRI (Ra) | R9 | Class | Perceived Effect | Living Room Suitability | Efficiency Loss vs CRI 80 |
|---|---|---|---|---|---|
| 70–79 | <0 | Poor | Dull colors, gray complexions | Not suitable | — |
| 80–89 | 0–20 | Standard | Acceptable, opaque reds | Only secondary indirect light | 0% |
| 90–94 | 50–70 | High | Faithful colors, natural complexions | Recommended | 10–15% |
| 95–97 | >80 | Very High | Almost solar rendering | Optimal for accents and artworks | 18–25% |
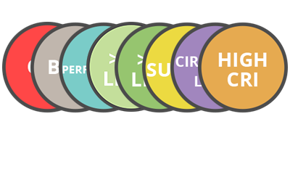
| ≥98 (Sunlike) | >90 | Full spectrum | Continuous spectrum, zero blue peak | Premium, visual well-being | 25–35% |
Those working on projects where visual well-being is an explicit requirement find in the Sunlike line a spectrum very close to solar, without the typical blue peak of conventional phosphor LEDs, and in the Circadian Light line solutions designed to accompany the day-night rhythm.
The MacAdam ellipse: why two "identical" reels are not identical
This is a detail that separates the expert installer from the beginner. Binning describes how tight the color selection of LEDs mounted on the strip is, measured in MacAdam steps (SDCM). A value of 3 SDCM means that the color difference between two sections is not perceptible to the eye, at 5 SDCM it begins to be seen on contiguous white surfaces, while at 7 SDCM it is evident.
The operational consequence is concrete: when ordering strips for a continuous perimeter, always order the entire requirement in a single solution and verify that they come from the same batch. Integrating three missing meters six months later on a perimeter cove is the certain recipe for a color patch visible to the naked eye.
4. Choosing the LED strip: density, chip, voltage, binning
At this point in living room lighting, you know how many lumens you need and at what temperature. The choice of product remains, which is articulated on five independent variables: supply voltage, chip type, LED density per meter, power per meter, and protection degree. Each has practical consequences on site.
12V, 24V or 48V: the choice that conditions everything else
In living room lighting, voltage is not a detail: it determines the maximum length of runs, cable cross-sections, the number of power points, and therefore labor costs. For the same power, doubling the voltage halves the current and reduces Joule losses by four times.
| Voltage | Max length per single supply | Current on 5 m @14.4 W/m | Advantages | Limitations | Typical use in living room |
|---|---|---|---|---|---|
| 5V | 1–2 m | 14.4 A | Pixel LED compatibility, electronics | Severe voltage drop | Dynamic effects, short TV backlighting |
| 12V | ~5 m | 6.0 A | Distribution, cut every 2.5–5 cm | High losses on long runs | Furniture, niches, short runs |
| 24V | ~10 m | 3.0 A | Best compromise, market standard | Cut every 5–10 cm | Reference choice for living areas |
| 48V | ~20–25 m | 1.5 A | Long perimeters with a single driver | Fewer models, long cut intervals | Open plan, continuous perimeters |
| 230V | up to 50 m | — | No separate power supply | Not SELV, limited dimming, flicker | Not recommended in living areas, ok technically |
Practical indication: for 90% of living rooms, the correct answer is 24V. You switch to 48V when the perimeter exceeds 20 linear meters and you want to avoid multiplying power points, or when suspended ceilings do not allow easy inspections. Ledpoint also offers strips with constant current control system, which maintain uniform brightness throughout the run even when voltage drop would otherwise be perceptible: it is the technically most elegant solution for very long perimeter coves.
Chip type: COB, 2835, 2216 and others
The chip format mainly determines the appearance of the light in living room lighting, specifically light emitted from nearby, which counts a lot in a living room because strips are often visible by reflection on shiny surfaces.
| Chip | Light Appearance | Typical Density | Efficiency | Strength | Ideal application in living area |
|---|---|---|---|---|---|
| COB | Continuous line, zero dots | 320–576 led/m | Good | Absolute uniformity | Visible coves, niches, under-cabinets |
| 2835 | Point-like, high yield | 60–240 led/m | Maximum | lm/W ratio and price | Indirect ambient in deep cove |
| 2216 | Semi-continuous, flat chips | 240–300 led/m | High | Reduced thickness | Micro profiles, furniture, shelves |
| 3014 | Fine point-like | 120–240 led/m | Medium | Compactness | Showcases, backlighting |
| 335 side LED | Lateral emission at 90° | 60–120 led/m | Medium | Emits sideways | Narrow coves, corner profiles, drywall |
| Pixel LED | Control per single LED | 30–144 led/m | Low | Dynamic effects | Scenography, home cinema |
The 10 mm rule: if the distance between the strip and the diffuser (or illuminated surface) is less than 10 mm, COB or at least 240 led/m is required, otherwise points will be visible. Between 10 and 20 mm, 120–180 led/m is sufficient. Beyond 25 mm, you can go down to 60 led/m without uniformity problems.
IP protection rating: what is really needed in a living room
| IP Rating | Protection | Where to use it in living areas | Effect on dissipation | Installation notes |
|---|---|---|---|---|
| IP20 | No protection against liquids | Coves, suspended ceilings, niches, bookshelves | Excellent | Standard choice, always in profile |
| IP54 | Light splashes | Open plan kitchen area, near cooktop | Good | Surface silicone |
| IP65 | Water jets | Connected terraces, verandas, frequent cleaning | Reduced by 10–15% | Extruded sheath, cut to be sealed |
| IP67/IP68 | Immersion | Exterior, steps, pool edge | Reduced by 20–30% | Power derating mandatory |
A frequent error is ordering IP65 "for safety" in dry indoor environments: the silicone sheath worsens thermal dissipation, reduces the strip's useful life, and costs more. In a closed living room, IP20 in an aluminum profile is technically the best choice, not a downward compromise.
5. Voltage drop, cable cross-sections, and power supply schemes
This is the chapter on living room lighting that electricians ask us for most often and that almost no lighting site addresses with usable numbers. Voltage drop along an LED strip is the number one reason why an apparently correct installation results darker at one end, with a progressive degradation that often also slightly shifts the color.
Why the strip fades towards the end
The printed circuit of an LED strip has copper tracks of limited cross-section, typically 1 oz (35 µm) or 2 oz (70 µm) thick. The current flowing through these tracks encounters distributed resistance, and since the current decreases progressively as it powers the various LED groups, the voltage drop is not linear but quadratic: the bulk of the loss occurs in the first third of the run.
The result is that the last meter of a 12V 5-meter strip may receive even 12–15% less voltage than the first, with a corresponding loss of flux and a slight shift towards amber due to lower current on the chips.
Table: recommended maximum lengths for single supply
| Voltage | Strip Power | PCB Copper | Max length (loss <5%) | Max length (loss <10%) | Solution beyond limit |
|---|---|---|---|---|---|
| 12V | 4.8 W/m | 1 oz | 5.0 m | 7.0 m | Bilateral power supply |
| 12V | 9.6 W/m | 1 oz | 3.0 m | 5.0 m | Bilateral power supply |
| 12V | 14.4 W/m | 2 oz | 2.5 m | 4.0 m | Switch to 24V |
| 24V | 9.6 W/m | 1 oz | 8.0 m | 12.0 m | Intermediate injection |
| 24V | 14.4 W/m | 2 oz | 6.0 m | 10.0 m | Bilateral power supply |
| 24V | 19.2 W/m | 2 oz | 5.0 m | 8.0 m | Injection every 5 m |
| 48V | 14.4 W/m | 2 oz | 18.0 m | 25.0 m | Intermediate injection |
| 24V CC (constant current) | various | 2 oz | 15–20 m | — | Constant brightness by construction |
Cable sizing table for connections
The cable leading from the power supply to the strip is often underestimated. On an 8-meter run with a 0.5 mm² cable and a current of 5 A, the loss is such as to render any upstream optimization useless.
| Current | Power @24V | Length 2 m | Length 5 m | Length 10 m | Length 20 m |
|---|---|---|---|---|---|
| 1 A | 24 W | 0.50 mm² | 0.50 mm² | 0.75 mm² | 1.00 mm² |
| 2 A | 48 W | 0.50 mm² | 0.75 mm² | 1.00 mm² | 1.50 mm² |
| 3 A | 72 W | 0.75 mm² | 1.00 mm² | 1.50 mm² | 2.50 mm² |
| 5 A | 120 W | 1.00 mm² | 1.50 mm² | 2.50 mm² | 4.00 mm² |
| 8 A | 192 W | 1.50 mm² | 2.50 mm² | 4.00 mm² | 6.00 mm² |
| 10 A | 240 W | 2.50 mm² | 2.50 mm² | 4.00 mm² | 6.00 mm² |
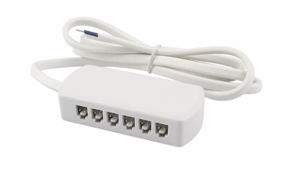
Adopted criterion: maximum 3% drop on the power cable, copper, go and return conductors. For connections, Ledpoint provides dedicated cables, quick connectors, and multiple quick plugs for orderly distribution inside the suspended ceiling.
The three power supply schemes to know
Scheme A - Unilateral power supply: the simplest because the driver is at the beginning of the run. Valid only within the lengths of table 5.2. It is the correct scheme for niches, shelves, and runs under 5 meters.
Scheme B - Bilateral power supply: the same driver powers the strip from both ends. It doubles the manageable length for the same drop and is the most economical solution for perimeter coves. Be careful to respect polarity on both ends and to size the two branches for half the current each.
Scheme C - Intermediate injection (backbone): a backbone in adequate cross-section cable is brought parallel to the strip and connections are injected every 4–5 meters. This is the mandatory scheme in open plans with perimeters exceeding 20 meters. It costs more labor but guarantees perfect uniformity and facilitates future maintenance.
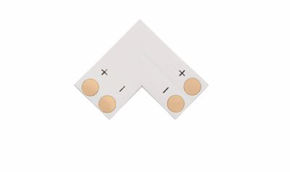
Golden rule: on joints between sections in a continuous cove, soldering remains more reliable than clip connectors in the long term, especially in the presence of thermal fluctuations. Where soldering is not practicable, Ledpoint offers specific PCB connectors and prepared soldered joints.
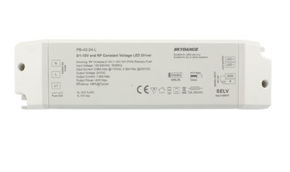
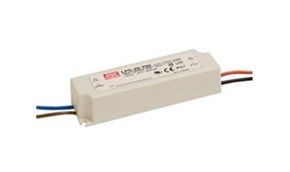
6. Power supplies and drivers: sizing and derating
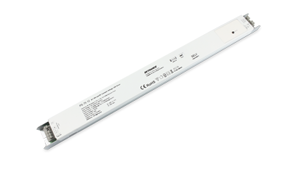
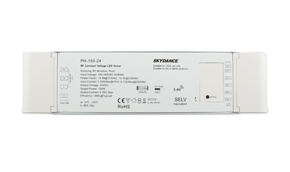
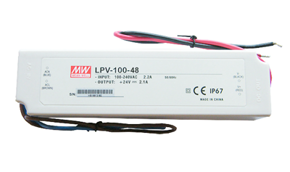
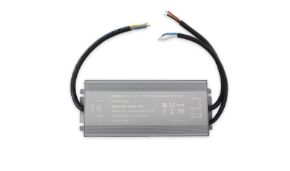
In living room lighting, the power supply is the component that, statistically, determines the real useful life of the system. Quality LED strips last decades, undersized or poorly chosen power supplies die in two or three years, typically due to electrolytic capacitor degradation accelerated by temperature. Spending five minutes on correct sizing means avoiding a warranty intervention.
The 80% rule
A switching power supply should never be operated at nominal load. Consolidated professional practice provides to load it to a maximum of 80% of declared power, and 70% when installed in a poorly ventilated suspended ceiling or in a closed compartment. For every 10°C of ambient temperature increase above 25°C, the expected life of capacitors halves: it is Arrhenius's law applied to electronics, and in a closed drywall cove, temperatures easily exceed 45°C.
Power supply sizing table
| Meters of strip | Strip Power | Real Load | Min. Power Supply (80%) | Recommended Power Supply | Ledpoint Model |
|---|---|---|---|---|---|
| 2 m | 9.6 W/m | 19.2 W | 24 W | 30 W | 24V Power Supplies |
| 5 m | 9.6 W/m | 48 W | 60 W | 60–75 W | 24V Power Supplies |
| 5 m | 14.4 W/m | 72 W | 90 W | 100 W | 24V Power Supplies |
| 10 m | 14.4 W/m | 144 W | 180 W | 200 W | 24V Power Supplies |
| 15 m | 14.4 W/m | 216 W | 270 W | 300 W | 48V Power Supplies |
| 20 m | 9.6 W/m | 192 W | 240 W | 250–300 W | 48V Power Supplies |
| 30 m | 9.6 W/m | 288 W | 360 W | 2×200 W | See catalog |
Project suggestion: two 200 W power supplies are almost always preferable to one 400 W. Heat is distributed, the risk of total blackout in case of failure is reduced, and management of separate dimmable zones is simplified.
Constant voltage or constant current
Standard LED strips require constant voltage (CV) power supplies: stabilized 12V, 24V, or 48V. Constant current (CC) power supplies are instead used for modules and sources requiring a fixed current, typically 350 mA, 700 mA, or 1,050 mA. Swapping them is one of the most destructive errors possible: a CC driver connected to a CV strip will quickly drive it out of specification.
Flicker: the invisible parameter that counts more than all
Flicker, often neglected in living room lighting, is the oscillation of luminous flux linked to the driving frequency. Even when not consciously visible, it produces visual fatigue, headaches, and, in predisposed subjects, more serious neurological effects. In a living room, where hours are spent, it is a parameter far from academic - and becomes critical if videos are recorded at home, because flicker imperceptible to the eye produces evident bands on camera sensors.
The European regulation on ecodesign of light sources has introduced mandatory limits: PstLM ≤ 1.0 and SVM ≤ 0.4. For a quality living room, it is advisable to go beyond the legal minimum and demand products with high PWM frequency.
| PWM Frequency | Direct Perception | Stroboscopic Effect | Video Recording | Judgment for living room |
|---|---|---|---|---|
| <200 Hz | Visible flicker | Strong | Evident bands | To be rejected |
| 200–500 Hz | Not visible, fatigues | Present | Visible bands | Insufficient |
| 1–3 kHz | Not perceptible | Reduced | Bands in slow-motion | Acceptable |
| 3–10 kHz | Absent | Negligible | Clean | Recommended |
| >20 kHz | Absent | Null | Clean even in slow-motion | Optimal, flicker-free |
Those installing 230V strips must pay particular attention: without a dedicated anti-flicker driver, the residual 100 Hz undulation is almost always outside comfort limits.
7. Aluminum profiles and diffusers: heat dissipation and efficiency
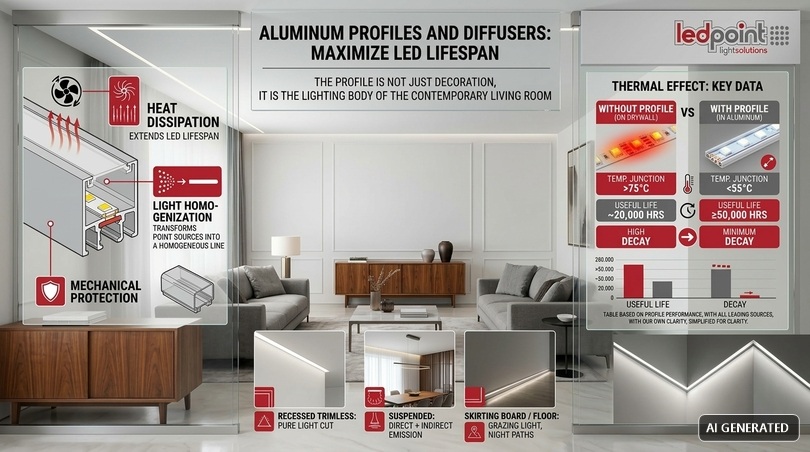
The profile is not a decorative frame. It performs three technical functions simultaneously: it dissipates heat prolonging LED life, mechanically protects the strip, and through the diffuser transforms a row of point sources into a homogeneous line of light. In contemporary living room lighting, the profile is, in fact, the luminaire.
The measured thermal effect
In a living room lighting system, a 14.4 W/m strip mounted on double-sided tape directly on drywall reaches a junction temperature even higher than 75°C. The same strip, inserted in an aluminum profile of adequate mass, typically drops below 50–55°C. The difference in terms of useful life is dramatic.
| Mounting support | Estimated junction temperature | Estimated L70 useful life | Decay at 3 years | Incremental cost |
|---|---|---|---|---|
| Double-sided tape on drywall | 75–85°C | ~20,000 h | −18% | — |
| Double-sided tape on wood | 70–80°C | ~25,000 h | −15% | — |
| Flat aluminum profile | 55–62°C | ~40,000 h | −8% | +3–6 €/m |
| Recessed aluminum profile | 50–58°C | ~45,000 h | −6% | +5–9 €/m |
| Finned / high mass profile | 42–50°C | ≥50,000 h | −4% | +8–15 €/m |
Profile types by application
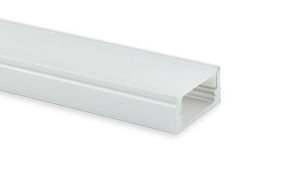
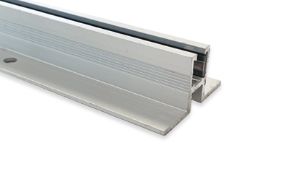
The Ledpoint aluminum profiles catalog covers all installation geometries, with the relative equipment of end caps, mounting clips, joints, and suspension cables.
| Type | Installation | Lighting effect | Use in living room | Installation complexity |
|---|---|---|---|---|
| Surface mount | Screwed to ceiling/wall | Visible light line | Renovations without suspended ceiling | Low |
| Recessed | Embedded in drywall | Line flush with plaster | Cleanest solution, new constructions | Medium |
| Trimless recessed | Flush with plaster | Pure light cut | Author projects, minimalism | High |
| Suspended | Steel cables | Direct + indirect | Above table, light islands | Medium |
| 45° Angular | In wall-ceiling corner | Grazing wall washing | Floating ceiling, textured walls | Low |
| Baseboard / floor | At base of wall | Grazing light from below | Night paths, stone walls | Medium |
| For drywall with flanges | Integrated in sheet | Perfect light cove | Perimeters and suspended ceilings | High |
| Round 360° | Suspended | Circular emission | Islands above sofa and table | Medium |
Diffusers and flux loss
In living room lighting, every diffuser absorbs a part of the emitted flux. It is an acceptable and necessary loss, but it must be calculated before ordering, otherwise the system results undersized by 20–30%.
| Type of diffuser | Transmittance | Flux loss | LED hiding | Recommended use |
|---|---|---|---|---|
| Transparent | 92–95% | 5–8% | None, points visible | Only where strip is not in field of view |
| Light satin | 85–88% | 12–15% | Partial | Deep coves, under-cabinets |
| Standard opal | 78–82% | 18–22% | Good | Standard for living areas |
| High diffusion opal | 68–75% | 25–32% | Total | Visible profiles, continuous lines |
| With anti-glare optics | 60–70% | 30–40% | Total | Suspensions above table |
Correct calculation: if 1,000 lumens effective output are needed from a profile with standard opal diffuser, you must install a strip that emits at least 1,250. Those who skip this step deliver systems that "look right on paper" and are visibly weak in operation.
8. Dimming and control: PWM, 0/1-10V, DALI, ZigBee
Living room lighting without regulation is a half-done project. The reason is simple: the same environment must function at nine in the morning with breakfast and at eleven at night in front of a movie, and no single illuminance level is good for both scenarios. Dimming is not a luxury accessory but a basic functional requirement.
Technologies compared
| Protocol | Wiring | Regulation range | Scenes | Cost | Suitable for |
|---|---|---|---|---|---|
| PWM on driver | No additional | 1–100% | No | € | Simple single zone |
| 0/1-10V | 2 signal wires | 1–100% (0-10V: 0–100%) | Limited | €€ | Reliable traditional systems |
| Push dimmer | Existing NO button | 5–100% | No | € | Light renovations |
| DALI / DALI-2 | Bus 2 wires polarity-free | 0.1–100% logarithmic | Complete, addressable | €€€ | Professional projects |
| DMX512 | Bus RS-485 | 0–100%, 8/16 bit | Dynamic | €€€ | Scenography, dynamic RGB |
| ZigBee | Wireless mesh | 1–100% | Complete via app | €€ | Residential smart home |
| Kinetic | None, battery-free | 1–100% | Basic | €€ | Retrofit without masonry work |
Dim-to-warm: the function that changes evening perception
In evening living room lighting, this detail counts: incandescent sources, when lowered, shifted towards amber: it is a behavior that our brain deeply associates with the idea of evening and rest. Standard LEDs, instead, maintain the same CCT at any dimming level, and this produces a subtle but persistent sensation of "light off" rather than "warm light".
CCT tunable strips solve the problem at the root: they allow varying the color temperature independently of intensity, or correlating the two quantities. For a living room, it is the technology with the best ratio between additional cost and perceived improvement, because it allows having 4000K in the morning in the kitchen area and 2700K in the evening in the sofa area with the exact same luminaire.
Recommended control architecture for a living room
Here is the scheme we propose as a professional standard, adaptable by subtraction to more contained budgets:
| Zone | Circuit | Control | "Day" Scenario | "Relax" Scenario | "Cinema" Scenario | "Night" Scenario |
|---|---|---|---|---|---|---|
| Perimeter cove | C1 | CCT + dimmer | 100% – 4000K | 40% – 2700K | 10% – 2700K | 0% |
| Table suspension | C2 | Dimmer | 80% | 60% | 0% | 0% |
| Bookshelf / niches | C3 | Dimmer | 50% | 100% | 25% | 0% |
| TV back (bias light) | C4 | On/off + dimmer | 0% | 30% | 15% | 0% |
| Night baseboard | C5 | PIR Sensor | 0% | 0% | 0% | 5% |
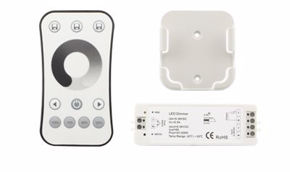
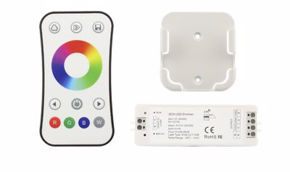
To realize this, Ledpoint controllers are needed in the appropriate configuration, the relative CCT receivers, and, for night automation, motion sensors. If the project involves long runs with multiple receivers on the same signal, signal amplifiers must be provided.
9. Drywall, suspended ceilings, and light coves: execution dimensions
This chapter is worth the reading time alone, because it contains the dimensions that are normally learned by making mistakes in two or three sites. The light cove (cove lighting) is the prime technique of indirect living room lighting, but it works only if the geometries are correct.
Anatomy of a functioning light cove
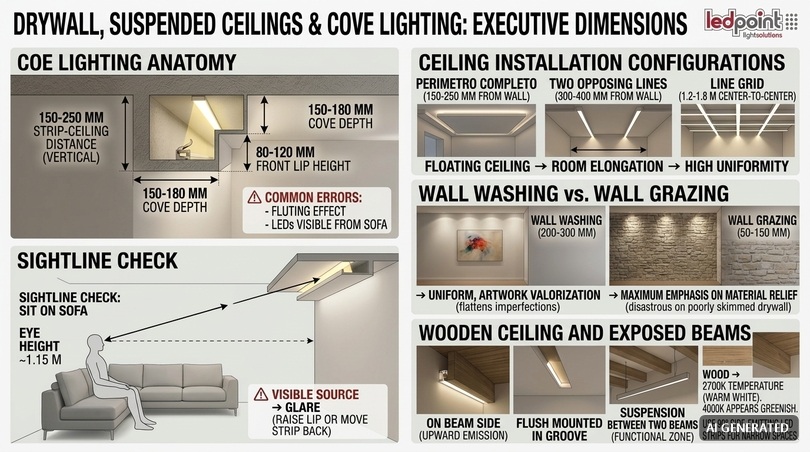
The principle of indirect living room lighting is simple: the strip illuminates the ceiling, the ceiling reflects downwards. The problem is that if the strip is too close to the reflecting surface, a band of intense light followed by a rapid drop is produced, the so-called "groove effect", which is exactly the opposite of the sought uniformity.
| Geometric parameter | Minimum | Recommended | Optimal | Consequence if wrong |
|---|---|---|---|---|
| Distance strip – ceiling (vertical) | 80 mm | 150 mm | 200–250 mm | Net light band, "lines" |
| Distance strip – vertical wall | 50 mm | 80–100 mm | 120 mm | Over-illumination of corner |
| Cove depth | 100 mm | 150 mm | 180 mm | LEDs visible from sofa |
| Front lip height | 60 mm | 80–100 mm | 120 mm | Direct glare |
| Useful width for maintenance | 60 mm | 80 mm | 100 mm | Impossible to replace strip |
| Lip inclination | 0° | 15° | 30° | Shadow on ceiling |
Line of sight verification
There is a very simple test that avoids the most frequent complaint about living room lighting: sitting on the sofa before closing the drywall. If from the seated position (eye at about 1.15 m from the floor) the upper edge of the strip is visible, glare is guaranteed. The lip must be raised or the strip moved back until the source is completely screened from every habitual seating position.
Distances for ceiling and wall installation
| Configuration | Distance from wall | Spacing between parallel lines | Ceiling height | Effect obtained |
|---|---|---|---|---|
| Complete perimeter | 150–250 mm | — | 2.70–3.00 m | Floating ceiling, dilated volume |
| Two opposing lines | 300–400 mm | — | 2.50–2.80 m | Directionality, room elongation |
| Grid of parallel lines | 400 mm | 1.2–1.8 m | ≥2.80 m | High uniformity, technical effect |
| Wall washing (grazing) | 200–300 mm | — | any | Enhancement of wall texture |
| Wall grazing (close) | 50–150 mm | — | any | Maximum emphasis on relief |
Crucial difference between wall washing and wall grazing: the first, with the strip 20–30 cm from the wall, flattens imperfections and illuminates uniformly (ideal on painted walls or with paintings). The second, with the strip a few centimeters away, enhances every relief and every defect) splendid on stone, brick, and textured plasters, disastrous on poorly smoothed drywall.
Wooden ceiling and exposed beams
Living room lighting with exposed beams is a case in itself, typical of rural recovery in Emilia-Romagna, Tuscany, and Umbria but also of Alpine chalets and Northern European lofts, the traditional perimeter cove is not practicable. The solutions that work are three: linear profile fixed on the side of the beam with upward emission on the boarding, profile recessed in the beam groove when the wood allows it, and linear suspension between two beams for the functional area.
In these contexts, the color temperature should always lean towards 2700K: wood at 4000K appears greenish and dull. The use of strips with lateral LEDs at 90° is often the only practicable solution in narrow grooves.
10. Wall lighting, behind TV, sofa, and bookshelves
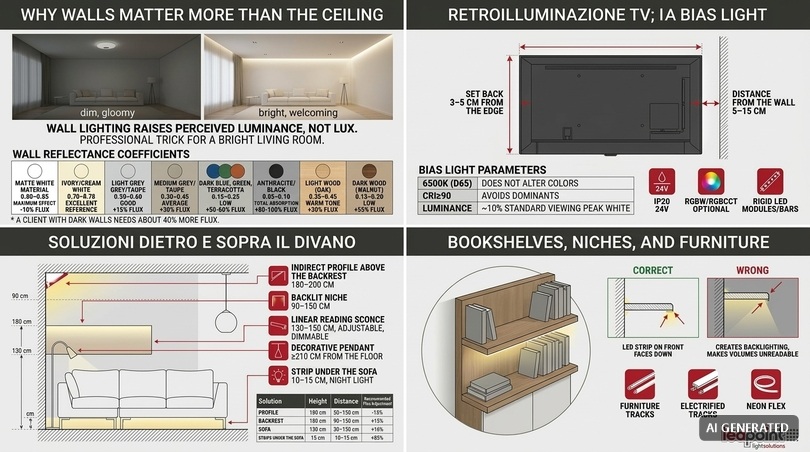
The wall is the surface that the eye reads most when seated, yet it is the one that receives the least design attention. A well-studied living room wall lighting raises the perceived luminance of the environment without increasing measured lux: it is the professional trick to make a dark living room feel bright without installing more watts.
Why walls count more than the ceiling
In living room lighting, the subjective sensation of a "bright room" depends on the luminance of vertical surfaces much more than on floor illuminance. Two living rooms with identical 150 lux at work level can be perceived as completely different: the one with illuminated walls results spacious and welcoming, the one with only zenithal light results gloomy. Illuminating walls is the most efficient way absolutely to make a living room brighter.
| Wall color | Reflection coefficient | Effect on useful flux | Correction to apply |
|---|---|---|---|
| Pure matte white | 0.80–0.85 | Maximum yield | −10% installed flux |
| Ivory / cream white | 0.70–0.78 | Excellent | Reference |
| Light gray | 0.50–0.60 | Good | +15% flux |
| Medium gray / taupe | 0.30–0.45 | Medium | +30% flux |
| Dark blue, green, terracotta | 0.15–0.25 | Low | +50–60% flux |
| Anthracite / black | 0.05–0.10 | Almost total absorption | +80–100% flux |
| Light wood (oak) | 0.35–0.45 | Medium, warm tone | +30% flux, CCT 2700K |
| Dark wood (walnut) | 0.15–0.20 | Low | +55% flux |
This table is one of the most useful tools in the quoting phase: a client who has chosen a walnut feature wall and a taupe paint needs about 40% more flux than someone with white and light oak. Telling them before avoids the complaint after.
TV backlighting: bias light
In living room lighting, the strip behind the television is not an aesthetic whim. It has a documented function: by reducing the contrast ratio between the lit screen and the dark wall behind it, it decreases visual fatigue and improves the perception of black in the image. It is a standard recommendation even in video calibration guidelines.
| Parameter | Correct Value | Why |
|---|---|---|
| Color temperature | 6500K (D65) | Corresponds to video reference white; does not alter color perception on screen |
| CRI | ≥90 | Avoids dominance on the wall |
| Luminance | ~10% of screen peak white | Reference standard for viewing |
| Position | Rear perimeter, set back 3–5 cm from edge | Avoids visible "glow" on sides |
| Distance from wall | 5–15 cm | Soft halo, no hot spots |
| Power supply | 24V, IP20 | Minimum section, contained heat |
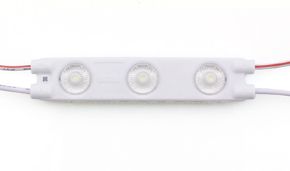
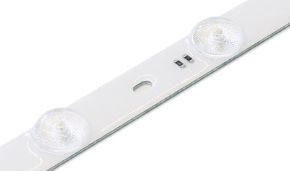
For this application, high temperature strips are the technically correct choice, while those wanting a dynamic scenic effect can orient themselves towards RGBW or RGBCCT strips, which maintain a quality white alongside the color channel. LED modules for backlighting and LED bars cover cases where greater mechanical rigidity is needed.
Behind and above the sofa
The question "what lamp to put above the sofa" has a precise lighting answer: it depends on what is done there. If the sofa is a conversation zone, soft indirect light and no source in the field of view are needed. If reading is done, a localized task of 300–500 lux on the page is needed, not on the room.
| Solution | Height from ground | Distance from sofa | Recommended flux | Notes |
|---|---|---|---|---|
| Indirect profile above backrest | 180–200 cm | Flush with wall | 400–600 lm/m | Upward emission, never downwards |
| Backlit niche | 90–150 cm | - | 200–400 lm/m | "Picture of light" effect |
| Linear reading applique | 130–150 cm | 60–80 cm laterally | 500–800 lm | Adjustable, dimmable |
| Decorative suspension | ≥210 cm from ground | Centered on coffee table | 800–1,200 lm | Only if coffee table is fixed |
| Strip under sofa | 10–15 cm | - | 100–200 lm/m | Suspension effect, night light |
Bookshelves, niches, and furniture
Illuminating a bookshelf is one of the most effective ways to enrich living room lighting and give depth to a living room, and requires specific components. The strip goes on the front edge of the upper shelf, facing downwards, never on the back: illuminating from the rear produces backlighting on volumes and makes them illegible.
For furniture, Ledpoint has furniture tracks and electrified tracks, which allow repositioning light points over time without redoing wiring: it is the correct answer to the search for track lighting for living room, with the advantage of domestic scale compared to retail tracks. For curved geometries and graphic signs on walls, Neon Flex allows tight bending radii with a perfectly homogeneous light line.
11. Typical projects: seven living rooms, seven solutions with bill of materials
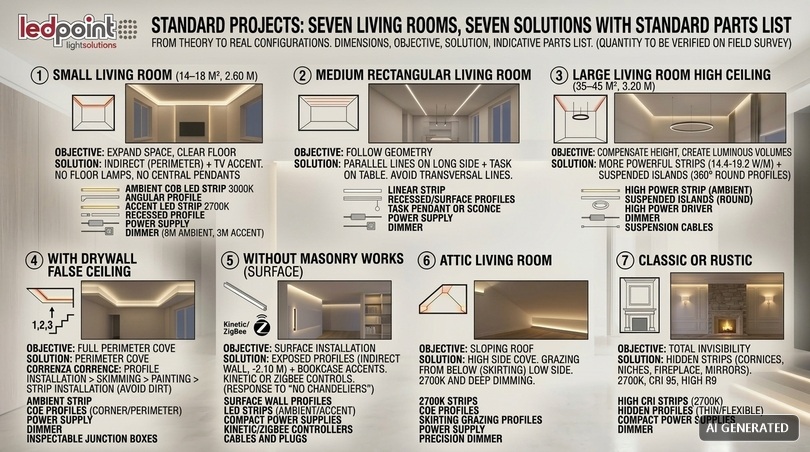
We move from theory to seven real living room lighting configurations, those that cover almost all cases an installer encounters. For each, we report dimensions, objective, solution, and indicative bill of materials. Quantities are for reference: they must always be verified on survey.
Small living room, 14–18 m², ceiling 2.60 m
The priority objective is to visually dilate the space and free the floor. Bulky floor lamps and low central suspensions are excluded. The strategy is entirely indirect: perimeter on two opposing sides, plus an accent in a niche or behind the TV wall.
| Component | Quantity | Specification | Circuit |
|---|---|---|---|
| Ambient LED strip | 8 m | 24V, 9.6 W/m, 3000K, CRI>90, COB | C1 |
| 45° angular profile | 8 m | With opal diffuser | — |
| Accent LED strip | 3 m | 24V, 4.8 W/m, 2700K | C2 |
| Thin recessed profile | 3 m | ≤8 mm | — |
| Power supply | 1 | 24V – 150 W | — |
| Dimmer | 2 | Monochromatic or ZigBee | — |
Total installed flux: about 8,200 lm nominal, ~6,000 lm effective after diffuser, which on 16 m² in indirect configuration returns about 160 lux average. Correct.
Medium rectangular living room, 22–28 m²
The rectangular geometry must be accommodated, not contrasted: light lines must be arranged parallel to the long side, never transversely, because transversely they optically shorten the room. Two longitudinal lines at 40 cm from the long walls plus a task on the table.
Large living room, 35–45 m², ceiling 3.20 m
With high ceilings, indirect light loses efficiency because the optical path lengthens. It must be compensated with more powerful strips (14.4–19.2 W/m) and affianced by suspended light islands that bring the source back to a perceptually correct height. 360° round profiles are the most elegant solution to construct these suspended luminous volumes.
Living room with drywall suspended ceiling
This is the ideal scenario, because it allows the complete perimeter cove with the dimensions of chapter 9. The correct site sequence is: tracing, preparation of backbone and inspectable junction boxes, profile mounting, closing and smoothing, strip installation only after painting is finished. Those who install the strip before painting find it dirty with putty and with compromised adhesive.
Living room with no possibility of masonry work
In light renovations and rentals, work is done on the surface. Surface profiles fixed with clips, power from existing socket, Kinetic or ZigBee control to avoid traces in walls. The search "lighting a home without chandeliers" has its technical answer here: linear wall profiles at 2.00–2.20 m from the floor, upward emission, plus accents on bookshelf.
Attic living room
The inclined slope changes the geometry: the perimeter cove works only on the high side. On the low side, grazing light from below is convenient, with baseboard profile, to counteract the sensation of compression. 2700K temperature and deep dimming are essential because in an attic the reflecting surface is very close to the eye.
Classic or rustic style living room
Technical linear light clashes with cornices, boiserie, and stone fireplaces. The solution is to make it completely invisible: strips inside the groove of the existing cornice, inside niches, behind mirrors, at the base of fireplaces. With 2700K, CRI 95, and high R9 the result coexists perfectly with traditional decorative sources.
12. Open plan kitchen-living room: light zoning
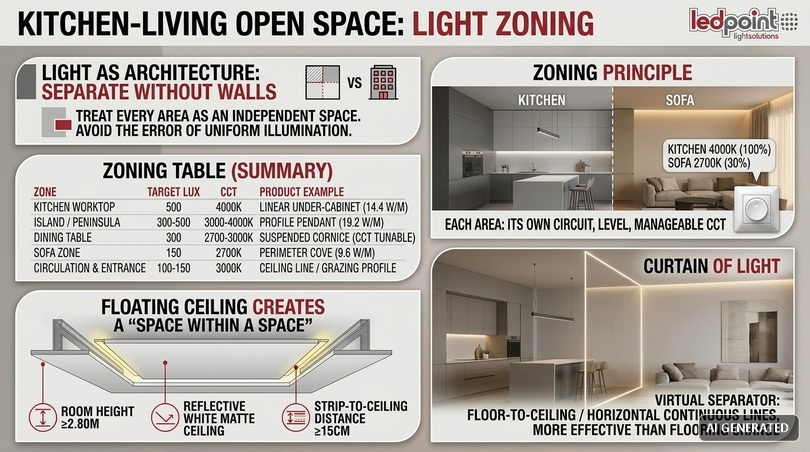
Living room lighting in open plan is the type that generates the most errors, because the temptation to treat it as a single environment is strong and the result is always the same: a uniformly lit warehouse in which no zone has identity. Light, in an open plan, is the only architectural element available to separate without building walls.
The principle of zoning
In zoned living room lighting, each functional area must have its own circuit, its own level, and ideally, its own manageable color temperature. It does not mean creating violent contrasts: it means being able to turn the kitchen on at 4000K at 100% while the sofa area stays at 2700K at 30%, and being able to reverse roles after dinner.
| Zone | Target lux | CCT | CRI | Source type | Recommended product |
|---|---|---|---|---|---|
| Kitchen worktop | 500 | 4000K | ≥90 | Linear under-cabinet | COB 14.4 W/m |
| Island / peninsula | 300–500 | 3000–4000K | ≥90 | Linear suspension | 19.2 W/m in profile |
| Dining table | 300 | 2700–3000K | ≥90 | Suspended frame | CCT tunable |
| Sofa area | 150 | 2700K | ≥90 | Perimeter cove | 9.6 W/m |
| Circulation | 100 | 3000K | ≥80 | Ceiling line | 4.8 W/m |
| Entrance | 150–200 | 3000K | ≥90 | Grazing on wall | Vertical profile |
The floating ceiling
It is the most requested effect in the last two years and the most misunderstood. It consists of a drywall panel lowered, detached from the structural ceiling by 15–25 cm, with LED strips in the perimeter facing upwards. The panel appears suspended, the room seems higher, and the area underneath is perceived as a "space within a space".
For it to work, three conditions are needed: starting height of at least 2.80 m (below 2.70 m the lowering compresses too much), structural ceiling painted in matte white with high reflectance, and distance between strip and upper ceiling of at least 15 cm.
The light curtain as virtual separator
In very deep open plans, the separation between day area and dining area can be obtained with a continuous vertical light line from floor to ceiling, or with two superimposed horizontal lines marking the passage. It is a light sign, completely reversible, and much more effective than any floor change.
13. The living room around the world: regulatory and cultural differences
Those who design or install for international clientele (and with e-commerce it happens more and more often) soon discover that living room lighting is not a universal concept. Expectations on color temperature, levels, and source type vary enormously, and installation prescriptions change from country to country. This chapter summarizes what is needed to know to not deliver a technically correct but culturally wrong project.
Cultural differences in the perception of domestic light
| Geographic area | Expected CCT in living | Preferred level | Dominant approach | Design note |
|---|---|---|---|---|
| Italy, Spain, Southern France | 2700–3000K | Medium | Mix decorative + technical | Chandelier remains an identity element |
| Germany, Austria, Switzerland | 2700–3000K | Medium-high | Functional, many light points | Great attention to efficiency and certifications |
| Nordic countries | 2200–2700K | Low, many sources | Hygge: many weak lights, never just one | Table lamps widespread even in living room |
| United Kingdom and Ireland | 2700K | Low-medium | Floor lamps, little zenithal light | Downlights very common in renovations |
| Netherlands, Belgium | 2700–3000K | Medium | Architectural, large windows | Strong attention to relationship with natural light |
| Eastern Europe | 3000–4000K | High | Central chandelier + spotlights | Greater tolerance to neutral light |
| Middle East and Gulf | 4000–5000K | Very high | Abundant, scenic light | Greater acceptance of neutral white |
| East Asia | 4000–6000K | High | Dimmable and CCT multifunction ceiling lights | Market standard very oriented to tunable |
| North America | 2700–3000K | Medium | Grid of recessed downlights | Strong habit of recessed spotlights |
Voltages, frequencies, and technical implications
| Area | Mains voltage | Frequency | Installation norm reference | Implication on LED strips |
|---|---|---|---|---|
| EU and EEA | 230V | 50 Hz | HD 60364 / CEI 64-8 (IT), VDE 0100 (DE), NF C 15-100 (FR) | 100–240V power supplies, CE marking, EPREL |
| United Kingdom | 230V | 50 Hz | BS 7671 | UKCA marking in addition to CE |
| Switzerland | 230V | 50 Hz | NIN / SEV | Type J plugs, rest aligned with EU |
| North America | 120V | 60 Hz | NEC (NFPA 70) / CEC | UL Class 2 drivers (≤60 VA), UL/ETL certification |
| Gulf / Emirates | 220–240V | 50 Hz | IEC derivatives, UK schemes | Check thermal derating for high temperatures |
| Australia / NZ | 230V | 50 Hz | AS/NZS 3000 | RCM marking mandatory |
| Japan | 100V | 50/60 Hz | PSE Law | Dedicated power supplies, PSE marking |
Two operational points merit underlining. In France, the NF C 15-100 norm prescribes a minimum number of light points per room and a minimum socket provision, which conditions living room design much more than in Italy. In the United States, UL Class 2 classification limits drivers to 60 VA and 30 V in many residential applications, which pushes towards architectures with more small power supplies instead of a single centralized driver: a European 24V/200 W project must be redesigned, not simply adapted.
For sites outside the Union, finally, it must always be verified that the chosen power supply has the universal input range 100–240V AC and the required local certification: CE marking is not recognized in North America, Australia, or Japan.
14. Regulations, safety, and markings: what the installer needs to know
For living room lighting, there is no norm imposing illuminance levels, unlike work environments. However, there are product and installation norms that are fully mandatory and which, in case of dispute or accident, make the difference. This chapter summarizes the essential framework without claim of legal exhaustiveness.
Reference regulatory framework
| Reference | Object | Relevance for living room | Mandatory |
|---|---|---|---|
| CEI 64-8 | Low voltage user electrical installations | Rule of art of installation, protections, sections | Yes (Italy) |
| D.M. 37/08 | Installation activity of systems | Qualification and declaration of conformity | Yes (Italy) |
| IEC/EN 60598 | Luminaires | Safety of lighting bodies | Yes |
| IEC/EN 61347 | Lamp controlgear | Safety of LED power supplies | Yes |
| EN 62471 | Photobiological safety | Blue light risk, RG0–RG3 groups | Yes |
| Reg. UE 2019/2020 | Ecodesign of light sources | Minimum efficiency, flicker, power factor | Yes (EU) |
| Reg. UE 2019/2015 | Energy labeling | Classes A–G, EPREL registration | Yes (EU) |
| UNI EN 12464-1 | Lighting of indoor work places | Methodological reference for task zones | No in residential |
| EN IEC 61000-3-2 | Electromagnetic compatibility, harmonics | Quality of power supplies | Yes |
SELV and extra-low voltage safety
Strips at 12V, 24V, and 48V powered by drivers with safety separation operate in SELV (Safety Extra-Low Voltage) regime. It is one of the most underestimated technical advantages: it allows installations with practically nil electrical risk even within reach, and simplifies intervention in environments where the presence of children is a factor. Attention however: the advantage exists only if the driver is truly safety separated, a requirement to verify on nameplate data and not to presume.
Photobiological safety and blue light risk
EN 62471 norm classifies sources into risk groups. For general domestic lighting, one must stay in RG0 (no risk) or RG1 (low risk). High CCT and high density sources are those that can approach RG2 and must be avoided at direct gaze range. It is a further argument in favor of warm white and continuous spectrum sources in living rooms.
Energy label and EPREL
Since September 2021, light sources placed on the EU market must be registered in the EPREL database and report the new energy class scale from A to G, much stricter than the previous one. A good quality LED strip today typically falls in class D or E; classes A and B are reserved for products of exceptional efficiency. Do not be frightened by the letter: the scale was voluntarily recalibrated to leave room for future innovation.
15. The ten mistakes that ruin an installation (and how to fix them)
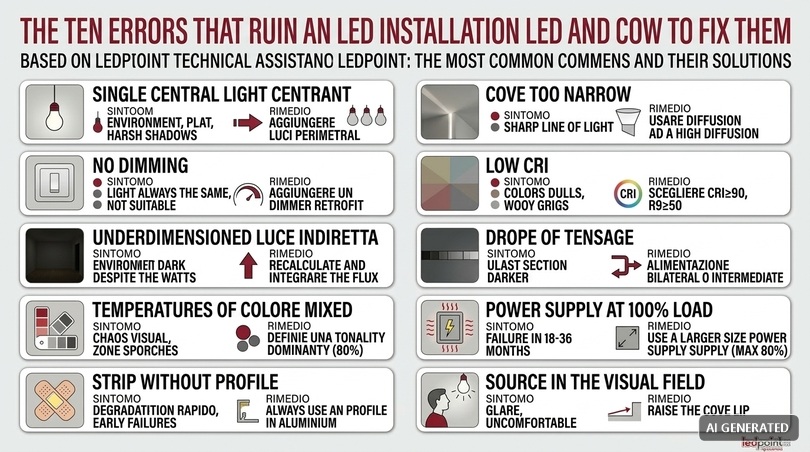
This section on living room lighting errors arises from technical assistance: these are the problems reported to us most often, in order of real frequency. For each, we indicate the cause, symptom, and remedy, even for an already realized system.
| # | Error | Perceived symptom | Technical cause | Remedy |
|---|---|---|---|---|
| 1 | Single central light point | Hard shadows, flat and "interrogation-like" environment | Absence of stratification, wrong luminance ratios | Add at least two indirect perimeter lines |
| 2 | No dimming | Light always the same, never suitable | Single unregulated circuit | Push dimmer or ZigBee, retrofit without work |
| 3 | Undersizing on indirect light | Dark environment despite "correct" watts | Utilization coefficient not applied | Recalculate with Cu 0.45–0.60; integrate flux |
| 4 | Mixed color temperatures | Visual chaos, some zones "dirty" | Simultaneous contrast between different CCTs | Dominant tone on 80% of sources |
| 5 | Strip without profile | Rapid luminous decay, early failures | Excessive junction temperature | Redo with aluminum profile |
| 6 | Cove too narrow | Sharp light line on ceiling | Strip-ceiling distance <8 cm | High diffusion diffuser or setback |
| 7 | Low CRI | "Dull" sofas and woods, gray complexions | Ra<80, negative R9 | Replace with CRI≥90, R9≥50 |
| 8 | Voltage drop | Last section darker and more amber | Run beyond limits, undersized cable | Bilateral power supply or intermediate injection |
| 9 | Power supply at 100% load | Failure after 18–36 months | Thermal degradation of capacitors | Replace with larger size, max 80% |
| 10 | Source in field of view | Discomfort, fatigue, glare | Cove lip too low | Raise lip or incline at 30° |
16. Lifespan, maintenance, consumption, and return on investment
The conversation about living room lighting with the final client almost always closes on operating numbers. It is worth having precise answers, because LED has a very different cost profile from previous technologies: it costs more at purchase and much less throughout its useful life.
How to read the useful life of an LED strip
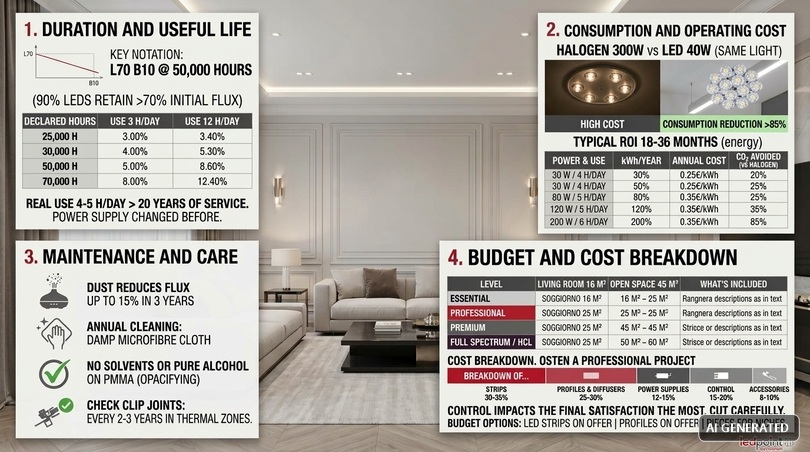
LEDs do not burn out: they decay. The correct notation is L70 B10 at 50,000 hours, and it means that after 50,000 hours of operation, 90% of samples retain at least 70% of initial flux. Pay attention to the two parameters: L80 is more severe than L70, and B10 is more severe than B50.
| Declared hours | Use 3 h/day | Use 5 h/day | Use 8 h/day | Use 12 h/day |
|---|---|---|---|---|
| 25,000 h | 22.8 years | 13.7 years | 8.6 years | 5.7 years |
| 30,000 h | 27.4 years | 16.4 years | 10.3 years | 6.8 years |
| 50,000 h | 45.7 years | 27.4 years | 17.1 years | 11.4 years |
| 70,000 h | 63.9 years | 38.4 years | 24.0 years | 16.0 years |
In a living room, with a realistic average use of 4–5 hours a day, a well-dissipated strip with L70 at 50,000 hours easily exceeds twenty years of service. The component that needs replacement first is almost always the power supply.
Consumption and operating cost
| Installed power | Average use | kWh/year | Annual cost @0.25 €/kWh | Annual cost @0.35 €/kWh | CO₂ avoided vs halogen |
|---|---|---|---|---|---|
| 30 W | 4 h/day | 43.8 | 10.95 € | 15.33 € | ~60 kg/year |
| 50 W | 4 h/day | 73.0 | 18.25 € | 25.55 € | ~100 kg/year |
| 80 W | 5 h/day | 146.0 | 36.50 € | 51.10 € | ~200 kg/year |
| 120 W | 5 h/day | 219.0 | 54.75 € | 76.65 € | ~300 kg/year |
| 200 W | 6 h/day | 438.0 | 109.50 € | 153.30 € | ~600 kg/year |
The most eloquent comparison: a living room lit with six 50 W halogen spotlights consumed 300 W; the same amount of light today is obtained with about 40 W of high-efficiency LED. Consumption reduction exceeds 85%, with a return on investment that, on energy costs alone, typically falls between 18 and 36 months.
Maintenance
Maintenance of an LED strip system is minimal but not null. Dust on the diffuser reduces flux by up to 15% in three years: an annual cleaning with a slightly damp microfiber cloth, with system off and cold, recovers almost all. Never use solvents or pure alcohol on PMMA diffusers, which become opaque. Clip joints should be checked every two or three years in areas subject to thermal excursion.
17. Budget: how much it really costs to light a living room
The spending ranges for living room lighting that follow are indicative and refer to material only, VAT excluded, with professional market prices. They serve to set up a credible quote in the first instance and to make the client understand where the cost items are.
| Level | 16 m² Living room | 25 m² Living room | 45 m² Open plan | What it includes |
|---|---|---|---|---|
| Essential | 180–300 € | 280–450 € | 500–800 € | CRI80 strip, basic profiles, 1 power supply, single dimmer |
| Professional | 400–650 € | 650–1,000 € | 1,200–1,900 € | COB CRI90, recessed profiles, 2 circuits, dimming |
| Premium | 800–1,300 € | 1,300–2,100 € | 2,500–4,200 € | CCT tunable CRI95, trimless, 4–5 circuits, scenes |
| Full spectrum / HCL | 1,400–2,200 € | 2,200–3,500 € | 4,000–7,000 € | Sunlike or Circadian, DALI, complete automation |
Typical material cost breakdown on a professional project: strips 30–35%, profiles and diffusers 25–30%, power supplies 12–15%, control and dimming 15–20%, accessories and wiring 8–10%. The item that clients tend to cut first, control, is the one that impacts final satisfaction the most.
Those who want to contain the budget without compromising the result can look at LED strips on offer, profiles on offer, and LED strip offcuts, ideal for niches and short runs where the full reel is not needed.
18. 2026 Trends and Human Centric Lighting
The directions of living room lighting emerged in the latest editions of major sector fairs, from Fuorisalone to Light + Building, converge on a few solid themes, worth distinguishing from passing fads.
Human Centric Lighting
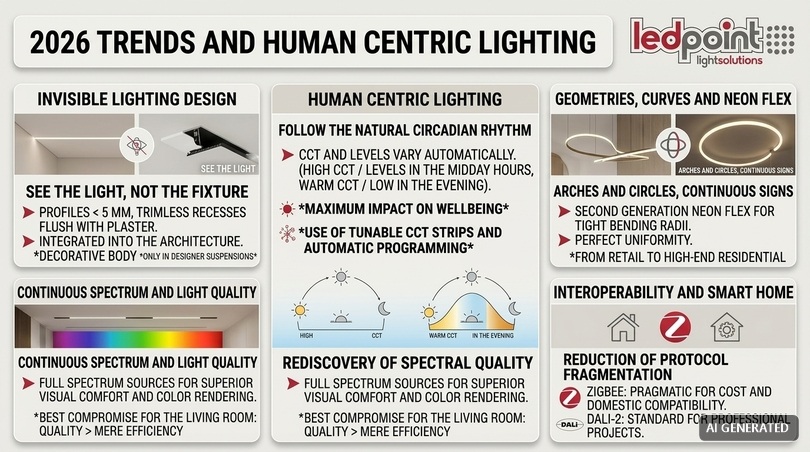
The idea is that artificial living room lighting should follow the trend of natural light, supporting the circadian rhythm instead of contrasting it. In practice: higher CCT and levels in central hours, progressive passage to warm white and low levels from evening. In the living room, it is realized with CCT tunable strips and automatic hourly programming. It is probably the innovation with the greatest real impact on well-being among those available today.
Invisible lighting design
The clearest trend of recent years: you see the light, not the fixture. Thinner and thinner profiles, under 5 mm, trimless installations flush with plaster, coves integrated into architecture. The luminaire as a decorative object survives only in author suspensions above the table, where it is declaratively a furnishing element.
Geometries, curves, and Neon Flex
Arches, circles, continuous signs on ceiling and walls. Second generation Neon Flex has made very tight bending radii practicable with perfect uniformity, and has shifted this language from retail to high-end residential.
Continuous spectrum and light quality
After years of racing for efficiency, the market is rediscovering spectral quality. Full spectrum sources cost more energy per lumen but offer incomparable color rendering and visual comfort. In a living room, where total lumens are few and hours many, the compromise is almost always favorable to quality.
Interoperability and smart home
Protocol fragmentation is reducing. For residential, ZigBee remains the most pragmatic choice in terms of cost, reliability, and compatibility with the most widespread domestic ecosystems, while DALI-2 remains the standard for projects where the client is professional.
19. Operational site checklist
We close the living room lighting guide with the most practical tool of the article: the verification sequence to check before, during, and after installation. It is the same one we use internally for technical support.
| Phase | Verification | Acceptance criterion |
|---|---|---|
| Survey | Dimensions, height, finish colors | Reflection coefficients noted |
| Survey | Fixed position of sofa, TV, table | Lines of sight verified |
| Calculation | Total lumens with Cu and Md applied | Deviation <10% from target |
| Product choice | Dominant CCT, CRI, R9, SDCM | CRI≥90, R9≥50, SDCM≤3 |
| Product choice | Single batch for continuous runs | Batch code verified |
| Sizing | Voltage drop on each run | <5% at line end |
| Sizing | Power supply load | ≤80% of nominal power |
| Sizing | Power cable cross-section | Drop <3% on cable |
| Preparation | Inspection points for power supplies | All accessible without demolition |
| Preparation | Driver compartment ventilation | Temperature <45°C at regime |
| Geometry | Light cove dimensions | Compliant with chapter 9 |
| Geometry | Source not visible from seated | Empirical test passed |
| Installation | Clean and degreased surface | Double-sided tape adhesion guaranteed |
| Installation | Strip installed after painting finished | No putty residue |
| Installation | Cuts only on markings | No interrupted circuit |
| Installation | Polarity verified before closing | Ignition test executed |
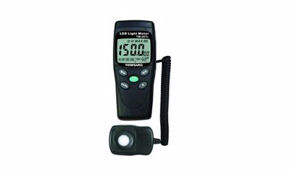
| Testing | Lux measurement in task zones | Within project range |
| Testing | Flicker verification (camera test) | No visible bands |
| Testing | Regulation at minimum without flicker | Stable below 10% |
| Delivery | Memorized and documented scenes | Scheme delivered to client |
| Delivery | Declaration of conformity | Released according to regulation |
20. Frequently asked questions about living room lighting
We have collected the questions about living room lighting that we receive most often from installers and designers who purchase from Ledpoint.it, along with those most searched online on the topic. The answers are synthetic and operational: click on each question to open it.
What type of light to put in the living room?Warm white light between 2700K and 3000K with CRI greater than 90, distributed over at least two levels: an indirect base for the environment and functional light on reading areas or the table. Cold light above 4000K is discouraged because it makes the environment rigid and hinders evening relaxation. |
How many lumens are needed to light a living room?Approximately 200–300 lumens per square meter are needed with direct light, and up to 400–450 lumens per square meter with completely indirect light. A 20 m² living room therefore requires about 4,200 lumens in direct configuration and about 6,500 lumens if the light is all reflected on ceiling and walls. |
How many watts are needed to light a living room?With modern LEDs at 120–140 lm/W, about 2–3 watts per square meter are needed in direct light and 3–5 watts per square meter in indirect light. A 20 m² living room is well lit with 32–50 total watts, compared to the 250–300 watts that would have been needed with halogens. |
What is the difference between 2700K and 3000K?2700K is more amber and recalls incandescence: it enhances warm woods, terracotta, and brass, ideal for classic and evening environments. 3000K is a cleaner warm white that better returns whites, grays, and contemporary finishes. The difference is visible if the two tones are side-by-side in the same field of view, so they must never be mixed. |
What is the difference between 3000K and 4000K?3000K is warm white and favors relaxation; 4000K is neutral white, perceived as daylight, and stimulates attention. In the living room, 3000K is the correct choice for the sofa area, while 4000K should be reserved for the kitchen worktop in open plans or an actual workstation. |
What light does 4000K make?4000K produces a neutral white, devoid of yellow or blue dominance, very similar to natural light on a cloudy day. It is excellent for precise visual tasks and for enhancing white surfaces and steel, but in a relaxation zone it often results cold and unwelcoming. |
How to light a living room with little natural light?By increasing the luminance of vertical surfaces: LED strips illuminating walls raise the sensation of brightness much more than adding flux to the center of the room. A slightly more neutral temperature is used, around 3000–3500K, light and matte finishes are preferred, and concentrated ceiling sources are avoided. |
How to make a living room brighter?Three actions in order of effectiveness: illuminate walls rather than just the floor, increase surface reflectance with light matte tints, distribute flux over multiple sources instead of concentrating it. For the same installed watts, the perception of brightness can increase by even 40%. |
How to light a small living room?With indirect perimeter light on two opposing sides, 2700–3000K temperature, no bulky floor sources, and an accent in a niche or behind the TV wall. Thin recessed or 45° angular profiles completely free the ceiling and visually dilate the space. |
How to light a large living room or salon?By zoning: each functional area receives its own circuit and level. Indirect perimeter for the base, suspended light islands above sofa and table to bring the source back to a perceptually correct height, accents on bookshelves and textured walls. With ceilings over 3 meters, 14.4–19.2 W/m strips are needed. |
How to light an open plan living room with visible kitchen?With separate circuits and differentiated temperatures: 4000K on the kitchen worktop, 2700–3000K on the sofa area, 3000K on the table. CCT tunable strips allow managing both needs with the same appliance, passing from daytime to evening configuration with a command. |
How to light a living room with exposed beams?With linear profiles fixed on the side of beams and upward emission on the boarding, or recessed in the groove when the wood allows it. Temperature should always be 2700K, because wood lit at 4000K appears greenish. Strips with lateral LEDs at 90° solve narrow grooves. |
How to light a living room with drywall suspended ceiling?With a perimeter light cove: strip set back at least 15 cm from ceiling and 8–10 cm from wall, cove depth of 15 cm, front lip high 8–12 cm inclined at 30°. The strip must be installed after painting and must always be inserted in an aluminum profile. |
How to light a living room without chandelier?With LED strips in perimeter profiles, linear wall profiles at 2.00–2.20 m from floor with upward emission, accents in bookshelf and niches, and localized functional light where reading occurs. The result is more uniform and flexible than any central source. |
What lamp to put above the sofa?If the sofa is a conversation zone, only indirect light is needed: a profile above the backrest at 180–200 cm with upward emission. If reading is done, a 500–800 lumen task positioned laterally at 60–80 cm is needed, adjustable and dimmable. Never a frontal point source in the field of view. |
How to light the sofa area?With an indirect ambient level of 100–150 lux and regulation that allows dropping below 50 lux for TV viewing. Adding a backlighting strip behind the television at 6500K reduces visual fatigue and improves black perception in the image. |
How to light the dining area in the living room?With a suspended source centered on the table at 75–85 cm from the plane, 300 lux average, 2700–3000K and CRI greater than 90 so food is correctly rendered. As an alternative to traditional suspension, a rectangular frame of suspended profiles eliminates shadows and distributes light over the whole table. |
How are lights positioned in the living room?Light lines should be arranged parallel to the long side of the room, at 15–25 cm from walls for the perimeter and with spacing of 1.2–1.8 m if there are more than two. Task sources go above or laterally to the activity point, never behind the reader, to avoid cast shadow. |
Spotlights or LED strips better in living room?LED strips in profile produce diffuse and continuous light, ideal for the ambient level, and do not create the typical "spots" of a spotlight grid. Spotlights remain useful as directional accent on specific objects. The best solution combines the two, with the strip as base and the spotlight as pointing. |
Which LED strip to choose for the living room?A 24V strip, 9.6–14.4 W/m, 3000K, CRI greater than 90 with R9 above 50, SDCM within 3 steps, mounted in aluminum profile with opal diffuser. If the strip is visible or very close to the diffuser, COB technology completely eliminates dotting. |
Why is my LED strip darker at the end?It is voltage drop. On a 12V strip, loss becomes sensible already beyond 5 meters, on 24V beyond 10 meters. It is solved by powering the strip from both ends, bringing a backbone with intermediate injections every 4–5 meters, or switching to 48V or a constant current system. |
Is the aluminum profile really needed?Yes, for three reasons: it dissipates heat lowering junction temperature by 20–25°C and more than doubling useful life, it mechanically protects the strip, and through the diffuser it transforms luminous points into a continuous line. Above 14.4 W/m it is not an option but a requirement. |
What power supply is needed for living room LED strips?A constant voltage power supply of the same voltage as the strip, sized with at least 20–25% margin on real load. Ten meters of 14.4 W/m strip absorb 144 W and therefore require a 180–200 W power supply, installed in a ventilated and inspectable position. |
How much does living room LED lighting consume?A well-lit 25 m² living room absorbs 50–80 total watts. With four hours of use per day, this amounts to 73–117 kWh per year, or about 18–30 euros annually. Compared to an equivalent halogen system, consumption reduction exceeds 85%. |
How long does an LED strip last?A quality strip typically declares L70 at 50,000 hours, meaning it retains at least 70% of initial flux after 50,000 hours. With four hours of use per day, this means over thirty years. Real duration depends almost entirely on thermal dissipation: without profile it can be reduced by half. |
Can LED strips be cut and joined?Yes, exclusively on the cut markings printed on the circuit, which recur every 2.5–10 cm depending on voltage. For joining, soldering remains the most reliable solution in the long period; alternatively, dedicated PCB connectors exist, to be preferred where maintenance is difficult. |
Why do my LED lights flicker when I dim them?Because the dimmer is not compatible with the driver, or the PWM frequency is too low. A system is needed where dimmer and power supply are designed to work together, with modulation frequency above 3 kHz. Below 500 Hz, flicker produces fatigue even when not consciously visible. |
What CRI is needed for a living room?At least 90, with R9 greater than 50. CRI measures color fidelity but does not include saturated reds, which determine the appearance of skin, wood, and fabrics: for this reason, the R9 index must be checked separately. Below CRI 80, faces appear gray and warm materials lose depth. |
How to light a bookshelf in the living room?With the strip on the front edge of each shelf, facing downwards, never on the back of the furniture. Illuminating from the rear produces backlighting and makes volumes illegible. 200–400 lumens per linear meter are sufficient, with high CRI to correctly render the colors of spines and displayed objects. |
What light to put behind the TV?A 6500K strip with CRI greater than 90, positioned on the rear perimeter set back 3–5 cm from the edge and distant 5–15 cm from the wall, regulated to about 10% of screen peak luminance. It reduces contrast with the dark wall, decreases fatigue, and improves black perception. |
How many light circuits are needed in a living room?Three as professional minimum: general, functional, and accent. Four if a night path or independent TV backlighting is planned. A living room with a single circuit is half-designed, regardless of the quality of installed luminaires. |
Are 230V LED strips a good idea in the living room?Rarely. They eliminate the power supply but do not operate in safety extra-low voltage, have long cut intervals, limited dimming, and often residual 100 Hz undulation producing flicker. In domestic scope, 24V remains technically superior under almost every aspect. |
22. Living room lighting: light becomes a building material
If there is one thing we would like to remain from this guide, it is that living room lighting is not a product choice, it is a sequence of concatenated technical decisions. It starts from square meters, passes to lux, arrives at lumens, chooses color temperature and color rendering, sizes the run, verifies voltage drop, chooses the power supply with the right margin, positions the source out of the field of view. Every link that skips compromises those downstream.
Done well, this sequence produces a result that the client cannot describe technically but perceives immediately: a room that seems larger than it is, in which colors are right, in which in the evening one feels good and no one knows exactly why. Done badly, it produces the exact opposite, and no amount of added watts afterwards can remedy it.
The tool of living room lighting remains the LED strip in aluminum profile, because it is the only one that allows building light as one builds an architectural detail: continuous, dimensionable to the centimeter, integrable in any geometry, invisible when needed and scenic when required. The rest (the author suspension above the table, the reading applique, the floor lamp next to the armchair) is added on top of a base that must already be correct.
The LED strips, aluminum profiles, power supplies, and controllers catalog of Ledpoint is organized exactly according to the parameters used in this guide: power per meter, voltage, color temperature, LED density, chip type. If a sizing step does not add up, our technical support responds with numbers, not with catalogs.
This article was developed with the support of artificial intelligence and subsequently reviewed, corrected, and validated by the Ledpoint.it technical team, which guarantees its reliability and compliance with official sources.