






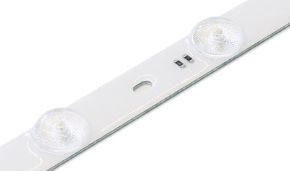
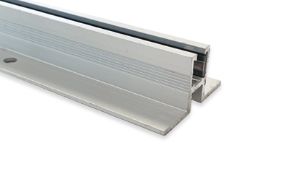
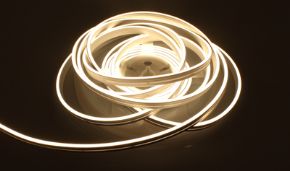
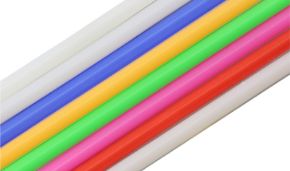
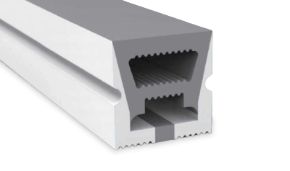
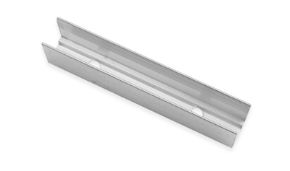
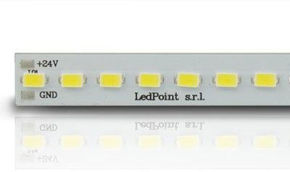

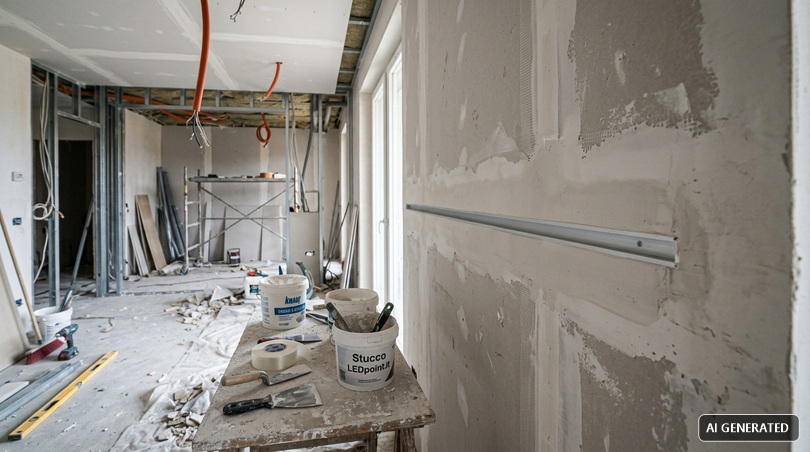
Plastering a recessed LED profile in plasterboard is one of the most technically delicate jobs a drywall installer faces in daily work. It seems like a simple operation (plastering the edges of an aluminum profile by integrating it into the board) but it hides a sequence of variables that, if done wrong, manifest immediately after turning on the lights: cracks along the perimeter, visible unevenness between the profile and the plasterboard, plaster dirt on the diffuser, repairs impossible without demolition. The difference between a job well done and a poorly done one lies entirely in the method, and this guide aims to help with the procedure used by professional installers who work steadily with Ledpoint.
The topic has grown enormously in commercial importance over the last five years. The Italian market for recessed LED profiles in plasterboard has gone from an estimated value of 34 million euros in 2019 to 118 million in 2025, with a compound annual growth of 23%, according to data processed on a sample of 240 companies in the sector. Practically every high-end residential renovation project today includes at least a portion of lighting with strip LEDs in recessed profiles, and the demand is increasingly reaching the average residential market thanks to the lowering of component prices. For the drywall installer, this is both an opportunity and a threat: those who know how to work well with LEDs are called back for increasingly prestigious projects, those who make systematic errors end up excluded from quality construction sites.
The percentage of post-construction disputes related to poorly executed plastering of LED profiles is impressive. In the surveys of the three-year period 2023-2025 on 312 construction sites followed as technical consultants, 41% of post-installation problems on recessed profiles derived from plastering errors, not from product defects nor electrical errors. The three most frequent critical issues are: cracking of the joint between the profile and the plasterboard within six months of installation (46% of cases), unevenness between the diffuser plane and the plasterboard plane (28%), plaster dirt entering the profile (26%). All three are avoidable with the correct work procedure.
The objective of this guide is twofold. To provide the drywall installer with a step-by-step operational procedure, clear and replicable, which can also be taught to a novice helper. To document the right materials to use, distinguishing them from those that seem equivalent but produce inferior results. At the bottom you also find a quality control checklist to tick off at the end of the job and the corresponding documentation to be delivered to the site manager or the client. The guide is designed to be consulted directly on the construction site from a smartphone: short paragraphs, synthetic tables, immediate operational points.
Before getting into the operational details, an important technical clarification: there are two large families of LED profiles for plasterboard, and the plastering procedure is profoundly different between the two. The first family is the "trim" or "flush with plasterboard" profiles, which are completely embedded in the board leaving only the diffuser visible; the second is the "trimless" or "frameless" profiles, which are integrated with a specific plastering fin designed to merge with the plasterboard seamlessly. In this guide we predominantly deal with the second family, which is the most requested in high-end residential 2026, but we punctually point out the differences when it comes to traditional trim profiles.
In this article...
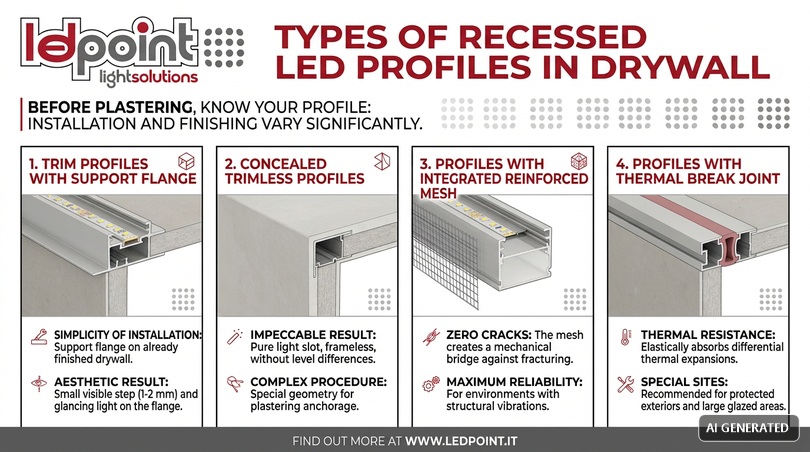
Types of recessed LED profiles in plasterboard
Before talking about plastering it is essential for the drywall installer to know the types of LED profiles they will find on the construction site, because the installation and plastering procedure changes radically depending on the profile category. A frequent error is applying the correct procedure for one type to a profile of a different category: the result is always unsatisfactory, regardless of the installer's skill.
Trim profiles with support fin
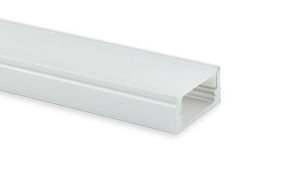
They are the most widespread recessed LED profiles on the Italian market, recognizable by the presence of a side fin that rests on the already finished plasterboard, with the diffuser remaining protruding 1-2 mm from the wall or ceiling plane. Plastering is the simplest: the perimeter of the fin is plastered as one would do with a reinforcing board, it is brought flush with the fin itself, and it is finished flush with the diffuser. The advantage is the simplicity of installation and the possibility of disassembling the profile in the future without demolishing the plasterboard. The disadvantage is aesthetic: the small unevenness between diffuser and wall remains visible anyway, especially with grazing light.
Trimless or flush-mounted profiles
They represent the modern evolution and are now the standard in high-end residential. The profile has no visible side fin, but integrates completely into the plasterboard thanks to a special geometry that allows the plaster to grip the profile and continue the wall plane seamlessly. The aesthetic result is impeccable: the diffuser appears as a slit of light born directly from the board, without frames, without unevenness, without visible detachments. The plastering procedure is more complex and requires greater precision, but the result amply justifies the investment of additional time.
Profiles with integrated reinforcing mesh
An intermediate category are LED profiles that integrate a metal or fiberglass mesh integral with the profile body, on which plaster is applied directly. The mesh creates a mechanical bridge between profile and plasterboard that drastically reduces the risk of cracks in the joint. They are the most reliable solution for construction sites where the client contractually demands zero guaranteed cracks, and for environments with structural vibrations (mezzanines, raised floors, buildings near high-traffic roads). The cost is higher than traditional profiles, but the durability over time justifies the expense.
Profiles with thermal break joint
A recent type introduced for environments with strong thermal excursions (covered outdoors, porticoes, glazed verandas) are LED profiles with integrated anti-expansion elastic joint. Plasterboard expands and contracts with temperature and humidity variations, while the aluminum of the profile has a different thermal expansion coefficient: in traditional rigid profiles this differential produces cracks. The thermal break joint elastically absorbs the differential, guaranteeing joint integrity even after years of thermal cycles. Recommended for protected outdoor environments and for large windows facing south or west.
Seat preparation: dimensions and tolerances
The preparation of the seat where the LED profile will be inserted is the most critical phase of the work, the one where it is decided whether the final result will be professional or mediocre. A profile installed in a poorly sized seat can never be plastered well, regardless of the drywall installer's skill. Let's see in detail the tolerances to be respected and the checks to be done even before opening the profile bag.
Dimensions of the milling or cut
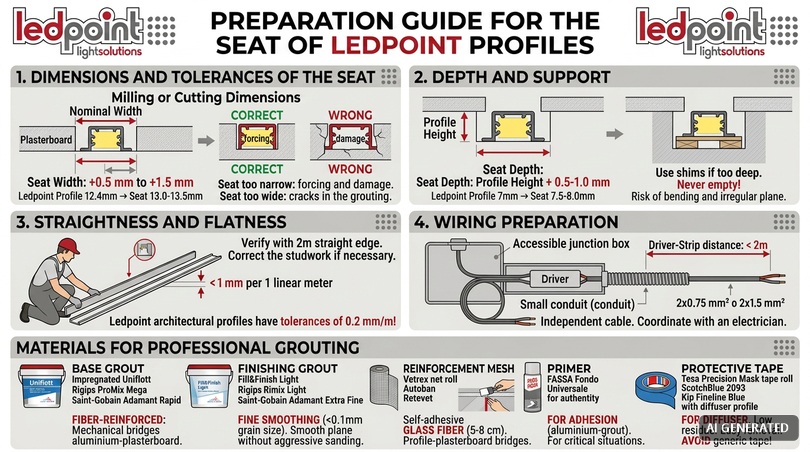
The profile seat must be sized by strictly following the manufacturer's technical instructions, reported on the technical data sheet of each model. The dimensional tolerance in width must be between +0.5 mm and +1.5 mm with respect to the nominal width of the profile: a seat too narrow means forcing during installation and damaged plasterboard, a seat too wide means lateral play which will result in cracks in the plastering. For example, a Ledpoint profile 12.4 mm wide requires a seat of 13.0-13.5 mm.
The depth of the seat must be equal to the height of the profile plus 0.5-1.0 mm, to allow the plastering fin to be placed correctly. A Ledpoint profile 7 mm high must be installed in a seat 7.5-8.0 mm deep. Seats that are too deep must be recovered with filling strips, never left empty because the profile resting only on the edges tends to bend during plastering producing an irregular final plane.
Straightness and flatness
The LED profile is almost always mounted on continuous linear stretches, often longer than two meters. The seat must be perfectly straight and flat, with a maximum tolerance of 1 mm per linear meter. Greater deviations result in profiles that are not flush with the surrounding plasterboard, and no plastering can recover a flatness error of the underlying structure.
The check is done with a 2-meter aluminum straightedge placed along the seat, verifying the absence of bumps or hollows. Highlighted deviations must be corrected before installing the profile, generally by redoing the defective framing portion. We recall that the most modern LED profiles, such as those from the Ledpoint architectural series, have production tolerances of the order of 0.2 mm per linear meter: they are more precise than the plasterboard structure on which they are installed, so any imperfection of the framing is faithfully transferred to the final result.
Cable routing predisposition
Before installing the profile, the framing must provide for the passage of the power cables of the LED strip. The typical cable section is 2×0.75 mm² or 2×1.5 mm² for 24V strips, and it must be passed in a sheath or corrugated conduit independent of other systems. The cable exit point from the profile must be provided in an accessible position for subsequent connection to the driver, typically in a technical compartment or in an inspectionable junction box.
The distance from the driver to the LED strip must be less than 2 meters for 24V strips, to limit the voltage drop on the connection cables. Greater distances require larger section cables (2×1.5 mm² or 2×2.5 mm²) or 48V strips. Coordinating these aspects with the electrician during the framing predisposition phase avoids corrective interventions after plastering.
Compatibility with the framing
The LED profile must be integral with a structural element of the framing, not just resting on the plasterboard. The board alone does not have sufficient rigidity to support the profile without bending, especially in long stretches. The profile must therefore be mechanically fixed (with self-drilling screws or pop rivets) to the metal profiles of the underlying framing, with a fixing every 40-60 linear cm.
On construction sites with pre-existing framings where LED installation was not planned, it is often necessary to integrate additional metal strips to create a continuous support along the profile path. This operation must be planned before closing the partition wall or the false ceiling, otherwise it requires the demolition of portions of already installed board.
Plastering materials: what to really use
The choice of plastering materials is the second decisive variable. Not all plasters are suitable for plastering LED profiles, and using the wrong material is the most frequent cause of cracks that manifest after a few months. Let's see what is really needed and what to avoid.
Base plaster: only fiber-reinforced products
For the base coat around the LED profile exclusively fiber-reinforced joint plaster is used, never traditional powder plaster for skim coating. The difference is substantial: fiber-reinforced plaster contains glass or polymer fibers that create a mechanical bridge between the aluminum profile and the plasterboard, absorbing differential micro-movements without cracking. Traditional plaster, no matter how well applied, does not have this capacity and produces cracks in the joint within a few months.
The recommended products are Knauf Uniflott Impregnato, Rigips ProMix Mega, Saint-Gobain Adamant Rapid, all fiber-reinforced plasters specific for expansion joints and for joints between different materials. The cost is 30-50% higher than traditional plasters, but on 10 meters of LED profile the additional expense is 15-25 euros, negligible compared to the value of the overall work and the cost of a possible return for repair.
Finishing plaster: fine skim coats
For subsequent finishing coats, after the fiber-reinforced base coat, fine skim plasters with grain size less than 0.1 mm are used. The fine grain size allows obtaining perfectly smooth planes without having to sand aggressively, reducing the risk of damaging the profile diffuser with abrasive paper.
Recommended products: Knauf Fill&Finish Light, Rigips Rimix Light, Saint-Gobain Adamant Extra Fine. They must be applied in thin coats of 0.5-1.0 mm thickness, never in a single thick layer, to avoid differential shrinkage that produces superficial cracks. They are generally available in ready-to-use versions, in 20 kg buckets, with storage after opening of 4-6 weeks in a dry environment.
Support reinforcing mesh
Even when using fiber-reinforced plaster, it is good practice to add a fiberglass reinforcing mesh on the edges of the profile, 5-8 cm wide, which bridges the profile to the surrounding plasterboard. The mesh creates an additional mechanical reinforcement that further reduces the risk of cracks, particularly useful on long stretches (over 3 meters) and in environments with structural vibrations.
The mesh to use is the self-adhesive fiberglass mesh 8×8 mm, such as Vetrex, Knauf Autoban, Fassa Bortolo Retevet. It is applied directly on the plasterboard, straddling the edge of the profile, before the first coat of plaster. It must be extended for at least 4-5 cm on the plasterboard and 1-2 cm on the profile (when compatible with the profile geometry).
Primers and adhesion foundations
In some cases it is useful to apply an adhesion primer between the aluminum of the profile and the plaster, to improve grip in critical situations. It is not always necessary, but it is recommended when the LED profile is particularly exposed to thermal variations (near air conditioning vents, in humid environments such as bathrooms). The primer to use is the universal one for metal surfaces, such as Fassa Fondo Universale Adhesion, applied with a brush on the edge of the profile before the first coat of plastering.
Protective tape for the diffuser
A material often overlooked but fundamental is the high-quality masking tape to protect the diffuser during plastering. The correct tape is that for precision painting, 25-38 mm wide, with low-residue adhesive and clean removal capacity even after 24-48 hours of application. Recommended products: Tesa Precision Mask, 3M ScotchBlue 2093, Kip Fineline Blue.
Generic use adhesive tape (the brown-yellow one) is absolutely not recommended: it leaves sticky residues on the diffuser that become visible when the light is turned on as dark spots, and removal can damage the polycarbonate diffuser. The extra cost of quality tape is a few euros for an entire construction site, while removing adhesive residues from an already installed diffuser can take hours of work.
Drywall installer equipment for LEDs
Plastering LED profiles requires some specific equipment that the traditional drywall installer might not have as standard equipment. Let's see the list of minimum tools to work correctly with LED profiles in plasterboard.
Precision spatulas
Traditional drywall spatulas (10, 15, 20, 25 cm) remain fundamental, but for fine plastering around LED profiles narrower precision spatulas with a perfectly straight edge are needed. The most useful are 5, 8 and 12 cm flexible stainless steel spatulas, with an ergonomic handle. Reference brands: Hyde, Kraft Tool, Marshalltown. The cost is 25-45 euros per piece, but they are investments that last decades if cleaned properly after use.
Checking straightedge
A 2-meter aluminum straightedge is essential for checking the flatness of both the seat before installation and the plastering during and after application. The straightedge must have a certified straightness tolerance of less than 0.5 mm over 2 meters, not the cheap straightedges for generic construction sites. Recommended brands: Stabila, Sola, BMI, with costs of 45-90 euros for a professional straightedge.
Fine-grit abrasive paper
For finishing after the last coat of plaster, 220-280 grit abrasive paper is used, never more aggressive grit because it risks damaging the diffuser when sanding gets close to the profile. Silicon carbide paper in self-adhesive sheets for electric sanding block is preferable, for uniformity of the result. Manual sanding block should only be used for detail finishes in corners and intersections.
Vacuum cleaner for plaster dust
A professional class M vacuum cleaner (for fine dust) is essential to clean the environment before turning on the lights. Plaster dust that enters the LED profile and settles on the diffuser becomes visible when turned on as spots and shadows, and cleaning requires partial disassembly of the profile. Better to prevent with continuous suction during and after sanding.
Control lighting
The final check of the work must be done with grazing lighting, which highlights any imperfection of the plastered plane. The simplest way is to use a powerful LED flashlight (600-1200 lumens) placed grazing to the plane, or — much better — an LED work lamp on a tripod placed at 30-45° with respect to the plastered plane. Only with grazing lighting can you see the imperfections that will then become evident when the client turns on the lights in their environment.
Step-by-step plastering procedure
We come to the operational heart of the guide: the complete procedure for plastering a recessed LED profile in plasterboard, step by step, with the indicative times for each phase. The procedure is designed for high-end trimless profiles, with adaptations indicated for traditional trim profiles.
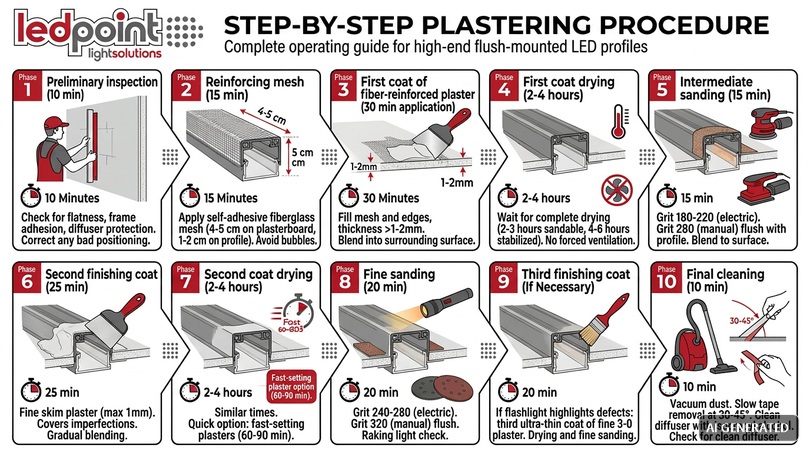
Phase 1 — Preliminary check (10 minutes on a 3-meter stretch)
Before starting any plastering operation, verify that the profile has been installed correctly. Check the flatness of the seat with a straightedge, the adherence of the profile to the framing, the correct protection of the diffuser with masking tape. If the profile is not flush with the surrounding plasterboard — a frequent condition when installation was rushed — disassemble it and reposition it before starting plastering. Trying to "recover" a poorly installed profile with additional amounts of plaster always produces inferior results.
Phase 2 — Application of reinforcing mesh (15 minutes)
Apply the self-adhesive fiberglass mesh on the edges of the profile, centered on the joint between profile and plasterboard. The mesh must extend 4-5 cm on the plasterboard and 1-2 cm on the profile (if the profile geometry allows it). Press well with a wide spatula to ensure complete adhesion, avoiding bubbles or creases. The mesh must rest flat and uniform.
Phase 3 — First coat of fiber-reinforced plaster (30 minutes application)
Prepare the fiber-reinforced plaster by strictly following the water/powder proportions indicated by the manufacturer, mixing with a drill and mixer until a homogeneous consistency is reached. Apply the first coat over the entire mesh and on the edges of the profile, with a 15-20 cm wide spatula, completely filling the thickness of the mesh and bringing the plaster to blend with the plane of the surrounding plasterboard.
The first coat must not be finished level with the final plane: leave a plaster thickness 1-2 mm greater than the final plane, which will then be reduced with sanding and subsequent coats. Remove any excess plaster on the edges of the profile with a narrow spatula before drying begins, to prevent the hardened plaster from overflowing onto the protective tape.
Phase 4 — Drying of first coat (2-4 hours in normal conditions)
Wait for the first coat to dry completely before proceeding. Drying times depend on ambient temperature and humidity: in standard conditions (20°C, 60% RH) a fiber-reinforced plaster dries in 2-3 hours to be sandable, in 4-6 hours to be completely stabilized. In unheated winter construction sites or in humid environments the times lengthen to 6-12 hours. Do not force drying with fans directed at the joint, because the differential thermal variation can produce cracks.
Phase 5 — Intermediate sanding (15 minutes)
Sand the first coat with 180-220 grit paper on an electric sanding block, reducing the plaster thickness until it blends with the plane of the surrounding plasterboard. Do not reach flush with the profile with the abrasive paper: leave 5-8 mm of space from the profile and manually finish this area with 280 grit paper and a small manual sanding block. Aggressive paper near the profile risks damaging the diffuser or removing the protective tape.
Phase 6 — Second finishing coat (25 minutes)
Apply the second coat with fine skim plaster, in a maximum thickness of 1 mm. The second coat covers the residual imperfections of the first coat and prepares the surface for the final finish. Extend the plaster over a 15-20 cm band centered on the profile, gradually fading towards the surrounding plasterboard to avoid visible "steps".
Phase 7 — Drying of second coat (2-4 hours)
Similar waiting time to the first coat. On construction sites with speed requirements it is possible to use fast-setting skim plasters (such as Knauf Fill&Finish Light Speed) that dry in 60-90 minutes, with a slight extra cost but with the possibility of completing the work in the day.
Phase 8 — Fine sanding (20 minutes)
Final sanding with 240-280 grit paper on an electric sanding block for the area far from the profile, 320 grit manual sanding block for the area flush with the profile. The plane must be perfectly smooth to the touch, without perceptible undulations with the hand running along the joint. The final check is done with a grazing flashlight: any residual defect must be corrected with a third coat of very fine plaster.
Phase 9 — Third finishing coat (if necessary)
If the check with a grazing flashlight highlights residual imperfections, apply a very thin third coat of fine plaster (0.3-0.5 mm thick) on the defective areas. Wait for drying, sand finely. In high-end construction sites with demanding clients, the third coat is almost always necessary to reach the required finish level.
Phase 10 — Final cleaning (10 minutes)
Carefully vacuum all sanding dust from the environment and the LED profile. Remove the masking tape from the diffuser slowly and at a 30-45° angle with respect to the plane, to avoid tearing portions of the freshly finished plaster. If the tape meets resistance, heat it slightly with a hairdryer to soften the adhesive. Clean any adhesive residues with isopropyl alcohol and a soft cloth.
Visually verify that the diffuser is perfectly clean, without plaster dust, without tape residues, without halos. This check must be done before delivering the work to the client, because once the lights are turned on, any imperfection on the diffuser becomes immediately visible and repair requires disassembly of the profile.
Drying and finishing times
The management of drying times is one of the most critical factors for the final result, and it is also the factor that is most frequently sacrificed for construction site delivery needs. Compressing drying times almost always means compromising the result, with consequences that manifest in the following months.
Standard drying times
Below we report the standard drying times of the recommended plasters, in environmental conditions of 20°C and 60% relative humidity (RH). These times must be considered as minimums: waiting longer does not damage, waiting less compromises the result.
| Plaster type | Thickness | Sandable time | Stabilization time |
|---|---|---|---|
| Traditional fiber-reinforced | 2-3 mm | 2-3 hours | 6-8 hours |
| Fast fiber-reinforced | 2-3 mm | 45-60 min | 3-4 hours |
| Traditional fine skim | 0.5-1 mm | 2-3 hours | 4-6 hours |
| Fast fine skim | 0.5-1 mm | 30-45 min | 2-3 hours |
| Thin third coat | 0.3 mm | 1-2 hours | 3-4 hours |
Influence of temperature and humidity
The environmental conditions of the construction site heavily influence the times. For every 5°C below 20°C, drying times lengthen by 25-40%. For every 10% of humidity above 60%, they lengthen by 15-25%. In unheated winter construction sites, with temperatures around 10°C and high humidity, times can triple compared to standards. Schedule LED plastering works preferably in periods of favorable environmental conditions, or turn on heating and dehumidification systems if available.
How to verify that drying has occurred
Before proceeding to the next coat it is essential to verify the actual drying of the previous coat. The correct methods are: visual observation (wet plaster is darker than dry plaster, with a well-visible transition); light touch with finger (dry plaster is cold to the touch, leaves no imprint nor does it come off); sanding test in a marginal point (if the dust comes off easily the plaster is ready, if the plaster rolls up it is still wet).
Differences between trim and trimless profiles
As anticipated in the opening, there are two large families of LED profiles that require different plastering procedures. Let's see the operational differences in detail.
Trim profiles: simplified procedure
Trim LED profiles, with a side fin resting on the plasterboard, require a simpler plastering procedure. Reinforcing mesh is not needed in most cases (the fin itself performs the function of mechanical connection), and plastering is limited to finishing the edge of the fin with the surrounding plasterboard. The procedure essentially reduces to 3 phases: base coat with fiber-reinforced plaster over the fin, sanding, fine finishing coat. Total time for a 3-meter stretch: 60-90 minutes of actual work distributed over 4-6 hours for drying.
Trimless profiles: complete procedure
Trimless profiles completely integrate the profile into the plasterboard plane, without a visible fin. They require the complete 10-phase procedure described in chapter 5, with mandatory reinforcing mesh, three coats of plaster, intermediate sanding. Total time for a 3-meter stretch: 2-3 hours of actual work distributed over 8-12 hours for drying. It is a significantly more demanding job that must be priced accordingly.
When to choose one or the other type
The choice between trim and trimless is generally made by the designer during the specification phase, but the drywall installer can give advice to the client. Trim profiles are recommended for: construction sites with limited budgets, tight delivery times, environments where aesthetics are not a priority (technical rooms, service areas), projects where future disassembly of the profile is planned. Trimless profiles are recommended for: high-end residential, representative environments, architectural projects where the light cut is the protagonist aesthetic element, clients demanding visual quality.
The 10 most frequent errors and how to avoid them
We conclude the operational part with the list of the ten most frequent errors we see made in plastering LED profiles, and the relative technical solution.
Error 1 — Traditional plaster instead of fiber-reinforced
The most widespread error of all. Traditional powder plaster does not have the capacity to absorb differential micro-movements between aluminum and plasterboard, and produces cracks in the joint within 3-9 months of installation. Solution: use exclusively fiber-reinforced plasters for the base coat around the profile.
Error 2 — Seat too wide or too narrow
A seat too narrow forces the profile during installation and deforms it; a seat too wide leaves lateral play which produces cracks. The correct dimensional tolerance is +0.5 / +1.5 mm with respect to the nominal width of the profile. Always check with a digital caliper before installation.
Error 3 — Absence of reinforcing mesh on trimless profiles
Some drywall installers avoid the reinforcing mesh to save time. On trimless profiles it is a guaranteed error: without mesh, joint cracking is almost certain within the year. The mesh costs a few euros per meter and adds 15 minutes to the overall work, an always justified investment.
Error 4 — Poor masking tape
Generic adhesive tape leaves sticky residues on the diffuser, which become dark spots when turned on. Always use professional masking tapes (Tesa Precision, 3M ScotchBlue, Kip Fineline). The extra cost is a few euros for the entire construction site.
Error 5 — Forcing drying times
Applying the next coat before the previous one is completely dry produces poorly adhering coats that detach over time. Strictly respect the indicated drying times, lengthening them in cold or humid environments. If the construction site has tight times, use specially formulated fast plasters.
Error 6 — Aggressive sanding near the profile
Using an electric sanding block with aggressive grit flush with the profile risks damaging the diffuser or tearing the protective tape. Near the profile use only fine-grit manual sanding block (280-320), leaving 5-8 mm of space from the profile for manual finishing.
Error 7 — Failure to clean the diffuser before tape removal
Removing the tape without having first vacuumed the plaster dust brings dust directly onto the diffuser, which is then seen when turned on. Carefully vacuum all the dust, and only then proceed to remove the tape. If possible, vacuum also after removal to capture residual dust.
Error 8 — Plaster overflowing on the edges of the profile
Excessive application of plaster that overflows on the edge of the profile before drying turns into flakes difficult to remove without damaging the diffuser. Remove the overflow with a narrow spatula immediately after application, when the plaster is still soft.
Error 9 — Quality control without grazing lighting
Checking the result only with diffused light does not show the imperfections of the plastered plane, which will then become evident with the LED light on. The final check must always be done with grazing lighting (flashlight or work lamp at 30-45°), which simulates the effect of the LED profile light on the plastered surface.
Error 10 — Delivery without switching on test
Delivering the construction site without having tested the switching on of the LED strip is a serious risk. Before delivering, coordinate with the electrician a switching on test of the profile: any plastering defects visible only with the light on can be corrected before the client detects them.
Quality control and testing
The quality control phase is what distinguishes the professional drywall installer from the amateur. Good quality control takes a few minutes but protects from weeks of returns to the construction site for repairs. Let's see the complete procedure.
Dimensional check
Check with a 2-meter straightedge that the plastered plane is perfectly flush with the surrounding plasterboard, with a maximum tolerance of 0.5 mm on the joint. Check that the diffuser is exactly at the expected level (flush for trimless profiles, protruding 1-2 mm for trim profiles). Greater deviations must be corrected with additional coats of plaster before delivery.
Tactile check
Run your hand along the entire length of the plastered profile: the surface must be perfectly smooth to the touch, without undulations, without steps, without perceptible roughness. Touch is more sensitive than sight to detect micro-imperfections of flatness, and every tactile imperfection becomes visible when the light is turned on.
Check with grazing lighting
The definitive check is done with grazing lighting. Position a powerful LED flashlight (800-1500 lumens) or a work lamp at 30-45° with respect to the plastered plane, and observe the entire length of the profile. Any residual imperfections must be corrected with final coats of fine plaster.
Cleaning check
Visually verify that the diffuser is perfectly clean, without dust, adhesive residues, halos. If possible, request a switching on test of the LED strip before delivery: the light on immediately highlights any residue on the diffuser, allowing intervention before final delivery.
Photographic documentation
Photographically document the finished work, with ambient lighting and with the LED light on. The photos must be sent to the site manager and the client as part of the delivery documentation, together with the technical data sheet of the materials used. This practice protects the drywall installer from future disputes on problems not attributable to the installation work.
How to quote the LED plastering job
We conclude with practical indications to correctly quote the job. The plastering of LED profiles must be priced separately from traditional plasterboard plastering, because it requires specific materials, longer times, and specific professional skills.
2026 reference prices
The indicated prices are indicative, referring to the 2026 Italian market, including materials and labor. They must be adapted to the local reality, to the complexity of the specific project and to one's own commercial positioning.
| Type of work | Price €/linear meter | Indicative time |
|---|---|---|
| Standard trim profile plastering | 12-18 €/lm | 30-45 min/lm |
| Standard trimless profile plastering | 22-32 €/lm | 60-90 min/lm |
| High-end trimless profile plastering | 32-48 €/lm | 90-120 min/lm |
| 90° angular profiles plastering | +35-50% on linear | +40 min per angle |
| Rounded curves plastering | +50-80% on linear | +60 min per curve |
What to include in the quote
The quote must explicitly detail: type and brand of plasters used, presence of reinforcing mesh, number of planned finishing coats, total processing time, guarantee on execution. A detailed quote positions the drywall installer as a professional and justifies prices higher than generic competition.
Contract and guarantee
For high-end jobs it is advisable to stipulate a small written contract specifying the guarantee on execution, typically 2 years on the absence of joint cracks. If during the guarantee period cracks attributable to execution defects manifest, the drywall installer undertakes to repair them without additional costs. This clause positions the service as premium and justifies prices on average 15-25% higher than the competition.
On-site operational checklist
We report the operations verification checklist, designed to be consulted directly on the construction site from the smartphone.
| Phase | Check |
|---|---|
| Before installation | Seat dimension: +0.5/+1.5 mm with respect to the profile |
| Before installation | Seat depth: profile height +0.5/+1.0 mm |
| Before installation | Seat flatness: max 1 mm per linear meter |
| Before installation | Cable routing predisposed |
| Profile installation | Mechanical fixing every 40-60 cm to the framing |
| Profile installation | Diffuser protected with professional tape |
| First plastering | Reinforcing mesh applied (mandatory for trimless) |
| First plastering | Fiber-reinforced plaster used |
| First plastering | First coat thickness 1-2 mm beyond final plane |
| First plastering | Overflows on the profile removed when soft |
| Drying | Standard times respected (min 2-3 hours) |
| Sanding | 180-220 grit paper on electric sanding block |
| Sanding | 280-320 grit manual near the profile |
| Second coat | Fine skim plaster max grain size 0.1 mm |
| Second coat | Max thickness 1 mm, gradual fade |
| Finishing | Third coat if necessary (high-end residential) |
| Finishing | Complete dust vacuuming |
| Finishing | Tape removal at 30-45° with possible hairdryer |
| Check | Dimensional check with 2 m straightedge |
| Check | Tactile check along the entire profile |
| Check | Check with grazing lighting |
| Check | Diffuser cleaning check |
| Check | Switching on test with electrician if possible |
| Delivery | Photographic documentation |
| Delivery | Materials used data sheet delivered to site manager/client |
Frequently asked questions (FAQ)
The questions we most frequently receive from drywall installers on plastering LED profiles, collected in a quick consultation format. Click on each question to expand the detailed answer.
What plaster should I use to plaster an LED profile in plasterboard?For the first coat around the LED profile use exclusively fiber-reinforced joint plaster, never traditional powder plaster. The recommended products are Knauf Uniflott Impregnato, Rigips ProMix Mega or Saint-Gobain Adamant Rapid. For subsequent finishing coats use fine skim plasters with grain size less than 0.1 mm. Traditional plaster does not have the capacity to absorb differential micro-movements between aluminum and plasterboard, and produces cracks in the joint within a few months. |
Is reinforcing mesh needed to plaster LED profiles?Yes, always for trimless profiles (without fin): the 8×8 mm fiberglass reinforcing mesh bridges the profile to the plasterboard and drastically reduces the risk of cracks. For trim profiles with side fin the mesh is not strictly necessary but is still recommended on long stretches (over 3 meters) or in environments with structural vibrations. The mesh costs a few euros per meter and adds only 15 minutes to the work, an always justified investment for the quality of the result. |
How long do I have to wait between coats?In standard conditions (20°C, 60% relative humidity) a fiber-reinforced plaster is sandable after 2-3 hours and is completely stabilized after 6-8 hours. Fast plasters allow reducing times to 45-60 minutes for sanding and 3-4 hours for stabilization. In cold (below 15°C) or humid (above 70% RH) environments times lengthen by 40-100%. Never force drying with direct fans, because it produces differential shrinkage and cracks. |
How do I protect the profile diffuser during plastering?Use exclusively professional masking tapes for precision painting, 25-38 mm wide, with low-residue adhesive. Recommended products: Tesa Precision Mask, 3M ScotchBlue 2093, Kip Fineline Blue. Absolutely avoid generic brown-yellow adhesive tape, which leaves sticky residues on the diffuser visible when the light is turned on as dark spots. The tape must be removed at the end of the work at an angle of 30-45° with respect to the plane, possibly heating it slightly with a hairdryer if it meets resistance. |
What is the dimensional tolerance of the LED profile seat?The profile seat must have a dimensional tolerance between +0.5 mm and +1.5 mm with respect to the nominal width of the profile. A seat too narrow means forcing during installation and damaged plasterboard, a seat too wide means lateral play which produces cracks. The depth of the seat must be equal to the height of the profile plus 0.5-1.0 mm. The flatness of the seat must have a maximum tolerance of 1 mm per linear meter, verified with a 2-meter straightedge. |
Why do cracks form after plastering the LED profile?The most frequent causes of cracks are four: use of traditional plaster instead of fiber-reinforced (most common cause, produces cracks within 3-9 months); absence of reinforcing mesh on trimless profiles; profile seat too wide with excessive lateral play; forcing of drying times with application of the next coat before the complete drying of the previous one. By applying the correct procedure described in this guide, the guarantee of absence of cracks for 2 years is realistic and commercially sustainable. |
How do I clean plaster dust from the diffuser?Prevention is always better than subsequent cleaning. Continuously vacuum during sanding with a professional class M vacuum cleaner, keep the protective tape on the diffuser until the end of all operations, vacuum again before removing the tape. If dust still enters the profile, cleaning is done with a soft microfiber cloth slightly dampened, in difficult cases with 70% isopropyl alcohol. Never use aggressive solvents (acetone, thinners) that permanently opacize the polycarbonate diffuser. |
How much does it cost to quote the plastering of an LED profile?The 2026 reference prices for the Italian market, including materials and labor, are: 12-18 euros/lm for standard trim profiles (time 30-45 minutes/lm); 22-32 euros/lm for standard trimless profiles (time 60-90 minutes/lm); 32-48 euros/lm for high-end trimless profiles with three finishing coats (time 90-120 minutes/lm). Angles and rounded curves add 35-80% on the linear price. They must be adapted to the local reality and to one's own commercial positioning. |
Can I plaster an LED profile without disassembling the LED strip?Yes, but only if the profile is designed for installation with a preinstalled strip and has a removable diffuser. In most cases it is better to plaster the empty profile or with the strip installed but diffuser removed, to better access the edges and protect the strip from any damage. If the strip is already installed and the diffuser is fixed, carefully protect with professional double-strip tape on the edges of the diffuser, and limit the coats of plaster to the strictly necessary area. Coordinate with the electrician for a switching on test at the end of the work. |
Does Ledpoint provide samples to drywall installers?Yes, Ledpoint provides free samples to professional installers registered in the drywall installer support program. The samples include 30-50 cm pieces of each profile in the catalog, for practical installation and plastering tests before real construction sites. The program also includes detailed technical data sheets with specific installation procedures for each profile, free technical training for installation teams, telephone assistance during construction sites. To register for the program contact the technical area at [email protected] or register in the professionals area on the site. |
Ledpoint: your technical ally in every high-end construction site
The plastering of recessed LED profiles in plasterboard is a specialist technical job that is becoming increasingly central in the work of the contemporary drywall installer. Those who master it position themselves on prestigious construction sites, with clients willing to pay margins 20-40% higher than traditional plasterboard jobs. Those who neglect it or execute it approximately are progressively excluded from quality construction sites and remain confined to the market of simpler and less profitable jobs.
The procedure described in this guide is the result of years of collaboration with professional installers and analysis of post-construction disputes. Applying it scrupulously does not require expensive equipment or exotic materials: the right plasters, the right time, the methodicalness of quality control are enough. The difference compared to an approximate job is seen immediately, both visually and commercially in terms of client satisfaction and calls for future jobs.
Ledpoint accompanies professional drywall installers with a dedicated technical support service: complete technical data sheets of each profile with installation and plastering procedures, free samples for on-site tests, technical training for installation teams, telephone assistance in case of operational doubts during work. For information on profiles contact our technical structure at [email protected] or register in the professionals area on the site.
Do you want to improve the yield of your LED construction sites? Download the technical data sheets of Ledpoint profiles for plasterboard or request samples for practical tests. The quality of the Italian drywall installer's work grows when more professionals apply the correct procedures.