






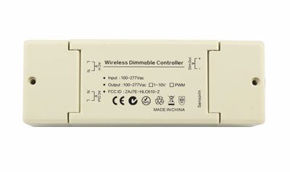
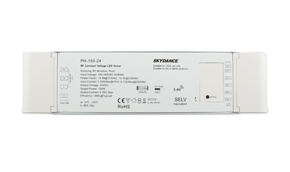

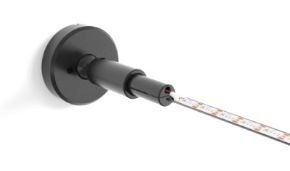
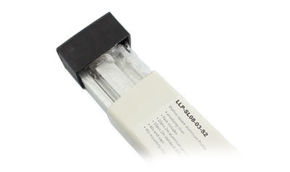
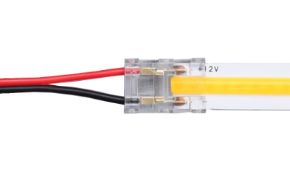
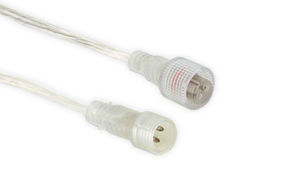
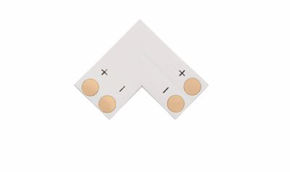
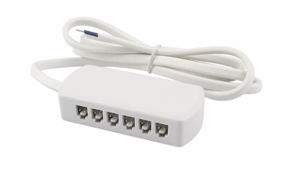

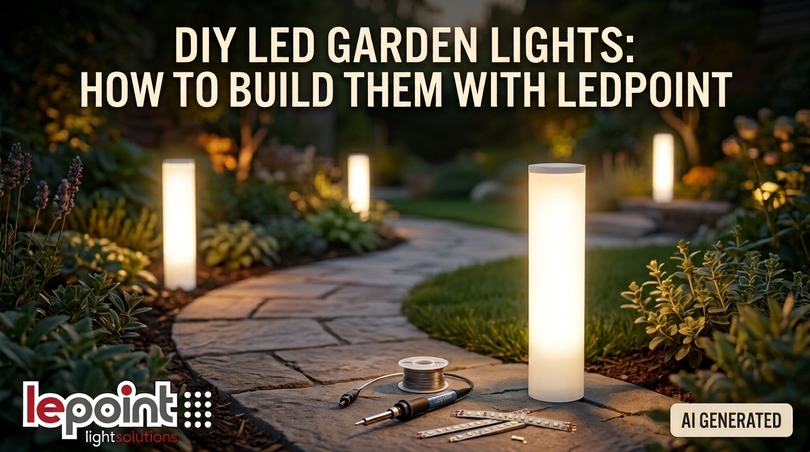
Garden lanterns are small vertical light points, typically 30 to 120 cm high, that illuminate pathways, flower beds, and entrances, ensuring safety and atmosphere. With an IP67 LED strip, an outdoor aluminum profile, and a waterproof 24V power supply, you can build custom, efficient, and durable LED garden lanterns, spending less than a designer model.
When the sun goes down, the garden changes its face: a dark pathway becomes an uncertain route, a well-kept flower bed disappears, and the entrance of the house loses its calling card. This is exactly where garden lanterns come into play, the silent protagonists of residential outdoor lighting. In this guide, we don't just explain how to choose them: we show you, step by step, how to build modern and functional garden lanterns starting from professional components like IP65/IP67 waterproof LED strips, aluminum profiles, waterproof power supplies, and outdoor controllers selected from the Ledpoint catalog.
The result? LED garden lanterns designed to the exact dimensions of your space, with the color temperature you prefer, the brightness you need, and consumption that amounts to just a few euros a year. Whether you are a villa owner, an interior designer looking for a distinctive lighting object, an agritourism manager, an electrical installer, or simply someone who wants a safer entrance without complicating their life, you will find a section dedicated to your needs. Make yourself comfortable: this is the most comprehensive guide you will find on DIY garden lanterns.
In this article...
1. What are garden lanterns (and how they differ from a lamppost)
Before picking up a hacksaw or a soldering iron, it is worth clarifying the vocabulary. Many users indiscriminately search for "lamppost", "lantern", "light post", or "garden light pole", but behind each term there is an object with different functions, heights, and performances. Understanding the difference helps you design your garden lanterns with the right proportions and choose the correct components.
What is a lamppost
The lamppost is a lighting fixture mounted on a pole, designed to illuminate large areas from above. In public lighting, street lamps often exceed 6-10 meters in height; residential garden lampposts, on the other hand, are typically between 1.5 and 3 meters. The upper part of the lamppost, which contains the light source, is called the lamp head, lantern, or luminaire, depending on the style. Incidentally, street lamps are managed by the Municipality or the public lighting service provider, who also bears the energy costs through local taxation: nothing to do with private garden lamps, which are the owner's responsibility.
What is a garden lantern and how garden lanterns differ from bollards
The garden lantern is the "human-scale" version of the lamppost: a low element, normally between 30 and 120 cm, that brings light close to the ground, where orientation and safety are needed. Garden lanterns illuminate the foot traffic of pathways, delimit flower beds and borders, and mark steps and entrances without glaring. When the height drops below 50 cm, they are often referred to as luminous bollards or garden bollards; when the body is a parallelepiped or a cylinder with emission on multiple sides, they are called totems or luminous columns.
How they are made: anatomy of a garden lantern
Whether they are classic garden lanterns or modern garden lanterns, the structure is always composed of four functional blocks:
- Anchoring base: plate with wall plugs, stake to be buried, or concrete plinth.
- Body or stem: the actual "pole", made of aluminum, stainless steel, cast iron, wrought iron, wood, or composite material.
- Light source and optics: light bulb, LED module, or, in our case, an IP67 LED strip with a diffuser.
- Power supply: cable from the mains (230V or extra-low voltage 24V) or a solar panel with a battery.
The beauty of DIY is that each of these blocks can be designed to your needs: an aluminum profile becomes the stem, the LED strip becomes the source, and the polycarbonate diffuser becomes the optic. This is exactly the method we will use in the tutorial.
A look at the market: why LED garden lanterns dominate
Over the last ten years, LED technology has almost completely replaced halogen, incandescent, and discharge lamps in garden lighting. The reasons are measurable: a modern LED reaches an efficiency of 100-150 lumens per watt compared to the 10-15 lm/W of an incandescent bulb, with a useful life of tens of thousands of hours. To this is added the European regulatory framework of ErP ecodesign, which has progressively excluded less efficient sources from the market. For those looking for garden lamps that are economical in operating costs, LED is today the only sensible choice.
| Source | Typical efficiency (lm/W) | Indicative useful life (hours) | Suitable for garden lanterns? |
|---|---|---|---|
| Incandescent | 10-15 | 1,000 | No, off the market |
| Halogen | 15-25 | 2,000-4,000 | Not recommended, high consumption |
| Compact fluorescent | 50-70 | 8,000-10,000 | Poorly suited to cold |
| LED (professional strips) | 100-150 | 30,000-50,000 | Yes, reference solution |
Indicative industry values; for the exact data of each strip, refer to the product data sheet.
2. Why build DIY LED garden lanterns
In stores and online, you can find garden lanterns of every shape and price, from cheap plastic garden lanterns to pieces signed by designers costing hundreds of euros. Why build them yourself? The answer lies in three words: custom size, light quality, and durability. In this section, we analyze the concrete advantages and the limitations to know before starting.
Custom-sized to the centimeter
A mass-produced product has a fixed height, a fixed color temperature, and a fixed emission. With an aluminum profile cut to size and an LED strip cuttable every few centimeters, however, you can build garden lanterns exactly 47 cm high to align with a hedge, or 95 cm to accompany a staircase. Custom design is the true added value of DIY, and it is what an interior designer looks for when integrating light into the architecture of the green space.
Professional light quality
Many cheap garden lanterns mount LEDs with a low color rendering index (CRI), which makes the green of plants look dull and grayish. Professional LED strips offer a CRI higher than 80 or 90, tight binning (as explained in our in-depth article on MacAdam steps and CCT), and consistent color temperatures from one lantern to another. The result is a garden where colors are natural and the light is uniform along the entire path.
Repairability and durability
When a commercial lantern with integrated LEDs fails, it often has to be replaced entirely. In a self-built lantern, every component is standard and replaceable: if one day the power supply fails, you only change the power supply. This is a more sustainable approach, appreciated by those who manage hospitality structures and by those who pay attention to environmental impact.
Limitations to know
DIY requires basic manual skills (cutting, soldering or using connectors, sealing with silicone) and, above all, respect for electrical rules. The extra-low voltage 24V part is within the reach of a prepared hobbyist; the 230V part, however, must be created or certified by a qualified installer. We discuss this in detail in the section dedicated to safety.
| Criterion | Cheap commercial garden lanterns | Designer garden lanterns | DIY LED garden lanterns with Ledpoint components |
|---|---|---|---|
| Height and shape | Fixed | Fixed, wide aesthetic choice | Free, custom-sized |
| Color temperature | Often only 3000K or 6000K | Normally 3000K | From 2200K to 6500K, adjustable CCT or RGB |
| CRI | Often not declared | Generally >80 | >80 or >90 depending on the strip |
| IP rating | IP44 frequent | IP54-IP65 | IP65-IP67 with waterproof strips and power supplies |
| Repairability | Low | Medium | High, standard components |
| Dimming and home automation | Rare | Sometimes | Yes, with controllers and receivers |
| Cost per light point | Low | High | Medium, with professional quality |

3. What light to use in the garden: kelvin, lumen, lux, and watts
The most frequent question for those designing garden lanterns is also the most important: what light to use for the outdoors? Warm or cool? How many lumens are needed? How many watts to light a pathway? In this section, we translate lighting concepts into practical numbers, so you can choose the right LED strip for your garden lanterns with full awareness.
For outdoors, is warm or cool light better?
The color temperature is measured in kelvin (K). Low values correspond to a yellow and enveloping light, high values to a white and technical light. For residential garden lanterns, the best choice is almost always a warm light between 2700K and 3000K: it enhances wood, stone, and terracotta, creates atmosphere, reduces perceived glare, and disturbs nocturnal fauna less. The Ledpoint catalog of 2200-3500K warm white LED strips is the ideal starting point.
Neutral light at 4000K is indicated when a more "functional" rendering is needed, for example on a driveway, an agritourism parking lot, or an outdoor work area; you can orient yourself among the 3800-5300K white LED strips. Cool light above 5500K, on the other hand, is not recommended for private gardens: it flattens colors and gives a "hospital-like" effect. If you don't want to choose once and for all, the CCT dynamic white LED strips allow you to switch from warm to neutral with a remote control.
| Color temperature | Perceived effect | Recommended application for garden lanterns |
|---|---|---|
| 2200-2400K | Amber, similar to a flame | Agritourisms, rustic gardens, areas near naturalistic zones |
| 2700K | Warm, welcoming | Residential pathways, flower beds, terraces |
| 3000K | Balanced warm | Universal solution for modern gardens |
| 4000K | Neutral, crisp | Driveways, parking lots, service paths |
| CCT 2700-6500K | Adjustable | Design projects, hospitality structures with different scenarios |
Lumens and lux: how much light is really needed
The lumen measures the amount of light emitted by the source, the lux measures how much light arrives on a surface (1 lux = 1 lumen per square meter). For garden lanterns, the lux on the ground is what matters most. Technical references for outdoor pedestrian areas, such as the UNI EN 12464-2 standard for outdoor workplaces and the classifications of UNI 11248 for pedestrian areas, indicate modest values: for a residential pathway, an average of 5-15 lux is enough, for steps and entrances 20-50 lux. If you want to calculate precisely, follow our guide on how to calculate the lux of an LED installation.
| Garden zone | Indicative ground illuminance | Recommended flux per lantern | Suggested strip (indicative lm/m) |
|---|---|---|---|
| Border, decorative flower bed | 3-10 lux | 80-200 lm | 200-500 lm/m |
| Pedestrian pathway | 5-15 lux | 150-400 lm | 400-1000 lm/m |
| Steps and level changes | 20-50 lux | 300-600 lm | 800-1500 lm/m |
| Entrance, gate, rest area | 20-50 lux | 400-800 lm | 1000-2000 lm/m |
| Agritourism parking lot | 10-20 lux | 500-1000 lm | 1000-2600 lm/m |
Orientative values for garden lanterns with a height of 50-100 cm and a spacing of 2.5-4 m.
How many watts are needed to light a garden?
With LEDs, the correct question is not "how many watts" but "how many lumens". However, given an average efficiency of 100-130 lm/W, we can translate: a pathway garden lantern requires an average of 2-5 W, an entrance lantern 5-8 W. A medium-sized garden (about 300-500 m²) with 8-12 garden lanterns absorbs a total of between 30 and 60 W: less than an old incandescent light bulb. This is why LED garden lanterns are also economical garden lamps in the most concrete sense of the term.
CRI: why it matters for plants and materials
A high CRI ensures that the green of leaves, the red of geraniums, or the grain of teak appear true to reality. Our article Discovering CRI explains the concept in detail. For garden lanterns that illuminate ornamental plants, we recommend CRI >90; for service pathways, CRI >80 is sufficient. For those who desire an even more natural light, similar to the sun, there is the Sunlike / Sunled line, with a spectrum very close to that of the sun.
Is LED light good for plants?
The nighttime light from garden lanterns, at low intensity and for a few hours, is not enough to make plants grow and, if well managed, does not harm them. The discussion is different for cultivation lamps: those really work because they emit in the blue and red bands that chlorophyll absorbs best. Blue favors compact vegetative development, red favors flowering. Ledpoint offers dedicated strips in the Growing category and an in-depth area on horticultural lighting, useful for greenhouses and winter gardens, not for decorative garden lanterns. To respect natural cycles, the advice is to turn off or dim garden lanterns during the central hours of the night, perhaps with a timer.
4. The most suitable Ledpoint components: strips, profiles, power supplies, controllers
Now that you know what light you need, let's move on to the components. We have analyzed the Ledpoint catalog to identify the products most suitable for building resistant, safe, and good-looking garden lanterns. The evaluation criteria are explicit and we apply them to every product family: IP protection rating, operating voltage, luminous efficiency, uniformity of the light line, ease of cutting and processing, mechanical and UV resistance.
LED strips for outdoors: IP65, IP67, and extruded silicone
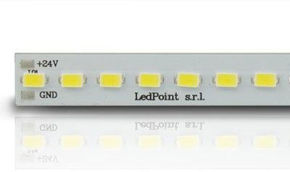
The LED strip is the heart of your garden lanterns. Outdoors, it is subjected to thermal excursions, UV rays, driving rain, and condensation: for this reason, Ledpoint has developed a specific range of outdoor LED strips, with different levels of protection. Let's see the most suitable types.
Extruded silicone IP67 strips
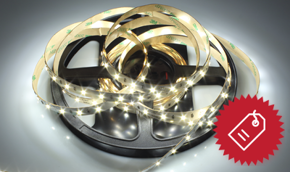
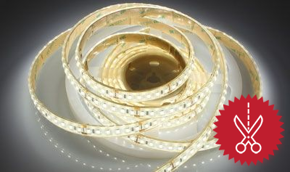
Fully extruded silicone strips are the most robust choice for garden lanterns exposed to the elements. The silicone completely envelops the circuit, resists temporary immersion, and does not yellow like old resins. An example from the catalog is the 2700K 24V 12W/m IP67 solid silicone LED strip, cuttable every 5 cm, with 120 LEDs/m and 3-step MacAdam binning: ideal for garden lanterns with a warm and decorative character. For installations in contact with water or damp soil, extruded silicone is unbeatable.
Neon Flex: the continuous light line
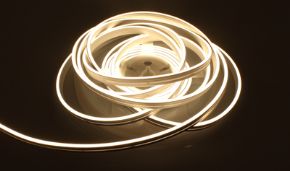
If you are looking for the "blade of light" continuous effect, without visible dots, LED Neon Flex are the most elegant solution for modern garden lanterns. They are flexible silicone tubes with an integrated strip, available with top or side emission. Two practical references:
- The 3x5 mm 4000K 24V 5.5W/m IP65 Neon Flex, with CRI >90, thin and discreet, perfect for fitting into a profile groove.
- The 5x5 mm warm white 3000K 24V 5.5W/m Neon Flex, IP53 as standard and IP65 with closing accessories, with CRI >90 and a soft luminous line.
For more compact sections, it is worth reading about the novelty of Mini Neon Flex, and consulting the 2nd generation Neon Flex category. To properly seal the ends, there are specific Neon Flex accessories: end caps, cable pass-throughs, and mounting clips.
COB strips for outdoors
COB LED strips have chips so close together that they produce a homogeneous line even without a diffuser. For garden lanterns, COBs should be chosen in IP65 version or inserted into a waterproof profile with a sealed diffuser. For scenic projects, for example in an agritourism that wants to change color based on events, the COB Pixel RGB + warm white 3000K IP65 strip combines service warm light with dynamic effects manageable pixel by pixel via SPI controllers.
Why choose 24V strips
For garden lanterns, we recommend 24V LED strips: at the same power, they draw half the current compared to 12V, reducing voltage drop along buried cables and allowing longer runs. For very large gardens, 48V technology can also be considered, as illustrated in the in-depth article on 48V LED strips. 230V strips exist, but for a DIY garden project, Safety Extra-Low Voltage (SELV) is strongly preferable.
| Strip type | Protection | Light effect | Mechanical resistance | Ideal for |
|---|---|---|---|---|
| Fully extruded silicone | IP67 | Soft dotted | Very high | Exposed garden lanterns, damp areas |
| Neon Flex | IP65 (with accessories) | Continuous line | High | Modern and minimal garden lanterns |
| COB IP65 | IP65 | Continuous line | Medium | Garden lanterns with profile and diffuser |
| Pixel / RGBIC IP65 | IP65 | Dynamic, colored | Medium | Hospitality structures, events |
| IP20 strip in waterproof profile | Depends on the profile | Variable | Depends on the profile | Only with truly waterproof profile and closures |
Aluminum profiles: the stem of the lantern
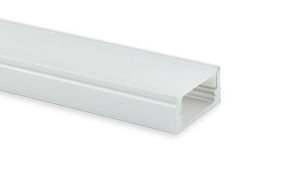
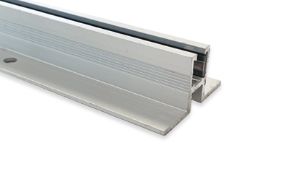
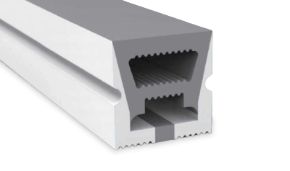
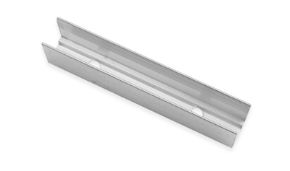
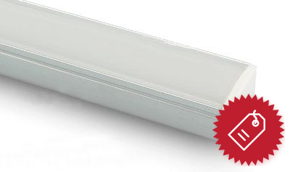
The aluminum profile serves three functions: load-bearing structure, heat dissipator, and optical housing. Ledpoint offers a selection of outdoor profiles, mainly waterproof and architectural profiles, in addition to the entire range of aluminum profiles. Aluminum, especially if anodized, resists corrosion well and can be worked with common tools.
To build garden lanterns, it is advisable to choose profiles with these characteristics:
- Rigid section (at least 15-20 mm per side) for stems up to 60 cm; for greater heights, more generous sections or two coupled profiles are better.
- Opal or satin diffuser that hides the light points and reduces glare: discover Ledpoint diffusers.
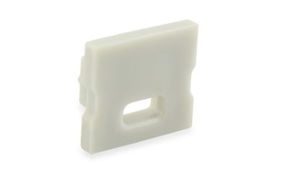
- End caps with and without cable pass-through holes, available in the profile end caps section.
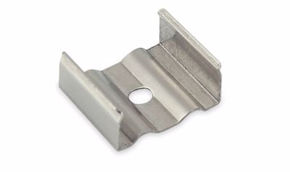
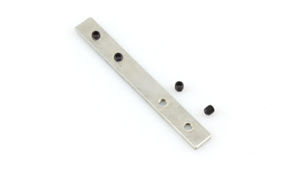
- Mounting accessories such as mounting clips and profile joints to create L or T shapes.
If you are looking for a turnkey solution, the profile and accessory kits already include the profile, diffuser, and caps. For serial projects, such as twenty identical garden lanterns for a resort, Ledpoint also makes customized profiles cut to size. And to contain the budget, take a look at the profiles on offer.
IP67 waterproof 24V power supplies
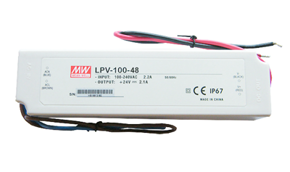
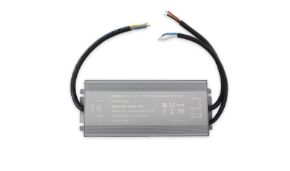
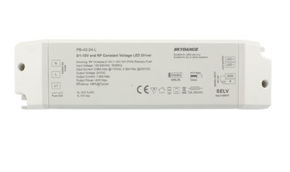
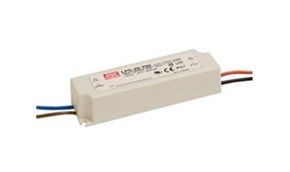
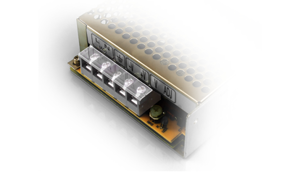
The power supply converts the mains voltage into continuous 24V. For garden lanterns, it is fundamental to choose power supplies with an IP67 protection rating if installed outdoors, or IP20 power supplies placed in a panel or a sheltered technical room. In the catalog, you will find 24V power supplies, filterable by power and IP rating, smart power supplies with integrated control, and power supply accessories. If you use 12V strips, the corresponding category is that of 12V power supplies.
Golden rule: size the power supply with a 20-30% margin on the total power of the strips. If your garden lanterns absorb a total of 48 W, choose a power supply of at least 60 W. Operating at a reduced load, the power supply heats up less and lasts longer.
Controllers, dimmers, sensors, and home automation
A modern garden lantern system does not just turn on and off. With the right components, you can adjust the intensity, program scenarios, and integrate the system into home automation:
- Monochromatic dimmers, receivers, and remote controls to adjust the brightness of fixed white light strips.
- CCT controllers to vary the color temperature from warm to neutral.
- RGB controllers and RGB+CCT for colored effects during parties and events.
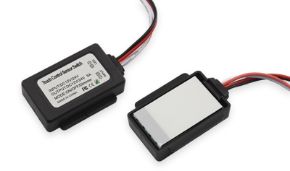
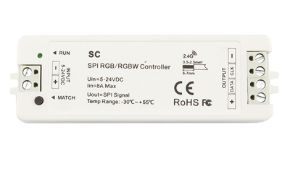
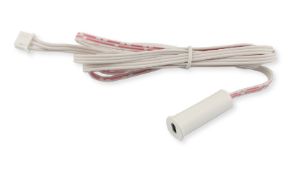
- Sensors for automatic activation upon passage.
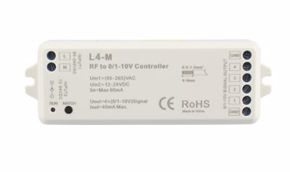
- ZigBee devices for integration with voice assistants and smart home hubs, and 0/1-10V and DMX and DALI interfaces for professional systems.
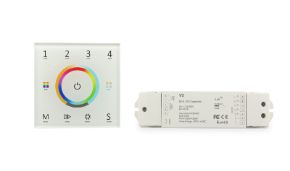
Attention: many controllers and receivers are in IP20 enclosures. They must therefore be installed in a waterproof junction box or inside the house, while only the 24V cables to the garden lanterns go outdoors.
Cables, connectors, and wiring accessories
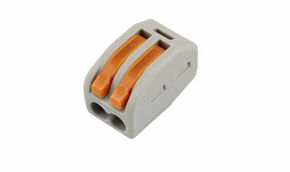
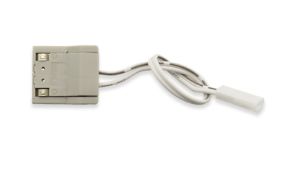
A lantern is only as reliable as its weakest connection. For durable connections, you will need adequately sized cables, connectors, PCB connectors for LED strips, soldered joints, and end caps for LED strips, in addition to the tools for cutting and assembly. Outdoors, a soldered connection protected by adhesive heat shrink tubing is always more reliable than a pressure connector, which should be reserved for connections inside waterproof boxes.
| Component | Key criterion | Recommended value for garden lanterns | Ledpoint category |
|---|---|---|---|
| LED strip | IP, voltage, CRI | IP65/IP67, 24V, CRI >80 (better >90) | Outdoor strips |
| Profile | Rigidity, diffuser, caps | Anodized aluminum, opal diffuser | Outdoor profiles |
| Power supply | IP, power, margin | IP67 if outdoor, +20-30% power margin | 24V power supplies |
| Controller | Protocol, placement | In a waterproof box or indoors | Controllers |
| Cables and joints | Section, insulation | Cable for outdoor installation, soldered joints | Accessories |
5. Four modern garden lantern projects to build
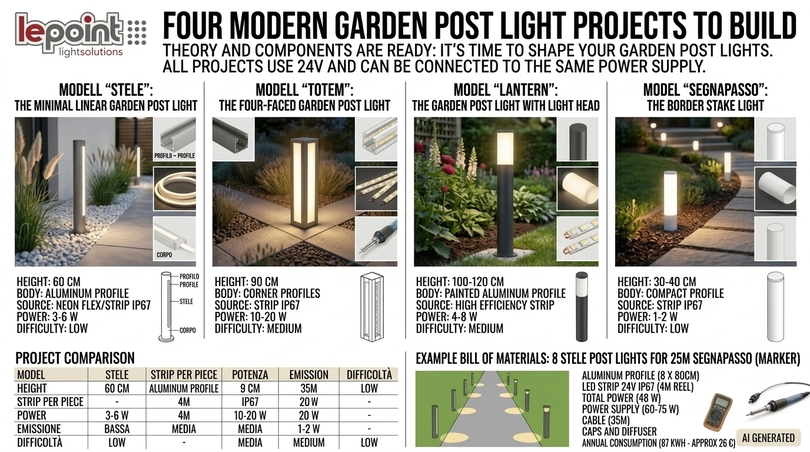
Theory and components are ready: it is time to give shape to your garden lanterns. We have designed four models of increasing difficulty, intended to cover the most common needs, from border path markers to entrance totems. For each, we indicate dimensions, components, estimated consumption, and difficulty level. All projects use 24V extra-low voltage and can be connected to the same power supply.
"Stele" model: the minimal linear lantern
The Stele is the simplest among DIY garden lanterns and also the most requested by landscape architects: a vertical profile with a blade of light on one side, facing the pathway. The effect is clean, contemporary, perfect for modern gardens, white gravel, and ornamental grasses.
Characteristics of the Stele
- Above-ground height: 60 cm (plus 20 cm for burial or plate).
- Body: outdoor aluminum profile with opal diffuser.
- Source: 50 cm of 3000K Neon Flex or 24V IP67 strip.
- Power: about 3-6 W per lantern depending on the strip.
- Difficulty: low.
"Totem" model: the four-sided lantern
The Totem is a luminous parallelepiped obtained by coupling four angular profiles or a square profile with strips on multiple sides. It emits light at 360° and works as a reference point at a pathway intersection, at the entrance of an agritourism, or next to a bench. It is among the most scenic design garden lanterns.
Characteristics of the Totem
- Above-ground height: 90 cm.
- Body: four profiles joined with joints or a square profile, blind top cap.
- Source: 4 sections of 80 cm COB or IP67 strip.
- Power: about 10-20 W.
- Difficulty: medium.
"Lantern" model: the lantern with a luminous head
The Lantern recovers the silhouette of classic garden lamps: a dark stem and a luminous head in the upper part, which projects light downwards. The head is obtained with a short section of horizontal profile or with a ring of Neon Flex around a cylinder. It pairs well with country houses, English gardens, and historic villages.
Characteristics of the Lantern
- Above-ground height: 100-120 cm.
- Body: profile or anthracite painted aluminum tube; head with profile and diffuser.
- Source: 20-30 cm of high-efficiency strip facing downwards.
- Power: about 4-8 W.
- Difficulty: medium.
"Path marker" model: the border bollard
The Path marker is a low luminous bollard, 30-40 cm high, with grazing emission towards the ground. It is used in series along borders, flower beds, and steps, at close distances. It is the most discreet solution for those who wish to light a small garden without "filling" it with objects, and the most economical among the garden lanterns we propose.
Characteristics of the Path marker
- Above-ground height: 30-40 cm, with stake.
- Body: compact profile with waterproof caps.
- Source: 10-15 cm of IP67 strip.
- Power: about 1-2 W.
- Difficulty: low.
| Model | Height | Strip per piece | Indicative power | Emission | Style | Difficulty |
|---|---|---|---|---|---|---|
| Stele | 60 cm | 50 cm | 3-6 W | Frontal | Modern, minimal | Low |
| Totem | 90 cm | 4 x 80 cm | 10-20 W | 360° | Design, scenic | Medium |
| Lantern | 100-120 cm | 20-30 cm | 4-8 W | Downwards | Revisited classic | Medium |
| Path marker | 30-40 cm | 10-15 cm | 1-2 W | Grazing | Discreet, functional | Low |
Example bill of materials: 8 Stele garden lanterns for a 25-meter pathway
Here is an example of a real calculation, useful for understanding quantities and powers. Let's assume a 25-meter pathway with 8 Stele garden lanterns placed 3.5 m apart, alternating on both sides.
| Item | Quantity | Calculation | Notes |
|---|---|---|---|
| Outdoor aluminum profile | 8 x 80 cm = 6.4 m | 60 cm above ground + 20 cm anchoring | 2 m or 3 m profiles, optimizing offcuts |
| 24V IP67 LED strip (12 W/m) | 8 x 50 cm = 4 m | One 5 m reel | Cut only at the indicated cut points |
| Total strip power | 48 W | 4 m x 12 W/m | With a dimmer, it can operate at 50-70% |
| IP67 24V power supply | 1 x 60-75 W | 48 W + 25% margin | Placed in an inspectable pit or indoors |
| Connection cable | about 35 m | Pathway length + risers | Section to be verified with voltage drop calculation |
| Caps and diffuser | 8 blind caps + 8 with hole | 2 per lantern | Seal with neutral silicone |
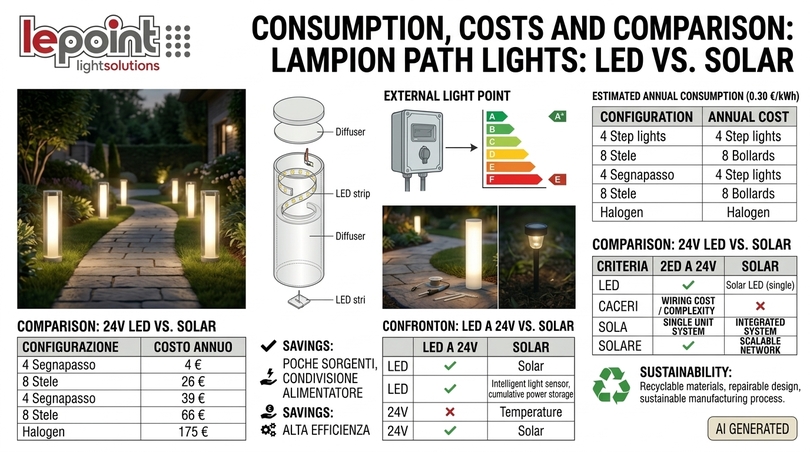
| Annual consumption | about 87 kWh | 48 W x 5 h x 365 days | About €26 per year at €0.30/kWh |
Eight LED garden lanterns for less than 30 euros of energy per year: this is the data that convinces those who want to light the garden spending little without giving up quality.
6. Step-by-step tutorial: cutting, wiring, sealing, and assembly
Here we are at the practical part. In this tutorial, we build a Stele model garden lantern, but the same steps apply, with small adaptations, to the Totem, Lantern, and Path marker. Take the necessary time: care in sealing determines the lantern's durability more than any other factor.
Necessary equipment
- Hacksaw or chop saw with aluminum blade, fine file.
- Heavy-duty scissors or utility knife for the LED strip.
- Soldering iron (25-60 W) with fine tip, flux-core solder.
- Adhesive-lined heat shrink tubing and heat gun.
- Neutral outdoor silicone, transparent, UV resistant.
- Multimeter to verify voltages and polarity.
- Drill, metal and masonry bits, stainless steel wall plugs.
Step 1: design and measure
Draw the position of each lantern, the cable route, and the point where you will place the power supply in plan. Measure the actual distances and note the final height of each garden lantern. Calculate the total power (meters of strip x W/m) and choose the power supply with a 20-30% margin. If the line exceeds 20-25 meters, consider center feeding the run or using two power supplies.
Step 2: cut the aluminum profile
Mark the length on the profile, clamp it in a vise interposing two wood scraps to avoid scratching it, and cut with a fine-toothed blade, proceeding slowly. Remove burrs with a file: a sharp edge can cut the cable sheath over time. If the lantern will be buried, remember to add 15-20 cm to the above-ground length. Drill the cable pass-through hole on the bottom cap, or on the side of the profile near the base, with a diameter just larger than that of the cable.
Step 3: cut the LED strip at the correct points
Every LED strip has cut points marked by a line or a scissor symbol, corresponding to the copper pads. Cut only there: a cut in the wrong position turns off the last segment. In extruded silicone strips, after cutting, remove 5-8 mm of silicone from the end with a utility knife to expose the pads, without cutting the circuit. In Neon Flex, cutting must be done with the manufacturer's specific indications, using the dedicated closing accessories.
Step 4: solder the power cables
Tin the pads and the cable ends first, then join them with a quick touch of the soldering iron. Respect the polarity: positive (+) to positive, negative (−) to negative. Immediately verify with the power supply that the entire section lights up. Alternatively, you can use PCB connectors, but outdoors, soldering is more reliable.
Step 5: seal the ends of the strip
This is the step that separates a garden lantern that lasts one winter from one that lasts ten years. Fill the end of the strip with neutral silicone, insert an LED strip end cap also filled with silicone, and cover the joint with adhesive-lined heat shrink tubing. Repeat on the opposite side with a blind cap. Allow the silicone to cure for at least 24 hours before exposing the lantern to rain.
Step 6: insert the strip into the profile
Clean the inside of the profile with isopropyl alcohol and apply the strip using the adhesive backing. Remember that the adhesive requires an installation temperature of about 21 to 38 °C and reaches full hold after 72 hours: work in a garage or indoors, not outdoors in winter. For Neon Flex, use the appropriate clips. Then insert the pressure-fit or sliding diffuser.
Step 7: close the profile with the caps
Apply a bead of silicone on the edge of the caps and mount them at the ends of the profile: the top cap must be blind, the bottom one with a cable pass-through hole. Fill the hole around the cable with silicone. Always leave the cable pass-through at the bottom: water runs down by gravity and must not find entry points from above.
Step 8: prepare the base and fix the lantern
How are garden lanterns fixed? There are three main methods:
- On a plate with wall plugs, on stone or concrete pavements: use an L-shaped stainless steel bracket screwed to the profile and fixed with stainless steel plugs.
- On a concrete plinth: dig a hole of about 20x20x30 cm, insert a corrugated tube for the cable, pour the concrete, and embed a bushing or bracket into which you will insert the profile. This is the most stable method for garden lanterns over 80 cm.
- With a burying stake: ideal for path markers on lawns and flower beds, allowing you to move the light points.
How to make the base for the lamppost so it doesn't move? The plinth is the definitive solution: provide a layer of draining gravel at the bottom of the hole to avoid water stagnation at the base of the profile.
Step 9: connect to the 24V line and the power supply
Connect the cables of each lantern to the 24V backbone in parallel, never in series, inside IP67 waterproof pits or junction boxes, with sealed joints. Bring the backbone to the power supply and, if provided, to the controller. The connection of the power supply to the 230V mains must be performed by a qualified electrician, except in the case of power supplies equipped with a plug connected to an already compliant outdoor socket.
Step 10: test and adjust
Turn on the system at sunset, observe the rendering from different viewpoints, even from the windows of the house, and adjust the intensity with the dimmer. Measure the voltage at the farthest lantern with the multimeter: if it drops below 22-23V on a 24V line, the voltage drop is excessive and it is advisable to increase the cable section or feed from multiple points.
7. How to bring power to the garden and size the system
How to bring electricity to the garden? How to bury electrical cables? These are questions that recur in every outdoor lighting project, because the system is the least visible but most critical part of garden lanterns. In this section, we distinguish what you can do autonomously from what requires a professional, and we give you the tools to correctly size the line.
Recommended architecture: 230V up to the power supply, 24V in the garden
The safest scheme provides a 230V line protected by a dedicated residual-current device (RCD), which arrives at a power supply installed in a protected point (technical room, IP65 outdoor panel, or inspectable pit). From the power supply onwards, the entire garden operates at 24V: any damage to the cable, for example with a shovel, does not entail the risks of a 230V line.
How to bury cables in the garden
- Lay the cables inside a double-wall corrugated conduit for underground installation, which protects them mechanically and allows replacement.
- For 230V lines, the typical reference depth is about 50 cm, with warning tape 20 cm above the tube; the precise prescriptions are those of the CEI 64-8 standard and must be verified by the installer.
- For SELV 24V lines, the installation can be shallower, but the corrugated conduit remains indispensable.
- Provide inspectable pits at derivations and direction changes.
Voltage drop calculation
In low voltage, the current is high and the cable resistance matters. The simplified formula for a direct current circuit is: ΔV = 2 x L x I x ρ / S, where L is the length in meters, I the current in amperes, ρ the resistivity of copper (0.0175 Ω·mm²/m), and S the section in mm². We recommend staying under a 5% drop, i.e., 1.2V on a 24V line.
| Power on the line (24V) | Current | Max length with 1.5 mm² | Max length with 2.5 mm² | Max length with 4 mm² |
|---|---|---|---|---|
| 24 W | 1 A | about 51 m | about 85 m | about 137 m |
| 48 W | 2 A | about 25 m | about 43 m | about 68 m |
| 72 W | 3 A | about 17 m | about 28 m | about 46 m |
| 96 W | 4 A | about 13 m | about 21 m | about 34 m |
Calculation for a 5% drop (1.2V) with load concentrated at the end of the line; with loads distributed along the path, the real values are more favorable.
How to bring power to the garden without masonry work
If there is already a waterproof outdoor socket protected by an RCD, you can use an IP67 power supply equipped with a plug and start the 24V line to your garden lanterns from there. This is the simplest solution for those who want to install garden lanterns without the intervention of an electrician: no 230V connections to make, only extra-low voltage connections. To fix the lights without nails on walls and fences, use the supplied clips and adhesive or stainless steel cable ties.
Can multiple garden lanterns be connected to the same circuit?
Yes, provided they are connected in parallel and the total power remains within the capacity of the power supply, with the recommended margin. For extensive systems, it is convenient to divide the garden lanterns into multiple groups, each with its own power supply or dedicated branch: this way, a failure does not turn off the entire garden and different scenarios can be created.
8. Where to position garden lanterns: distances and heights
Even the most beautiful lantern performs poorly if it is in the wrong place. Positioning decides whether the garden will result welcoming or glaring, safe or full of shadow zones. Let's see how to distribute garden lanterns along pathways, flower beds, trees, and terraces, with reference distances and heights.
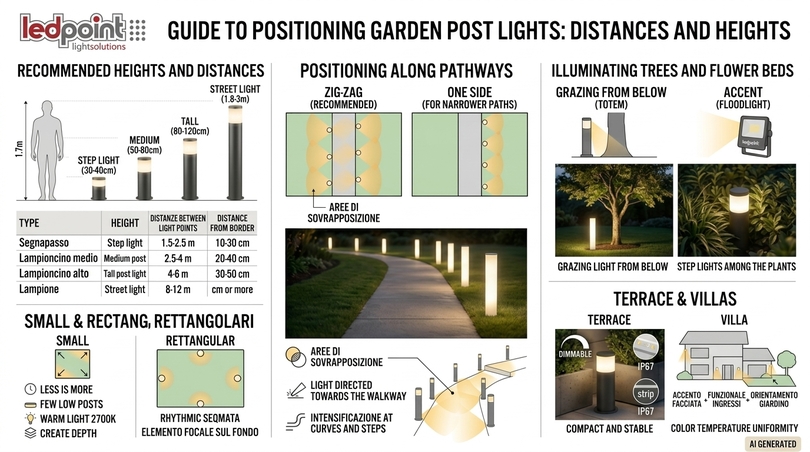
How tall should garden lamps be?
The height should be chosen based on the area to be illuminated and the distance between the light points. As a practical rule, the spacing between two garden lanterns is about 3-5 times their height for garden lanterns with downward emission, and 2-3 times for bollards with grazing emission.
| Typology | Height | Distance between light points | Distance from pathway edge |
|---|---|---|---|
| Path marker / border bollard | 30-40 cm | 1.5-2.5 m | 10-30 cm |
| Medium lantern | 50-80 cm | 2.5-4 m | 20-40 cm |
| Tall lantern / totem | 80-120 cm | 4-6 m | 30-50 cm |
| Garden lamppost | 1.8-3 m | 8-12 m | 50 cm or more |
How to light the garden pathway with garden lanterns
For pathways, the most elegant solution is to alternate garden lanterns on both sides (a "zig-zag" arrangement), thus creating islands of light that overlap without the "runway" effect. On narrow pathways, under 1.2 m, one side is enough. Orient the emission towards the foot traffic, not towards the eyes of the person walking, and intensify the light at curves, steps, and paving changes.
How many garden lanterns are needed for a medium-sized garden?
For a garden of about 300-500 m² with a main pathway of 20-30 meters, an entrance, and a couple of flower beds, you typically need 8-12 garden lanterns: 6-8 along the pathway, 2 at the entrance, and 2-4 among the flower beds or near a tree. The exact number depends on height, luminous flux, and desired illuminance level.
How to light trees and flower beds
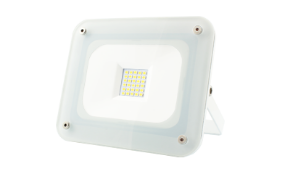
Trees are enhanced with grazing light from below, obtainable with adjustable spotlights or with a Totem lantern placed 1-2 m from the trunk. For flower beds and borders, Path markers are ideal, positioned among the plants so that the light reveals the texture of the foliage without showing the source. For punctual accents on trees, you can add floodlights from the Ledpoint catalog, while for the Christmas atmosphere there are LED trees.
How to light a small garden with few garden lanterns
In a small garden, less is more. A few low garden lanterns, with warm 2700K light and reduced intensity, dilate the perceived space. Avoid homogeneous light everywhere: alternate illuminated zones and shadow zones to create depth. A single Totem in a corner and two Path markers along the path are often sufficient.
How to light a rectangular garden
In rectangular gardens, it is convenient to emphasize the long axis with a rhythmic sequence of garden lanterns and close the perspective with an illuminated focal element at the back, such as a tree, a fountain, or a green wall. In this way, the eye is guided and the garden appears deeper.
What lights to put on the terrace
On the terrace, terrace lanterns must be compact and stable: the Path marker mounted on a weighted plate or fixed to planters is perfect. Use 2700K, dimmable light, and prefer IP67 strips even under a roof, because nighttime condensation is as insidious as rain.
How to light the exterior of a villa or house
For the exterior of a villa, reasoning is done by levels: accent light on the facade, functional light on entrances, orientation light in the garden with garden lanterns. The latter unite the different levels and accompany the guest from the gate to the door. A uniform color temperature between the facade and the garden lanterns is fundamental for a coherent effect.
9. Sensors, timers, dimmers, and home automation
Leaving garden lanterns on all night at maximum power is a waste of energy and a contribution to light pollution. With the right automation, you can have light when needed, as much as needed, without thinking about it. Let's see the solutions from the simplest to the most advanced.
Dusk switch and timer
The dusk switch turns the system on at sunset and off at dawn; combined with a timer, it allows scenarios like "turn on at sunset, turn off at midnight". It must be installed on the 230V line upstream of the power supply, by an electrician. It is the ideal solution for those who want garden lanterns that work on their own, without remote controls or apps.
Garden lanterns with motion sensors
Garden lanterns with motion sensors turn on only upon passage: excellent for secondary pathways, service areas, and little-frequented entrances. With Ledpoint sensors, you can also achieve two-level operation: low courtesy light always on and full power upon detection.
Dimmers and remote controls for garden lanterns
With a monochromatic receiver and a remote control, you adjust the intensity of the garden lanterns from the sofa. Do garden lanterns with warm light and adjustable intensity exist? Yes, and it is precisely the 2700-3000K strip + dimmer combination that allows it. Dimming to 50% reduces consumption by about half and extends the life of the LEDs.
Dynamic white and color
With CCT strips and the respective CCT remote controls, you switch from the amber light of summer dinners to neutral light for cleaning operations. With RGBCCT strips, color is added for parties and events.
Home automation and smart control
Which garden lanterns are compatible with sensors and home automation systems? Those based on low-voltage strips and standard controllers. With ZigBee devices and smart power supplies, you integrate garden lighting into apps and voice assistants; with the DALI protocol or 0/1-10V interfaces, you integrate it into building automation systems. For an in-depth look at the protocol, see the Zigbee entry. Ledpoint also collaborates with the Skydance ecosystem for advanced control.
| Control system | Convenience | Energy saving | Complexity | Ideal profile |
|---|---|---|---|---|
| Manual switch | Low | Depends on the user | Minimal | Second homes |
| Dusk switch + timer | High | High | Low | Retirees, villas |
| Motion sensor | High | Very high | Low | Service pathways, entrances |
| Dimmer with remote control | Medium | High | Low | Families, terraces |
| ZigBee / smart | Very high | Very high | Medium | Smart homes, designers |
| DALI / DMX | Very high | Very high | High | Hotels, agritourisms, architectural projects |
10. Consumption, costs, and comparison with solar garden lamps
How much does a garden lamppost cost? How much does it cost to light a garden? Is solar worth it? These are the questions that decide the purchase. In this section, we line up concrete numbers to compare DIY LED garden lanterns, commercial garden lanterns, and solar garden lamps, in terms of initial cost, consumption, and performance over time.
How much do LED garden lanterns consume
The calculation is simple: power (kW) x hours of operation x days. With an assumed energy cost of €0.30/kWh:
| Configuration | Total power | Hours per day | kWh/year | Indicative annual cost |
|---|---|---|---|---|
| 4 Path markers | 6 W | 6 | about 13 | about €4 |
| 8 Steles | 48 W | 5 | about 88 | about €26 |
| 8 Steles dimmed to 60% | 29 W | 5 | about 53 | about €16 |
| 12 mixed agritourism lanterns | 90 W | 8 | about 263 | about €79 |
| Comparison: 8 x 40W halogen lamps | 320 W | 5 | about 584 | about €175 |
How much do garden lamps and lanterns cost
Market prices vary greatly. In general, cheap garden lanterns start from a few euros for plastic solar models, mid-range electric models are placed between 40 and 150 euros, while designer garden lamps can exceed 300-500 euros per light point. A DIY LED garden lantern with professional components has a material cost that depends on the length of the strip and profile, but the cost per light point drops significantly as the number of garden lanterns increases, because the power supply and controller are shared. To the materials, the cost of electrical line installation must be added, if necessary.
How much does an outdoor light point and a garden system cost
The cost of an outdoor light point depends above all on the works: excavation, conduit, pits, line from the panel, RCD. These are the items, more than the lantern itself, that determine the budget. Designing a single 24V backbone from the start reduces excavations and costs compared to bringing 230V to each lamp. A 3-meter pole or a street lamp have completely different costs and structural constraints: tall poles require dimensioned plinths and static checks.
Solar or electrically powered garden lanterns?
This is one of the most common doubts. Solar garden lamps do not require cables and are very easy to install, but they have objective limits: modest luminous flux, reduced autonomy on cloudy days and in winter, batteries that lose capacity over time. Solar garden lamps typically last a few seasons, and batteries need to be replaced approximately every 1-3 years depending on the technology and exposure.
| Criterion | Solar garden lanterns | 24V LED garden lanterns |
|---|---|---|
| Installation | Immediate, no cables | Requires cable laying and power supply |
| Brightness | Low, often decorative | From decorative to functional |
| Winter autonomy | Reduced | Constant, all year round |
| Energy cost | Zero | A few euros per year |
| Maintenance | Battery replacement, panel cleaning | Minimal |
| Duration | A few seasons | Many years |
| Control | Limited | Dimmers, sensors, home automation |
| Indicated for | Decoration, areas without power | Pathway safety, hospitality structures |
Are solar lamps sufficient for a hospitality structure? Rarely: for paths frequented by guests, reliable light every night of the year is needed, which only mains power guarantees. Solar remains a good answer to the question "how to light the outdoors without power", for example in a remote corner of the park.
How to light the garden spending little
- Use few well-positioned sources instead of many weak sources.
- Share a single power supply among multiple garden lanterns.
- Choose high-efficiency strips (over 120 lm/W) and work dimmed.
- Automate with timers or sensors.
- Take advantage of LED strips on offer and LED strip offcuts, perfect for Path markers that require short sections.
Sustainability and disposal
Which garden lanterns are the most energy-efficient? LED ones with high luminous efficiency, dimmed and automated. From an environmental point of view, materials also matter: aluminum is infinitely recyclable without loss of quality, and the modularity of DIY allows replacing only the faulty component. At the end of their life, strips, power supplies, and batteries of solar models are WEEE waste and must be taken to recycling centers or returned to the retailer, never thrown in unsorted waste.
11. Materials, IP rating, and weather resistance
Rain, frost, summer sun, automatic irrigation, salt in coastal areas: the outdoors is a hostile environment for any electrical appliance. Choosing the right materials and the correct IP protection rating is what makes garden lanterns resistant to rain and durable over time.
What the IP rating means
The IP code consists of two digits: the first indicates protection against solids (dust), the second against liquids. For garden lanterns, the minimum recommended is IP65, the ideal is IP67, especially for parts close to the ground where water accumulates.
| IP rating | Protection | Use in garden lanterns |
|---|---|---|
| IP20 | No water protection | Only for components indoors or in panels |
| IP44 | Water splashes | Covered areas, not recommended on the ground |
| IP54 | Dust and splashes | Under porches and roofs |
| IP65 | Total against dust, water jets | Minimum recommended for exposed outdoors |
| IP67 | Temporary immersion up to 1 m | Ideal for garden lanterns and outdoor power supplies |
| IP68 | Prolonged immersion | Fountains, swimming pools, ponds |
Aluminum, stainless steel, cast iron, wrought iron, wood
- Anodized or painted aluminum: lightweight, corrosion-resistant, excellent heat dissipator. It is the material of Ledpoint profiles and the best choice for modern garden lanterns.
- AISI 316 stainless steel: indicated in marine areas, for screws and brackets.
- Cast iron and wrought iron: typical of classic garden lamps, heavy and subject to rust if not treated.
- Wood: warm and natural, suitable for rustic contexts, but requires periodic treatments.
- Polycarbonate and silicone: for diffusers and protections, provided they are stabilized against UV rays.
Operating temperatures
Many LED strips have a declared operating range such as -10 °C ~ +45 °C. In climates with harsh winters or scorching summers, it is convenient to verify the data in the technical sheet, prefer profiles that dissipate heat well, and do not install dark garden lanterns in full sun without ventilation.
12. Styles and design: modern, minimal, classic, rustic
Light is nocturnal architecture. Garden lanterns must dialogue with the style of the house, the materials of the paving, and the type of vegetation. This section is designed particularly for interior designers and landscape architects, but offers useful ideas to anyone who wants a coherent and refined result.
Modern and minimalist garden lanterns
Clean lines, thin sections, anthracite, matte black, or natural aluminum finishes, continuous blade of light. The Stele with Neon Flex is the archetype of the modern garden lantern: it disappears by day and draws the path by night. Pair it with light gravel, brushed concrete, corten, and ornamental grasses.
Designer garden lanterns for residential projects
For high-level projects, the four-sided Totem, made with customized profiles and satin diffusers, becomes a sculptural object. The most elegant finishes for a contemporary garden are bronze anodized aluminum, micaceous black, and anthracite gray, always with 2700-3000K light and CRI >90. The possibility of adjusting intensity and color temperature allows the designer to tune the scene for the client.
Classic garden lamps revisited in LED key
Those who love classic garden lamps, in cast iron or wrought iron, can reinterpret them with the Lantern: dark stem, luminous head, and 2200-2700K warm light that recalls a flame. Alternatively, LED components can be used as spare parts for existing garden lamps, replacing the old bulb with an efficient source: an intelligent solution to recover vintage lamps. For source replacement, you can also consult the light bulbs and spotlights category.
Rustic garden lanterns for agritourisms and country houses
In rural contexts, the combination of aluminum profile and natural claddings, such as treated wood slats, rope, or stone, works well. Amber light at 2200-2400K respects the natural atmosphere and disturbs insects and nocturnal fauna less than white light.
How to match garden lanterns to the style of the house
| Architectural style | Recommended model | Finish | Color temperature |
|---|---|---|---|
| Contemporary, minimal | Stele, Path marker | Matte black, anthracite, natural aluminum | 3000K |
| Designer villa | Totem, Stele | Bronze, micaceous black | 2700-3000K or CCT |
| Classic, liberty | Lantern | Dark green, black, burnished brass | 2200-2700K |
| Rustic, farmhouse, agritourism | Lantern, Totem clad in wood | Corten, wood, stone | 2200-2400K |
| Mediterranean, coastal | Stele, Path marker | White, sand, 316 stainless steel | 2700-3000K |
13. Safety and regulations
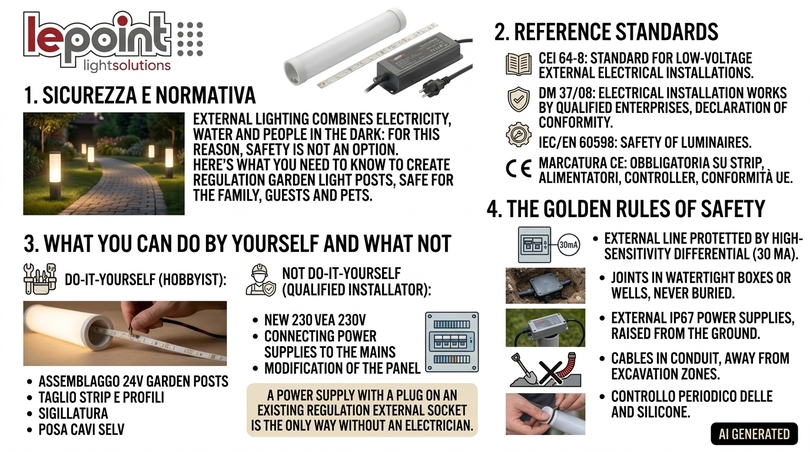
Outdoor lighting combines electricity, water, and people walking in the dark: for this reason, safety is not optional. Here is what you need to know to build compliant garden lanterns, safe for the family, guests, and pets.
Reference standards
- CEI 64-8: the standard for low-voltage electrical installations, with a section dedicated to outdoor systems.
- DM 37/08: establishes that work on building electrical systems must be performed by authorized companies, which issue the declaration of conformity.
- IEC/EN 60598: the reference standard for the safety of lighting appliances.
- CE marking: mandatory on strips, power supplies, and controllers, attesting compliance with European directives.
What you can do yourself and what not
Assembling 24V garden lanterns, cutting strips and profiles, sealing, and laying SELV cables are activities within the reach of an attentive hobbyist. Creating a new 230V line, connecting power supplies to the mains, or modifying the panel are works reserved for an authorized installer. If you want to avoid the electrician altogether, the only way is a power supply with a plug connected to an existing and already compliant outdoor socket.
The golden rules of safety
- Outdoor line always protected by a high-sensitivity residual-current device (30 mA).
- Joints only in waterproof boxes or pits, never buried without protection.
- IP67 power supplies if outdoors, positioned raised from the ground.
- Cables in conduit, away from frequent digging areas like vegetable gardens and flower beds to be tilled.
- Periodic check of gaskets and silicone.
14. Maintenance, cleaning, and winter protection
One of the advantages of LED garden lanterns is reduced maintenance. Reduced, however, does not mean none: a few simple seasonal checks preserve brightness, aesthetics, and safety for many years. Here is how to clean garden lamps and how to protect them during winter.
How to clean garden lanterns
Use a soft microfiber cloth with warm water and neutral soap. Avoid solvents, alcohol on polycarbonate diffusers, and high-pressure washers, which can force the gaskets even on IP65 appliances. To polish aluminum garden lamps, a specific non-abrasive metal product is enough; on stainless steel, use dedicated detergents.
Seasonal checks on garden lanterns
| When | Check | Why |
|---|---|---|
| Spring | Clean diffusers, check silicone and caps | Remove pollen and winter residues |
| Summer | Pruning of vegetation around garden lanterns | Avoid shadows and overheating |
| Autumn | Leaf removal, check pits | Prevent water stagnation |
| Winter | Check fixings after frost | Frost can lift stakes and bases |
How to protect garden lanterns during winter
With IP67 components and properly made sealings, garden lanterns can remain installed all year round. Useful precautions: ensure the base does not remain immersed in stagnant water, avoid piling shoveled snow on the light points, and verify that the pits are draining. Solar models, on the other hand, benefit from frequent panel cleaning and, in harsher climates, storing the batteries indoors.
Replacement of garden lantern components
In DIY garden lanterns, there are no "light bulbs" to change: if a section of strip fails, you replace the section; if the power supply fails, you change the power supply. This is the most economical and sustainable way to manage outdoor lighting in the long term.
15. Mistakes to avoid
We have collected the most common mistakes we see in garden lighting projects, both DIY and professional. Avoiding them makes the difference between a suggestive garden and a glaring one, between a system that lasts years and one that fails at the first storm.
Garden lantern design mistakes
- Too much light: lighting the garden like a parking lot annihilates the atmosphere and wastes energy.
- Glare: visible sources at eye level, without a diffuser, make the path less safe, not more.
- Mixed color temperatures: 3000K garden lanterns next to 6000K spotlights create a messy effect.
- Irregular distances: leave dark zones exactly where light is needed.
Garden lantern installation mistakes
- Using IP20 strips outdoors without a truly waterproof profile.
- Hasty sealings: uncured silicone or caps without silicone are the primary cause of failure.
- Undersized power supply or installed in a flood-prone spot.
- Insufficient cable section, with garden lanterns getting progressively dimmer towards the end of the line.
- Series connections instead of parallel.
- Cables buried without conduit, impossible to replace.
Management mistakes
- Leaving the system on all night at maximum power.
- Neglecting gasket maintenance.
- Ignoring the impact on fauna and neighbors: the light must stay in your garden, not enter other people's windows.
16. Lanterns or alternatives: spotlights, wall lights, bollards, strips
Garden lanterns are not the only tool for lighting outdoor spaces. Spotlights, wall lights, bollards, and linear LED strips each have a precise role. Knowing the alternatives helps compose a complete project, where each source does its job.
| Solution | Main function | Pros | Cons |
|---|---|---|---|
| Garden lanterns | Orientation along paths | Excellent visual comfort, aesthetic presence | Require bases and cables |
| Spotlights and floodlights | Accent on trees and facades | Scenic effects | Risk of glare if poorly oriented |
| Outdoor wall lights | Illumination of walls and entrances | No ground work | Limited to walls |
| Low luminous bollards | Path markers and borders | Discreet | Reduced illuminated area |
| Linear LED strips | Steps, edges, benches, low walls | Invisible integration | Requires a support or profile |
| Solar lamps | Decoration | Zero cables | Weak and inconsistent light |
What to put instead of wall lights
Instead of traditional wall lights, on low walls and under sills, you can use an IP67 LED strip in a profile, which creates a grazing line of light on the wall. This is a modern alternative that integrates perfectly with garden lanterns, because it shares the power supply, color temperature, and controller.
What is the best lighting for the pathway?
The most effective combination is low garden lanterns along the path + LED strips under the steps + an accent spotlight on the focal element. In this way, you obtain orientation, safety, and scenography with contained consumption.
17. Solutions by profile: villa, designer, agritourism, installer
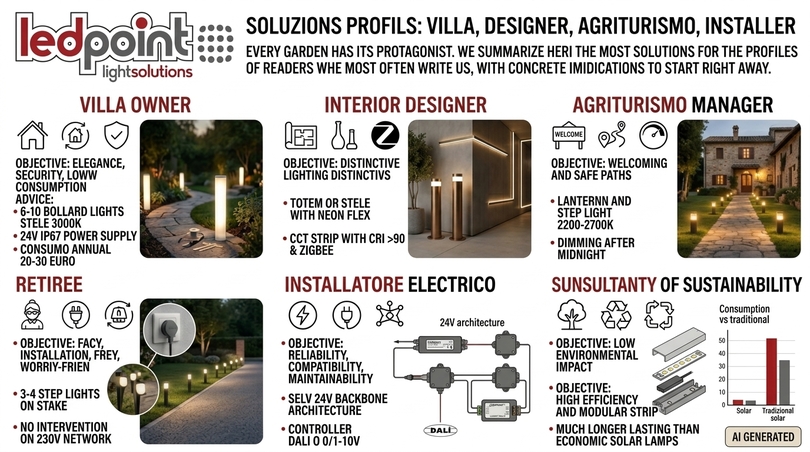
Every garden has its protagonist. We summarize here the most suitable solutions for the reader profiles that most often write to us, with concrete indications to get started immediately.
Villa owner
Goal: elegance, safety, and low consumption. Advice: 6-10 Stele garden lanterns at 3000K along the pathway, 24V IP67 power supply, dusk switch with timer. Annual consumption in the order of 20-30 euros. Materials: aluminum profile and extruded silicone strip, which resist rain and frost better.
Interior designer
Goal: distinctive lighting objects coherent with the architecture. Advice: Totem or Stele with Neon Flex, bronze or black finishes, CCT strip with CRI >90 and ZigBee control. For recurring projects, Ledpoint customized profiles allow creating a line of garden lanterns signed by the studio.
Agritourism manager
Goal: welcoming and safe paths, low management costs. Advice: Lantern and Path marker at 2200-2700K, division into multiple circuits, motion sensors on secondary paths, and dimming after midnight. IP67 components to resist intensive use and weather; standard spare parts to reduce downtime.
Retiree or user desiring simplicity
Goal: easy installation and worry-free management. Advice: 3-4 Path markers on stakes, IP67 power supply with plug connected to an existing outdoor socket, automatic dusk switch. No intervention on the 230V mains, no app to learn: the light turns on at sunset and illuminates the pathway all night with a few watts.
Electrical installer
Goal: reliability, compatibility, maintainability. Advice: 24V SELV architecture with backbone sized for voltage drop, power supplies with a 25% margin, joints in IP67 pits, and DALI or 0/1-10V controllers for integration into the building system. For professional supplies, you can consult the Ledpoint catalogs and check stock availability.
Sustainability consultant
Goal: low environmental impact. Advice: high-efficiency strips, dimming, automation, recyclable aluminum, and modular design. In the overall balance, a well-managed 24V LED system consumes very little and lasts much longer than several generations of cheap solar lamps, reducing electronic waste.
18. Final checklist before purchasing
Before ordering the components for your garden lanterns, review this checklist. It helps you not to forget anything and to compare products with objective criteria.
| Check | Reference value | Done |
|---|---|---|
| Strip IP rating | IP65 minimum, IP67 recommended | ☐ |
| Voltage | 24V (48V for long distances) | ☐ |
| Color temperature | 2700-3000K for residential use | ☐ |
| CRI | >80, better >90 | ☐ |
| Efficiency | >100 lm/W | ☐ |
| Profile | Aluminum, opal diffuser, caps with and without hole | ☐ |
| Power supply | IP67 if outdoor, power +20-30% | ☐ |
| Cables | Section verified for voltage drop | ☐ |
| Control | Dusk switch, timer, sensor, or smart | ☐ |
| Sealing accessories | UV neutral silicone, adhesive heat shrink, end caps | ☐ |
| Fixing | Plinth, plate, or stake, stainless steel hardware | ☐ |
| 230V part | Performed or verified by an authorized installer | ☐ |
What is the best brand for outdoor lighting?
There is no single answer: the best brand is the one that transparently declares technical data (lumens, efficiency, CRI, IP, operating temperature), offers spare parts and assistance, and allows building a coherent system. Ledpoint, a company based in Faenza specializing in LED strips, profiles, power supplies, and controllers, provides complete technical data sheets and consultancy to design custom garden lanterns. If you have a specific project, you can contact the Ledpoint technical team and consult the outdoor lighting section.
19. Technical glossary of garden lanterns
To close the technical part, here is a quick glossary of the terms you will encounter when choosing and building garden lanterns. Keeping it at hand will help you read technical data sheets without doubts.
| Term | Meaning and relevance for garden lanterns |
|---|---|
| Lumen (lm) | Amount of light emitted: in pathway garden lanterns, we typically work between 150 and 400 lm per light point. |
| Lux (lx) | Light arriving on the ground: this is the value that makes garden lanterns safe or insufficient. |
| Efficiency (lm/W) | Lumens produced per watt: the higher it is, the less garden lanterns consume for the same light. |
| Kelvin (K) | Color temperature: 2700-3000K is the reference for welcoming garden lanterns. |
| CRI / Ra | Color fidelity: a high CRI makes plants and materials around garden lanterns appear natural. |
| IP rating | Protection against dust and water: IP67 is the ideal level for exposed garden lanterns. |
| SELV | Safety Extra-Low Voltage: powering garden lanterns at 24V reduces electrical risks. |
| Voltage drop | Voltage loss along the cable: if excessive, the last garden lanterns on the line appear dimmer. |
| Cut point | Position where the strip can be cut without damage: must be respected for every section of the garden lanterns. |
| MacAdam step | Measure of color uniformity between LEDs: tight binning avoids garden lanterns with different shades. |
| Neon Flex | Flexible silicone tube with integrated strip: creates garden lanterns with a continuous light line. |
| Diffuser | Opal or satin screen that hides the light points and reduces glare of garden lanterns. |
| Dusk switch | Sensor that turns on garden lanterns at sunset and turns them off at dawn. |
| Dimmer | Intensity regulator: dimming garden lanterns reduces consumption and glare. |
| Plinth | Buried concrete block that gives stability to taller garden lanterns. |
| Lamp head | Upper luminous part of a lamppost; in the Lantern model garden lanterns, it is made with a profile and strip. |
20. Frequently asked questions about garden lanterns
We have collected the questions we receive most often about garden lanterns, outdoor lamps, and LED garden lighting. Click on each question to read the answer.
Which garden lanterns are most suitable for the home driveway?For the driveway, garden lanterns 50-80 cm high are ideal, with downward emission and 3000K warm light, placed 2.5-4 m apart and alternating on both sides. With 24V IP67 LED strips and an aluminum profile, you obtain uniform, safe light with consumption of a few watts per light point. |
Is it better to choose solar or electric garden lanterns?Solar garden lanterns are convenient because they do not require cables, but they offer little light and reduced autonomy in winter. 24V electric ones guarantee constant light all year round, control with dimmers and sensors, and long duration. For pathway safety, electric is preferable; solar is indicated for decorations or areas without power. |
How many garden lanterns are needed for a medium-sized garden?For a garden of 300-500 m² with a 20-30 meter pathway, you typically need 8-12 garden lanterns: 6-8 along the path, 2 at the entrance, and a few path markers among the flower beds. The exact number depends on the height of the garden lanterns, luminous flux, and desired illuminance level, generally 5-15 lux on paths. |
What IP rating should garden lanterns have?For garden lanterns exposed to the elements, the minimum is IP65, but the ideal is IP67, which also protects against temporary immersion. The same applies to the power supply if installed outdoors. IP20 controllers and receivers must be placed indoors or in waterproof boxes, leaving only the 24V cables in the garden. |
Can I install garden lanterns without an electrician?Yes, if you use a 24V extra-low voltage system with an IP67 power supply equipped with a plug, connected to an outdoor socket already protected by an RCD. Assembly, laying of 24V cables, and fixing are within your reach. Any new 230V line, mains connection, or panel modification must instead be performed by an authorized installer. |
For outdoor lanterns, is warm or cool light better?For residential outdoor lanterns, warm light between 2700K and 3000K is preferable: it creates atmosphere, enhances wood and stone, and reduces glare. Neutral light at 4000K is useful for driveways and parking lots. Cool light above 5500K is not recommended in the garden because it flattens colors. |
How much do LED garden lanterns consume?An LED garden lantern absorbs an average of 2-6 W. Eight 6 W garden lanterns on for 5 hours a day consume about 88 kWh per year, equal to about 26 euros with energy at €0.30/kWh. Dimming to 60% and using timers or motion sensors further reduces consumption. |
How much does a garden lamppost cost?Cheap solar garden lanterns cost a few euros, mid-range electric models 40-150 euros, and designer ones even over 300 euros. In DIY garden lanterns, the cost per light point drops with the number of pieces, because the power supply and controller are shared. Excavation works and the electrical line often cost more than the lantern itself. |
How are garden lanterns fixed?Garden lanterns are fixed in three ways: with a plate and stainless steel plugs on rigid pavements, with a concrete plinth for models over 80 cm, or with a burying stake for path markers on lawns and flower beds. In any case, it is good to provide a corrugated tube for the cable and a layer of draining gravel at the base. |
How to protect garden lanterns in winter?With IP67 components and correct sealings, garden lanterns can remain installed all year round. It is important to avoid water stagnation at the base, not to pile snow on the light points, check fixings after frost, and verify the condition of the silicone and closing caps at the start of the season. |
Can multiple garden lanterns be connected to the same circuit?Yes, by connecting the garden lanterns in parallel on the same 24V backbone and choosing a power supply with a 20-30% margin on the total power. For long lines, the voltage drop must be verified and an adequate cable section chosen; in extensive systems, it is convenient to divide into multiple groups with dedicated power supplies. |
How long do solar lantern batteries last?Solar garden lantern batteries typically last from 1 to 3 years, depending on the technology, number of cycles, and exposure to cold and heat. They must be replaced with equivalent models and disposed of as WEEE at recycling centers or retailers, never in unsorted waste. |
21. Key points about garden lanterns
- Height: garden lanterns typically measure 30-120 cm; path markers stay under 40 cm.
- Light: for residential garden lanterns, the most balanced choice is 2700-3000K with CRI >90.
- Illuminance: 5-15 lux are enough on a pathway; 20-50 lux on steps and entrances.
- Protection: exposed garden lanterns require IP65 or, better, IP67 strips.
- Voltage: 24V SELV garden lanterns are safer and easier to lay than 230V ones.
- Consumption: eight 6 W LED garden lanterns cost about 26 euros a year in energy.
- Distances: the spacing between garden lanterns is about 3-5 times their height.
- DIY: building garden lanterns with Ledpoint components allows free dimensions, professional light, and standard spare parts.
22. Your garden, your light
Building DIY LED garden lanterns means combining the freedom of a custom project with the quality of professional components. With an IP67 LED strip, an outdoor aluminum profile, a waterproof 24V power supply, and a suitable controller, you can create modern, efficient, repairable garden lanterns coherent with the style of your house, spending a few euros a year in energy. Whether you choose the linearity of the Stele, the scenic presence of the Totem, the classic charm of the Lantern, or the discretion of the Path marker, you now have all the tools to design, build, and manage your garden lighting like a professional.
Ready to start? Explore the outdoor LED strips, the outdoor profiles, and the 24V power supplies by Ledpoint, download the technical data sheets from the product pages, and for a custom project, request a consultation or a quote. For further insights, visit the Ledpoint blog.
This article was developed with the support of artificial intelligence and subsequently reviewed, corrected, and validated by the Ledpoint.it technical team, which guarantees its reliability and compliance with official sources.