






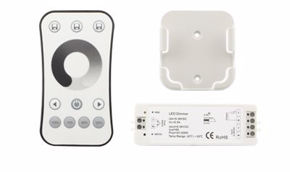
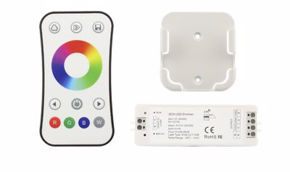
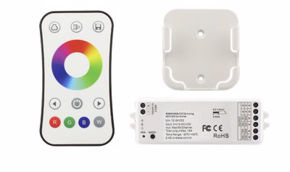
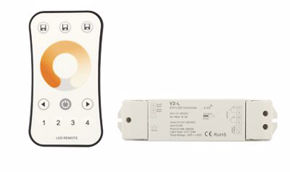
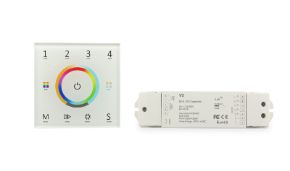
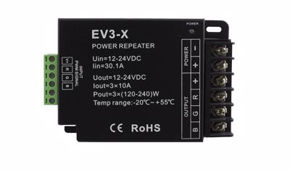
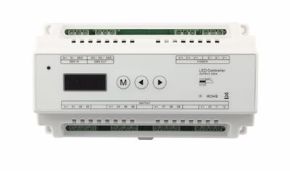
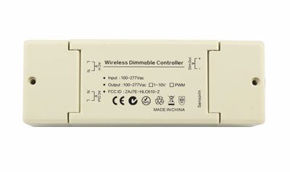
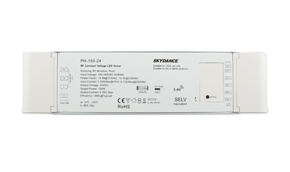
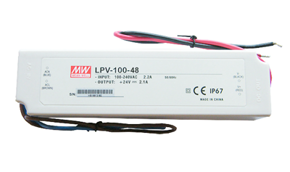
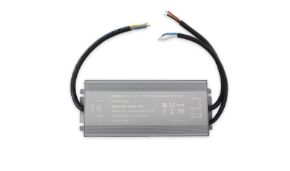
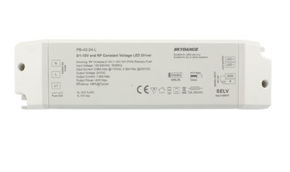
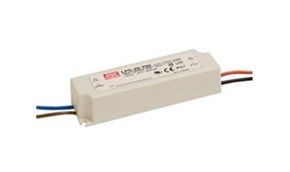
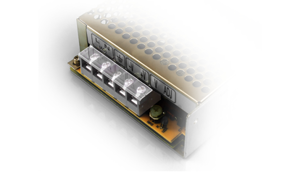



An LED strip power supply is chosen in four steps: matching the strip voltage (12V, 24V, or 48V), power equal to the total watts of the strip plus a 20-30% margin, a suitable control system (TRIAC, Push-Dim, 0/1-10V, DALI, RF, or Smart), and an IP rating consistent with the environment. The rest of this guide explains why, with calculations, tables, and a configurator.
Today we want to support you in understanding how to select the perfect power supply for your LED strips. We will review all types, from 220V/230V dimmers to DALI and 0-10V systems, and provide you with a technical and practical guide to avoid common mistakes and ensure maximum efficiency and longevity of your lighting system. Every choice you read about is designed for the electrician who needs to close a job site without callbacks, for the designer seeking luminous uniformity, for the retailer who must advise the customer at the counter, and for the engineer integrating lighting into home automation.
You will find the difference between a power supply, transformer, and LED driver, the internal operation of a switching power supply, the formula for calculating the power supply for a 5, 10, 15, or 20-meter LED strip, parallel connection diagrams, rules for positioning and hiding the power supply, diagnosis of the most common faults (LED power supply flashing, buzzing, whining, or heating up), and an interactive configurator that, starting from your LED strip data, takes you directly to compatible Ledpoint power supplies.
In this article...
Power supply: the importance of the choice
When designing an LED strip installation, attention often focuses on the light strip itself: its color, LED density, and light quality. However, there is a component just as fundamental, if not more so, that determines the success or failure of the entire system: the power supply. This device, often underestimated, is the beating heart of LED lighting, responsible not only for providing energy but for doing so in a stable, safe, and efficient manner.
Choosing the wrong power supply can lead to a series of problems: annoying flickering, drastic reduction in the useful life of the LEDs, dangerous overheating, and luminous performance well below expectations. In this guide, we will explore every aspect, every parameter, and every option available to help you select the ideal power supply for every possible application, from a home living room to a shop, from an office to an industrial environment.
Why the power supply decides the lifespan of the system
The choice of power supply is never a marginal detail. It is a technical decision that affects light quality, energy consumption, the safety of people and environments, and the overall economic investment. A quality power supply, correctly sized, is an insurance policy on the durability and performance of your LED system. Conversely, a poor-quality or inadequate power supply is the weak link in an otherwise perfect chain, destined to cause malfunctions and costly premature replacements.
In practical job site experience, this is often seen: a good quality LED strip, with LM-80 certified chips, is paired with a cheap power supply without power factor correction and without thermal protections. After a few months, flickering appears, the light changes tone at the end of the line, the power supply heats up and buzzes. The customer attributes the defect to the strip, but the problem is upstream. For an electrician, every return to the job site is an unbilled cost: choosing the right power supply the first time is the easiest way to reduce maintenance time.
What you will find in this guide
We will dive into the world of LED strip power supplies, examining the different product types, output signals, dimming technologies, electrical parameters, and practical considerations for installation. Whether you are a professional installer, a passionate hobbyist, or a private individual who wants to light their home competently, this guide will provide you with the knowledge necessary to make a conscious, technical, and winning choice. Each section opens with a concise answer and continues with details, so you can stop at the level of depth you need.
LED power supply: what it is for and why it is indispensable
Before delving into technical specifics, it is crucial to understand the physical and electrical role of the power supply in an LED strip system. The LED power supply serves to transform the 230V AC mains voltage into a low, stable DC voltage (typically 12V or 24V), the only kind an LED strip can use without being damaged. Without a power supply, a normal low-voltage LED strip connected to a household outlet would burn out in a fraction of a second.
From alternating current to direct current
In the vast majority of cases, LED strips operate at low voltage in direct current (DC), typically 12V or 24V. The Italian and European electrical grid, on the other hand, provides alternating current (AC) at 220-230V with a frequency of 50 Hz. The power supply is the bridge between these two worlds: its primary task is AC/DC conversion, that is, taking the mains alternating voltage, reducing it, rectifying it, and smoothing it, transforming it into a continuous voltage suitable for the operation of light-emitting diodes.
The five functions of a good power supply
Its function goes far beyond simple conversion. A good power supply must also:
- stabilize the output voltage or current, protecting the LEDs from inevitable mains power fluctuations that could damage them;
- filter electrical disturbances present on the line, both to protect the LEDs and to avoid injecting disturbances back into the grid;
- guarantee galvanic isolation between the dangerous mains voltage (230V AC) and the low output voltage (12/24V DC), a fundamental safety requirement;
- operate with maximum possible efficiency, minimizing losses in the form of heat, with direct benefits on the electricity bill and the component's lifespan;
- offer integrated protections against short circuits, overloads, overtemperatures, and overvoltages.
Power supply, transformer, or LED driver: what is the difference?
In common language, the three terms are used as synonyms, and indeed many search for "transformer for LED strips" meaning a power supply. From a technical point of view, however, differences exist, and it is useful to know them when reading a technical data sheet or speaking with a supplier.
The transformer
A transformer in the strict sense is an electromagnetic component that steps down or steps up an alternating voltage: it outputs alternating current. Old toroidal or electronic transformers for 12V AC halogen spotlights are an example. A transformer for halogens is not suitable for an LED strip, because the strip requires stabilized direct current. Today, the transformer is just one of the internal blocks of a switching power supply, where it operates at high frequency and is much smaller.
The power supply
The power supply (in English, power supply unit or PSU) is the complete device that converts mains voltage into a regulated direct voltage. In the world of LED strips, we almost always speak of a constant voltage power supply: it provides fixed 12V, 24V, or 48V, and the strip draws the current it needs.
The LED driver
The LED driver is a power supply specialized for LEDs. Strictly speaking, the term refers to constant current power supplies (350mA, 500mA, 700mA, 1050mA) used for spotlights, COB modules, and power LEDs, but by extension, it is also used for dimmable and intelligent power supplies. When you hear "LED driver power supply" or "LED driver", we are essentially talking about the same object.
| Characteristic | Traditional transformer | Constant voltage power supply | Constant current driver |
|---|---|---|---|
| Output | Alternating voltage (e.g., 12V AC) | Fixed direct voltage (5V, 12V, 24V, 48V DC) | Fixed direct current (350-1500mA) |
| Typical use | Halogen spotlights | LED strips, LED bars, Neon Flex | LED spotlights, COB, power LEDs |
| Load connection | Parallel | Parallel | Series |
| Suitable for LED strips | No | Yes | Only specific constant current strips |
| Galvanic isolation | Yes | Yes (SELV models) | Yes (SELV models) |

How an LED power supply works
Understanding how an LED power supply works helps to correctly interpret technical data sheets and recognize a quality product. Almost all modern LED strip power supplies are of the switching type: instead of stepping down the voltage with a large 50 Hz transformer, they "chop" it into tens of thousands of pulses per second, making the components small, light, and efficient. Let's look at the main blocks, from the 230V input to the output to the strip.
The block diagram of a switching power supply
A switching power supply for LEDs consists of six cascaded stages. This is, in simplified form, the scheme of an LED power supply you will find inside every quality product.
| Stage | Component | What it does | Why it matters to you |
|---|---|---|---|
| 1 | Input EMI filter and fuse | Blocks disturbances entering and leaving the grid | Prevents interference with radio, Wi-Fi, audio systems |
| 2 | Bridge rectifier | Converts AC to pulsating DC | First step of AC/DC conversion |
| 3 | PFC stage | Makes the draw from the grid sinusoidal | High power factor, fewer line losses |
| 4 | High-frequency switch (MOSFET) | Switches voltage at 50-150 kHz | Reduced size and efficiency over 90% |
| 5 | High-frequency isolation transformer | Steps down voltage and separates grid from output | SELV safety on the strip side |
| 6 | Rectifier, output filter, and control loop | Smooths and stabilizes 12V/24V | Low ripple, no flickering |
The feedback loop: the secret to stability
The heart of the power supply is the control loop: a circuit continuously measures the output voltage (or current) and, via an optocoupler that maintains isolation, communicates to the primary circuit to lengthen or shorten the pulses. If you turn on an extra meter of strip, the power supply notices it in a few microseconds and compensates, maintaining exactly 24V. This regulation is what distinguishes a stabilized LED power supply from a simple transformer with a diode bridge.
The role of temperature
Every stage produces a bit of heat. In a power supply with 90% efficiency, 10% of the absorbed power becomes heat to be dissipated through the enclosure. The most sensitive components are the electrolytic capacitors: their life approximately follows the "10-degree rule", meaning it halves for every 10°C increase in operating temperature. For this reason, as we will see, a power supply installed in a ventilated compartment and loaded at 80% lasts much longer than a power supply enclosed in a box and loaded at 100%.
Constant voltage or constant current power supply
This is the first major fork in the road when choosing the type of power supply. Understanding it is essential to correctly match the power source to the LED strip. Standard LED strips want a constant voltage (CV) power supply; spotlights, COB modules, and some professional linear strips want a constant current (CC) power supply. Reversing the two almost always means destroying the LEDs.
Constant Voltage (CV) power supply
These are by far the most common and used for standard LED strips. These power supplies maintain a fixed and strictly constant output voltage (e.g., 12V DC or 24V DC), regardless of the connected load within the declared power limits. LED strips designed to work with this type of power supply have current-limiting resistors built into them or, in more advanced models, small integrated current regulators in series with groups of LEDs. In practice, the strip is built to draw the correct current when the nominal voltage is applied.
The choice is simple: if your LED strip is rated for 12V, you will need a 12V constant voltage power supply; if it is 24V, you will need a 24V constant voltage power supply. The golden rule is: the voltage of the power supply and that of the LED strip must match perfectly. Installation is simple and allows connecting multiple strips in parallel to the same power supply, provided the sum of the powers does not exceed the power supply's capacity.
Constant Current (CC) power supply
These are specific for particular types of LED strips or high-power LED modules that do not have built-in current-limiting resistors. These power supplies maintain a fixed output current value (e.g., 350mA, 700mA, 1050mA), while the output voltage varies within a range (e.g., 9-42V DC) to adapt to the voltage drop of the LEDs connected in series. Strips and modules designed for constant current require the current to be precisely controlled to ensure uniform illumination and prevent burnout.
In this case, the rule is: the nominal current of the power supply must exactly match the current required by the load, and the sum of the voltages of the LEDs in series must fall within the voltage range of the power supply. Connecting a constant current strip to a constant voltage power supply (or vice versa) will almost certainly lead to its immediate destruction. In the Ledpoint catalog, you will find constant current power supplies and LED strips with a constant current control system, which integrate regulation on the strip and are still powered by a constant voltage power supply, guaranteeing uniform brightness even over long runs.
How to size a 350mA or 700mA constant current LED power supply
For a 350mA constant current LED power supply powering, for example, six 1W LEDs in series with a forward voltage of 3.2V each, the total voltage is 6 x 3.2 = 19.2V. Therefore, a 350mA driver with an output range that includes 19.2V (for example, 9-24V) and a power of at least 19.2V x 0.35A = 6.7W is required. If the same LEDs were 3W (700mA), the power would become 19.2 x 0.7 = 13.4W, and a 700mA constant current LED power supply would be needed.
| Current | Typical LEDs | Power per LED | Applications |
|---|---|---|---|
| 350mA | 1W Power LEDs | approx. 1.1W | Recessed spotlights, step lights, showcases |
| 500mA | 1.5W LEDs, linear modules | approx. 1.6W | Furniture modules, ceiling lights |
| 700mA | 3W Power LEDs | approx. 2.3W | Downlights, track spotlights |
| 1050mA | Medium power COBs | approx. 3.4W | Commercial spotlights |
| 1500mA | High power COBs | approx. 5W | Floodlights, architectural lighting |
| Criterion | CV Power Supply | CC Power Supply |
|---|---|---|
| Fixed quantity | Voltage (12V, 24V, 48V) | Current (350mA, 700mA...) |
| Connection | Parallel | Series |
| Adding or removing load | Free within nominal power | Changes voltage, must be recalculated |
| Use with LED strips | Standard | Only dedicated strips |
| Open circuit | No problem | Driver goes into protection |
| Ease of installation | High | Medium, requires calculation |

5V, 12V, 24V or 48V LED power supply: which voltage to choose
The voltage of the power supply is decided by the strip, not the other way around. However, when designing from scratch, choosing a 12V, 24V, or 48V strip means also choosing the power supply, cables, and number of power injection points. For the same power, doubling the voltage halves the current and reduces cable losses to a quarter: this is why 24V has become the standard in professional installations and 48V is spreading for long runs.
The physical principle: Ohm's law applied to strips
The current drawn by a strip is derived using Ohm's law in power form: I = P / V. A 72W strip (5 meters at 14.4 W/m) draws 6A at 12V, 3A at 24V, and 1.5A at 48V. The voltage drop on the cables is proportional to the current, and the power lost as heat is proportional to the square of the current. More current means thicker cables, more voltage drop, more heat, and more difference in brightness between the beginning and end of the line.
Graph - Current drawn by 72W of LED strip
Voltage drop: a real calculation
Let's take a typical case: 5 meters of strip at 14.4 W/m (72W) powered by a power supply placed 5 meters away, with a 1.5 mm² cable. The electrical path is 10 meters (out and back), and the resistance of copper is about 0.0175 Ω·mm²/m, so R = 0.0175 x 10 / 1.5 = 0.117 Ω. Here is what happens at different voltages, only on the connection cable, even before the internal drop within the strip.
| Power supply voltage | Current | Cable drop | Drop in % | Power lost in cable |
|---|---|---|---|---|
| 12V | 6.0 A | 0.70 V | 5.8% | 4.2 W |
| 24V | 3.0 A | 0.35 V | 1.5% | 1.05 W |
| 48V | 1.5 A | 0.18 V | 0.4% | 0.26 W |
At 12V, almost 6% of voltage is lost in the cable alone, at 24V just 1.5%. With an LED strip, a drop exceeding 5% becomes visible as a decrease in brightness and, on white and CCT strips, as a slight color shift towards the end of the line.
Maximum length powered from one side
In addition to the cable, there is the internal drop within the strip, along the copper tracks of the printed circuit board. For this reason, each voltage has a recommended maximum length with power injection from one end only. Beyond this limit, it must be powered from both ends or at multiple points, bringing dedicated cables from the power supply.
| Voltage | Typical length from one side | Strengths | Limitations | Ledpoint Category |
|---|---|---|---|---|
| 5V | 1-2 m | USB power, addressable pixel LEDs | Very high currents, very short runs | 5V Power Supplies |
| 12V | 3-5 m | Tight cuts, automotive, campers, batteries | High currents, noticeable drop | 12V Power Supplies |
| 24V | 5-10 m | Professional standard, excellent compromise | Less tight cut spacing compared to 12V | 24V Power Supplies |
| 48V | 10-20 m and beyond | Long runs, fewer power injection points | More restricted choice of accessories | 48V Power Supplies |
| 230V | up to 50 m | No external power supply needed | Requires dedicated driver, mains-level safety | 230V Anti-flicker Drivers |
Is a 12V or 24V LED power supply better?
The answer for 90% of installations in homes, shops, and offices is: 24V LED power supply. The 12V LED power supply remains the right choice when the strip needs to be cut very short (2.5-5 cm modules), when working in automotive, nautical, or camper environments with a 12V battery, or when replacing existing strips in a system already at 12V. If you need to power a continuous 10-meter strip, 12V almost always forces you to use dual power injection; 24V often does not; with a 48V LED strip you can reach 20 meters with a single power injection point.
Types of power supplies on the market
Now that we have established the basic principles, we can examine in detail the different categories of power supplies available, such as those in the Ledpoint catalog, each with specific characteristics, advantages, and fields of application. The real question is not just "how many watts", but "how do I want to turn on, turn off, and adjust the light": it is the control system that determines the family of power supply to choose.
Standard non-dimmable power supply
This is the simplest power supply: it converts and stabilizes, without regulation functions. It is perfect when the strip is controlled only with an on/off switch on the 230V line, or when dimming is entrusted to a separate downstream controller (a monochromatic dimmer PWM, an RF receiver, an RGB controller). It is the most flexible solution for those who want to change the control system in the future without replacing the power supply.
220V / 230V and TRIAC power supply/dimmer
This category represents an integrated and particularly convenient solution for those who desire light intensity control directly from the main electrical line. This is not a simple power supply, but a combined device that integrates both the AC/DC power supply function and the regulation function. Dimming occurs on the AC input side (at 220-230V), usually through TRIAC technology, the same as common dimmers for halogen lamps. You can therefore use a normal phase-cut wall dimmer or, in Push-Dim models, a simple normally open push button.
The concept of "phase-cut"
Leading edge (forward phase-cut): the TRIAC activates after a certain delay from the beginning of each half-cycle, "cutting" the first part. This is the classic technology for resistive loads.
Trailing edge (reverse phase-cut): the device conducts from the beginning of the half-cycle and turns off before its conclusion. Often implemented with MOSFETs, this technology is much more suitable for capacitive loads like the switching power supplies of LEDs: soft start, less noise, less interference.
The challenge of TRIAC compatibility with LEDs
A power supply not designed for phase-cut, connected to a TRIAC dimmer, can generate flickering at low levels, buzzing of coils and capacitors, limited regulation range (the light only starts to vary after 20-30% of the travel), and flashes upon turning on. The solution is to use power supplies expressly declared "TRIAC dimmable" or "Leading/Trailing Edge", which integrate holding circuits and simulate the minimum load required by the dimmer. An example in the catalog is the 75W 24V CV Triac AC Push-Dim SkyDance power supply, which accepts both phase-cut dimmers and push buttons; for higher loads, there is the 150W 24V CV Triac AC Push-Dim power supply, a true 24V 150W dimmable LED power supply.
Advantages: often a more economical solution compared to a standard power supply plus a separate DC dimmer, ideal in renovations where a wall dimmer is already present, compatible with many home automation systems that act on the 230V line. Considerations: it is fundamental to verify compatibility between the dimmable power supply, wall dimmer, and strip, and to choose brand-name dimmers specific for LED loads, preferably trailing edge.
Push-Dim power supply: the button that becomes a dimmer
The Push-Dim function allows you to adjust the light with a standard recessed push button, the same one used for step relays. Short press: turns on or off. Long press: increases or decreases intensity, with memory of the last level. For the electrician, it is the fastest way to get a dimmable LED power supply with a button without laying dedicated signal cables: just bring the phase controlled by the button to the "PUSH" input of the power supply. Many SkyDance models in the catalog, such as the 40W 24V RF Wireless Push-Dim power supply, combine Push-Dim and radio receiver in the same body.
Ultra-slim power supply
The ultra-slim power supply stands out for its minimal profile, often less than 20 mm in thickness. This design responds to the need for installations in tight spaces where a traditional power supply could not fit.
Typical applications: plasterboard false ceilings with reduced voids, behind furniture, wall-mounted televisions, kitchen cabinets, small profile trunking, and any context where minimal footprint is a primary requirement. Technical characteristics: to achieve such compact dimensions, high-quality components and high-frequency circuits are used; dissipation is entrusted to the metal enclosure, and the available power in this format is generally limited to 100-150W for thermal reasons. Those looking for a slim LED power supply or a small LED power supply for furniture will find the answer in this family.
Power supply with quick cable (plug & play)
This type is designed for the end user, DIY, or temporary installations, where simplicity and speed are everything. The power supply comes complete with an input cable with a plug and, often, an output cable with a pre-configured connector (DC jack or snap connector compatible with quick-connection strips).
Practical advantages: no wiring on the 230V side, just a nearby outlet. Plug the power supply into the outlet and the connector to the LED strip: ideal for showcases, shelves, furniture, or ambient lighting in the living room without masonry work. This is the classic direct LED power supply with a plug. Limitations: predefined cable lengths, aesthetic of visible cables, generally medium-low powers (up to 60-100W).
Power supply with RX receiver and wireless control
The designation "RX" indicates the presence of a receiver for wireless control signals integrated directly into the power supply. This opens the door to remote wireless control, perfect when wiring a traditional dimming signal would be complex or unsightly.
Transmission technologies
RF (radio frequency): uses radio frequencies (typically 2.4 GHz) to communicate with a remote control or keypad. It offers good range (up to 20-30 meters in open field, less through thick walls) and does not require line of sight. This is the technology of the classic LED power supply with remote control. In the catalog, you will find the 75W 24V RF Wireless Push-Dim power supply and the 150W 24V RF Wireless push dim power supply.
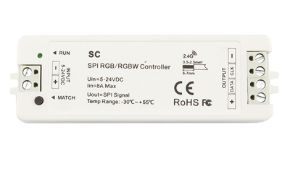
Multi-channel for CCT, RGB, and RGBW: when the strip has multiple color channels, the multi-channel RF power supply replaces both the power supply and controller in a single body. The 75W 24V 2-channel RF power supply is designed for CCT LED strips with tunable white, the 3-channel model for RGB LED strips, and the 4-channel model for RGBW LED strips. It is the simplest answer for those looking for an RGB LED power supply or a power supply for an RGB LED strip without a separate control unit.
Wi-Fi, ZigBee, and Smart: the power supply or receiver connects to the home network or a hub, and control occurs via app or voice assistants (Amazon Alexa, Google Assistant). It allows remote control and integration into home automation scenarios. You will find solutions in the Smart power supplies and ZigBee devices, the concrete answer for those looking for an Alexa LED power supply.
Advantages of RX control: you place the power supply where it is most convenient and control the light from any point; you eliminate signal cables; a single remote control or app manages multiple groups; it is ideal for retrofitting without masonry work. Considerations: possible radio interference in crowded environments, remote control batteries to replace, initial pairing to be performed carefully.
0/1-10V analog power supply: subtle differences and applications
The 0-10V analog protocols represent an established standard in professional lighting, appreciated for simplicity and robustness. However, there are variants that are essential to understand for perfect integration.
0-10V: the standard protocol
A variable direct voltage signal between 0 and 10 Volts is sent from the regulator to the control input of the power supply: 0V corresponds to the minimum (or off, depending on the implementation), 10V to 100%. The signal power is a few milliamps, so it travels on reduced cross-section cables (0.5-0.75 mm²) with two dedicated wires in addition to the power wires.
1-10V: the variant with an off zone
In the 1-10V variant, described in Annex E of the IEC 60929 standard (now merged into IEC 62386 for the digital part and IEC 61347 for safety), control regulates between 1V (minimum) and 10V (maximum). In many implementations, the actual turn-off is entrusted to a relay on the 230V line, while the signal below 1V maintains the minimum. Here the practical difference is enormous: with a "passive" 1-10V regulator, it is the power supply that provides current to the potentiometer, and the light does not turn off unless the mains is interrupted.
0/1-10V: the hybrid version
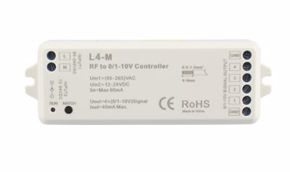
The designation "0/1-10V" indicates a power supply compatible with both standards, capable of correctly interpreting both a signal that drops to 0V and one that stops above 1V. It has become the de facto standard choice in quality products because it guarantees maximum interoperability. Compatible regulators and interfaces are in the 0/1-10V category, while the 60W 24V power supply compatible with dimmer and sensor interface allows combining regulation and presence detection.
Wiring and practical configurations
2-wire configuration: two conductors connect the regulator to the DIM+ and DIM- input of the power supply. This is the most common wiring; over long runs, voltage drop can slightly alter the signal. Configuration with active regulator: the regulator has its own power supply and generates a "strong" signal, which allows driving dozens of power supplies in parallel without degradation. This is the professional choice for hotels, offices, and medium-to-large shops. Remember that the 0-10V cable must be treated as a SELV circuit, but if laid in the same conduit as 230V conductors, it must have insulation adequate to the highest voltage present, as required by CEI 64-8.
DALI power supply: the digital protocol for professional lighting
DALI (Digital Addressable Lighting Interface) is not simply an alternative to 0-10V: it is a leap towards digital, bidirectional, and individually addressable control of every light point. Governed by the IEC 62386 standard, it transforms lighting into a network of communicating devices.
Architecture and operation
DALI controller (or gateway): the brain of the system, which can be a dedicated panel, an interface to the BMS, or a bridge from KNX or BACnet. DALI power supply: each compatible power supply has a microprocessor and a unique address; it receives commands and returns information (status, faults, level). DALI bus: an unpolarized pair of wires, at about 16V, over which data travels. The same bus controls up to 64 individually addressed devices, organizable into 16 groups and 16 scenes.
Advantages for professional projects
Individual addressing and dynamic groups: groups ("Showcase", "Aisle 2", "Meeting room") are modified via software, without rewiring. Bidirectional communication: the power supply reports faults or overtemperatures, enabling predictive maintenance. Stable and repeatable regulation, immune to voltage drop on cables. Preset scenes recallable with a command. Native integration with building automation systems. In the catalog, the 150W 24V DALI Push-Dim SkyDance power supply and the 2-channel DALI version for CCT strips are the answer for those looking for a DALI LED power supply or a dimmable DALI LED power supply; to integrate standard power supplies, there are DMX and DALI decoders.
Considerations: the cost per light point is higher than an analog system and requires initial programming by qualified personnel. It is the natural choice for offices, hotels, museums, and high-end retail.
DMX power supply for RGB LED and scenography
DMX512 is the protocol of the entertainment industry: 512 channels per universe, ultra-fast updating, ideal for dynamic effects on facades, venues, installations, and RGBCCT strips. Generally, a dedicated DMX power supply is not used, but rather a standard constant voltage power supply plus a DMX decoder that receives the signal and drives the channels in PWM. This architecture separates power and control, makes maintenance simpler, and allows scaling the system by adding power supplies.
"Clear" power supply: when aesthetics is a design requirement
The definition "clear" refers to a specific construction characteristic: high-frequency switching circuits that drastically reduce the size of the ferrite transformer, in white or translucent plastic enclosures with a clean appearance. Reduced footprint, modern design, and silence make it the ideal choice when the power supply might remain partially visible, in a designer piece of furniture or an open niche. It is important to verify that they still guarantee galvanic isolation and SELV marking.
230V anti-flicker driver
230V LED strips do not need an external low-voltage power supply, but a driver that rectifies and smooths the mains voltage. 230V anti-flicker drivers eliminate the 100 Hz flicker typical of strips connected with only a rectifier, making the light suitable even for work environments and video recording.
Power supply with battery for emergency lighting
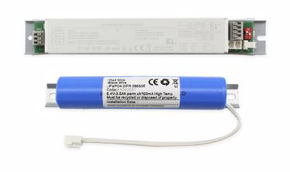
Increasingly common are power supplies with a backup battery for safety and emergency lighting. In the event of a blackout, they automatically switch to the battery, keeping the lights on, generally at reduced power, for the time required by the UNI EN 1838 and CEI EN 60598-2-22 standards (1-3 hours). You will find all solutions in the emergency lighting category: this is the most requested emergency LED power supply by those designing escape routes and public premises.
| System | Command | Extra cables | Precision at low levels | Ideal for |
|---|---|---|---|---|
| On/Off | 230V switch | None | - | Service lighting |
| TRIAC | Phase-cut wall dimmer | None | Medium | Renovations with existing dimmer |
| Push-Dim | NO push button | 1 wire (switched phase) | Good | Residential, hotel rooms |
| 0/1-10V | Analog regulator | 2 SELV wires | Good | Offices, shops |
| DALI | Digital controller | 2 bus wires | Excellent | Tertiary, hotels, museums |
| RF 2.4 GHz | Remote control, keypad | None | Excellent | Retrofit, furniture, CCT and RGB |
| Smart/ZigBee/Wi-Fi | App, voice | None | Excellent | Residential home automation |
| DMX512 | Console, software | RS-485 bus | Excellent | Scenography, facades, venues |

The technical parameters that make the difference
Two power supplies with the same "24V 100W" label can have very different performance, lifespan, and operating costs. Nominal power is only the first number: efficiency, power factor, IP rating, ripple, inrush current, and operating temperature are the parameters that separate a professional power supply from one that will fail before the strip does. Here is how to read them.
Efficiency (η)
Efficiency is the ratio between output power and power absorbed from the grid. An efficiency of 90% means that to provide 90W to the LEDs, the power supply absorbs 100W from the outlet, dissipating 10W as heat. Always look for power supplies with efficiency equal to or greater than 85%, preferably over 90% for powers above 50W. The best models reach 94-95%.
How much you save with an efficient power supply
A concrete example helps answer the question "how can I save energy with quality LED power supplies". Consider a shop with 20 power supplies of 100W loaded at 80% (80W of LEDs each), turned on 12 hours a day for 360 days, with energy at €0.25/kWh.
| Efficiency | Power absorbed per power supply | Losses per power supply | kWh/year system | Annual system cost |
|---|---|---|---|---|
| 82% | 97.6 W | 17.6 W | 8,429 kWh | €2,107 |
| 88% | 90.9 W | 10.9 W | 7,855 kWh | €1,964 |
| 92% | 87.0 W | 7.0 W | 7,513 kWh | €1,878 |
Switching from an 82% power supply to a 92% one saves about €230 per year on this system, and reduces the heat produced by the power supplies by 60%. Less heat means cooler capacitors and a longer life: the savings are double.
Power factor (PF) and PFC
The power factor measures how effectively the power supply uses the current drawn from the grid. A low PF (e.g., 0.5) indicates a lot of useless current that overloads lines and circuit breakers. A high PF (≥0.9) is an indicator of project quality and lower impact on the grid; it is achieved with an active correction stage, the so-called PFC LED power supply. For professional systems, correction is required by the EN 61000-3-2 standard on harmonic emissions, which imposes strict limits for lighting appliances above 25W.
IP protection rating
The IP protection rating indicates resistance to dust and water, according to the EN 60529 standard.
| IP Rating | Protection | Where to install it | Notes |
|---|---|---|---|
| IP20 | Only against contact with fingers | False ceilings, furniture, closed panels | The most common, dissipates better |
| IP42 | Solid bodies over 1 mm and drops | Technical compartments, low-dust rooms | Compromise between dissipation and protection |
| IP65 | Total protection against dust, water jets | Sheltered outdoors, attics, kitchens | Classic waterproof LED power supply |
| IP67 | Temporary immersion up to 1 m | Gardens, pits, flood-risk areas | Resin-coated IP67 LED power supply |
An outdoor LED power supply is not enough just by being IP65: it must be installed with the cable glands facing downwards and with equally protected joints, because water almost always enters through the cables, not the enclosure.
Useful life, temperature, and warranty
The life of a quality power supply depends on the electrolytic capacitors. Look for models that declare a useful life at a precise temperature (e.g., 50,000 hours at Tc 70°C) and check the Tc point printed on the enclosure: that is where the reference temperature is measured. A 3-5 year warranty is a sign of the manufacturer's confidence.
Ripple, flicker, and EMI
Ripple is the residual undulation on the output voltage. High ripple produces flicker that is often invisible to the naked eye but evident in smartphone recordings, and strains the eyes in work environments. The data sheets of good power supplies report a ripple of a few hundred millivolts peak-to-peak. Electromagnetic emissions must comply with EN 55015 (electromagnetic compatibility) to avoid disturbing radio, TV, and Wi-Fi networks.
Inrush current
At startup, the input capacitors charge, and the power supply absorbs a current peak of even 30-60A for a few microseconds. This is a fundamental piece of data for the electrician: the inrush current of the LED power supply determines how many power supplies you can put under the same circuit breaker without nuisance tripping. The most complete data sheets report the maximum number of units per circuit breaker in curve B and C. On systems with many power supplies, it is better to use curve C circuit breakers, relays with contacts suitable for capacitive loads, or inrush current limiters.
Integrated protections
A professional power supply must have at least: SCP (short circuit), OLP (overload), OVP (overvoltage on output), and OTP (overtemperature). The behavior in protection matters: the "hiccup" mode (the power supply tries to restart at intervals) is the most common and is recognized because, in the event of a short circuit, the strip flashes rhythmically.
| Parameter | Minimum acceptable | Professional value |
|---|---|---|
| Efficiency | ≥ 85% | ≥ 90% |
| Power factor (above 25W) | ≥ 0.9 | ≥ 0.95 |
| Ambient temperature | -20 / +40°C | -30 / +50°C or higher |
| Useful life | 30,000 h | ≥ 50,000 h at declared Tc |
| Protections | SCP, OLP | SCP, OLP, OVP, OTP |
| Warranty | 2 years | 3-5 years |
| Certifications | CE, RoHS | CE, RoHS, ENEC, SELV, third-party marks |
LED strip power supply calculation: formula and examples
Erring in sizing is the most common and costly mistake. The formula to calculate the LED power supply power is: watts per meter of the strip x installed meters x 1.2 (or 1.3) = minimum power supply power; then choose the immediately superior commercial size. Let's see the procedure step by step, with real examples.
Step 1: calculate the total load power
P_tot (W) = power per meter (W/m) x total length (m), or, for modules, P_tot = power per module x number of modules. The power per meter is always reported in the strip's data sheet: in the Ledpoint catalog, you can filter strips by power per meter, from 4.8 W/m up to over 24 W/m.
Complex example: kitchen lighting project with 4 m of strip under cabinets (14.4 W/m), 2 m of strip inside the hood (9.6 W/m), and a 25W linear module. Calculation: (4 x 14.4) + (2 x 9.6) + 25 = 57.6 + 19.2 + 25 = 101.8 W total.
Step 2: apply the 20-30% safety margin
The power supply must never work at 100% of its capacity: working at the limit generates heat, reduces useful life, and increases the risk of failure. Minimum P_power supply = P_tot x 1.25. In the example: 101.8 x 1.25 = 127.25 W minimum.
Step 3: choose the commercial size and correct voltage
Among the commercial values (30W, 40W, 60W, 75W, 100W, 150W, 200W, 240W, 320W...) choose the immediately superior one: in our example, a 150W power supply. Verify that the output voltage matches that of all connected strips. In a mixed project, two separate power supplies might be needed (one 24V for the strips and a constant current driver for the module).
Step 4: verify distance and voltage drop
If the distance between the power supply and the strip exceeds 3-4 meters, especially at 12V, the voltage drop on the cable becomes significant. The solutions: switch to 24V or 48V, increase the cable cross-section, move the power supply closer to the load, or distribute multiple power supplies.
Real example with a Ledpoint strip
The 5m warm white 3000K 2835 240 led/m 24V 14.4 W/m LED strip in the catalog has a total power of 72W per reel and a declared efficiency of 155 lm/W, with about 2000 lumens per meter. For a full reel: 72 x 1.25 = 90W, therefore a 100W 24V LED power supply. For two reels (10 m) the load rises to 144W: 180W minimum is required, so a 200W 24V LED power supply (minimum size 180W) or two 100W 24V LED power supplies, one per reel, which also simplifies cable distribution. The same amount of light (2000 lm/m) with a 110 lm/W strip like the 120 led/m version, which emits 1410 lm/m, would require about 40% more power: a more efficient strip also reduces the size, cost, and heat of the power supply.
Quick sizing table
| Strip power | 1 m | 3 m | 5 m | 10 m | 15 m | 20 m |
|---|---|---|---|---|---|---|
| 4.8 W/m | 6W → 20W | 18W → 20W | 30W → 30/40W | 60W → 75W | 90W → 100W | 120W → 150W |
| 9.6 W/m | 12W → 20W | 36W → 40W | 60W → 60/75W | 120W → 150W | 180W → 200W | 240W → 240W |
| 14.4 W/m | 18W → 20W | 54W → 60W | 90W → 100W | 180W → 200W | 270W → 320W | 360W → 2 x 200W |
| 19.2 W/m | 24W → 30W | 72W → 75W | 120W → 150W | 240W → 240W | 360W → 2 x 200W | 480W → 2 x 240W |
| 24 W/m | 30W → 30W | 90W → 100W | 150W → 150W | 300W → 320W or 2 x 150W | 450W → 2 x 240W | 600W → 2 x 320W |
Values indicated as "minimum power with margin → recommended size". Beyond 240-320W it is almost always preferable to divide the load across multiple power supplies: it reduces the current per terminal, limits voltage drop, provides redundancy in case of failure, and each power supply runs cooler.
Oversized or undersized power supply: what happens
What happens if I use a power supply with more watts? Nothing negative for the strip: with a constant voltage power supply, the strip draws only the power it needs. An oversized LED power supply runs cooler and lasts longer; the only limitation is that many power supplies have optimal efficiency and power factor between 50% and 90% of the load, so a 300W power supply with only 20W connected is a waste of money and may present a low PF. What happens with an undersized LED power supply? It goes into protection (the light flashes or turns off), or, if it is cheap and lacks protections, it overheats until failure. This is the mistake to always avoid.
Configurator: find your Ledpoint power supply
To make the calculation immediate, we have prepared a configurator: enter the data of your LED strip and the desired control type, and you will get the power, current, recommended size, estimated voltage drop, and the direct link to Ledpoint power supplies with the corresponding characteristics. It is the same reasoning our technical office uses, transformed into a few selectors.

