







Outdoor Christmas lights: how to choose IP rating, watts, and voltage
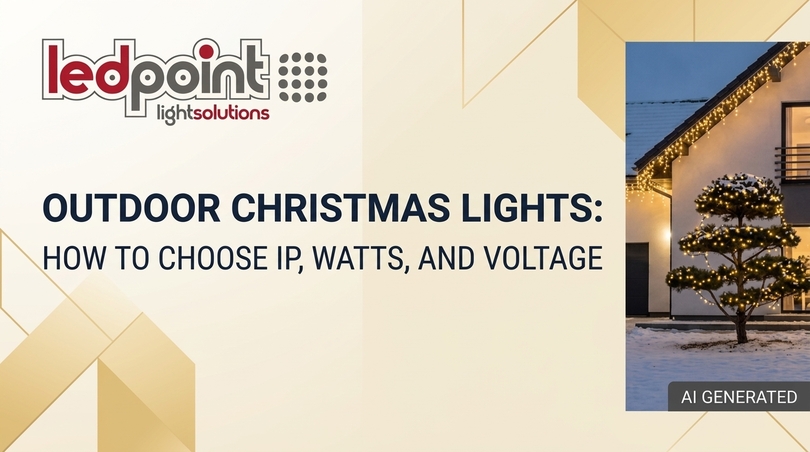
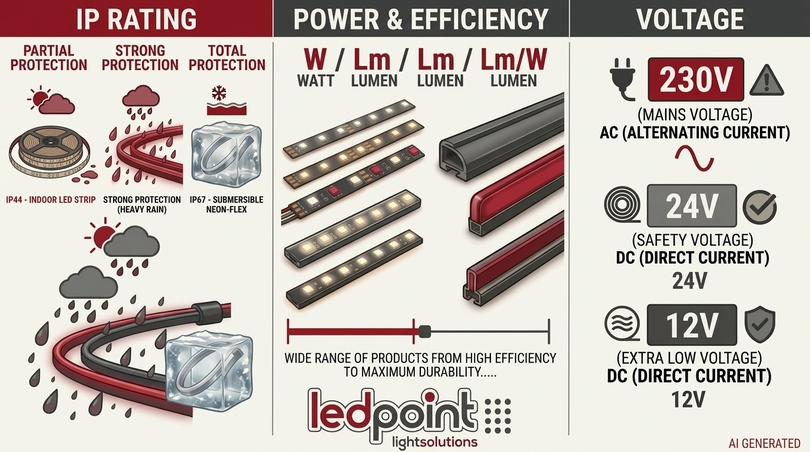
Outdoor Christmas lights are decorative lighting fixtures designed to withstand water, frost, wind, and UV rays. The correct choice is based on three technical parameters: the IP rating (protection against water and dust), the watts (power draw and consumption), and the voltage (power supply: 230V, 24V, or 12V). Getting one of these three values wrong means, at best, a display that goes dark halfway through December, and at worst, a real electrical hazard.
Every year, between late November and December 8, millions of households, restaurateurs, shopkeepers, hotels, and municipal administrations face the exact same problem: choosing outdoor Christmas lights that look beautiful, are safe to install, and can last until Epiphany without turning off, corroding, or blowing a fuse. The Italian market for outdoor Christmas lighting is worth hundreds of millions of euros and continues to grow, but it remains one of the sectors where buyers are least informed: people buy based on price per meter and number of LEDs, almost always ignoring the parameters that truly determine the product’s lifespan and safety.
This guide draws on the technical experience of Ledpoint, a company based in Faenza specializing in professional LED components, and addresses the topic with the same rigor that would be applied to a permanent architectural lighting system. Because, ultimately, that is exactly what it is: a temporary system exposed to the elements, powered by electricity, mounted at height, and left on for six consecutive weeks. Inside, you will find watt/lumen conversion tables, voltage drop tables, explicit selection criteria, real consumption calculations, regulatory references, and a step-by-step path from design to disassembly. If you are looking for outdoor Christmas lights that last more than one season, this is the reading you need.
In this article...
1. What outdoor Christmas lights are: technical definition
Before talking about IP, watts, and volts, we need to organize the vocabulary, because in this sector commercial terms and technical terms almost never coincide. What the market generically calls “Christmas lights” includes at least eight different product families, with radically different standards, performance, lifespans, and prices. Understanding which family what you are buying falls into is the first step toward not making a mistake.
From a regulatory standpoint, outdoor Christmas lights fall into the category of lighting chains and decorative lighting fixtures, governed in Europe by standard EN/IEC 60598-2-20 (luminaires - lighting chains) and, for fixed installation, by CEI 64-8. A compliant product bears the CE marking, the IP rating, the rated voltage, the total power, and the explicit indication “for outdoor use.” If any of this information is missing from the packaging, the product is not reliable: this is the first operational rule of the entire guide.
If in doubt, always ask for the technical data sheet: a serious supplier of outdoor Christmas lights provides it within minutes; an improvised reseller simply does not have it.
Seasonal decorative lighting vs. permanent architectural lighting
There is a substantial difference between decoration and system. Consumer outdoor Christmas lights are designed for 4-8 weeks of operation per year, with repeated assembly and disassembly cycles; professional LED components, such as Ledpoint LED strips or Neon Flex tubes, are designed for 30,000-50,000 hours of continuous life. The practical consequence is enormous: anyone who sets up a commercial facade every year, after two or three seasons, has spent more on disposable strings than they would have spent on a semi-permanent 24V system, which is much more beautiful and infinitely longer-lasting.
This is why restaurants, hotels, shops, and municipalities are progressively migrating from consumer strings to professional LED components, keeping the Christmas aesthetic but with reusable infrastructure all year round. A line of IP65 Neon Flex installed along the eaves becomes Christmas lighting in December, white accent lighting the rest of the year, and, with an RGB controller, themed lighting for Halloween, Valentine’s Day, or private events.
The eight families of outdoor Christmas lights
Here is the complete map of solutions available on the Italian market, from the cheapest to the most professional. Each family has its optimal scope, and knowing it prevents wasting budget.
Knowing these eight families is the fastest way to understand which outdoor Christmas lights you are actually comparing when you read two seemingly similar product sheets.
| Family | Description | Typical use | Typical IP | Expected lifespan |
|---|---|---|---|---|
| Lighting strings | Cable with LEDs spaced 8-15 cm apart, extendable | Trees, hedges, railings, balconies | IP44 - IP67 | 2-5 seasons |
| Light curtains | Horizontal cable with hanging vertical wires | Windows, eaves, porches, shop windows | IP44 - IP65 | 2-4 seasons |
| Cascades / icicles | Wires of varying length, water effect | Facades, pergolas, balconies | IP44 - IP65 | 2-4 seasons |
| Micro LEDs on wire | Very thin copper wire, 2 mm LEDs | Branches, vases, details, photographic setups | IP44 - IP65 | 1-3 seasons |
| Light tubes / Neon Flex | PVC or silicone tube with internal LEDs | Architectural profiles, lettering, eaves | IP65 - IP68 | 8-15 years |
| LED strips + profile | Flexible tape in aluminum profile | Lines of light, frames, under-eaves, outdoor areas | IP65 - IP68 | 8-15 years |
| Figures and light trees | Preassembled 3D structures | Gardens, squares, entrances, lobbies | IP44 - IP65 | 5-10 years |
| Projectors and floodlights | Adjustable beam lighting body | Facades, tall trees, walls | IP65 - IP66 | 10-15 years |
Reading this table immediately suggests something counterintuitive: the cheapest outdoor Christmas lights are almost always the most expensive over the medium term. A low-cost 100-meter string with IP44 rarely survives three consecutive winters in the Po Valley, where fog, frost, and condensation cycles put every non-watertight joint to the test. A 24V system with IP67 components costs more per meter, but pays for itself in two or three seasons and can be reused in countless other applications.
Thinking in terms of cost per season, rather than list price, completely changes the ranking of outdoor Christmas lights available on the market.
Why Christmas is the harshest test for an LED
An LED fixture installed outdoors between November and January simultaneously faces five stresses: relative humidity close to 100%, temperature swings of as much as 20 °C between day and night, freeze-thaw cycles that expand and contract silicones and sheaths, driving rain and wind that mechanically stress joints, and UV rays that over time yellow polymers. No other decorative application concentrates so many variables into so few weeks.
This is why the declared IP rating alone is not enough: the sheath material also matters (PVC hardens below -5 °C, silicone remains flexible down to -30 °C), the type of connector matters, and the operating temperature range declared by the manufacturer matters. Ledpoint’s COB LED strips, for example, declare an operating range down to -30 °C in specific versions, a figure that supermarket strings simply do not provide.
When evaluating outdoor Christmas lights, the declared operating temperature range is one of the few data points that immediately separates a professional product from a generic one.
2. The three parameters that decide everything: IP, watts, voltage
IP, watts, and voltage are not three independent characteristics to compare separately, but an interconnected system. The IP rating determines where you can install, the voltage determines how far you can reach and with what safety, and the watts determine how much you consume, how much heat you generate, and which power supply is needed. Changing one of the three forces you to review the other two.
Thinking in terms of a system, rather than a single parameter, is what makes outdoor Christmas lights reliable even in the worst conditions of December and January.
Before going into the details of each parameter, this table summarizes the complete decision logic. It is the tool we recommend keeping open while comparing products: it resolves 80% of purchasing doubts about outdoor Christmas lights on its own.
| Parameter | What it measures | Minimum recommended value outdoors | Typical mistake | Consequence of the mistake |
|---|---|---|---|---|
| IP (protection) | Resistance to dust and water | IP44 sheltered, IP65 exposed, IP67 on the ground | Using IP20 or IP44 in an exposed area | Short circuit, corrosion, failure in 2-6 weeks |
| Watts (power) | Energy drawn per meter or per string | 0.5-5 W/m decorative, 7-14 W/m architectural | Putting too many meters on one power supply | Overheating, protection tripping, light loss |
| Volts (voltage) | Supply voltage | 24V SELV where touched, 230V only with adequate IP | Improvised 230V extension cords outdoors | Serious electrical hazard, non-compliance with standards |
| Kelvin (color) | Color temperature of the light | 2200-3000K traditional, 6000-8000K ice | Mixing different kelvins on the same facade | Messy visual effect, poor photographic rendering |
| CRI (color rendering) | Fidelity of illuminated colors | Ra>80 decorative, Ra>90 on fine materials | Ignoring CRI on stone or wood facades | Dull surfaces, “dirty” colors, gray photos |
| IK (impact) | Resistance to mechanical impacts | IK07 in areas accessible to the public | Fragile products in passage areas | Breakage, splinters, risk to people |
The correct order of decisions
Many buyers start with aesthetics (“I want a cold white cascade effect”) and only at the end ask whether the product will withstand rain. That is the wrong order and systematically leads to repurchasing the following year. The correct order, the one used by lighting designers, is as follows:
- Site analysis: where will the lights be installed? Exposed or sheltered surface? Height? Accessibility for maintenance? Presence of standing water?
- Definition of the minimum IP rating, which follows directly from point 1 and is not negotiable.
- Choice of voltage: direct 230V, or safety extra-low voltage at 24V/12V with a power supply.
- Calculation of meters and total power in watts, with sizing of the power supply and cables.
- Aesthetic choice: color temperature, light effect, LED density, product type.
- Control and automation: timer, photocell, dimmer, app or remote control.
By following this sequence, the outdoor Christmas lights you choose will be technically correct before they are beautiful. And when an installation is technically correct, it stays beautiful for years instead of just a few weeks.

3. The IP rating of outdoor Christmas lights: complete table and use cases
The IP rating (Ingress Protection), defined by standard IEC 60529, is the most important and at the same time most misunderstood abbreviation in the entire outdoor Christmas lights market. It consists of two digits: the first indicates protection against solid bodies and dust (scale from 0 to 6), the second against liquids (scale from 0 to 9K). The higher the digits, the greater the protection. An IP44 string and an IP65 string may look identical in the package, but in a rainy December in Emilia-Romagna, the difference between the two is the difference between a working installation and an evening spent looking for the blown fuse.
The second misunderstanding concerns zones: many people believe that outdoor is a single condition. It is not: under a deep porch, with the light mounted two meters from the edge, conditions are similar to indoors, while on the same facade, three meters farther on, driving rain hits directly and the product requires a higher IP. Designing outdoor Christmas lights means first and foremost mapping the building’s microzones.
Only after this mapping does it make sense to compare prices of the outdoor Christmas lights available on the market: without it, you are comparing products that meet different needs.
Complete table of IP ratings applied to outdoor Christmas lights
| IP rating | Solids protection | Liquids protection | Where it can be used at Christmas | Judgment |
|---|---|---|---|---|
| IP20 | Bodies > 12.5 mm | None | Dry indoors only: living room tree, indoor shop windows | Never outdoors |
| IP33 | Bodies > 2.5 mm | Light rain inclined at 60° | Enclosed verandas, very deep porches | Insufficient for direct exposure |
| IP44 | Bodies > 1 mm | Splashes from any direction | Covered balconies, under-eaves, porches, sheltered terraces | Minimum acceptable in a sheltered area |
| IP54 | Limited dust | Splashes from any direction | Semi-exposed terraces, pergolas with tarpaulin | Good compromise |
| IP65 | Total against dust | Low-pressure water jets | Exposed facades, garden trees, railings, eaves | Recommended standard for outdoors |
| IP66 | Total against dust | Powerful water jets | Windy areas, coast, areas with pressure washing | Excellent for severe contexts |
| IP67 | Total against dust | Temporary immersion up to 1 m | Products on the ground, flowerbeds, areas with standing water and snow | Necessary in contact with the ground |
| IP68 | Total against dust | Continuous immersion | Fountains, ponds, tubs, submerged elements | Only for underwater applications |
The operational rule we apply at Ledpoint is simple: IP44 if water never reaches it directly, IP65 if rain reaches it, IP67 if the product can end up under snow or in still water. On this scale, the vast majority of outdoor Christmas lights sold in large-scale retail stop at IP44, which explains why the average failure rate of outdoor Christmas lights after the second season is so high.
The product’s IP rating is not the system’s IP rating
This is the point that almost all online guides forget to mention, and yet it is what makes the difference between a professional and an amateur: a protection chain is only as strong as its weakest link. You can install IP68 Neon Flex and completely undermine it by connecting it with an IP20 flying connector left resting on the windowsill. That connector, not the tube, is where water will enter.
The elements that must have the same IP rating as the light body are at least five: the connectors, extension joints, end caps, the power supply (if positioned outdoors), and any junction box. For this reason, in serious installations, solder joints with heat-shrink tubing and internal adhesive are used, or certified watertight connectors, and the power supply is placed in an indoor technical compartment.
Condensation: the invisible enemy
A fixture can be perfectly IP65 and still fail due to internal condensation. The mechanism is this: during the day the tube heats up from solar radiation, the internal air expands and escapes through micro-openings; at night the air cools, contracts, and draws humid air back in from outside. Repeated for weeks, the cycle deposits water inside, which at -2 °C freezes and can crack the sheath or corrode the copper tracks.
There are three design remedies: prefer tubes and strips with an extruded one-piece coating rather than post-silicone sealing; avoid very long runs without interruptions, which increase the internal air volume; install with a slight slope so that any moisture drains toward the lower end, which must always be left at the lowest point. In the Ledpoint catalog, the second-generation Neon Flex line was created specifically to overcome the limitations of traditional tubes in this respect.
What light to use outdoors: the answer by microzone
Many people directly search for “what light to use outdoors” and expect a straight answer. The straight answer exists, but it changes depending on exactly where the light point is located. Here is the complete map of the microzones of a home or commercial premises.
| Microzone | Exposure | Minimum IP | Recommended voltage | Ideal product |
|---|---|---|---|---|
| Deep under-eave | Sheltered | IP44 | 24V or 230V | String or light curtain |
| Balcony railing | Exposed | IP65 | 24V SELV | IP65 string or Neon Flex |
| Glass parapet | Exposed, reflective | IP65 | 24V SELV | LED strip in profile |
| Vertical facade | Highly exposed | IP65-IP66 | 24V or 230V | Cascade, Neon Flex, projector |
| Garden tree | Highly exposed | IP65-IP67 | 24V SELV | IP67 string or ground projector |
| Flowerbed and hedge | In contact with soil | IP67 | 24V SELV | IP67 string, IP67 micro LEDs |
| Path and walkway | Walkable | IP67 + IK08 | 24V SELV | Walkable profile, spotlights |
| Restaurant outdoor area | Exposed, public | IP65 + IK07 | 24V SELV | Neon Flex in protected profile |
| Shop window | Inside the glass | IP20-IP44 | 24V | High-density LED strip |
| Fountain or body of water | Submerged | IP68 | 12V SELV | Underwater strip or spotlight |
When in doubt between two IP ratings, always go up a level. The surcharge between IP44 and IP65 on the same string averages 15-25%; the cost of redoing the installation in mid-December, at height, with a ladder and in the cold, is incomparably higher. Well-chosen outdoor Christmas lights are the ones you don’t think about again until January.
4. The watts of outdoor Christmas lights: power, lumens, efficiency, and real consumption
Watts are the most cited and least understood parameter. In common language, more watts means more light, but with LED technology this equivalence has broken down: watts measure energy drawn, not light emitted. Emitted light is measured in lumens, and the ratio between the two, luminous efficiency expressed in lumens per watt (lm/W), is the real quality indicator of an LED product.
Comparing outdoor Christmas lights in lumens per watt, rather than absolute watts, is the fastest way to distinguish an efficient product from one that wastes energy as heat.
To give a sense of the progress: an old incandescent Christmas string bulb produced about 10-12 lm/W, a cheap decorative LED stops at 60-80 lm/W, and the high-efficiency LED strips in the Ledpoint catalog exceed 140-155 lm/W. For the same perceived light, consumption is reduced by more than ten times compared with incandescent and by about half compared with a low-end LED. On an installation lit 6 hours a day for 45 days, the difference shows up on the bill.
Conversion table: watts, lumens, and equivalences
This conversion table is intended for anyone who has to compare different products at purchase and finds inconsistent data on technical sheets. It is the table that lets you understand, in ten seconds, whether you are buying quality or just watts.
| Source type | Efficiency (lm/W) | Power for 1,000 lm | Consumption 45 days x 6 h | Season cost (€0.25/kWh) |
|---|---|---|---|---|
| Traditional incandescent | 10-12 | ~90 W | 24.3 kWh | €6.08 |
| Cheap uncertified LED | 50-70 | ~17 W | 4.6 kWh | €1.15 |
| Standard quality LED | 90-110 | ~10 W | 2.7 kWh | €0.68 |
| High-efficiency LED (2835) | 130-155 | ~7 W | 1.9 kWh | €0.48 |
| High-output COB LED (CRI>93) | 70-90 | ~13 W | 3.5 kWh | €0.88 |
Important technical note: COB has lower efficiency than 2835 not because of a defect, but because the continuous phosphor that generates the homogeneous line of light absorbs part of the flux. You pay in lumens for what you gain in uniformity: no dotted effect, 180° beam angle, soft light perfect for Christmas photographs. This is why COB LED strips are the preferred choice for those setting up outdoor areas and venues that will end up on social media.
How many watts are really needed for outdoor Christmas lights
For decorative lighting there is no normative illuminance requirement as in workplaces (where UNI EN 12464 applies): the goal is not to see, but to suggest. This means working at very low power levels, and those who overdo it get a worse result, not a better one. Excess luminous flux flattens shadows, cancels depth, and produces that typical “football pitch” effect that ruins any atmosphere.
| Application | Recommended power | Indicative flux | Effect achieved |
|---|---|---|---|
| Decorative string on railing | 0.3-1 W/m | 20-60 lm/m | Sparkling points of light |
| Micro LEDs on branches and vases | 0.2-0.5 W/m | 10-30 lm/m | Firefly effect |
| Light curtain on window | 1-3 W/m² | 50-120 lm/m² | Diffuse luminous veil |
| Line of light on eaves (Neon Flex) | 5-8 W/m | 300-500 lm/m | Continuous architectural outline |
| LED strip in profile on outdoor area | 7-14 W/m | 600-2,000 lm/m | Usable ambient light |
| Projector on facade (4-8 m) | 20-50 W | 2,000-6,000 lm | Architectural enhancement |
| Decorative LED tree 2.5-2.8 m | 70-190 W | Variable | Central scenic element |
How to calculate total power and why it is essential
The calculation is elementary but must always be done, because the sizing of the power supply, cable cross-section, and circuit protection depend on it. The basic formula is: Total power (W) = power per meter (W/m) × meters installed. To this, add a safety margin of 20-30% on the power supply, because a power supply constantly working at 100% load degrades rapidly and drastically reduces its useful life.
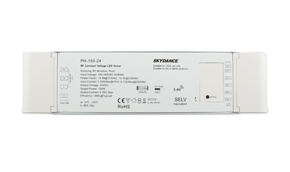
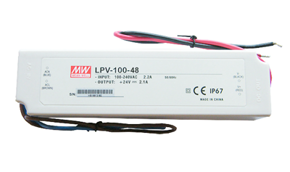
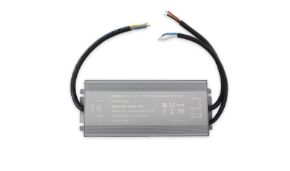
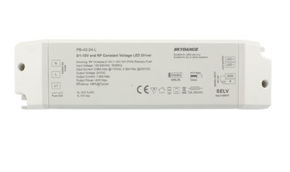
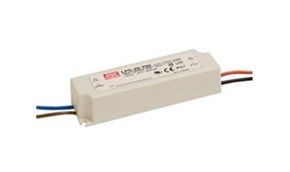
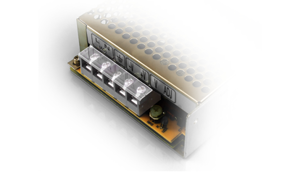
Practical and verifiable example: 40 meters of Neon Flex at 5.5 W/m draw 220 W. With a 25% margin, a power supply of at least 275 W is needed, so a 300 W model will be chosen. If, instead, 14.4 W/m strips are used for 40 meters, the power rises to 576 W: in this case, a single power supply is not used; instead, the system is divided into multiple circuits, always preferable because it limits voltage drop and isolates any faults. Ledpoint 24V power supplies cover the entire range of power needed for an outdoor Christmas light installation, from 30 W for a balcony to 400 W for a complete facade.
The real consumption of a complete installation: three case studies
Abstract numbers are not very convincing. We therefore calculated the consumption of three real installations, typical of the requests we receive, considering 45 days of operation (from December 1 to January 6 plus margin) at 6 hours a day and an energy cost of €0.25/kWh.
| Scenario | Composition | Total power | Season kWh | Season cost |
|---|---|---|---|---|
| Urban balcony | 15 m IP65 string + 1 curtain 2x1 m | 18 W | 4.9 kWh | €1.22 |
| House with garden | 50 m string + 2 trees + 1 30 W projector | 105 W | 28.4 kWh | €7.09 |
| Restaurant outdoor area | 60 m Neon Flex 5.5 W/m + 25 m strip 9.6 W/m | 570 W | 153.9 kWh | €38.48 |
The figure that surprises everyone is the first: a complete balcony of outdoor Christmas lights costs about €1.20 in energy for the entire season. That is less than a coffee. The widespread concern about the consumption of outdoor Christmas lights is today largely unfounded with LED technology: the real impact on the bill is marginal, while the cost of replacing products that fail remains significant. Once again, the expense item to control is quality, not consumption.
In other words, the budget for outdoor Christmas lights should be spent on IP rating, power supplies, and connections, not on saving watts.
5. Voltage: 230V, 24V, 12V, and voltage drop
Voltage is the parameter that separates safe installations from dangerous ones, and it is also the one on which the consumer market communicates worst. Put simply, there are two worlds: fixtures powered directly at 230V alternating current, which connect the plug to the socket without intermediaries, and those powered at safety extra-low voltage (SELV) at 24V or 12V direct current, via a power supply or transformer.
The practical difference is enormous and mainly concerns electrical risk. At 230V, direct contact in damp conditions can be lethal; at 24V direct current, the human body practically perceives nothing and the risk of electrocution is considered negligible. When talking about outdoor Christmas lights installed on balconies reachable by children, on hedges accessible to pets, or on an outdoor area frequented by customers, this difference is not theoretical: it is the main selection criterion.
When we are asked what the most important characteristic of outdoor Christmas lights intended for spaces frequented by people is, the answer is always the same: safety extra-low voltage.
Systematic comparison of the three voltages
| Criterion | 230V AC | 24V DC (SELV) | 12V DC (SELV) |
|---|---|---|---|
| Contact safety | Dangerous | Safe | Safe |
| Power supply required | No | Yes | Yes |
| Max single run length | Even 100 m | 10-20 m per side | 4-5 m per side |
| Voltage drop | Negligible | To be calculated | Critical |
| Dimmability | Limited, with dedicated drivers | Excellent (PWM) | Excellent (PWM) |
| Flicker | Possible with poor driver | Absent with stabilized power supply | Absent |
| System cost | Lower | Medium | Medium |
| Recommended use | Large meterages, municipalities, tall trees | Professional standard | Short runs, underwater, furniture |
Ledpoint’s technical recommendation is clear: for domestic and commercial outdoor Christmas light installations, 24V is the best choice in the vast majority of cases. It combines the safety of SELV with the ability to create long runs, dims perfectly, and allows the same infrastructure to be used all year round. 12V remains valid only for short runs or underwater applications; 230V makes sense for very extensive meterages, where the number of power supplies needed would become unsustainable — this is the case for city lights and preassembled decorative LED trees, which indeed operate at 230V with IP45.
Voltage drop: the calculation nobody does and that ruins installations
Here is the phenomenon that explains why so many installations “fade” toward the end of the run. At extra-low voltage, the current traveling through the conductor encounters resistance that dissipates energy as heat: the available voltage decreases as you move away from the power supply. The visual result is a line that starts bright and gradually dims, with a very unpleasant effect especially on facades.
The formula for calculation in direct current is: ΔV = 2 × ρ × L × I / S, where ρ is the resistivity of copper (0.0178 Ω·mm²/m), L the length in meters, I the current in amperes, and S the conductor cross-section in mm². The factor 2 accounts for the outgoing and return paths. The practical rule is that voltage drop must not exceed 3-5% of the nominal voltage: at 24V this means losing no more than 0.7-1.2 V.
| Power at 24V | Current | 0.75 mm² cross-section | 1.5 mm² cross-section | 2.5 mm² cross-section |
|---|---|---|---|---|
| 24 W | 1 A | 25 m | 50 m | 84 m |
| 48 W | 2 A | 12 m | 25 m | 42 m |
| 96 W | 4 A | 6 m | 12 m | 21 m |
| 144 W | 6 A | 4 m | 8 m | 14 m |
| 240 W | 10 A | 2.5 m | 5 m | 8.4 m |
Indicative values for maximum length of the connecting cable between power supply and load to remain within 3% voltage drop at 24V. The reading is immediate: the more power you install, the more you must increase cable cross-section or move the power supply closer. Three design solutions solve the problem definitively: feed the line from both ends, divide the system into shorter circuits with distributed power supplies, or step up voltage by using 48V LED strips, which at the same power halve the current and quadruple the useful length.
Outdoor Christmas lights without a socket: battery, solar, and standalone systems
One of the most frequent searches concerns outdoor Christmas lights without a socket, meaning solutions that do not require a power point nearby. This is a real need: large gardens, trees far from the house, balconies without outdoor sockets, shop windows in historic centers with installation restrictions. The three available technologies have very different characteristics.
| Technology | Autonomy | Pros | Cons | Ideal context |
|---|---|---|---|---|
| Alkaline batteries | 20-40 hours | Low initial cost, zero cables | Frequent replacements, waste, light loss | Small details, vases, outdoor centerpieces |
| Rechargeable batteries + USB | 8-14 hours per cycle | Reusable, app control | Daily manual recharging | Small balconies, temporary shop windows |
| Solar panel + storage | 4-8 hours if fully charged | No grid consumption, zero wiring | Low output in December, weather-dependent | Sunny gardens, areas without power |
| 24V power from indoors | Unlimited | Total reliability, dimmable | Requires running a cable | All stable installations |
On solar, technical honesty is required: in December, at Italian latitudes, a panel receives about one third of the energy it receives in June, with short days and frequent cloud cover. Solar-powered outdoor Christmas lights work, but with reduced autonomy and often with a drop in intensity in the final hours. They are excellent as decorative integration, less reliable as the main system for a restaurant or shop that must guarantee the effect every evening from 5 p.m. to 11 p.m. For those needs, a 24V cable run from indoors remains the professional solution.
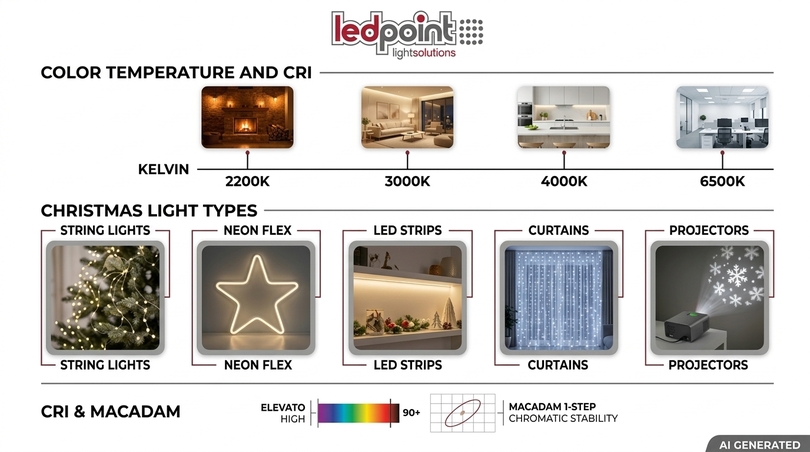
6. Color temperature and CRI: which color to choose this year
Once the three fundamental technical parameters are settled, we move on to the aesthetic dimension, where technique still matters enormously. Color temperature, measured in kelvin (K), describes the tone of white light: low values give a warm light tending toward amber, high values a cool light tending toward blue. It is the parameter that, more than any other, determines the perceived atmosphere.
The question “what color is in fashion this year” returns every season, but the technically correct answer is that trends change, the principle does not: color temperature should be chosen based on the materials it illuminates, not on fashion. Those who choose outdoor Christmas lights looking only at the year’s trend end up with an installation that ages in twelve months. A brick or warm stone facade calls for 2200-2700K; a building in glass, steel, or white plaster easily handles 4000K and above; a snowy fir tree, real or artificial, benefits greatly from ice white at 6500-8000K, which enhances the residual blue of the snow.
Complete guide to color temperatures for outdoor Christmas lights
| Temperature | Name | Perception | Materials it enhances | Christmas application |
|---|---|---|---|---|
| 2200K | Extra warm white / amber | Candle flame, nostalgic | Stone, terracotta, dark wood, brass | Historic villages, chalets, traditional atmosphere |
| 2700K | Warm white | Welcoming, domestic | Light wood, warm plaster, fabrics | Balconies, outdoor areas, entrances, porches |
| 3000K | Standard warm white | Elegant, balanced | Almost all materials | The most versatile standard of all |
| 4000K | Natural white | Clean, contemporary | Glass, steel, concrete, white | Modern architecture, retail, offices |
| 6000-6500K | Cool white | Wintery, brilliant | Snow, glass, reflective surfaces | Snowy trees, ice effect |
| 8000-15000K | Ice white | Glacial, scenic | Artificial snow, crystal | Cascades, icicles, polar effects |
| RGB / RGBW | Dynamic color | Spectacular, changing | Neutral and light surfaces | Events, shop windows, light shows |
The Ledpoint catalog covers the entire spectrum with dedicated categories: warm white 2200-3500K for traditional atmosphere, cool white 5500-8700K for winter effect, ice white 9000-15000K for the most scenic installations, and RGBW LED strips for those who want color and white in the same fixture.
What lights to put on the tree: snowy, white, natural green
The choice changes radically depending on the color of the tree, and this is one of the points where amateur installations most often go wrong. Here are the combinations that work, verified on real installations.
| Tree type | Recommended temperature | LED density | Effect | To avoid |
|---|---|---|---|---|
| Natural green fir | 2700-3000K | 80-100 LEDs/m of height | Warm, traditional, greens stay vivid | Cool white: makes green look gray |
| Snowy tree | 6000-6500K + 3000K mixed | 100-120 LEDs/m | Snow sparkles, shadows stay blue | Warm only: snow turns yellowish |
| White tree | 2200-2700K or RGB | 60-80 LEDs/m | Warm contrast on white, very elegant | Cool white on white: flat and clinical |
| Black or anthracite tree | 2200K or gold | 120+ LEDs/m | Jewel effect, high density required | Low density: disappears in the dark |
| Garden tree (real) | 3000K + 4000K projector | Variable | Crown illuminated and trunk enhanced | Strings only: volume is not readable |
The golden rule for the tree is depth: lights should be brought toward the inside of the crown, not only on the outer surface. A tree lit only on the surface appears flat and two-dimensional; bringing some outdoor Christmas lights near the trunk creates depth and the volume becomes readable even from a distance. This is the technique that distinguishes professional outdoor Christmas lights from an improvised installation. This technique, long used in city lights, doubles the visual impact without increasing the number of LEDs.
CRI: why the same facade can look dull
The color rendering index (CRI or Ra) measures how faithfully a source reproduces the colors of illuminated objects, on a scale up to 100. An LED with Ra>80 is acceptable for pure decoration, while illuminating fine materials such as stone, wood, copper, or fabrics requires Ra>90. The difference is especially evident on reds, which with low CRI become dull and lifeless: a crucial detail when the installation includes red decorations, the Christmas color par excellence.
Anyone producing photographic or video content, from influencers to restaurateurs posting on social media, should consider CRI a non-negotiable parameter: smartphone cameras amplify color rendering defects and low-Ra light produces images with unnatural colors that are difficult to correct in post-production. Ledpoint explores the topic extensively in its technical article “Discovering CRI,” recommended reading for anyone who truly wants to understand how light quality is measured.
Color uniformity and MacAdam: the professional detail
Two LED strips purchased with the same “3000K” label can look visibly different side by side. The cause is binning tolerance, measured in MacAdam steps: a 3-step product guarantees that color differences are imperceptible to the human eye, while a product without a binning declaration can have evident shifts. On a continuous 40-meter facade, this difference is immediately noticeable and ruins the result.
For this reason, Ledpoint products explicitly state binning in the technical data sheet (for example “3000K 3step”), and the company has dedicated a specific in-depth article to the topic on Step MacAdam and CCT. When purchasing outdoor Christmas lights intended for an extensive installation, asking for the binning figure is the fastest way to distinguish a professional supplier from a generic reseller.
On outdoor Christmas lights intended for continuous facades, binning is not a technical detail: it is the difference between a homogeneous line of light and a sequence of slightly different tones.
7. Types compared: strings, curtains, cascades, neon flex, LED strips
At this point you know the parameters; now it is a matter of applying them to real products. This section compares all types of outdoor Christmas lights available using explicit and consistent criteria, so you can decide rationally rather than on impulse. The evaluation criteria we apply to every product are six: weather resistance, luminous efficiency, ease of installation, expected lifespan, versatility of use, and cost per meter.
A useful preliminary warning: there is no single best type. There is the right type for a surface, a budget, and an objective. A garden tree calls for a string, a straight eave calls for a tube, an outdoor area calls for a strip in profile. Mixing types coherently is, in fact, the secret of professional installations: visual depth is born precisely from the combination of points of light, lines of light, and illuminated surfaces.
In the following pages, each type is evaluated as if it had to go into a specification: this is how you choose outdoor Christmas lights when the result must hold up for years and not just for a photograph.
Lighting strings: the timeless classic
The lighting string is the best-selling and most versatile product. It consists of a supporting cable with LEDs distributed at regular intervals, typically every 8-15 centimeters, often extendable in series up to a maximum length declared by the manufacturer. It is the ideal solution for wrapping trees, following railings, outlining paths between hedges, and creating starry skies between two anchor points.
There are three points of attention. First, the extension limit must be strictly respected: connecting more strings in series than declared causes overheating of the first section and a drop in brightness in the last. Second, the cable can be green, transparent, black, or “metal” silver: the choice greatly changes the daytime impact, often overlooked but visible for two thirds of the day. Third, check the IP rating of the joining connector, not just that of the string.
Light curtains and cascades: verticality and movement
A light curtain consists of a horizontal cable from which vertical wires of equal length hang; a cascade, on the other hand, has wires of decreasing or random length, generating the effect of flowing water. Both brilliantly solve the same problem: giving verticality to an installation that would otherwise tend to remain horizontal and monotonous.
They work very well on windows, eaves, pergolas, and under balconies. The main constraint is wind: being hanging elements, in windy areas they oscillate, twist, and subject attachment points to cyclic stress. The professional solution consists of weighting or securing the lower end of each wire, or using curtains with a rigid supporting cable. For very exposed balconies, a line of Neon Flex fixed to the parapet is often a more robust choice.
Copper-wire micro LEDs: the photogenic detail
Micro LEDs mounted on copper or silver wire have become the preferred tool of those who create visual content. The wire, often less than a millimeter thick, disappears from view and the LEDs appear suspended in space: it is the “firefly” effect that works very well in photography, especially with a wide aperture that turns each point of light into a circular bokeh.
The limitation is mechanical fragility: copper wire bends easily and does not return to its original shape, and the solder joints to the LEDs are tiny. These products are ideal for careful, protected installations, less suitable for installations exposed to strong wind or repeated handling. There are IP65 and IP67 versions that resist water well, but mechanical fragility remains.
Neon Flex: the continuous line of light
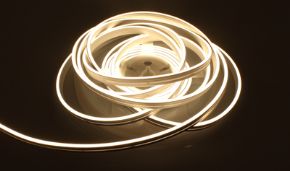
Neon Flex is a flexible PVC or silicone tube with integrated LED strips and a diffuser that generates a homogeneous line of light, with no visible points. It is the product that has replaced traditional neon in architectural lighting and that today represents the most elegant choice for high-end Christmas installations: it outlines cornices, draws lettering, follows arches and curves, and enhances the geometry of the building instead of merely decorating it.
The Ledpoint range includes classic Neon Flex, Neon Flex tubes, and the Neon Flex accessories needed to close the ends in a watertight way. A concrete example of a product suitable for outdoor Christmas use is the Led Neon Flex 3x5mm white 4000K, 24V, 5.5 W/m, IP65, 5 meters: minimal cross-section, very high LED density, IP65 protection, and extra-low voltage power. For a warmer atmosphere, the Neon Flex 5x5mm warm white 3000K, 24V, 5.5 W/m version offers the most widely used tone in residential and commercial Christmas installations.
LED strips in aluminum profile: the semi-permanent solution
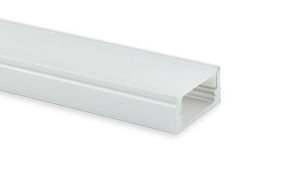
The combination of LED strip + aluminum profile + opal diffuser is the standard of contemporary architectural lighting, and applied to Christmas it produces results that no string can match. The profile performs three functions simultaneously: it dissipates heat, extending LED life; it mechanically protects the strip; and, with the diffuser, it transforms points of light into a uniform continuous line.
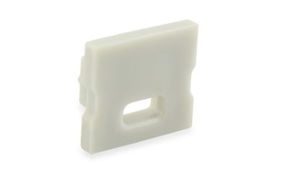
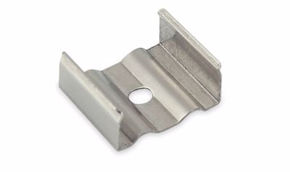
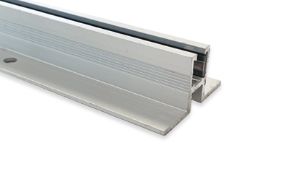
Ledpoint offers the entire supply chain: aluminum profiles of every cross-section, diffusers, mounting brackets, end caps, and complete profile and accessory kits. Those seeking maximum uniformity will find the definitive answer in COB strips: the COB LED strip 10m warm white 2200K with CRI Ra>93, 320 LEDs/m, 24V, 9.6 W/m produces a continuous amber light, with no dotting, very high color rendering, and an operating temperature down to -10 °C. For those who prefer maximum efficiency, the LED strip 5m warm white 3000K 3step, 240 LEDs/m, 24V, 14.4 W/m reaches 2,000 lumens per meter with an efficiency of 155 lm/W.
Projectors, floodlights, and light trees
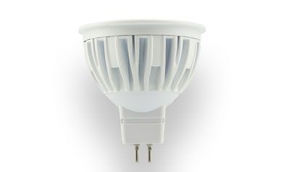
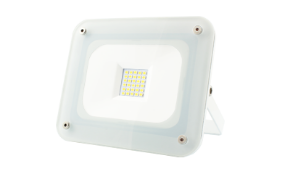
The projector, or floodlight, is the only tool capable of illuminating large surfaces from a distance: a facade, a tall tree, a perimeter wall. Positioned on the ground and aimed upward, it generates that architectural enhancement effect that no applied decoration can achieve. In the Ledpoint Floodlight category, fixtures are available for lighting extensive surfaces, while the bulbs and spotlights section covers punctual accent needs.
LED trees, on the other hand, represent the preassembled scenic solution: structures 2.5-2.8 meters tall with thousands of integrated LEDs, cables hidden inside the branches, and IP45 protection. The catalog includes the 2.5 m maple with 1,216 warm white LEDs, 73W, the 2.8 m cherry tree with 1,200 warm white LEDs, 72W, the 2.8 m ginkgo biloba with 3,072 LEDs, 188W, and the RGB ginkgo biloba with remote control, 98W, ideal for those who want to change color according to the event. They are perfect elements for hotel lobbies, shopping center entrances, restaurant outdoor areas, and large private gardens.
Compared with traditional strings, these elements function as a focal point: around them, the other outdoor Christmas lights can remain discreet, because the scene already has its protagonist.
Complete comparative table of outdoor Christmas lights
| Type | Weather resistance | Efficiency | Installation | Lifespan | Versatility | Indicative cost/m |
|---|---|---|---|---|---|---|
| IP44 lighting string | Low | Medium | Very easy | 2-3 seasons | High | €0.50-1.50 |
| IP65/67 lighting string | High | Medium | Easy | 4-6 seasons | High | €1.50-4 |
| Light curtain | Medium | Medium | Medium | 2-4 seasons | Medium | €3-8 |
| Cascade / icicles | Medium | Medium | Medium | 2-4 seasons | Medium | €3-8 |
| Copper wire micro LEDs | Medium | High | Easy but delicate | 1-3 seasons | Very high | €1-3 |
| IP65 Neon Flex | Very high | High | Medium, requires brackets | 8-15 years | High | €8-20 |
| IP65 LED strip + profile | Very high | Very high | Technical | 8-15 years | Very high | €12-35 |
| Projector / floodlight | Very high | Very high | Easy | 10-15 years | Medium | Per unit |
| Preassembled LED tree | High | Medium | Very easy | 5-10 years | Low | Per unit |
8. How many meters of outdoor Christmas lights do you need?
Getting the calculation wrong means either ending up with half an installation on the evening of assembly, or finding yourself with dozens of unused meters. Fortunately, there are reliable empirical formulas, verified on hundreds of installations.
The general principle is that the meterage of outdoor Christmas lights is calculated based on the geometry of the object to be illuminated, not by eye. For a tree, height and crown circumference matter; for a facade, the linear meters of cornice matter; for a balcony, the perimeter of the parapet matters. Here are the formulas and practical values.
Sizing formulas by type of surface
| Object to illuminate | Practical formula | Concrete example | Meters needed |
|---|---|---|---|
| Conical tree (wrapping) | Height (m) × 10 for standard effect | 2 m fir | 20 m |
| Conical tree (dense effect) | Height (m) × 15-20 | 2 m fir | 30-40 m |
| Tall garden tree | Height × 12 + trunk × 4 | 5 m pine | ~80 m |
| Balcony parapet | Perimeter × 1.3 (for curves) | Balcony 4+1.5+1.5 m | ~9 m |
| Railing with spiral wrapping | Length × 3 | 6 m railing | 18 m |
| Cornice / eave | Actual length + 10% | 12 m facade | 13.2 m |
| Window outline | Perimeter × 1.2 | Window 1.2 × 1.5 m | ~6.5 m |
| Hedge | Length × 2 (out and back) | 10 m hedge | 20 m |
| Pergola | Perimeter + diagonals | Pergola 4 × 3 m | ~24 m |
| Path (both sides) | Length × 2 | 15 m path | 30 m |
Typical configurations at 10, 50, and 100 meters
To make the numbers immediately usable, here is what can realistically be achieved with the three most requested meterages. These are real configurations, not optimistic estimates.
| Meterage | What it realistically covers | Typical power at 24V | Recommended power supply | Ideal audience |
|---|---|---|---|---|
| 10 meters | A balcony parapet, or a window, or a 1 m small tree | 5-15 W | 30 W | Urban apartment |
| 25 meters | Complete balcony + entrance door outline | 12-40 W | 60 W | Apartment with terrace |
| 50 meters | House facade + a medium tree + entrance | 25-80 W | 100-150 W | Detached house |
| 100 meters | Complete garden: 2 trees, hedge, path, facade | 50-160 W | 2 × 150 W | Villa with large garden |
| 200+ meters | Restaurant outdoor area, hotel, shop, square | 100-1,500 W | Multiple circuits | Commercial business |
The operational advice is to always buy 15% more meters than the theoretical calculation. Curves, returns, mandatory routes to reach the power point, and inevitable second thoughts during assembly consume meters that no paper calculation anticipates. Having a reserve avoids the Saturday afternoon rush to the store in December, when models compatible with those already purchased are systematically sold out.
A few extra meters also allow you to replace a damaged section on the spot without turning everything off: for the outdoor Christmas lights of a commercial business, this possibility is worth far more than its cost.
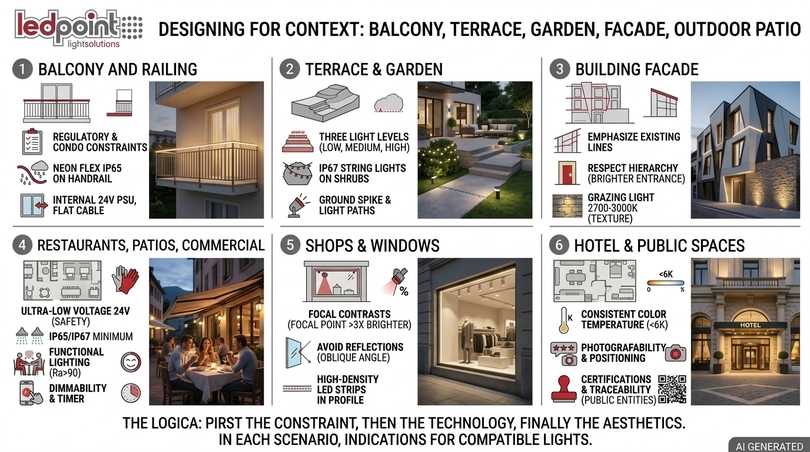
9. Designing by context: balcony, terrace, garden, facade, outdoor area
The same outdoor Christmas lights produce different results in different contexts, because every context has its own constraints: regulatory, condominium, mechanical, and aesthetic. This section addresses the six most frequent scenarios with immediately applicable operational guidance, because the same choice of outdoor Christmas lights that works perfectly in a private garden can be inadequate on a fourth-floor condominium balcony.
The underlying logic is always the same: first the constraint, then the technique, finally the aesthetics. A beautiful installation that violates the condominium rules or overloads a structure not designed for the load is not a good installation, however scenic it may appear in photographs.
For this reason, in each of the following scenarios, we explicitly indicate which outdoor Christmas lights are compatible with the typical constraints of that context.
Balcony and railing: Christmas lights for balconies
The balcony is the most widespread context in Italy and, paradoxically, one of the most delicate. The first constraint is regulatory: installed elements must not protrude beyond the line of the railing or create a risk of falling onto the public street. The second is condominium-related: many rules regulate decorations on facades, and it is good practice to check before creating an installation visible from outside.
Technically, the optimal Christmas lights for balconies are IP65 strings or Neon Flex fixed to the handrail or inside the parapet with UV-resistant nylon ties. The recommended voltage is 24V, with the power supply positioned inside the home and a single cable passing through the window frame. Pay attention to a detail often overlooked: never pinch the cable in the window sash, because the sheath is damaged within days of repeated opening and closing. The correct solution is a dedicated passage or a specific flat cable for window frames.
For balconies exposed to strong wind, the best choice is a rigid line fixed at least at five points per meter, rather than hanging elements. Christmas lights for balconies with a cascade effect are beautiful but require sheltered positions or end weighting.
Terrace and garden: how to illuminate the terrace at Christmas
The terrace allows more articulated installations because it offers horizontal surfaces, planters, pergolas, and often a view. The correct design strategy involves three overlapping levels of light: a low level (planters, vases, floor), a middle level (parapets, seating, tables), and a high level (pergola, curtains, trees). This stratification creates depth and makes the space usable even on cold evenings.
For the garden, the approach is similar but on a larger scale. The most effective Christmas garden lights combine three elements: IP67 strings on shrubs, ground projectors aimed at tall trees, and a luminous path along the walkway. The luminous path is the element with the best ratio between scenic impact and cost: it guides the eye, creates perspective, and transforms a flat garden into a narrative space.
Be careful with products installed in contact with the ground: they require IP67 as a minimum, because in December the soil remains wet for days and standing water is the norm, not the exception. An IP65 product placed on a soaked flowerbed will fail with very high probability within a few weeks.
Building facade: Christmas architectural lighting
Illuminating a facade requires a change of mindset: you do not decorate a surface, you draw an architecture. Professionals follow three principles. The first is emphasizing existing lines (cornices, string courses, outlines of openings) instead of adding arbitrary ones. The second is respecting hierarchy: the main entrance must be the brightest point. The third is leaving areas of shadow, because contrast is what makes volume readable. Applied to a facade, these three principles transform outdoor Christmas lights from added decoration into a true lighting project.
The tools are two: continuous lines (Neon Flex or strips in profile) for drawing, and grazing projectors for surfaces. For stone or brick facades, grazing light at 2700-3000K with high CRI enhances texture; for modern glass and steel architecture, 4000K better renders the materials. On historic buildings, it is always advisable to check for any Superintendency restrictions before installing any invasively fixed element.
Restaurants, outdoor areas, and commercial businesses
For a restaurant with outdoor space, outdoor Christmas lights are not a decoration: they are a measurable commercial investment. A well-lit outdoor area in December extends the seasonality of the outdoor space, improves the venue’s perception in photos shared by customers, and increases visibility from the street in the evening hours, when darkness falls at 5 p.m.
The technical requirements in this context are stricter than in residential settings, because responsibility toward the public and service continuity come into play:
- 24V extra-low voltage mandatory at every point reachable by customers, to eliminate electrical risk.
- IP65 minimum on all exposed elements, IP67 on those at floor level or near planters.
- Mechanical resistance: aluminum profiles where the public passes, to prevent accidental damage.
- Functional illuminance on tables: decoration is not enough; useful light is needed to read the menu, with CRI Ra>90 to make dishes appetizing.
- Dimmability: different scenes for lunch, aperitif, and dinner improve the experience and reduce consumption.
- Timer and photocell: automatic switching on and off, without depending on staff.
The typical solution combines Neon Flex on the structure’s perimeter, 24V LED strips in profile above the tables, and a couple of LED trees as scenic elements. Control is handled by a monochromatic dimmer or, for those who want app management and programmable scenes, by a ZigBee system.
Shops, windows, and shopping centers
In retail, Christmas lighting has a precise objective: stop passersby and bring them inside. The shop window works with contrasts: the focal point must be 3-5 times brighter than the surrounding area, otherwise the gaze does not stop. The most effective Christmas lights for points of sale combine a perimeter luminous frame (which defines the space) with punctual accents on featured products.
A recurring mistake is illuminating the window uniformly: the result is flat and unattractive. Another mistake is reflection: a source pointed directly at the glass creates a reflection that cancels visibility of the interior. The solution is to position sources at an oblique angle or hide them behind the mullion. For shop windows, high-density LED strips in profile with diffuser remain the technically superior choice.
Hotels, accommodation facilities, and public spaces
For hotels, farm stays, and accommodation facilities, Christmas lighting has positioning value: it directly contributes to the perception of the facility’s quality and its photographability, a crucial element in reviews and digital promotion. Christmas lights for hotels require a coordinated approach across exterior, entrance, and lobby, with a consistent color temperature throughout the welcome path.
For public spaces and Christmas lights for municipalities, the discussion becomes a full-scale project: work is done on an urban scale, with safety constraints, structural loads, connections, and inspections. In these cases, the choice of components must guarantee traceability, complete certifications, and availability of spare parts in subsequent years, requirements that only a structured supplier can ensure.
10. Installing outdoor Christmas lights step by step: anchors, cables, watertight connections
A good product installed badly performs worse than a mediocre product installed well. This section describes the complete installation procedure for outdoor Christmas lights, from planning to disassembly, with the same care that would be used for a permanent system. The time invested in preparation is recovered many times over during assembly.
It is worth remembering right away: outdoor Christmas lights almost always fail at connection and fastening points, not in the LEDs. That is where attention must be concentrated.
The ten-step procedure
- Draw the installation on paper or a photo: photograph the facade during the day, print the image, and draw the lines of light on it. This step, which takes twenty minutes, eliminates 90% of sizing errors.
- Identify power points: mark where the sockets are, how far they are from the light points, and where the cable will run. This is the constraint that conditions everything else.
- Measure the actual meters with a measuring wheel or a wire, following the real path, not the straight-line distance. Add a 15% margin.
- Calculate total power and size the power supply with at least 20-25% reserve.
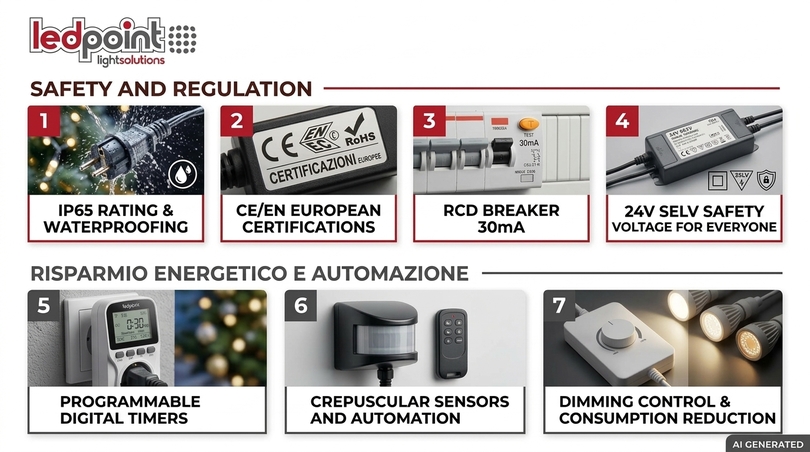
- Check electrical protection: the circuit powering the outdoors must be protected by a 30 mA residual current device. This is a fundamental safety requirement, not optional.
- Test everything on the ground before going up: connect each element, turn it on, and verify it on the bench. Discovering a faulty section five meters up is the worst possible experience.
- Install from top to bottom: always work starting from the highest point, so cables descend naturally and no tangles form.
- Fasten with adequate anchors and at regular intervals: 30-50 cm for light strings, 20-30 cm for Neon Flex, every 50 cm with dedicated clips for aluminum profiles.
- Seal and protect connections, always positioning them downward and never in places where water can stagnate.
- Set the timer and check the complete installation in the dark, correcting orientations and shadow areas.
Anchoring systems: what to use on each surface
The fastening method is the variable that determines whether the installation will survive the first Atlantic storm in December. This table summarizes the correct solutions for each type of support, including cases where you do not want to drill into surfaces.
| Surface | Recommended system | Holding strength | Reversible | Notes |
|---|---|---|---|---|
| Metal railing | UV-resistant nylon ties | Excellent | Yes | Replace every 2-3 seasons |
| Wooden railing | Insulated staples or ties | Good | Yes | Never metal nails on the cable |
| Brick wall | Wall plug + hook or clip | Excellent | No | Seal the hole at the end of the season |
| Plaster | Outdoor adhesive hooks | Medium | Yes | Apply to a dry, clean surface |
| Glass and aluminum | Professional suction cups or 3M double-sided tape | Medium | Yes | Clean with isopropyl alcohol first |
| Gutter | Specific gutter clips | Good | Yes | Never deform the metal sheet |
| Tree trunk | Loose spiral wrapping | Good | Yes | Leave room for growth |
| Ground and flowerbeds | Galvanized steel stakes | Good | Yes | IP67 products mandatory |
| Walkable floor | Recessed walkable profile | Excellent | No | IP67 + IK08 minimum |
Watertight connections: the technique that saves the installation
Joints are the number one failure point of any outdoor installation. The professional procedure for making a truly watertight connection involves four steps: strip the conductors to the minimum necessary length, make the mechanical joint or solder it, apply heat-shrink tubing with internal adhesive that seals the conductor when heated, and finally position the joint so that any drops slide away rather than stopping.
An additional very effective technique is the drip loop: creating a downward loop before the connection point, so that water running along the cable drips at the lowest point of the loop instead of reaching the connector. This is an expedient that costs nothing and prevents most water ingress. To make proper joints, the Ledpoint catalog offers solder joints, PCB connectors for LED strips, connection cables, and dedicated tools for assembly.
The ten things never to do
- Never connect indoor extension cords outdoors: they are the single most dangerous and most widespread mistake.
- Never leave the power supply resting on the ground without protection: it must be in a sheltered compartment or IP65 box.
- Never exceed the maximum number of strings connectable in series declared by the manufacturer.
- Never install during rain or on wet surfaces: trapped moisture means certain failure.
- Never drill or cut IP65 and higher tubes and strips outside the designated cut points: protection is lost.
- Never over-tension cables: cold contracts them further and tears internal solder joints.
- Never use nails or metal staples in direct contact with conductor insulation.
- Never leave connectors facing upward: they accumulate water by capillary action.
- Never install on branches that can move a lot in the wind without leaving slack in the cable.
- Never improvise at height: use a stable ladder, work in pairs, and never lean beyond your balance.
11. Safety, standards, and certifications
Safety is the least visible and most important aspect of the entire installation. Every year firefighters intervene for fires caused by improvised decorative systems, almost always traceable to three causes: indoor extension cords used outdoors, overloaded power strips, and uncertified products purchased through untraceable channels. None of these causes concerns LED technology itself: they concern installation and product provenance.
LED outdoor Christmas lights, installed correctly and with certified components, are among the safest decorative fixtures ever created: the problem is never the technology, but the shortcut.
Choosing compliant outdoor Christmas lights means verifying documentation, markings, and electrical requirements before purchase. This section summarizes the regulatory framework in terms understandable even to non-installers, with references to cite when requesting a technical data sheet from a supplier.
The reference regulatory framework
| Standard or reference | Subject | Why it matters to you |
|---|---|---|
| EN/IEC 60598-1 | Luminaires, general requirements | Safety basis of any fixture |
| EN/IEC 60598-2-20 | Lighting chains | Specific standard for outdoor Christmas lights |
| IEC 60529 | IP protection degrees | Defines what IP44, IP65, IP67 mean |
| CEI 64-8 | User electrical installations | Installation rules, 30 mA residual current device |
| EN 62471 | Photobiological safety | Relevant for high-intensity sources |
| EU Reg. 2019/2020 (ErP) | Ecodesign of light sources | Energy class and minimum efficiency |
| WEEE Directive | Disposal of electrical equipment | How and where to dispose of faulty lights |
| UNI EN 12464 | Lighting of workplaces | Applicable to outdoor areas with work activity |
Ledpoint declares conformity with the LM-80 standard for evaluating LED luminous flux depreciation and reports the energy class according to the ErP regulation, with a dedicated in-depth article on energy labeling available on its website. These are exactly the information a professional buyer should demand and that, in seasonal large-scale retail, are almost always absent.
The indispensable electrical requirements for outdoor Christmas lights
Let us summarize in a list the requirements that admit no exceptions when powering an outdoor installation. They are the same ones an electrician would verify during commissioning.
- 30 mA residual current device protecting the circuit that powers the outdoors. It is the device that saves lives in the event of indirect contact.
- Outdoor sockets and junction boxes with a minimum IP44 rating, preferably IP55, and spring-loaded cover.
- Cables suitable for outdoor installation, resistant to UV rays and cold, with a cross-section adequate for the current.
- Certified power supplies with overload, short-circuit, and overtemperature protection.
- No flying connections: every joint must be made with components designed for the purpose.
- SELV extra-low voltage wherever people may come into contact with the fixtures.
Children, pets, and family safety
For families with small children, the question of which outdoor Christmas lights are safest has a clear technical answer: those powered at 24V or 12V safety extra-low voltage. At these values, even if the cable is damaged or directly touched, the risk of electrocution is considered negligible. Let us add three very effective practical precautions.
The first is to keep the power supply and every connection point out of reach, ideally indoors or at least two meters high. The second concerns pets: dogs and cats chew cables on the ground, so strings installed on accessible flowerbeds and hedges must be 24V and fixed so they do not remain loose. The third concerns temperature: LEDs produce much less heat than old bulbs, but they are not cold, and a high-power fixture wrapped in flammable materials such as dry branches or fabrics remains a risk to avoid.
12. Energy savings, timers, and sustainability of outdoor Christmas lights
We have seen that the energy cost of a domestic installation is on the order of a few euros per season. This does not make efficiency irrelevant, however: on a commercial scale, for a hotel, shopping center, or city lighting, the same percentages translate into hundreds or thousands of euros. And, regardless of cost, reducing unnecessary consumption remains the right choice.
The three available levers are source efficiency, control of operating time, and intensity regulation. The second is by far the most powerful: halving the hours of operation exactly halves consumption, with no aesthetic compromise, because nobody looks at decorations at three in the morning.
Programming outdoor Christmas lights with a photocell and timer is therefore the intervention with the best ratio of cost, simplicity, and result in this entire guide.
Timers, photocells, and automation
| Device | Operation | Typical savings | Indicative cost | When it is worth it |
|---|---|---|---|---|
| Mechanical timer | Fixed schedules set with tabs | 30-50% | €8-15 | Basic solution, always |
| Digital timer | Different programs by day | 40-60% | €15-30 | Businesses with variable hours |
| Photocell sensor | Turns on as natural light fades | 20-30% | €10-25 | Always correct switching on |
| Photocell + timer | Turns on at dusk, off at a set time | 50-65% | €25-45 | Optimal configuration |
| Dimmer | Reduces intensity in late hours | 15-40% | €20-60 | Outdoor areas, hotels, shop windows |
| ZigBee smart system | Scenes, app, complete automations | 50-70% | €60-200 | Professional installations |
The configuration we recommend for a commercial installation is photocell for switching on, timer for switching off, and dimmer for nighttime hours: the lights always turn on at the right time regardless of the season, turn off at closing time, and in the intermediate hours operate at 40-50%, maintaining visual presence with reduced consumption. The Ledpoint catalog covers these needs with controllers, sensors, and smart power supplies.
Ten concrete strategies to reduce consumption
- Choose high-efficiency LEDs: going from 70 to 140 lm/W halves consumption for the same light.
- Turn on only during useful hours: from 5 p.m. to 11 p.m. is six hours, not twelve.
- Use a dimmer in late hours: at 50% intensity, the perceived reduction is minimal.
- Concentrate light on focal points instead of spreading it everywhere: fewer meters, more impact.
- Check the declared energy class according to the ErP regulation.
- Prefer 24V over 12V on long runs: less cable loss.
- Size the power supply correctly: a greatly oversized power supply operates at worse efficiency.
- Reduce extension wires: every meter of cable is a small loss.
- Invest in durable products: the greatest environmental impact is production, not consumption.
- Dispose of faulty products correctly at WEEE centers, never in general waste.
Point nine deserves particular emphasis, because it is counterintuitive: for an LED product, the dominant environmental footprint is production and transport, not use. A string that lasts six seasons has a vastly lower overall impact than three strings that last two seasons each, even if it consumed slightly more. Buying quality outdoor Christmas lights is, in this sense, the most sustainable choice available. Durability and sustainability, in the case of outdoor Christmas lights, coincide almost perfectly: what lasts longer pollutes less.
13. Maintenance, disassembly, and troubleshooting
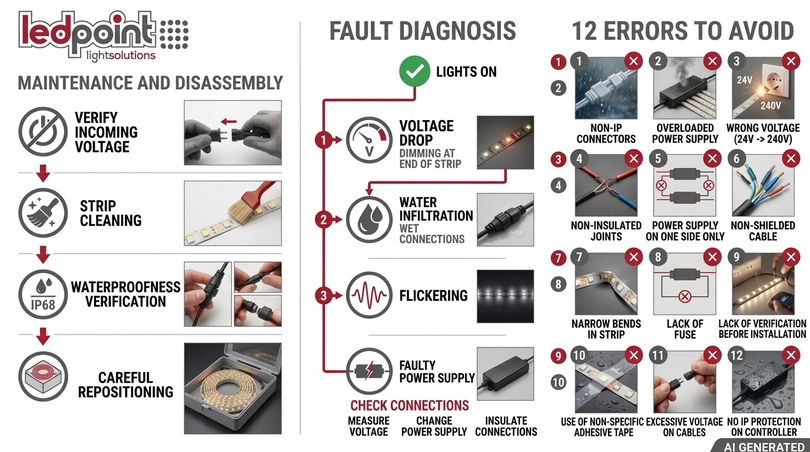
The real useful life of outdoor Christmas lights depends more on how they are disassembled and stored than on how they are used. For eleven months a year, outdoor Christmas lights sit in a box, and that is precisely where they get damaged: crushed, twisted, exposed to temperature swings in an unheated garage. Spending twenty extra minutes on disassembly means finding them working the following year, instead of having to buy them again.
The correct disassembly procedure
- Disconnect from the mains and wait for components to cool completely.
- Disassemble from bottom to top, in reverse order from assembly.
- Cut the ties with wire cutters, never pulling the cables to free them.
- Dry every element with a soft cloth: storing them damp means guaranteed oxidation.
- Wind onto rigid supports (cardboard, reel) without ever making knots or tight tangles.
- Label every element with length, type, and installation position: next year you will save hours.
- Store in rigid containers in a dry place, away from heat sources and extreme temperature swings.
- Note any faults found so replacements can be planned in good time, not in December.
Troubleshooting table for the most common faults
| Symptom | Most likely cause | Check to perform | Solution |
|---|---|---|---|
| One section on, the rest off | Conductor break or failed LED in series | Check the transition point | Replace the section or bypass it |
| Brightness decreasing along the line | Voltage drop | Measure voltage at the end of the run | Feed from both ends or increase cross-section |
| Flicker | Inadequate or unstable power supply | Check power and stabilization | Replace with stabilized power supply |
| Everything off | Protection tripped or faulty power supply | Check residual current device and output voltage | Reset and look for leakage |
| Shifted or uneven color | Internal condensation or phosphor degradation | Visual inspection against the light | Replace the affected section |
| Power supply very hot | Overload or insufficient ventilation | Calculate actual load | Higher-power power supply |
| Residual current device trips | Leakage to ground due to infiltration | Disconnect circuits one by one | Identify and isolate the wet section |
| Individual LEDs off in patches | Cold solder joints or mechanical stress | Close inspection | Replace the segment |
Maintenance during the season
For those managing a commercial business, a ten-minute weekly check prevents almost all failures of installed outdoor Christmas lights. The checklist is short: verify that all sections are on, check that fastenings have not loosened after wind or rain, inspect connection points, and after snow or frost gently remove snow accumulations from horizontal elements. Never use hot water or metal tools to remove ice: thermal shock and scratches irreversibly damage polymers.
14. The 12 most common mistakes with outdoor Christmas lights
After seeing hundreds of installations, some mistakes recur with impressive regularity. Listing them serves two purposes: avoiding them in your own installation and recognizing them when evaluating someone else’s quote. They are ordered by decreasing severity, from safety problems to purely aesthetic ones. If you recognize even three of these mistakes in your current installation, it is time to review the outdoor Christmas lights you are using and the way they are powered.
| # | Mistake | Consequence | Correction |
|---|---|---|---|
| 1 | Indoor extension cords used outdoors | Serious electrical hazard, fire | Cables and sockets IP44 minimum, certified for outdoor use |
| 2 | No residual current device | No protection against indirect contact | 30 mA residual current device on the outdoor circuit |
| 3 | Products without CE marking | No guarantee of safety or compliance | Buy only from traceable channels |
| 4 | Insufficient IP for the area | Failure within a few weeks | Map microzones and go up a level when in doubt |
| 5 | Too many strings in series | Overheating and light loss | Respect the manufacturer’s declared limit |
| 6 | Undersized power supply | Reduced useful life, sudden shutdowns | 20-25% margin on power |
| 7 | Unsealed connections | Infiltration, oxidation, leakage | Heat-shrink tubing and drip loop |
| 8 | Insufficient cable cross-section | Voltage drop, fading light | Calculate with the cross-section table |
| 9 | Mixed color temperatures | Messy visual effect | One kelvin per coherent surface |
| 10 | Uniform lighting without hierarchy | Flat, anonymous installation | Define a focal point and shadow areas |
| 11 | Cables visible during the day | Careless effect for 16 hours a day | Cable matching the support color, hidden routes |
| 12 | No timer | Unnecessary consumption and accelerated wear | Photocell and timer in every installation |
15. Professional Ledpoint solutions for custom installations
Ledpoint is an Italian company based in Faenza specializing in professional LED components: LED strips, Neon Flex, aluminum profiles, power supplies, controllers, and lighting accessories. It does not sell consumer Christmas strings, and this is precisely why it is worth considering when the goal is to create outdoor Christmas lights designed to last many years rather than a few weeks.
The approach is that of a project: start from the surface to be illuminated, define IP, power, and voltage, choose components, and build a coherent system, powered and controlled correctly. This is the approach with which outdoor lights for any commercial space should be addressed, and it serves a restaurateur who wants a recognizable outdoor area, a hotelier renovating an entrance, a designer who must deliver a compliant installation, and a municipality planning urban Christmas lights.
In all these cases, outdoor Christmas lights cease to be a seasonal purchase and become a lighting infrastructure, reusable for events, seasons, and different installations throughout the year.
The product lines best suited to outdoor Christmas installations
| Need | Ledpoint solution | Key features |
|---|---|---|
| Continuous line of light on eaves and frames | Neon Flex | IP65, 24V, homogeneous light, flexible on curves |
| Soft light without dotting | COB LED strips | 320-400 chips/m, 180° diffusion, CRI up to Ra>93 |
| Maximum luminous efficiency | 2835 LED strips | Up to 155 lm/W, LM-80 compliant |
| Dynamic effects and animations | Addressable LED strips (Pixel LED) | LED-by-LED control, sequential effects |
| Programmable color | RGBCCT LED strips | Color and adjustable white in the same fixture |
| Mechanical protection and heat dissipation | Aluminum profiles | Every cross-section, with dedicated diffusers and end caps |
| Safe power | Power supplies | 5V, 12V, 24V, 48V, smart and anti-flicker versions |
| Control and scenes | Controllers and dimmers | Monochromatic, RGB, RGBW, CCT, DMX, DALI, ZigBee |
| Ready-made scenic elements | LED trees | 2.5-2.8 m, IP45, 230V, hidden cables, RGB versions |
| Lighting large surfaces | Floodlights | Wide beams for facades and tall trees |
| Outdoor applications | Outdoor lighting | Dedicated section for outdoor solutions |
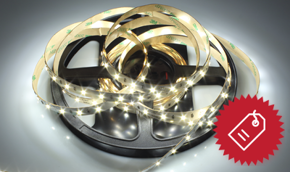
| Occasions and ready stock | LED strips on offer | Stock available at advantageous conditions |
Three ready configurations for three scenarios
To make everything you have read immediately operational, here are three complete configurations you can replicate or adapt. The values are calculated and verified.
Each configuration indicates the real components with which to create the outdoor Christmas lights described, so you can go directly from design to order.
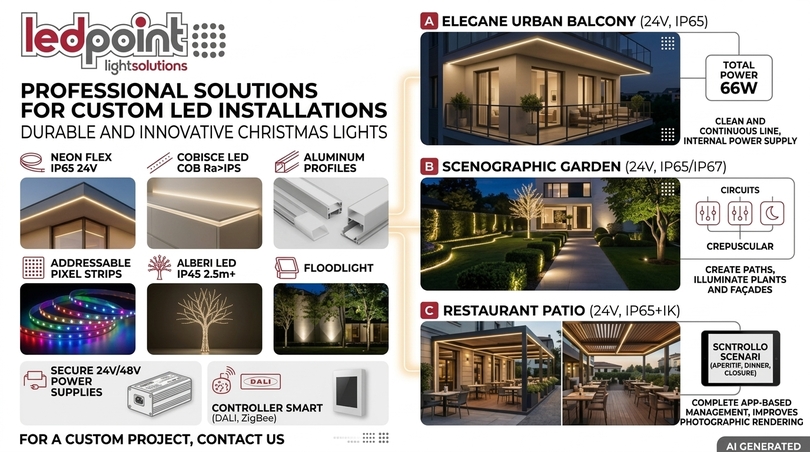
Configuration A - Elegant urban balcony (24V, IP65).
12 meters of warm white 3000K Neon Flex at 5.5 W/m fixed inside the parapet, a 100 W power supply positioned indoors, a monochromatic dimmer, and a timer. Total power 66 W, seasonal consumption about 18 kWh, seasonal energy cost under €5. Effect: a continuous, clean line of light, visible from the street, with no dangling cables.
Configuration B - House garden (24V, IP65/IP67).
40 meters of IP65 string or Neon Flex on hedge and railing, 2 projectors aimed at trees, a 2.8 m LED tree as a focal point near the entrance, and an IP67 luminous path along the walkway. Three separate circuits with dedicated power supplies, a single photocell for switching on. This is the installation that transforms a garden into a scenic space without overloading it with decorations.
Configuration C - Restaurant outdoor area (24V, IP65 + IK).
60 meters of Neon Flex on the structure’s perimeter, 25 meters of COB strip CRI Ra>93 in profile above the tables for functional light, two LED trees at the entrances, ZigBee control with three scenes (aperitif, dinner, closing). Total power about 570 W, complete app management, automatic dimming after 11 p.m. This is the investment that extends the seasonality of the outdoor space and significantly improves the venue’s photographic rendering.
To build your configuration, you can consult the Ledpoint catalog, explore the technical in-depth articles on the blog - starting with the guide How to calculate the lux of an LED installation - or contact the technical team directly from the Contact page for an assessment of your specific project.
16. Final checklist and quick-selection table
This is the operational summary of the entire guide: the table that resolves the choice in thirty seconds and the checklist to tick before purchase. If you have read everything else, this section is your reminder; if you have arrived here directly, you will find the concentrated essence of it all. Use it as a comparison grid while examining outdoor Christmas light offers: it will tell you in seconds whether a product is suitable for your context or not.
Quick-selection table by user profile
| Profile | Objective | IP | Voltage | Kelvin | Recommended product |
|---|---|---|---|---|---|
| Family with children | Safety and simplicity | IP65 | 24V SELV | 2700-3000K | IP65 24V string + timer |
| Apartment with balcony | Order and elegance | IP65 | 24V | 3000K | Neon Flex on parapet |
| Villa with large garden | Scenography and depth | IP65/IP67 | 24V | 3000K + 6000K | Strings + projectors + LED tree |
| Restaurant with outdoor area | Atmosphere and functionality | IP65 + IK07 | 24V | 2700K, CRI>90 | Neon Flex + COB strip in profile |
| Shop and window | Attract passersby | IP20/IP44 | 24V | 3000-4000K | High-density strip in profile |
| Hotel and accommodation facility | Positioning and consistency | IP65 | 24V | 2700-3000K | Coordinated system + LED trees |
| Creator and photography | Color rendering and bokeh | IP65 | 24V | 2200-2700K, CRI>93 | High-CRI COB + micro LEDs |
| Gardener and installer | Durability and support | IP67 | 24V/48V | Per project | Professional components |
| Municipality and public space | Safety and urban scale | IP65/IP66 | 230V/24V | 2700-3000K | Certified systems per project |
Checklist before purchase
- Have I mapped the microzones and defined the minimum IP rating for each?
- Have I chosen the voltage according to accessibility and run length?
- Have I calculated the actual meters adding a 15% margin?
- Have I calculated the total power and sized the power supply with 20-25% reserve?
- Have I checked the cable cross-section with respect to voltage drop?
- Have I chosen a color temperature consistent with the materials illuminated?
- Have I checked the CRI if the light will illuminate materials or dishes?
- Is the outdoor circuit protected by a 30 mA residual current device?
- Do all products have CE marking and a complete technical data sheet?
- Have I provided a timer or photocell for automation?
- Have I provided watertight connections and drip loops at critical points?
- Have I planned how to disassemble and store the material in January?
If all items are ticked, the installation you are about to create is technically correct and the outdoor Christmas lights you have chosen will accompany you for many seasons. If even one item remains uncovered, that will in all likelihood be the point where, in mid-December, you will have to intervene.
17. Frequently asked questions about outdoor Christmas lights
We have collected the questions we most often receive from our technical office and the most searched online. Click each question to open the answer. They are all real questions about how to choose, install, and maintain outdoor Christmas lights, with concise and verifiable answers.
What IP rating should outdoor Christmas lights have?The minimum acceptable is IP44 in sheltered areas such as porches and under-eaves. For surfaces exposed to direct rain, IP65 is required. For products resting on the ground, in flowerbeds, or subject to snow, IP67 is required. Outdoor Christmas lights with an IP lower than IP44 must never be installed outdoors. |
Is 230V or 24V better for outdoor Christmas lights?24V safety extra-low voltage is preferable in almost all domestic and commercial cases: it eliminates the risk of electrocution, dims perfectly, and does not produce flicker. 230V remains suitable only for very extensive meterages, such as city lights or preassembled LED trees. |
How much do outdoor Christmas lights consume?Very little. A complete balcony with LED outdoor Christmas lights draws about 18 W and costs just over one euro in energy for the entire season. A complete house garden is around €7, and a large professional outdoor area around €40 for 45 days of operation. |
How many meters of lights are needed for a Christmas tree?The practical rule is ten meters per meter of height for a standard effect, fifteen to twenty meters per meter for a dense effect. A two-meter fir therefore requires about 20 meters of string for a balanced result and up to 40 meters for a very rich effect. |
What color of light should be chosen for outdoors at Christmas?3000K warm white is the most versatile and most used choice. 2200-2700K is better suited to stone, brick, and wood; 6000-6500K cool white enhances snowy trees and the ice effect. The rule is not to mix different temperatures on the same continuous surface. |
Can multiple lighting strings be connected together?Only within the limit declared by the manufacturer, which is always indicated on the packaging or technical data sheet. Exceeding it causes overheating of the first section and a drop in brightness in the last ones. In 24V systems, the limit depends on voltage drop and is overcome by feeding the line from both ends. |
Do outdoor Christmas lights without a socket work well?Battery versions are convenient for details and small installations, but require frequent recharging or replacement. Solar versions have reduced output in December due to short days and often overcast skies. For commercial installations that must work every evening, 24V power run from indoors remains the reliable solution. |
Are outdoor Christmas lights safe for children?Yes, if powered at 24V or 12V SELV, with an adequate IP rating and with the power supply and connections out of reach. Extra-low voltage makes electrical risk negligible even if the cable is touched or damaged. Avoid 230V installations in reachable points. |
How do you fasten lights without drilling into the wall?On railings and metal structures, use UV-resistant nylon ties; on plaster and smooth surfaces, outdoor adhesive hooks applied to a dry, clean surface; on glass and aluminum, professional suction cups or technical double-sided tape. On gutters, dedicated clips are available that do not deform the metal sheet. |
How long do outdoor Christmas lights last?Consumer IP44 strings last on average two or three seasons; IP65 and IP67 versions reach four to six seasons. Professional components such as Neon Flex and LED strips in profile have a declared useful life of 30,000-50,000 hours, equivalent to many years even with continuous use. |
Is a residual current device required for outdoor lights?Yes. The circuit powering outdoor fixtures must be protected by a 30 mA residual current device, according to the installation rules of CEI 64-8. It is the device that intervenes in the event of leakage to ground and represents the fundamental protection against indirect contact. |
Why do my lights turn off halfway along the run?The two most likely causes are a conductor break, typical after mechanical stress or frost, or excessive voltage drop on a run that is too long at extra-low voltage. In the first case, replace the segment; in the second, feed from both ends or increase the cable cross-section. |
What lights should be put on a balcony without disturbing neighbors?Choose contained intensity, warm temperatures between 2700K and 3000K, and always aim sources toward your own property, never toward others’ windows. Avoid rapid flashing effects, which are the most annoying at a distance. A timer that switches off by 11 p.m. to midnight prevents almost all complaints in advance. |
How should outdoor Christmas lights be stored after the holidays?They should be dried thoroughly, wound onto rigid supports without knots, labeled by length and position, and stored in rigid containers in a dry place with a stable temperature. Most damage to outdoor Christmas lights occurs during storage, not during use. |
Can LED strips replace professional outdoor Christmas lights?Yes, and with significant advantages. An IP65 or IP67 LED strip mounted in an aluminum profile offers uniform light, ten-year lifespan, dimmability, digital control, and the possibility of reuse all year round. It is the solution chosen by restaurants, hotels, and retail businesses that do not want to redo the installation every season. |
What is the difference between Neon Flex and a lighting string?The string produces distinct points of light at regular intervals and is ideal for wrapping volumes such as trees and hedges. Neon Flex produces a continuous, uniform line of light, perfect for following architectural profiles, cornices, and lettering. Many quality installations combine them, using each for what it does best. |
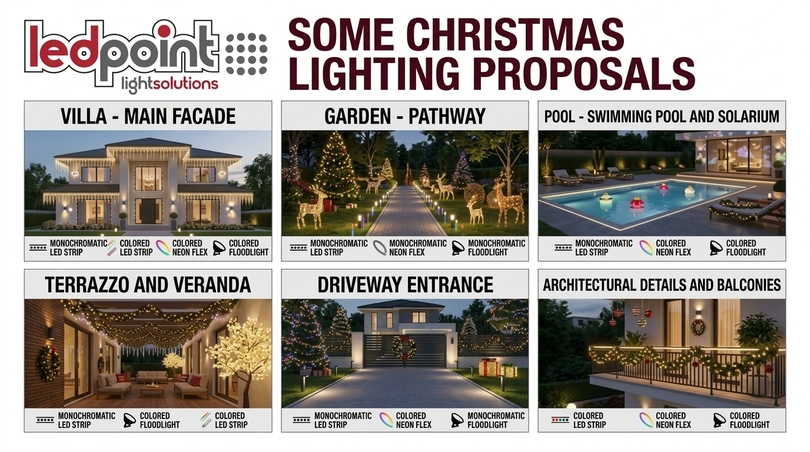
18. Outdoor Christmas lights: a choice to be made without rushing
Choosing outdoor Christmas lights is not a matter of taste, or not only. It is a technical decision made in three moves: define the IP rating based on the actual exposure of the installation point, choose the voltage based on safety and run length, calculate the watts to correctly size the power supply and cables. Once these three choices are made, aesthetics comes naturally and remains stable over the years.
The underlying message of this guide is that the difference between an installation that lasts one season and one that lasts ten years is not in the price, but in the design. An IP65 instead of an IP44, a 24V instead of an improvised extension cord, a sealed joint instead of a flying connector: these are choices that cost little at the time of purchase and decide everything else. Anyone who sets up an outdoor area, a shop window, a facade, or a garden every year has every interest in thinking in terms of a system, not a disposable decoration.
This year, before filling the cart, do one thing: look at where you will install each individual element and ask yourself whether water reaches it. Everything else follows from that answer, and your outdoor Christmas lights will still be on on January 6, exactly as on December 1. Designed once, lit for many winters.
This article was developed with the support of artificial intelligence and subsequently reviewed, corrected, and validated by the technical team of Ledpoint.it, which guarantees its reliability and conformity with official sources.