








Light switches: types, diagrams, and LED strips | Ledpoint
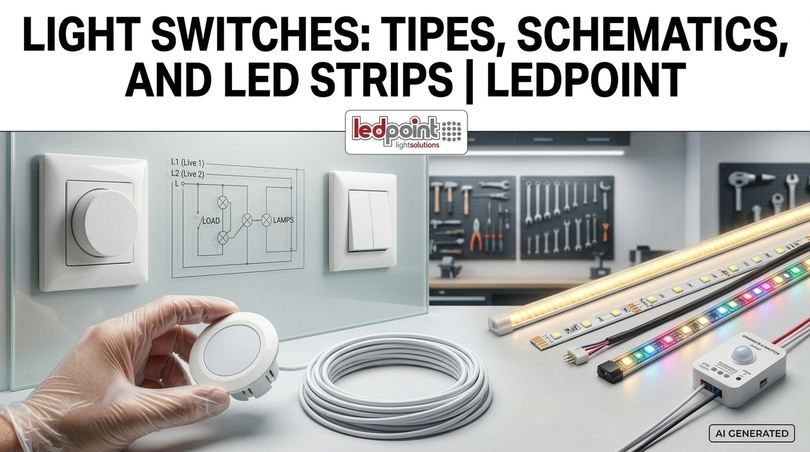
Light switches are the devices that open or close an electrical circuit to turn a light source on and off: lamps, spotlights, ceiling lights and LED strips. There are single-pole switches, double-pole switches, two-way switches, intermediate switches, push buttons, dimmers, touch switches, sensors and smart switches. For LEDs, it is important to choose the right switch for voltage, current and type of control.
Every day we press a switch dozens of times without thinking about it: entering the house, going up the condominium stairs, opening the kitchen door. Yet behind that gesture there is over a century of technical evolution, a precise wiring logic and a series of standards that make light control safe and reliable. Today, with the spread of LED strips, electronic power supplies and home automation, choosing the correct switches has become more important than ever: the wrong light switch can cause lights that remain dimly lit, flickering, contacts worn out within a few months or, in the worst cases, overheating.
In this complete guide, curated by the Ledpoint technical team, we trace the history of switches, explain how a light switch works, which types exist, how to read wiring diagrams and, above all, which switches to choose to control LEDs and LED strips at 12V, 24V and 230V. You will find comparison tables, load calculations, detailed sheets for five switches available in the Ledpoint.it catalogue, a section dedicated to troubleshooting and a collection of FAQs designed for electricians, homeowners, interior designers, building administrators, home automation enthusiasts and electrical material retailers.
In this article...
1. What a light switch is
Before talking about models, diagrams and LED strips, it is useful to establish a clear definition, because in everyday language the word "switch" is used to indicate devices that can be very different from one another. In this paragraph we look at the technical meaning of the term, what a light switch is called in English, which components it is made of and how it differs from other electrical devices found in the panel or on the wall.
Definition and meaning of light switch
A switch is an electromechanical or electronic device that allows current to flow through a circuit or interrupts it. The light switch, specifically, is the control that opens or closes the live conductor supplying a light point, allowing a bulb, chandelier, spotlight or LED strip to be turned on or off. When the internal contacts are closed, current flows and the light turns on; when the contacts are open, the circuit is interrupted and the light turns off.
The meaning of the word comes precisely from the verb "interrupt": the light switch interrupts electrical continuity. Unlike a socket, which supplies power to an appliance, or a fuse, which protects the circuit, light switches have a control function: they are the interface between the user and the lighting system.
Light switch in English and other common names
Anyone looking for "interruttore luce in inglese" will find the term light switch; more generally a switch is called switch, a two-way switch is called two-way switch (in the United Kingdom) or three-way switch (in the United States), a push button is called push button and a dimmer is called dimmer switch. Knowing these terms is useful when consulting technical data sheets and manuals for controllers and LED components, which are often written in English.
In Italian, when asked "what is the button to turn on the light called?", the possible answers are several: switch, light control, button, push button, light push button, toggle. In professional contexts, people speak of control devices in the modular wiring series, while the main light switch, the one that cuts power to the whole house, is actually a miniature circuit breaker (often combined with an RCD) installed in the electrical panel: a protection device, not a simple control. Finally, the switch that adjusts the light, increasing or decreasing its intensity, is called a dimmer or brightness regulator.
What a switch is made of: the components
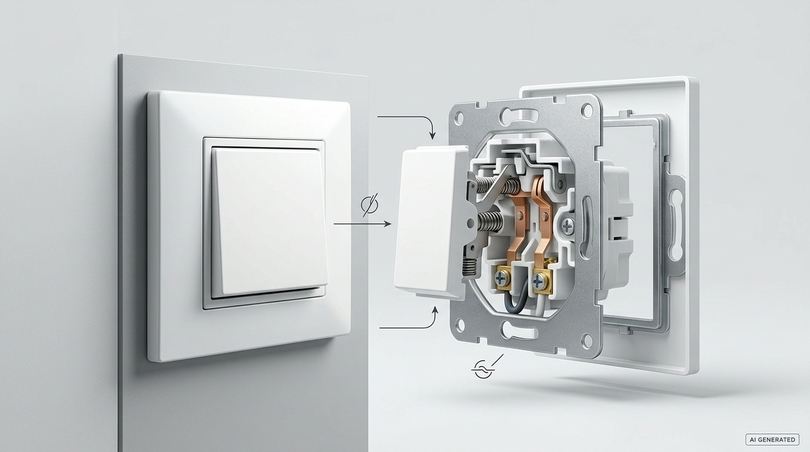
To understand what a light switch is made of, it is helpful to ideally take apart one from the modular wiring series, the type installed in flush-mounted boxes. The main components are:
- Button or rocker: the part you press, in plastic, metal, glass or wood depending on the series.
- Snap mechanism: springs and levers that move the contacts quickly from one position to another, reducing the formation of an electric arc.
- Contacts: copper or silver alloy strips that, when touching, close the circuit.
- Terminals: the points where wires are fixed, screw or quick-insert (automatic terminals).
- Insulating body: the self-extinguishing technopolymer casing that contains the mechanism.
- Support and plate: the frame that fixes the mechanism to the box and the aesthetic plate that covers it.
- Possible indicator light or backlighting: a small LED or neon lamp to locate the switch in the dark or indicate that a load is on.
In electronic switches, such as touch or sensor switches used for LED strips, the mechanical mechanism is replaced by a circuit that detects touch or movement and controls a power component, typically a MOSFET for direct current loads or a relay for 230V loads.
Difference between a switch and other electrical devices
The fundamental difference between a switch and a push button is that a switch maintains its position, while a push button returns to rest as soon as it is released. A two-way switch, on the other hand, does not simply open or close but switches the live wire between two outputs, and for this reason it allows the same light to be controlled from two points. A relay is an electrically operated switch, a dimmer regulates power and a miniature circuit breaker protects the line from overloads and short circuits. We will examine these differences in the dedicated paragraph, but it is important to keep them in mind from now on because, as we will see, in the LED world confusing a switch with a push button can throw off an entire controller.
2. How switches were born: a brief history
Light switches were born together with electric lighting and have followed every evolution: from the first incandescent lamps to fluorescent tubes, up to modern LEDs and home automation networks. Tracing this history helps us understand why switches are made the way they are and why such different technologies coexist today.
The origins: from gas lighting to electric light
Before electricity, "turning on the light" meant opening a gas valve or lighting a candle. With the spread of the incandescent lamp perfected by Thomas Edison and other inventors at the end of the nineteenth century, the need arose for a simple and safe electrical control. The first systems used knife devices (so-called knife switches) or rotary taps derived precisely from gas valves, with exposed contacts and a high risk of sparks.
The quick-break switch
A fundamental milestone was the introduction of the quick-break switch, attributed to the British inventor John Henry Holmes in the 1880s. The brilliant idea was to separate the contacts very quickly thanks to a spring, regardless of how fast the user moves the knob: in this way the electric arc lasts very briefly and the contacts wear much less. The same principle is still the basis of all quality mechanical switches today.
From rotary knob to toggle
In the first decades of the twentieth century, rotary switches and double push-button switches spread (one button to turn on, one to turn off), followed by the toggle switch, patented in the United States around 1917. In Italy, for much of the century, systems were "surface-mounted", with rotary porcelain switches mounted on wooden bases and twisted cables running along the walls: even today they are sought after in vintage or industrial-style renovation projects.
The modular wiring series and concealed wiring
After the Second World War, with reconstruction and the building boom, concealed wiring became established, with cables in conduits embedded in plaster and control devices recessed into wall boxes. From the 1960s and 1970s, Italian manufacturers developed modular wiring series: interchangeable mechanisms that attach to a standard support and are covered with design plates. This is the system that still dominates light switches in Italian homes today, with standard boxes such as the 503 (three modules) and the rocker (or toggle) button that replaced the toggle lever.
The electronic era: dimmers, touch and sensors
With the spread of power semiconductors, the first electronic dimmers for incandescent and halogen lamps appeared, followed by touch switches, presence detectors and infrared controls. The arrival of LEDs changed the rules further: an LED load is powered by a driver or electronic power supply, and the switch must be compatible with this type of load, which behaves very differently from an incandescent filament.
Today: wireless, self-powered and smart switches
In recent years, switches have freed themselves from wires: there are self-powered push buttons that generate the energy for the radio signal simply by pressing the button, switches hidden behind the wood of a piece of furniture, touch controls under the glass of a mirror and smart modules that communicate via Wi-Fi, ZigBee or radio frequency with smartphones and voice assistants. Many of these new-generation switches were created precisely to control LED strips, and in the Ledpoint.it catalogue you will find several examples that we will analyse in detail.
| Period | Control technology | Key feature | Current legacy |
|---|---|---|---|
| Late nineteenth century | Knife switches, rotary switches | Exposed contacts, electric arcs | Industrial disconnectors |
| 1880-1900 | Quick-break switch | Spring that separates contacts quickly | Mechanism of all mechanical switches |
| Early twentieth century | Porcelain rotary switches, toggle | Surface mounting | Vintage and industrial switches |
| Post-war - 1970s | Modular flush-mounted wiring series | Interchangeable mechanisms, plates | Standard for home light switches |
| 1970s - 2000 | Electronic dimmers, sensors, remote controls | Regulation and automation | Dimmers and presence detectors |
| Since 2010 | Touch, RF, self-powered, smart | LED control, wireless, app and voice | Switches for LED strips and home automation |
3. How a light switch works
Understanding how a light switch works means understanding three things: what happens to the contacts when the button is pressed, which wire must be interrupted and which electrical quantities (voltage, current, power) the switch can handle. These are simple concepts, but decisive when moving from traditional bulbs to LED loads.
Open and closed contacts
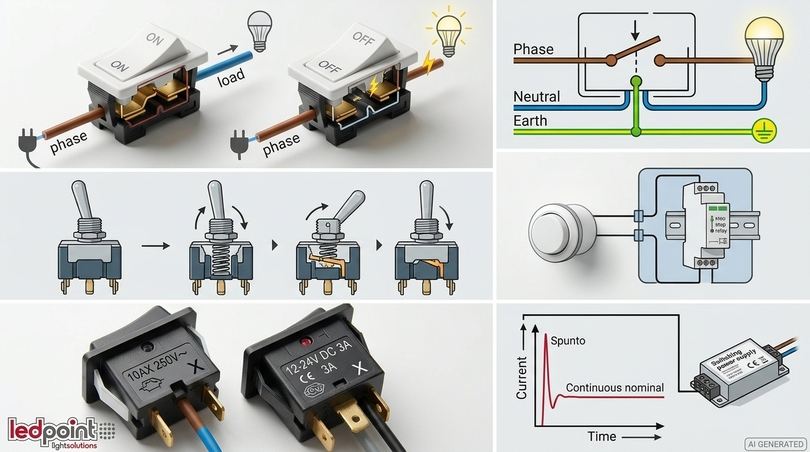
The operation of a household switch is based on two states: closed (ON), when the contacts touch and current flows, and open (OFF), when the contacts are separated by an insulating layer of air. When the button is pressed, the snap mechanism moves the moving strip from one state to the other and keeps it there until the next operation. In push button contacts, a distinction is made between NO (normally open, closes only while pressed) and NC (normally closed, opens only while pressed).
Why the switch must interrupt the live wire
In a single-phase household system, three conductors arrive: the live wire (brown, black or grey), the neutral (blue) and the earth (yellow-green). The light switch must always interrupt the live wire, never the neutral: in this way, when the light is off, the lamp holder or LED driver is not live and anyone replacing a bulb does not risk electric shock. The neutral goes directly to the light point, while the live wire passes through the switch and from there continues to the lamp through the so-called "lamp return". For a refresher on colours, we recommend our electrical cable colour table.
How a toggle and rocker switch work
In a toggle switch, the lever acts on a spring that, once past dead centre, snaps the moving contact. In a rocker switch, the most widespread in wiring series, the rocking button rotates around a pivot and transmits the same snap movement. In both cases the opening speed does not depend on the user's hand but on the spring: this is the "quick-break" principle born over a century ago.
How a light push button works
A light push button, unlike a switch, closes the circuit only for the instant it is pressed. On its own it could not keep a lamp on, so it is combined with a device that "remembers" the state: a step relay (or impulse relay) in the panel or junction box, a staircase light timer, or an electronic controller for LEDs. Each pulse of the push button changes the state of the relay: one pulse turns on, the next turns off. The advantage is that as many push buttons as desired can be connected in parallel, with smaller-section cables, without having to use two-way and intermediate switches.
Voltage, current and power: rating data
Each switch shows rating data printed on its body, for example "10AX 250V~" or "16A 250V~". Voltage indicates the maximum value for which the insulation is designed; rated current indicates how much current the contacts can carry continuously. The letter X after the amperes indicates that the device has also been tested with high inrush current loads, such as fluorescent lamps, and this is also a positive sign for electronic loads. In switches for low-voltage LED strips, the data are expressed differently: supply voltage (for example 12-24V DC), maximum current (3A, 5A) and maximum power for each voltage.
The relationship to remember is simple: power (W) = voltage (V) × current (A). A 3A switch at 24V can handle a maximum of 72W, while at 12V the same switch stops at 36W. This is a rule we will use often in the LED section.
The inrush current of LED loads
When a switching LED power supply is turned on, the input capacitors charge instantly and absorb, for a few milliseconds, a current much higher than the rated one: this is the inrush current. It is this peak, and not the rated power, that is the most frequent cause of stuck contacts or damaged relays in LED systems. For this reason, when a single switch or relay controls several power supplies, it is good practice to leave a wide margin on power, choose devices with adequate rating and, in the most demanding cases, use inrush current limiters or dedicated contactors.
4. Types of light switches
What types of switches exist? The answer depends on the criterion by which we classify them: by number of poles interrupted, by number of control points, by the way they are operated, by internal technology or by installation location. In this paragraph we bring order to the main types of light switches, with particular attention to those suitable for LEDs.
Classification by number of poles
Single-pole switch (simple switch)
The single-pole switch is the simple switch par excellence: it interrupts only one conductor, the live wire, and controls a light point from a single position. It has two terminals, one input and one output. How does a single-pole switch work? Pressing the button closes the connection between the two terminals and the live wire reaches the lamp. It is the most widespread switch in homes and the one replaced most often.
Double-pole switch
The double-pole switch simultaneously interrupts two conductors, live and neutral, and has four terminals. It is used when a load must be fully isolated: for example for the water heater, washing machine, boiler, extractor hoods, appliances in damp rooms or the supply lines of a group of LED power supplies to be fully de-energised during maintenance. How does a double-pole switch work? The button moves two pairs of mechanically linked contacts, which open and close together.
What is the difference between a single-pole and a double-pole switch?
In short, a single-pole switch interrupts only the live wire and is sufficient for ordinary light points; a double-pole switch interrupts live and neutral and guarantees complete isolation of the load. The double-pole switch is often rated for higher currents (16A or more) and is recognisable by its four terminals and, in many series, by its two-module format or indicator light.
Classification by control points
Here we find the simple switch (one point), the two-way switch (two points), the intermediate switch (combined with two two-way switches for three or more points) and the push button with relay (unlimited points). We dedicate the next paragraph to these solutions, because they are the ones on which most doubts focus.
Classification by operating method
- Toggle: a lever that moves up or down, typical of period systems and industrial panels.
- Rocker: the most common button in modern wiring series.
- Rotary: a knob that rotates, now reintroduced with a vintage look.
- Push button: a spring-return button, combined with a relay or controller.
- Pull-cord: a cord control, used in bathrooms according to some foreign customs.
- Foot or in-line: switches for floor and table lamps installed along the cable.
- Touch: activated by touching a sensitive surface, even hidden behind wood or glass.
- Sensor: activated by hand movement, the presence of a person or the opening of a door.
- Wireless: transmits a radio signal to a receiver that controls the load.
Classification by technology
Mechanical switches physically close a contact and are the simplest and most durable solution for 230V loads. Electronic switches use semiconductors or relays controlled by a circuit: they are the basis of dimmers, touch switches, sensors and smart switches. Wireless switches are divided into battery-powered and self-powered (with an internal kinetic generator). Finally, smart switches connect to a network (Wi-Fi, ZigBee, Bluetooth, Z-Wave) and can be controlled by app, voice assistants and automatic scenes.
Classification by installation location
- Flush-mounted wall switch: the classic mechanism in a 503, 504 or round box.
- Surface-mounted wall switch (outdoor): with its own box, for garages, cellars and conduit systems.
- Switches for lamps: on the cable, on the base or integrated into the appliance.
- Furniture and profile switches: touch or sensor micro-switches for LED strips in kitchens, wardrobes and bookcases.
- DIN rail switches: modules installed in the electrical panel, now often smart and with consumption measurement.
| Type | Terminals / wires | Control points | Typical use | Suitable for LEDs |
|---|---|---|---|---|
| Single-pole switch | 2 | 1 | Bedrooms, bathrooms, storage rooms | Yes, on the 230V side |
| Double-pole switch | 4 | 1 | Appliances, damp rooms, isolation | Yes, to isolate power supplies |
| Two-way switch | 3 | 2 | Corridors, stairs, master bedrooms | Yes, on the 230V side |
| Intermediate switch | 4 | 3 or more (with 2 two-way switches) | Long corridors, large halls | Yes, on the 230V side |
| NO push button + relay | 2 (push button) | Unlimited | Condominium stairs, large rooms | Excellent, also for push-dim controllers |
| Dimmer | 2-3 | 1 or more | Living rooms, bedrooms | Only if declared compatible |
| Touch / sensor for strips | DC input and output | 1 | Kitchens, wardrobes, mirrors | Designed for 12-24V LEDs |
| Wireless RF + receiver | Receiver only | Unlimited | Renovations without building works | Yes, with a suitable receiver |
| Smart Wi-Fi / ZigBee | Variable, often with neutral | App, voice, scenes | Home automation | Yes, checking the load |
Quick glossary of switches
To navigate catalogues, technical data sheets and customer requests, here is a concise glossary of the names used for light switches and their closest relatives.
| Term | Meaning |
|---|---|
| Single-pole switch | Simple switch that interrupts only the live wire; it is the most widespread light switch. |
| Double-pole switch | Switch that opens live and neutral together; it guarantees isolation of the load. |
| Two-way switch | Three-terminal switch that switches the live wire; two two-way switches control a light from two points. |
| Intermediate switch | Four-terminal switch inserted between two two-way switches for control from three or more points. |
| Push-button switch | Light push button with spring return that sends a pulse to a relay or controller; it is not a true bistable switch. |
| Switch with indicator light | Switch with an LED or neon locator light or an indicator showing that the load is on. |
| Toggle switch | Switch with a snap lever, typical of period systems and panels. |
| Rotary switch | Knob switch, now offered in surface-mounted systems with a vintage style. |
| Wall switch | Flush-mounted or surface-mounted switch fixed to the wall; the classic control of home light switches. |
| Lamp switch | In-line, foot or base-integrated switch for table and floor lamps. |
| Dimmer switch | Switch that, in addition to turning on and off, adjusts light intensity. |
| Touch switch | Capacitive touch switch, even hidden behind wood or glass. |
| Sensor switch | Switch that reacts to movement, presence, a hand gesture or the opening of a door. |
| LED strip switch | Switch designed for the 12-24V DC side of an LED strip, with current rating in amperes. |
| Wireless switch | Wireless switch that transmits by radio to a receiver; it can be battery-powered or self-powered. |
| Self-powered switch | Wireless switch that generates the signal energy by pressing the button: no batteries. |
| Smart switch | Switch connected to Wi-Fi or ZigBee, controllable by app, voice and scenes. |
| Twilight switch | Automatic switch that turns the light on when darkness falls. |
| Time switch | Programmable switch that turns the light on and off at set times. |
| DIN rail switch | Modular switch for the electrical panel, now often smart and with consumption measurement. |
| Miniature circuit breaker | Protection switch in the panel: it intervenes on overloads and short circuits, it is not a light control. |
| RCD | Protection switch that intervenes on leakage currents to earth. |
5. Switch, two-way switch, intermediate switch and push button: the differences
What is the difference between a switch and a two-way switch? And between a push button and a switch? These are among the most searched questions by anyone approaching electrical systems, and the confusion is understandable because externally these devices can look identical. Let us see how they differ in function, number of terminals and behaviour.
Switch and two-way switch: what is the difference
A switch opens or closes a circuit; a two-way switch switches the live wire between two output contacts. A two-way switch has three terminals: one common (often marked L or with an arrow) and two outputs, called "travellers". In one position the live wire goes to the first traveller, in the other to the second. On its own, a two-way switch can work as a switch (using the common and only one output), but its real purpose is to work in pairs: two two-way switches connected to each other by travellers allow the same light to be turned on and off from two different points, for example at the beginning and end of a corridor or on both sides of a bed.
The intermediate switch for three-point control
How do you turn on the light from three points? An intermediate switch is inserted between the two two-way switches. The intermediate switch has four terminals and, at each operation, crosses the two travellers: what entered on the first exits on the second and vice versa. By adding intermediate switches in series, you can reach four, five or more control points, although beyond three points it generally becomes more convenient to use push buttons and relays.
Push button and switch: what is the difference
What is the difference between a push button and a switch? A switch is "bistable": it remains on or off until it is operated again. A push button is "monostable": it closes the contact only while it is pressed. The push button, therefore, does not directly control the load but sends a pulse to an intelligent device (step relay, timer, LED controller) that decides what to do. Push-button switches are the classic choice for condominium stairways, for large rooms with many control points and, increasingly often, for LED strip controllers with a push-dim input, where a short press turns on or off and a long press adjusts brightness.
Careful: connecting a switch instead of a push button to the push input of an LED controller is a common mistake. With the switch in the ON position, the controller interprets a continuous press and the brightness keeps rising and falling without stopping. We also explain this in our guide to electrical diagrams for LED systems.
How to recognise a switch from a two-way switch
How can you tell whether it is a switch or a two-way switch? The quickest method is to look at the back of the mechanism (with the power off):
- Two terminals: single-pole switch or push button.
- Three terminals: two-way switch (one common, two travellers).
- Four terminals: double-pole switch or intermediate switch; the symbol printed on the body clarifies which of the two.
A second clue is behaviour: if pressing the button immediately returns it to the rest position, it is a push button. If the same light is controlled from two points, there are almost certainly two two-way switches. Finally, many manufacturers print a standard graphic symbol or code on the mechanism: in case of doubt, a tester in continuity mode definitively clarifies which contacts close in each position.
| Device | Behaviour | Terminals | Controls the load directly? | Example of use with LEDs |
|---|---|---|---|---|
| Switch | Bistable ON/OFF | 2 (single-pole) or 4 (double-pole) | Yes | Turning on the power supply of a strip in a bedroom |
| Two-way switch | Switches between two outputs | 3 | Yes, in pairs | LED strip in the corridor controlled from both ends |
| Intermediate switch | Crosses two lines | 4 | Yes, between two two-way switches | LED profiles in a hall with three entrances |
| NO push button | Monostable, closes only when pressed | 2 | No, sends a pulse | Push-dim input of a dimmer for LED strips |
6. Wiring diagrams and switch wires
Which wires go to the switch? How do you connect a switch to the light point? How do you connect a switch with an indicator light? In this paragraph we describe in general terms the main wiring diagrams, the conductors involved and the most common configurations. The instructions are educational: any work on the fixed electrical system must be carried out by a qualified installer, as we will see in the section dedicated to standards.
Which wires reach the switch
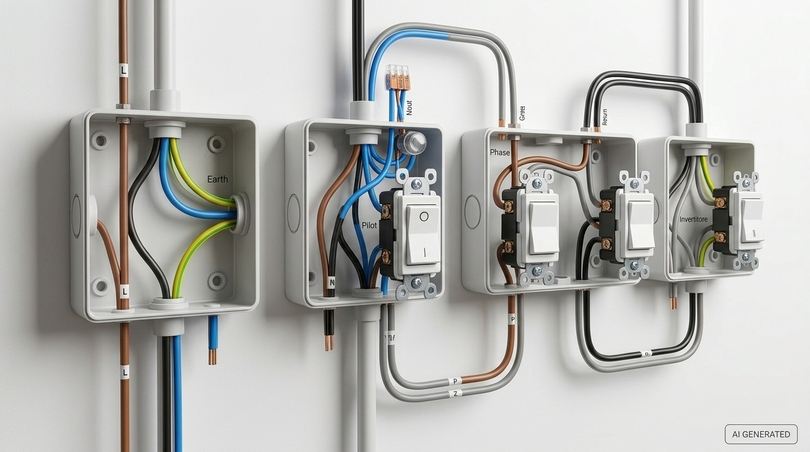
In a simple connection, only two conductors reach the switch: the incoming live wire (coming from the panel or junction box) and the lamp return (going to the light point). The neutral and earth, as a rule, do not pass through the switch but go directly from the junction box to the light point. The exceptions are switches with indicator lights, electronic switches, many dimmers and most smart switches, which also require the neutral to power their electronics.
Simple light switch diagram
The basic light switch diagram is as follows:
- The live wire (brown, black or grey) arrives from the junction box at the input terminal of the switch.
- From the output terminal, the lamp return starts and reaches the live terminal of the light point or the L terminal of the LED power supply.
- The neutral (blue) goes from the junction box directly to the N terminal of the light point.
- The earth (yellow-green) connects the metal parts of the appliance, if present.
How do you connect a 3-wire switch? If you find three conductors in the switch box, in most cases it is a two-way switch (common plus two travellers) or a switch with indicator light that also needs the neutral. Before disconnecting anything, photograph the original wire arrangement.
How to connect a switch with indicator light
A switch with indicator light has a small light that can work in two ways. The locator light stays on when the light is off so you can find the switch in the dark. The indicator light turns on when the load is powered, useful for lights in cellars, garages or outdoors. Depending on the model, the indicator requires the neutral on a dedicated terminal or is closed through the load itself: in the latter case, with some very sensitive LED drivers, the minimal current passing through the indicator can cause a faint glow of the lamp when it is off. This is a known phenomenon, which we discuss in the troubleshooting section.
Two-way light switch diagram: control from two points
How do you turn on a light from two switches? The two-way light point diagram requires:
- The live wire arrives at the common terminal of the first two-way switch.
- The two travellers connect the outputs of the first two-way switch to the outputs of the second.
- From the common terminal of the second two-way switch, the lamp return starts towards the light point.
- The neutral goes directly to the light point.
Whatever the position of the two two-way switches, operating either one changes the state of the light. This is the ideal diagram for lighting a corridor or staircase with an LED strip, connecting the two-way switches on the 230V side of the power supply.
Three-point light control with intermediate switch
For three-point light control, the two-way diagram is maintained and the two travellers are interrupted by inserting an intermediate switch: the travellers coming from the first two-way switch enter the intermediate switch and leave it towards the second two-way switch. Each additional intermediate switch is inserted in the same way, in series on the travellers. Connecting the intermediate switch requires care in identifying the pairs of input and output terminals, as indicated by the manufacturer.
Diagram with push buttons and step relay
With push buttons the diagram becomes simpler: all NO push buttons are connected in parallel and control the coil of a step relay; the relay contact, in turn, controls the load. Adding a new control point simply means running two wires to a new push button. If the LED strip controller has a push input, the relay is not needed: the push buttons connect directly to the controller, which performs both the memory and the adjustment function.
How to fit a switch on a lamp
How do you fit a switch on a wire? For table and floor lamps there are in-line or foot switches that are installed along the cable: open the casing, interrupt only the live conductor and connect it to the two terminals of the switch, leaving the neutral passing through. This is a simple operation but must be carried out with the plug disconnected and with a switch suitable for the lamp's power.
How to take a socket from a light point
This is a frequent question, but the answer requires caution: the lighting circuit is generally sized and protected for reduced loads, so deriving a socket from a light point can only be done if the conductor cross-section and the upstream protection allow it, and always by a professional who issues the relevant documentation.
| Conductor | Typical colour | Where it goes | Does it pass through the switch? |
|---|---|---|---|
| Live | Brown, black or grey | From the panel to the switch | Yes, it is interrupted |
| Lamp return | Often brown or black (according to practice) | From the switch to the light point | Yes, on the output |
| Neutral | Blue | From the junction to the light point | Only for indicators, dimmers and smart switches |
| Earth | Yellow-green | To metal parts | No (except metal plates and specific supports) |
| Travellers | Variable, often black or grey | Between two-way and intermediate switches | Yes |
7. Switches for LEDs and LED strips
How do you connect LED lights to a switch? This is where the discussion becomes truly specific. An LED strip is not connected directly to 230V (except dedicated versions): it is powered by a constant-voltage power supply, typically at 12V, 24V or 48V. This means that the switch can be positioned in two different points of the circuit, each with precise rules.
Switch on the 230V side (primary)
This is the most widespread solution in homes: the wall light switch controls the live wire supplying the 24V power supply, exactly as it would with a lamp. Advantages: you use switches, two-way switches and push buttons from the wiring series already present in the home, and when the light is off the power supply consumes nothing. Precautions: check that the switch is rated for the inrush current of the power supply, avoid connecting too many power supplies to the same contact and, with indicator switches, check that the small leakage current does not keep the driver partially on.
Switch on the low-voltage side (secondary)
In this case the power supply remains permanently connected to the mains and the LED strip switch is inserted between the power supply and the strip, on the direct current circuit at 12V or 24V. This is the typical solution for touch, sensor and profile switches for kitchens, wardrobes, bookcases and mirrors, because low voltage allows very small devices to be installed directly in the furniture. Precautions: a switch for alternating current is not automatically suitable for direct current, because the DC arc is harder to extinguish; moreover, the current at 12V is double that at 24V for the same power, so the current rating becomes the decisive parameter.
Calculating LED strip current
To choose an LED switch on the DC side, one calculation is enough: multiply the power per metre of the strip by the metres installed and divide by the voltage. The result must be compared with the maximum current of the switch, leaving a prudential margin of at least 20%. Here are some examples prepared by our technical department:
| LED strip | Metres | Total power | Current at 12V | Current at 24V | 3A switch | 5A switch |
|---|---|---|---|---|---|---|
| 4.8 W/m | 3 m | 14.4 W | 1.2 A | 0.6 A | Yes | Yes |
| 9.6 W/m | 3 m | 28.8 W | 2.4 A | 1.2 A | Yes at 24V, at the limit at 12V | Yes |
| 14.4 W/m | 4 m | 57.6 W | 4.8 A | 2.4 A | Only at 24V | Yes at 24V, at the limit at 12V |
| 14.4 W/m | 5 m | 72 W | 6 A | 3 A | No (no margin) | Yes at 24V |
| 19.2 W/m | 5 m | 96 W | 8 A | 4 A | No | At the limit at 24V |
The table clearly shows why, for installations of a certain length, it is better to prefer 24V LED strips rather than 12V LED strips: for the same power, the current is halved, switches work more comfortably and voltage drops along the strip are also reduced. For larger loads, dimmers and controllers with higher ratings are used.
Switch, dimmer or controller?
A simple switch turns on and off. If you want to adjust intensity, change colour temperature or manage scenes, you need dimmers for single-colour LED strips or controllers for CCT and RGB strips. In many cases the most elegant solution is to combine a controller with a wall control: a push-dim button, a radio wall remote or a self-powered push button. In this way the gesture remains the familiar one of the light switch, but with much richer functions.
Traditional dimmers and LEDs
A phase-cut dimmer designed for incandescent lamps is not automatically compatible with an LED power supply. Only power supplies declared dimmable with that specific technology (phase cut, DALI, 0/1-10V, push) can be dimmed. Otherwise there is a risk of flickering, buzzing and failures. For professional systems, Ledpoint offers 0/1-10V and DMX and DALI decoders.
Invisible and wireless controls
LED strips are often integrated into furniture, niches and suspended ceilings where running a wall switch would be inconvenient or unsightly. For this reason there are switches that hide behind wood, are activated by the passage of a hand, turn on when a door opens or transmit by radio to a hidden receiver. The gesture becomes natural and the switch disappears from view: this is one of the great advantages of LED lighting compared with traditional sources. The sensors category and the Kinetic category on Ledpoint.it collect precisely these solutions.
8. 5 Ledpoint.it switches analysed in detail
After the theory, let us move on to products. We have selected from the Ledpoint.it catalogue five switches that cover the most requested scenarios: automatic control when a door opens, the invisible switch behind wood, the touch switch for mirrors, the radio control for 230V loads and the smart panel module with consumption measurement. For each one you will find features, ideal applications and installation advice. Click on the photo to open the product sheet.
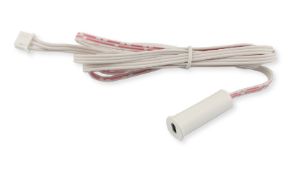
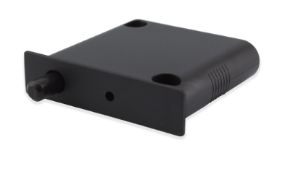
1. Wireless battery-free door switch, RF 433MHz (EB-D854-W)

The wireless battery-free door switch EB-D854-W is a brilliant solution for wardrobes, pantries, walk-in closets and storage furniture. An integrated plunger detects the opening of the door and sends a 433MHz radio command to the receiver that powers the LED strip: with the door closed the light is off, with the door open it turns on. The energy to transmit the signal is generated by the pressure of the plunger itself, so no batteries or wires to the sensor are needed.
Technical specifications
- Radio frequency: 433MHz
- Power supply: self-powered, no battery
- Number of zones and scenes: 1
- Declared range: 30 m
- Operating temperature: from -20°C to +55°C
- Dimensions: 106 x 31 x 13 mm
- Soft on/off, without flashing, for visual comfort
- Also available in the black version
When to choose it
It is the ideal switch when it is not possible or not convenient to run cables to the control point: already assembled furniture, light renovations, custom furniture. It pairs with RF 433MHz receivers from the same family, such as the controller described later or the 12/48V 9A RF 433MHz single-colour dimmer. Technical advice: Wi-Fi networks can interfere with radio range, so the receiver should be positioned as close as possible to the control point.
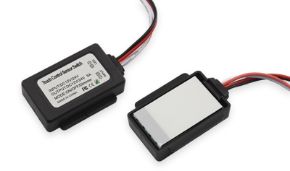
2. Hidden touch sensor behind wood up to 5 cm, 12-24V 3A, Master Control (SN-NT-TM-01H)

The Hidden Touch Switch sensor is the invisible switch par excellence. It works by capacitive sensing through surfaces such as wood and plasterboard up to 5 cm thick: it is installed behind a kitchen worktop, the side of a bookcase or a shop counter and is activated simply by touching the surface. A short touch turns on or off, a long touch adjusts brightness, and the device remembers the last level set.
Technical specifications
- Supply voltage: 12-24V DC
- Channels: 1, maximum current 3A
- Maximum load: 36W at 12V, 72W at 24V
- Dimensions: 55 x 40 x 8 mm
- Protection rating: IP20, indoor use
- Functions: ON/OFF, dimmer, last brightness memory
When to choose it
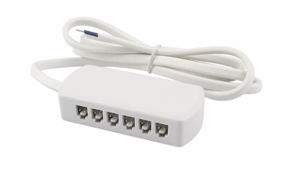
It is perfect for kitchens, walk-in wardrobes, bookcases and counters where the design requires clean surfaces without visible buttons. It is part of the Master Control system and is compatible exclusively with the related power supplies, such as the 100W 24V Slim power supply with terminal block for sensors, and can be distributed over multiple points with the 6-port power splitter. Remembering the calculation seen earlier, at 24V it can handle up to 72W: for example about 5 metres of 14.4 W/m strip, with no margin, or 5 metres of 9.6 W/m strip (48W, 2A) with a comfortable margin.
3. Monochrome white and blue touch switch for mirror, 5A 12-24V (CT-MON-05-TC01)

The touch switch for mirror CT-MON-05-TC01 transforms the glass of a backlit mirror into a switch. It is applied to the back of surfaces such as glass, acrylic, plastic or ceramic about 5 mm thick and allows the LED strip to be controlled with a simple touch. The dual-colour backlighting (white for the dimmer function, blue for the ON/OFF function with memory) makes the control point visible even in the dark.
Technical specifications
- Supply voltage: 12-24V DC
- Output current: 5A
- Maximum load: 60W at 12V, 120W at 24V
- Receiver dimensions: 63 x 57 x 12 mm
- Self-adhesive mounting clip
- Protection rating: IP20
Limitations to know
It works on clear glass, frosted or sandblasted glass, acrylic, plastic and ceramic. It does not work on silvered mirrors, glass with metallic coating and conductive surfaces: in these cases the film must be locally removed, by sandblasting or laser etching, to allow touch detection and LED visibility. For making the mirror, it pairs well with the aluminium mirror profile; other solutions are collected in the dimmers for mirrors category.
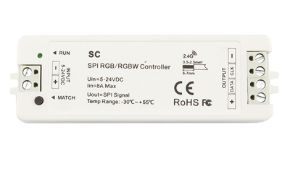
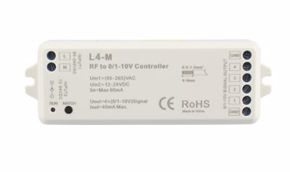
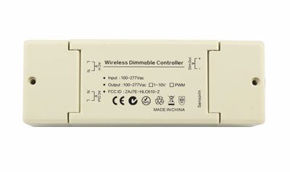
4. Monochrome controller 110/240V 500W RF 433MHz with ON/OFF push button (EB-ERC2201)

The EB-ERC2201 monochrome controller is the "heart" of a wireless switch system on the 230V side. It is installed upstream of the load (for example the power supply of an LED strip, a spotlight or a lamp) and receives commands from self-powered radio push buttons and the door switch of the same family. The input signal is Wi-Fi + RF 433MHz and the output is alternating current, non-dimmable.
Technical specifications
- Input voltage: 110-240V
- Channels: 1, maximum current 5A
- Maximum power: 500W
- Connection: terminal block
- Operating temperature: from -20°C to +40°C
- Dimensions: 44 x 44 x 22 mm, can be installed in a box or in the suspended ceiling
When to choose it
It is the ideal solution for adding a new control point without breaking walls: it pairs with the white self-powered ON/OFF wall push button, with the round 60 mm white and 35 mm black self-powered push buttons and with the door switch. For multiple loads there are the 2-channel 10A controller and the 6-channel controller with dry contact. Advice: if the cables of any wired push button run in the same conduit as the 230V wiring, use shielded cables; and when controlling LED power supplies, keep a good margin below 500W to absorb the inrush current.
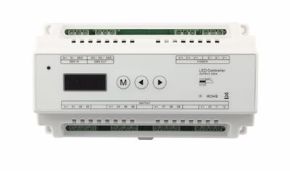
5. DIN rail ZigBee 16A switch with energy consumption measurement (ZB-CBM-16A)

The DIN rail ZigBee switch ZB-CBM-16A brings home automation directly into the electrical panel. It is installed on a DIN rail and allows a line up to 16A to be turned on and off via a ZigBee 2.4GHz network, displaying the energy consumption of the load. It is the ideal tool for controlling and monitoring entire LED lighting circuits: shop windows, signs, gardens, common areas.
Technical specifications
- Input and output voltage: 100-240V AC
- Maximum current: 16A
- Protocol: ZigBee, 2.4GHz radio frequency
- Control range: 30 m
- Operating temperature: from -20°C to +55°C
- Dimensions: 41 x 91 x 61.5 mm
When to choose it
It is designed for the electrician and for the home automation enthusiast who wants to automate lighting switching with schedules, scenes and smartphone control via the Wi-Fi interface for ZigBee technology. For the building administrator, consumption measurement is valuable data: it allows you to check how much common-area lighting contributes and to assess the savings obtained by switching to LEDs. The whole range is in the ZigBee category.
Comparison table of the 5 switches
To help you choose, we have summarised the most important evaluation criteria in a table: the circuit side on which they work, voltage, rating, type of control and ideal application.
| Product | Circuit side | Voltage | Rating | Control | Wiring to the control | Ideal application |
|---|---|---|---|---|---|---|
| EB-D854-W Door switch | Radio transmitter | Self-powered | Depends on the receiver | Door opening | None | Wardrobes, pantries |
| SN-NT-TM-01H Hidden touch | Low-voltage DC | 12-24V | 3A (72W at 24V) | Touch through wood | Yes, in the furniture | Kitchens, bookcases, counters |
| CT-MON-05-TC01 Mirror touch | Low-voltage DC | 12-24V | 5A (120W at 24V) | Touch on glass | Yes, behind the mirror | Mirrors, shop windows |
| EB-ERC2201 RF controller | 230V AC | 110-240V | 5A, 500W | Radio push buttons | None towards the push buttons | New light points without works |
| ZB-CBM-16A DIN ZigBee | 230V AC | 100-240V | 16A | App, scenes | In the panel | Home automation, condominiums, shops |
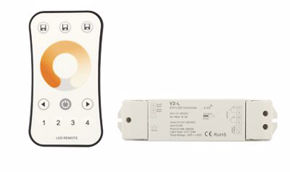
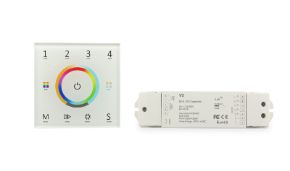
Do you need a push button with dimmer? Consider the white self-powered dimmer push button. Looking for a remote control or a wall panel? Browse the remote controls for single-colour strips and the entire single-colour controllers section.
9. How to choose the right switch
Which light switch should you choose? There is no single best model in absolute terms, but there is the most suitable switch for a given system, environment and user. In this paragraph we turn the concepts seen so far into concrete selection criteria, and then apply them to the profiles of those who write to us most often: electricians, homeowners, designers, home automation enthusiasts, building administrators and retailers.
The technical selection criteria
Rated current and voltage
In household systems, the rated current of light switches is typically 10A or 16A at 250V. The rated current of the switch must always be higher than the current absorbed by the load, with a margin for inrush. On the low-voltage side of LEDs the same principle applies, but with currents expressed at 12V or 24V, as we saw in the calculation table.
Compatibility with the existing system
A light switch compatible with the system must respect three aspects: the box (503 rectangular three-module, 504 four-module, 506 six-module, or round), the wiring series (supports and plates are specific to each manufacturer and line) and the availability of conductors (many electronic and smart switches require the neutral in the box). Before purchasing, check what is behind the plate.
Environment and protection rating
The IP protection rating indicates resistance to dust and water. Indoors at home, IP20/IP40 is sufficient; in the bathroom, in areas not directly exposed to splashes, the zones required by the standard must be respected; outdoors, in garages and cellars, switches with covers and IP44, IP55 or higher ratings are required. The touch switches and sensors for LED strips that we have seen are IP20: they must therefore be installed in dry, protected environments.
Load type
Incandescent, halogen, fluorescent lamps, LED power supplies and motors behave differently. For LEDs always check the declared compatibility and inrush current; for dimmers, the regulation technology supported by the power supply.
Frequency of use and service life
How long does a light switch last on average? A quality mechanical switch, compliant with the product standard, is designed for tens of thousands of operations; in domestic use this means many years of service. In high-traffic areas, such as condominium stairs and corridors, choosing quality push buttons and relays or presence sensors drastically reduces wear and maintenance work.
The answers for each profile
For the electrician
Which light switch is most suitable for a household system? For traditional light points, a 10AX single-pole switch from the series chosen by the customer; for corridors and bedrooms, two-way switches; for three or more points, push buttons with relays. In professional installations it is advisable to favour mechanisms with automatic terminals, which reduce time, and recognised safety brands. For LED strips, the choice between control on the primary side (wiring series) and control on the secondary side (touch, sensors, controllers) depends on the project: in furniture and mirrors the secondary side wins, in suspended ceilings and coves the primary side or a controller with push button wins.
For the homeowner
Which light switch should you choose for a modern home? Today the most appreciated choices are large rocker buttons, glass, metal or matt-colour plates and, where possible, touch switches. Those who want to add an LED strip in the kitchen or bedroom without building works can choose self-powered push buttons and radio receivers, or hidden switches that leave surfaces free.
For the home automation enthusiast
The best smart switch is the one compatible with your ecosystem and your system: protocol (Wi-Fi or ZigBee), presence of the neutral, load type. For those who want to automate lighting without touching the plates, a panel module such as the ZigBee 16A is a clean and powerful solution.
For the architect and interior designer
Designer light switches should be planned together with the finishes: colour, material and format of the plate, but also position and number of controls. A good lighting design reduces the number of visible switches, entrusting secondary functions to switches integrated into furniture, such as the hidden touch switch in wood or the switch under glass.
For the building administrator
Which light switch is most resistant for common areas? Robust illuminated wall push buttons, connected to quality timers or relays, or presence sensors. For garages and cellars, switches with adequate IP ratings are required. The module with consumption measurement helps document savings and plan maintenance.
For the owner of an electrical supplies shop
Which models should always be kept available? Single-pole switches, two-way switches, intermediate switches, NO push buttons and double-pole switches from the series most widespread in the area, lamp switches and, increasingly requested, LED strip accessories: profile touch switches, sensors, radio push buttons and receivers. Demand for wireless solutions is growing steadily, because they solve many renovation problems without building works.
| Requirement | Recommended solution | Why |
|---|---|---|
| Single light point | 10AX single-pole switch | Simple, economical, durable |
| Light from two points | Two two-way switches | Standard diagram, no electronics |
| Light from three or more points | NO push buttons + relay or controller | Simple wiring, unlimited points |
| LED strip in furniture | Hidden touch or sensor | Integrated control, low voltage |
| LED strip in the mirror | Touch switch for mirror | Control under glass, backlit |
| New control point without works | Self-powered push button + RF receiver | No wires, no batteries |
| Smartphone control and consumption | ZigBee DIN module | Automation and monitoring from the panel |
Switches room by room: the practical guide
Each room has different needs in terms of safety, frequency of use and aesthetics. Here is how to choose light switches for the home room by room, including solutions for LED strips.
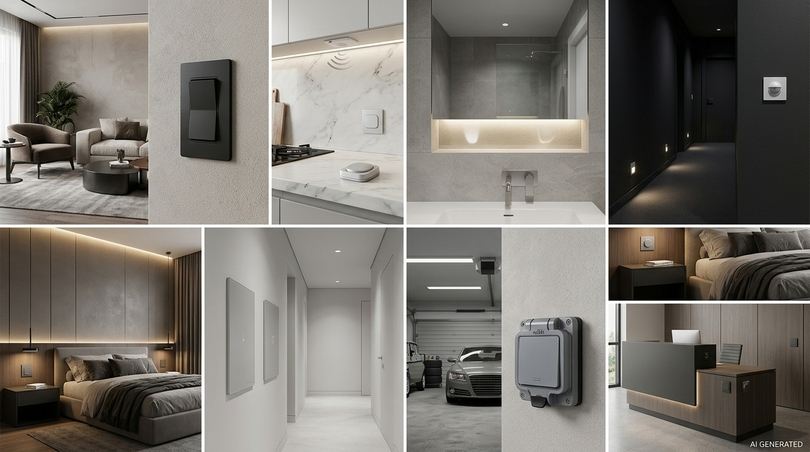
Entrance and corridor
In the corridor the classic solution is a pair of two-way switches at both ends; if there are three or more accesses, push-button switches with relays are better. An LED strip at skirting-board level or in a cove, controlled by two-way switches or a presence sensor, creates a safe luminous path even at night. Backlit switches help you find the control in the dark.
Kitchen
In the kitchen, the wall switch for general light coexists with switches dedicated to under-cabinet light. Here touch switches hidden in wood, sensor switches for hand passage and radio push buttons allow the LED strip to be turned on without touching surfaces with dirty hands and without leaving marks on the wall.
Living room
In the living room the switch must manage multiple scenarios: general light, accent light, TV backlighting, bookcases. Compatible dimmer switches, controllers with push buttons and smart switches with scenes are the most versatile solutions.
Bedroom
The classic control includes a two-way switch at the entrance and one on each side of the bed, with an intermediate switch if there are three points. For the walk-in wardrobe, the door switch that turns on the LED strip when the door opens is the most convenient choice.
Bathroom
In the bathroom the switch must be positioned in compliance with the safety zones required by the standard, away from the bath and shower. For the backlit mirror, the touch switch applied behind the glass avoids installing an additional wall switch and leaves the surface continuous and easy to clean.
Stairways, garages, cellars and common areas
For condominium stairways, illuminated push-button switches connected to timers or relays, or presence sensors, are required. In garages and cellars, switches must have a protection rating suitable for humidity and dust. In common areas the goal is to reduce operations on switches and therefore wear, automating where possible.
Outdoors
Outdoors, weatherproof switches with covers, twilight switches and time switches are used, or smart modules installed in the panel, which allow garden lighting to be controlled without running switches into areas exposed to bad weather.
Shops and shop windows
In shops, LED lighting for windows, displays and counters is managed with centralised switches in the panel, time switches and smart switches with consumption measurement, alongside hidden touch switches in furniture for service lights.
10. Materials, design, finishes and plates
Switches are among the few components of the electrical system that are always visible and touched every day: for this reason materials, colours and shapes affect the perception of a room much more than one might think. In this paragraph we see how to orient yourself among modern light switches, plates and finishes.
Plate materials
- Technopolymer: economical, lightweight, available in many colours; ideal for most home light switches.
- Metal (aluminium, steel, brass, galvanic finishes): elegant and resistant; some metal plates require earthing according to the manufacturer's instructions.
- Glass: continuous surface, easy to clean, perfect in contemporary environments.
- Wood and stone: for custom projects and warm environments.
- Ceramic and porcelain: typical of vintage surface-mounted switches.
How to match the switch to the walls
How do you match the colour of the light switch to the walls and furniture? There are two main strategies. The first is camouflage: a plate the same colour as the wall, so the switch disappears. The second is controlled contrast: matt black plates on light walls, brass on deep colours, metal coordinated with handles and taps. In both cases it is advisable to keep the same finish throughout the house, varying at most between living area and sleeping area.
Modern and customised light switches
Among the strongest trends we find flush buttons, very thin plates, buttons with engraved or backlit symbols, glass touch switches and customised light switches with engravings to indicate the function of each button. In LED lighting the most marked trend is the switch that cannot be seen: switches hidden behind wood, under glass or activated by movement, which leave surfaces free and make the gesture more natural.
How to choose and replace plates
How do you choose switch plates? First of all, check the brand and series of the installed supports: plates are compatible only with their own series. How do you replace old electrical plates? In most cases they snap off by pressure or with a small screwdriver inserted into the special slots; if you also change series, you will have to replace supports and mechanisms, a job best entrusted to an electrician. Changing only the plates is one of the cheapest ways to renew the appearance of an entire home.
11. Installation and replacement step by step
How do you change a light switch? How do you install a light switch? In this paragraph we describe the general phases of installing and replacing a switch, so that you can understand what happens during the work and communicate with your electrician. In Italy, work on the fixed electrical systems of homes is reserved for qualified companies, which issue the declaration of conformity at the end: the following instructions are therefore for information purposes.
Tools and materials
- Insulated flathead and Phillips screwdrivers
- Voltage detector or two-pole tester
- Wire strippers and pliers
- New switch compatible with support and plate
- Smartphone to photograph the original connections
How to replace a light switch: the phases
- Cut the power: lower the main switch or the circuit breaker for the lighting circuit in the panel.
- Verify the absence of voltage: with a detector or two-pole tester, check that no conductor is live. This step is never skipped.
- Remove the plate: snap it off by hand or by gently levering in the special slots.
- Unscrew the support: remove the screws fixing the frame to the box and extract the mechanism group.
- Photograph the connections: note which wire is connected to which terminal, especially when two-way switches are present.
- Disconnect the old switch: loosen the terminal screws or press the release button of automatic terminals.
- Connect the new switch: respect the same arrangement, inserting the stripped conductors for the length indicated by the manufacturer and tightening firmly.
- Refit support and plate: fix the frame level and snap on the plate.
- Restore power and test: raise the protection in the panel and check operation from all control points.
How to remove a switch
Mechanisms in wiring series are released from the support by pressing the side tabs or levering with a small screwdriver in the designated seats. Never force: each series has a specific coupling system and the manufacturer's instruction sheet indicates the correct point.
How to install a push-button switch
Installing a push-button switch follows the same phases, but the push button must be connected to the relay, timer or push input of the LED controller. If the push button directly controls a low-voltage LED strip controller, the two push-button wires carry only a signal: in this case it is important to keep them separate from 230V cables or use shielded cables, as recommended in the Ledpoint controller data sheets.
How to install a wireless switch
How does a wireless switch work? The receiver is installed upstream of the load, connected to the mains or to the low-voltage side depending on the model, then the pairing procedure is carried out (usually press the learning button on the receiver and immediately afterwards the radio push button). The self-powered push button is fixed with double-sided tape or screws, without building works. It is the quickest solution for adding a two-way light point in an already finished home.
How to install a switch for LED strips in furniture
- Calculate the total power of the strip and check that it is within the switch rating.
- Choose the power supply of the correct voltage, with a 20% power margin.
- Connect the DC output of the power supply to the input of the switch, observing polarity.
- Connect the switch output to the LED strip, preferably mounted in an aluminium profile to dissipate heat.
- Position the sensor or touch control at the control point, following the indicated thicknesses and materials.
- Connect the power supply to the mains through a protected circuit and test operation.
When to call a professional
Calling an electrician is always necessary for work on the fixed system, for creating new light points, for replacing mechanisms with deteriorated cables and in all cases where a burning smell, blackening or sparks are noticed. The cost of professional work is negligible compared with the risks of incorrect wiring.
12. Safety, standards and conformity
A light switch seems like a trivial object, but it is a safety device in every respect: it separates people from mains voltage. In this paragraph we summarise the fundamental precautions and the Italian and European regulatory references concerning switches and the systems in which they are installed.
The golden rules of safety
- Always cut the power before working, acting on the protection in the panel and not only on the local switch.
- Verify the absence of voltage with a suitable instrument, even if you are certain you have cut the power.
- Do not work with wet hands or feet and use insulated tools.
- Do not leave bare conductors exposed outside the terminals.
- Respect the switch ratings and do not overload the contacts.
- Mark at the panel that work is being carried out on the line, to prevent accidental re-energisation.
The risks of incorrect wiring
Interrupting the neutral instead of the live wire leaves the lamp holder live when the light is off; a poorly tightened terminal creates contact resistance that heats up and can carbonise the casing; a swap between travellers and common in a two-way diagram produces abnormal operation; an undersized switch for a group of LED power supplies can stick its contacts. Most switch failures arise from hasty installation, not from the product.
Reference standards in Italy
Low-voltage user electrical systems are governed by the standard CEI 64-8, which establishes the criteria for design, installation and verification. Switches for fixed electrical installations in homes and similar are covered by the product standard CEI EN 60669, which defines mechanical, electrical and endurance tests. For common areas and accessible buildings, the requirements on height and easy identification of controls set by legislation on the removal of architectural barriers are also considered.
CE marking and quality marks
Every switch marketed in the European Union must bear the CE marking, with which the manufacturer declares conformity with the applicable directives, such as the Low Voltage Directive and, for radio devices such as wireless and smart switches, the Radio Equipment Directive. In addition to CE marking, many wiring-series switches bear quality marks issued by third parties following independent tests: for the electrician and the retailer they are a further guarantee of reliability.
System Declaration of Conformity
In Italy, D.M. 37/2008 establishes that the installation, transformation and expansion of electrical systems in buildings must be carried out by qualified companies, which issue the declaration of conformity at the end. Simply replacing a switch with an identical one generally falls under ordinary maintenance, but creating new light points or modifying diagrams requires a professional and the relevant documentation.
Child safety
Light switches are generally safe even for children, because live parts are not accessible once the plate is fitted. The main concerns are broken or missing plates, damaged mechanisms and dangling lamp cables. For younger children, the low-voltage switches of LED strips, such as 12-24V touch switches, add a further level of peace of mind, and backlit switches make night-time orientation easier.
13. Common problems and diagnosis
How can you tell if a switch is broken? Why does the switch not turn on the light? Before replacing a component, it is useful to carry out an orderly diagnosis. In this paragraph we analyse the most frequent failures of light switches, with particular attention to phenomena typical of LED systems.
The light switch does not work
Why does the light switch not work? The most common causes, in order of probability, are: faulty lamp or driver, protection tripped in the panel, loose terminal, worn switch contacts, problem in the junction box. The correct path always starts from the load (does the lamp work in another point?) and goes back to the panel. How can you tell if a switch works? With the power off and the switch disconnected, a continuity tester must indicate a closed circuit in the ON position and an open circuit in the OFF position.
How to tell whether a switch is on or off
With rocker buttons it is not always obvious, especially in two-way diagrams, where the "up" or "down" position does not correspond to a fixed state. Indicator lights, backlit switches and smart switches that report status in the app solve the doubt.
The switch sparks
A small spark invisible inside the contacts is normal at the moment of switching. Visible sparks, crackling or a burning smell are instead a danger signal: they may indicate a loose terminal, worn contacts or an excessive load, for example too many LED power supplies on the same switch. The power must be cut and an electrician called.
Flickering light or LEDs that remain dimly lit
This is the most typical problem of LED systems. The most common causes are:
- Switch with indicator light: the small current that powers the indicator passes through the driver and keeps it partly on.
- Induced currents: long lamp return cables laid next to other lines can induce sufficient voltage to make the LEDs glow faintly.
- Switch interrupting the neutral instead of the live wire.
- Dimmer not compatible with the power supply.
- Oxidised contacts or loose terminals, which cause flickering.
Solutions range from replacing the indicator switch with a model without an indicator or with a neutral, to checking connections, up to using quality drivers such as those in the 230V anti-flicker drivers category.
Noisy, stuck or overheated switch
A noisy electrical switch that buzzes when the light is on often indicates an incompatible dimmer or a contact working badly. A stuck or hard-to-operate switch has a worn or dirty mechanism. An overheated light switch, warm to the touch or with a yellowed plate, must always be replaced and the cause (overload or loose terminal) must be identified. How can I solve the problem of a stuck light switch? In the vast majority of cases the definitive solution is replacing the mechanism, which has a low cost.
| Symptom | Probable causes | Check | Solution |
|---|---|---|---|
| The light does not turn on | Faulty lamp/driver, protection tripped, loose terminal | Test the lamp, check the panel | Replace the faulty component |
| Sparks or burning smell | Loose terminal, worn contacts, overload | Inspection with power off | Call an electrician and replace |
| LEDs dimly lit with switch off | Indicator light, induced currents, interrupted neutral | Check diagram and switch type | Switch without indicator, correct diagram |
| Flickering light | Oxidised contacts, incompatible dimmer | Test with a different switch | Replace switch or dimmer |
| Buzzing | Dimmer unsuitable for LED load | Check compatibility | Compatible dimmer or power supply |
| Switch hot | Overload, contact resistance | Measure the load | Replace and redistribute loads |
| Brightness rising and falling by itself | Switch connected to push input | Check the control | Use an NO push button |
14. Smart switches and home automation
Smart switches allow lights to be controlled from a smartphone, by voice or with automations based on schedules, presence and brightness. They are the simplest entry point into home automation, but they require some preliminary checks on the system. Let us see how they work, what requirements they have and how they integrate with LED strips.
How smart switches work
A smart switch contains a radio receiver, a small microcontroller and a power element (relay or semiconductor). It receives commands from the physical button, app, voice assistant or a scene and operates the load accordingly. The most widespread protocols are Wi-Fi, which connects directly to the router, and ZigBee, a low-consumption network that requires a gateway but is very stable and scalable.
Smart switch with or without neutral
Does a Wi-Fi light switch work without a neutral? Most smart switches require the neutral, because the internal electronics must be powered even when the light is off. There are "no-neutral" models that power themselves by passing a small current through the load: with incandescent lamps they work well, but with low-power LEDs they can cause flickering or glowing, and often require a compensation capacitor. For this reason, in LED systems it is preferable to choose modules with a neutral or install the smart logic in the panel, as happens with the ZigBee DIN switch.
Connection to Alexa and Google Home
How do you connect a smart light switch to Alexa or Google Home? The typical process involves installing the device, pairing it with the manufacturer's app or with the gateway (for ZigBee), and finally activating the relevant integration in the voice assistant app. From that moment it is possible to say "turn on the kitchen light" or include the switch in a routine.
Programming and scenes
Do smart light switches allow you to schedule switching on and off? Yes: via app you can set times, timers, presence simulation during holidays, switching linked to sunrise and sunset. For LED strips, by combining smart switches, smart power supplies and ZigBee controllers, complete scenes can be created: welcome light at the entrance, soft night light in the corridor, shop-window lighting that switches off automatically at the end of the day.
Lighting control from smartphone: practical benefits
- Convenience: control lights from any room or from outside the home.
- Savings: automatic switch-offs and, with measurement modules, consumption monitoring.
- Safety: presence simulation and remote checking of light status.
- Accessibility: voice commands for elderly people or people with reduced mobility.
15. Maintenance and cleaning
Switches require little maintenance, but a few periodic precautions extend their life and allow signs of wear to be noticed in time. In this short paragraph we see how to clean them without risk and when to check them.
How to clean an electrical switch
To clean an electrical switch, a microfibre cloth slightly dampened with water or a neutral detergent, wrung out well, is enough. Never spray liquids directly onto the switch: the product could penetrate the slots and reach live parts. For glass plates, a specific cleaner can be used, always applied to the cloth. Are there light switches that are easy to clean and resistant? Yes: glass plates and touch switches, with no slots, are the most hygienic and easiest to maintain.
Checking plates and signs of wear
During cleaning it is useful to check that plates are intact, well attached and free from cracks; that the button clicks firmly; that there is no yellowing, deformation or hot spots. Wear in a domestic switch manifests itself with soft buttons, uncertain clicks, lights that turn on only when pressed hard. A visual check once a year, especially in condominium common areas, prevents most failures.
Maintenance of switches for LED strips
For touch switches and sensors installed in furniture, it is sufficient to keep the control surface clean and check that cables are not pinched by drawers and doors. For self-powered radio switches there is nothing to replace, while for any battery-powered controls the charge should be checked periodically.
16. Prices, costs and where to buy
How much does a light switch cost? And how much does it cost to replace one? Prices vary greatly depending on brand, series, finish and technology. In this paragraph we provide an indicative overview of the costs of switches, plates and labour, together with some advice on where to buy.
Switch prices: indicative ranges
| Product | Indicative price range | Notes |
|---|---|---|
| Single-pole switch, basic wiring series | A few euros | Price rises with designer series |
| Two-way switch, intermediate switch, push button | A few euros, slightly more than the single-pole | The intermediate switch is generally the most expensive of the three |
| Plates | From a few euros to over 100 euros | Economical technopolymer, glass and metal more expensive |
| Lamp switches | A few euros | In-line or foot-operated |
| Touch switches and sensors for LED strips | Low-medium range | Vary by rating and functions |
| Radio push buttons and receivers | Medium range | Savings on building works |
| Smart switches and DIN modules | Medium-high range | May require a gateway |
Actual Ledpoint product prices are visible in the reserved area: Ledpoint is a specialised distributor serving mainly professionals, installers and retailers.
The most requested switches: the professional's list
Which light switches are most requested by customers? From our technical team's experience with installers and retailers, a fairly stable list emerges, useful both for those managing a warehouse and for those preparing a system quote:
- Single-pole switches and two-way switches from the most widespread wiring series: they are the light switches replaced most often.
- NO push-button switches: indispensable for relays, timers and push-dim LED controllers.
- Double-pole switches: to isolate appliances and groups of power supplies.
- Lamp switches, in-line and foot-operated: small, economical, always requested.
- Switches for LED strips, touch and sensor: the fastest-growing category, driven by kitchens, wardrobes and mirrors.
- Wireless switches, self-powered with receiver: the quickest answer to renovations without building works.
- Smart switches and panel modules: requested by those who want to control lights from a smartphone.
A balanced assortment of switches covers both ordinary replacement and new LED systems, which today represent a growing share of requests from those renovating a home or renewing a shop.
How much it costs to replace a light switch
The cost of replacing a light switch depends on the number of points, the electrician's rate in the area and any call-out fee. It is always worth grouping several jobs into a single visit: replacing all the switches in a home at once costs proportionally much less than calling the technician for a single mechanism. A burnt switch must be replaced promptly, because its overheating can also damage the support and the box.
The best light switch brands
In the Italian wiring-series market, brands such as BTicino, Vimar, Gewiss, ABB and Schneider Electric have historically operated, each with different lines for price ranges and styles. Those looking for a BTicino light switch or switches from other brands must remember that mechanisms, supports and plates are compatible only within the same series. For specific LED strip switches, such as touch switches, sensors, controllers and radio push buttons, it is better to turn to a distributor specialising in LED lighting, able to guarantee compatibility between switch, power supply and strip.
Where to buy electrical switches: Amazon, offers or distributor?
Those searching for "interruttore amazon" or "offerte interruttori" find a very wide offering, but often with incomplete technical information and without the possibility of consulting a technician. For wiring-series switches, the natural channel is the electrical supplies shop; for LED strip switches and switches for LED lighting, a specialised distributor such as Ledpoint offers complete technical data sheets, products that can be paired with each other, pre-sales support and availability for large quantities. Saving a few euros on a switch never compensates for a compatibility problem with the power supply. For catalogues and price lists you can consult the Ledpoint catalogues page or contact our technical team.
17. Frequently asked questions about switches
We have collected the questions that electricians, homeowners, designers and retailers ask us most often about light switches and LED strip switches. Click on each question to open the answer.
Which light switch should I choose for a household system?For a single light point, a 10AX single-pole switch from the installed wiring series is sufficient. To control the same light from two points, two two-way switches are needed; for three or more points, push buttons with relays. For LED strips in furniture, a 12-24V touch or sensor switch is preferable. |
What is the difference between a switch and a two-way switch?A switch opens or closes a circuit from a single point and has two terminals. A two-way switch has three terminals and switches the live wire between two outputs: used in pairs, it allows the same light to be turned on and off from two different points, such as the ends of a corridor. |
What is the difference between a push button and a switch?A switch maintains the ON or OFF position until operated again. A push button closes the contact only while pressed and sends a pulse to a relay, timer or LED controller. With push buttons, unlimited control points can be added. |
Which wires go to the light switch?In a simple diagram, two wires arrive: the incoming live wire and the lamp return towards the light point. Neutral and earth go directly to the lamp. Switches with indicator lights, dimmers and smart switches may also require the neutral. The switch must always interrupt the live wire, never the neutral. |
How do you connect an LED strip to a switch?There are two ways. You can control the 230V side of the power supply with a normal wall switch, or insert an LED strip switch between the power supply and the strip, on the 12-24V side. In this case you must check that the strip current is within the switch rating. |
Why do LED lights remain dimly lit when the switch is off?The most frequent causes are a switch with an indicator light, induced currents on long cables or a switch interrupting the neutral rather than the live wire. The solution is to check the diagram, replace the indicator switch with a model without an indicator and use quality LED power supplies. |
Does a smart switch work without a neutral?Some models do, but most smart switches require the neutral to power the electronics. No-neutral models pass a small current through the load and with LEDs can cause flickering. In LED systems a module with neutral or a panel solution is preferable. |
Can I connect a switch to the push input of an LED controller?No. The push input requires a normally open push button with spring return. With a fixed switch in the ON position, the controller interprets a continuous press and the brightness rises and falls without stopping. Always use an NO push button or a compatible radio push button. |
How can I tell if a switch is broken?If the lamp works elsewhere and the protections are on, with the power off disconnect the switch and measure continuity with a tester: it must be closed in ON and open in OFF. Uncertain clicks, heat, blackening or visible sparks indicate a switch to be replaced. |
How long does a light switch last?A quality mechanical switch is designed for tens of thousands of operations and lasts many years in the home. In condominium common areas, with intensive use, wear is faster: robust push buttons, quality relays or presence sensors reduce maintenance work and costs. |
Can I replace a light switch myself?In Italy, work on the fixed electrical system is reserved for qualified companies, which issue the declaration of conformity. For safety, it is always advisable to rely on an electrician, who also checks the condition of cables and terminals. Wireless solutions allow switches to be added without building works. |
What certifications must a light switch have?Every switch sold in the European Union must have CE marking. Wiring-series switches refer to the CEI EN 60669 standard and many bear quality marks issued by third parties. Radio and smart devices must also comply with the Radio Equipment Directive. |
Is there an invisible switch for LED strips?Yes. Capacitive touch sensors are installed behind wood or plasterboard surfaces and are activated by touching the surface. Ledpoint offers, for example, a sensor that works through wood up to 5 cm thick and a touch switch that is applied behind mirror glass. |
What is the switch that adjusts the light called?It is called a dimmer or brightness regulator. For LEDs it is essential that the dimmer is compatible with the power supply: phase cut, 0/1-10V, DALI or push. For LED strips, dedicated dimmers and controllers are used, often controlled by wall push buttons, remote controls or apps. |
18. The right switch for every light
From the nineteenth-century knife switch to the touch switch hidden in wood, switches have accompanied every evolution of lighting. Today the choice is wider than ever, and precisely for this reason it requires method.
To sum up: the single-pole switch remains the simplest solution for a light point; two-way and intermediate switches are used to control the same light from multiple points; push buttons with relays or controllers are the best choice for many control points and for LED strips with push-dim function. For LEDs you must decide whether to control the 230V side or the 12-24V side, calculate the current, consider the inrush current of power supplies and avoid incompatible indicators and dimmers. Finally, wireless and smart solutions allow switches and automations to be added without building works, with the advantage of consumption monitoring.
If you are designing a system with LED strips, in the controllers section of Ledpoint.it you will find touch switches, sensors, radio push buttons, receivers and smart modules designed to work together with our strips and power supplies. To learn more about technical terms, consult the LED glossary, read the other guides on the Ledpoint blog or write to our technical team: we will help you choose the right switch for your project, from a single piece of furniture to an entire building.
This article was developed with the support of artificial intelligence and subsequently reviewed, corrected and validated by the Ledpoint.it technical team, which guarantees its reliability and compliance with official sources.