


Over the last five years, ceiling LED lighting has evolved from an accessory solution to a primary system in the design of residential, commercial, and museum interiors. The reason is twofold: on the one hand, the luminous efficiency of the best LED strips now exceeds 160 lm/W, reducing consumption by 70–85% compared to equivalent halogen sources; on the other hand, COB (Chip On Board) technology has eliminated the spotting effect that for years had limited the use of LED strips in exposed installations, unlocking previously unthinkable aesthetic applications. Today, a well-chosen LED ceiling strip lasts between 50,000 and 70,000 hours of operation, equivalent to over 20 years of average domestic use, and consumes between 5 and 24 W per meter depending on the chip density and desired luminous flux.
In this technical guide you will find everything you need to professionally choose, size, install, and manage a ceiling LED strip, whether you are an architect looking for integrated solutions for a prestigious residential project, an interior designer wanting to create dynamic lighting scenographies, a construction entrepreneur who needs to deliver sites with certified and long-lasting systems, or an electronics retailer looking to offer end customers a technically solid product line. We will use measurable data, regulatory references (UNI EN 12464, IEC 60598, IEC 62471 for photobiological safety), and we will indicate for each application which ceiling LED strip to adopt, from classic LED strips to COB technology for homogeneous light lines, the high-efficiency Fx2 series, up to the PR-DW and PR-SL profiles for professional installation.
In this article...
1. What is a ceiling LED strip and how it works
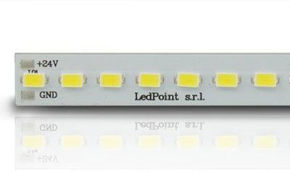
A ceiling LED strip is a flexible printed circuit board (FPCB) on which dozens or hundreds of LED chips per meter are soldered in series and parallel, powered by extra-low voltage (typically 24 V DC, sometimes 12 V or 48 V) or directly at 220 V AC via an integrated driver. The strip is generally supplied in reels of 5, 10, or 20 meters, features 3M adhesive on the back, and is cuttable every 2.5–10 centimeters at predefined graphically marked cutting points.
The operation of an LED strip is based on the emission of light through the electroluminescence of semiconductor diodes. When a direct current crosses the P-N junction of the LED chip, electrical energy is converted directly into photons without the thermal transition typical of incandescent sources, which is why luminous efficiency today reaches values that traditional technologies cannot replicate. An incandescent bulb converted about 5% of the consumed energy into light; a good quality LED strip converts over 40%, and top models like Ledpoint's Fx2 series exceed 50%.
Technical anatomy of an LED strip
To understand how to consciously choose a ceiling LED strip, it is useful to know its components. The flexible copper circuit, generally 2 oz thick in professional models versus 1 oz in cheap products, guarantees thermal dissipation and current capacity. The LED chips, distinguished into SMD technology (Surface Mounted Device, where individual light points are visible) and COB (Chip On Board, where the chips are covered by a continuous layer of phosphors that generates a homogeneous light line), determine efficiency, color rendering, and final aesthetics. The SMD resistors, calibrated to stabilize the current, are present at a rate of one for every three LEDs in 24V strips. The 3M VHB adhesive layer, of professional quality only in certified products, guarantees adhesion to the aluminum profile for the entire lifespan of the product. Finally, the protective coating, present in IP65, IP67, or IP68 versions, is made of poured or extruded transparent silicone, and protects the strip from humidity, dust, and accidental contact.
How LEDs are connected in LED strips
In 24V LED strips, the chips are organized in groups of 3 or 6 LEDs connected in series within each cuttable segment, with the groups in turn connected in parallel along the entire length of the strip. This circuit scheme is the reason why it is possible to cut the strip every 5 or 10 cm without compromising its residual operation. In 220V strips, on the other hand, the number of LEDs in series per group is much higher (typically 60 or more) and the allowed cuts are only every 100 cm. Understanding this point is fundamental: a poorly cut 220V strip becomes unusable, while a 24V strip forgives installation errors much more easily.
2. When to use ceiling LED strips: application scenarios
The ceiling LED strip is not a universal solution but a specific design tool, with precise strengths and equally precise contraindications. Knowing when to choose it over alternatives like recessed spotlights, LED ceiling lights, LED panels, or electrified tracks makes the difference between a successful lighting project and one that will stop convincing the inhabitants of the space after six months.
Ceiling LED strip lighting is the correct choice in five main scenarios.
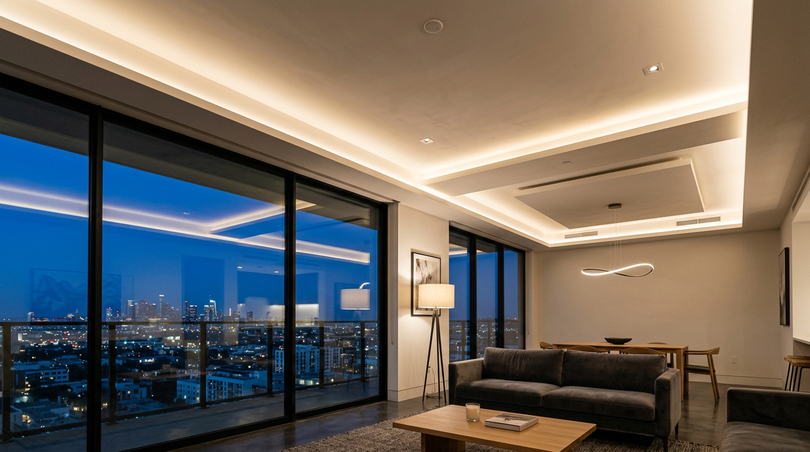
- First, when the goal is to obtain continuous light lines to emphasize the architectural geometry of a room: in these cases, no point source (spotlight, pendant, ceiling light) can compete with the continuity of an LED strip installed in a trimless profile or cove.
- Second, when diffused indirect light is needed: ceiling LED strip lighting directed upwards and reflected by the surface generates a soft, glare-free effect, ideal for living rooms, bedrooms, and prestigious residential environments.
- Third, when the ceiling height is reduced (under 250 cm) and recessed spotlights would create excessive hot spots on the work plane: linear light distributed over two or three meters solves the problem elegantly.
- Fourth, when dynamic control of color temperature or the color itself (RGB, RGBW, CCT tunable white) is desired: ceiling LED strips are effectively the only technology that allows this level of management at affordable costs.
- Fifth, when architectural integration requires the invisibility of the source: with recessed (trimless) profiles, the light seems to emerge directly from the plasterboard, without any visible lamp body.
When not to use ceiling LED strips
There are equally many cases where the LED strip is not the best choice. To illuminate a specific work plane (a dining table, a desk, a cooking zone) a directional spotlight or a dedicated LED pendant will guarantee punctual illumination and superior visual comfort. For very high environments (over 350 cm) the lumen dispersion of the ceiling LED strip makes it necessary to integrate it with point sources or pendants. For large transit spaces without specific aesthetic needs, high-flux LED ceiling lights remain cheaper and easier to install. The LED strip does not replace every other source: it integrates it, completes it, and in many projects coexists with spotlights, pendants, and ceiling lights within a coordinated layered lighting.
3. Types of LED strips: COB, SMD, RGB, CCT, Sunlike
The types of LED strips available on the market have multiplied in the last five years, to the point that choosing the correct technology is today more important than choosing the single model. The four main families (SMD, COB, RGB/RGBW, CCT tunable white) respond to different design needs, and an informed decision requires comparing strengths, application limits, price range, and context of use. In the following table you will find the technical summary that designers use to guide their choice.
| Type | Technology | Average Efficiency | CRI Color Rendering | Visual Effect | Ideal Application | Price €/m |
|---|---|---|---|---|---|---|
| SMD 2835/3528 | Discrete chips on PCB | 110–140 lm/W | 80–90 | Visible light points | Hidden installation in coves | 5–18 |
| SMD 5050 | Larger discrete chips | 90–110 lm/W | 80–90 | Visible light points | RGB and decorative applications | 8–25 |
| COB (e.g., F52-300-320OR2) | Chips covered by phosphors | 120–150 lm/W | 90–95 | Continuous homogeneous line | Exposed profiles, trimless | 15–40 |
| High Efficiency Fx2 | Optimized SMD binning | 160–180 lm/W | 90 | Small light points | Main lighting | 20–45 |
| Sunlike | SMD with solar spectrum | 100–125 lm/W | 97–98 | Visible light points | Living, bedroom, premium retail | 30–70 |
| CCT Tunable White | Dual warm/cool chip | 100–130 lm/W | 90 | Variable 2700–6500K | Home automation, hospitality | 25–55 |
| RGB / RGBW / RGBWW | Multicolor chips | 60–110 lm/W | n.a./90 on white | Dynamic color | Scenographies, retail, events | 15–60 |
SMD LED strips: the technological basis
SMD LED strips remain the most widespread and versatile solution. The 2835 and 5050 formats indicate the dimensions in millimeters of the single chip (2.8×3.5 mm and 5.0×5.0 mm). High-density SMD strips (240, 320, or 600 LEDs per meter) reduce the spotting effect but do not eliminate it completely: to obtain a truly continuous line of light, they must be housed in deep profiles with a thick opal diffuser or, better yet, choose COB technology. The main advantage of SMD remains the price, significantly lower than COB at the same luminous flux, and the availability in all color variants.
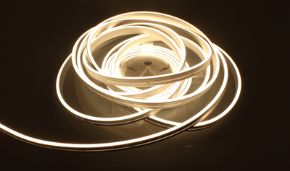
COB LED strips: the perfect light line
COB technology represents the decisive qualitative leap for exposed ceiling LED strip lighting. Instead of spaced discrete chips, COB has hundreds of micro-chips embedded in a continuous layer of yellow-orange phosphors: the result is a perfectly homogeneous light line, without visible point shadows. For installations in shallow profiles, where the strip is directly observable or reflected on shiny surfaces (resin floors, polished marbles, glasses), COB is the mandatory choice. The Ledpoint F52-300-320OR series implements this technology with 320 chips per meter and optimized power for residential profiles of reduced height.
Fx2 high-efficiency LED strips
When the ceiling LED strip must be the main light source of the environment, energy efficiency becomes the decisive parameter. The Fx2 series, and in particular the F52-30s-160822A model, exceeds 160 lumens per watt: this means that with just 10 W of absorbed power per meter, the strip generates over 1,600 lumens, sufficient to primarily illuminate medium-sized environments. This class of products allows reducing the total length of installed strip for the same required flux, cutting purchase costs, installation costs, power supply costs, and overall heat dissipation.
Sunlike LED strips: the spectrum of sunlight
Sunlike strips represent the current frontier of visual comfort. While traditional white LEDs generate light through a blue chip excited by yellow phosphors (with a spectrum that presents an anomalous peak in blue and a dip in cyan), Sunlike chips use a violet emitter and a combination of phosphors that faithfully reproduce the solar spectrum. The result is a CRI greater than 97 with an R9 value (saturated red) above 95, a rendering of materials, fabrics, and complexions comparable to natural daylight. For prestigious living rooms, bedrooms, high-end retail, and museum environments, the Ledpoint Sunlike series is the most advanced technical choice available.
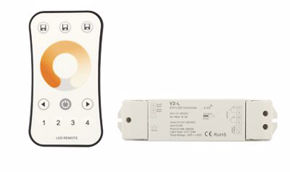
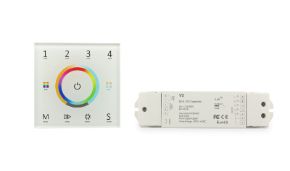
CCT tunable white LED strips
CCT strips, or tunable white, integrate two series of chips with different color temperatures (typically 2700K warm and 6500K cool) on the same PCB that can be mixed independently through a dedicated controller. The result is a light continuously adjustable from warm white to cool white, ideal for simulating the circadian cycle of natural light, for hospitality environments that change function during the day, and for integration into advanced home automation systems. Ledpoint offers a CCT line with control via Skydance, with a logarithmic dimming curve that returns a linearly perceived variation to the eye.
RGB, RGBW, RGBWW LED strips
RGB, RGBW (RGB plus cool white) and RGBWW (RGB plus warm and cool white) strips integrate chips of the three additive primary colors. They are indicated for lighting scenographies, dynamic retail, events, children's environments, gaming room applications. It must be emphasized that pure RGB strips are not suitable as main lighting: the white light obtained by mixing red, green, and blue has poor color rendering and an artificial aesthetic. For projects requiring both color and quality white, the correct option is RGBW or RGBWW.
4. Technical characteristics: lumens, watts, CRI, kelvin, IP
Comparing ceiling LED strips requires correctly reading the technical data sheet. The parameters that really matter are six, and ignoring even just one leads to costly purchasing errors. The following table summarizes the reference values that a residential or commercial lighting project should guarantee.
| Parameter | Unit | What it measures | Typical professional values | Minimum acceptable threshold |
|---|---|---|---|---|
| Luminous flux | lumens/m (lm/m) | Quantity of light emitted | 800–2,500 lm/m | 600 lm/m for main use |
| Absorbed power | watts/m (W/m) | Electrical consumption | 5–24 W/m | Consistent with flux and efficiency |
| Luminous efficiency | lumens/watt (lm/W) | Light/consumption ratio | 120–180 lm/W | 100 lm/W |
| Color rendering | CRI (Ra) | Color fidelity | 90–98 | 80 (90 for quality residential) |
| Color temperature | kelvin (K) | White tonality | 2700–6500K | Consistent with destination |
| Protection degree | IP | Dust/water tightness | IP20 indoor, IP65/67 damp | IP65 minimum for bathroom/outdoor |
| L70 Lifespan | hours | Time before drop to 70% | 50,000–70,000 h | 30,000 h |
| SDCM (binning) | MacAdam steps | Color consistency between LEDs | ≤3 SDCM | ≤5 SDCM |
How to choose the power of an LED strip
The power per meter of a ceiling LED strip must be chosen based on three variables: the required luminous flux, the efficiency of the strip, and the type of installation (direct or indirect).
- For indirect light in coves, where part of the flux is absorbed by reflection, it is sized abundantly: 14–20 W/m with 140–160 lm/W efficiency generate about 2,000–3,200 lm/m per meter, of which the user perceives 1,000–1,800 lm/m useful.
- For direct light in a ceiling profile, where the strip directly illuminates the environment, it is sized more conservatively: 8–12 W/m are usually sufficient for residential environments.
- For main lighting (absence of other significant sources), the requirements increase: 18–24 W/m in high-efficiency Fx2 technology guarantee the necessary flux without thermal excesses.
CRI, R9, and light quality
The CRI (Color Rendering Index, Ra) measures the fidelity with which a light source reproduces eight reference colors compared to sunlight. A CRI of 80 is the minimum for residential applications, 90 is the professional standard, 95–98 is the premium range. However, it must be noted that the CRI Ra does not include the saturated red R9, a crucial parameter for the rendering of warm woods, complexions, red fabrics. An LED strip with Ra 90 can have an R9 of 20 (terrible) or 90 (excellent): the difference in final perception is enormous. Sunlike series strips guarantee Ra greater than 97 and R9 greater than 95, values that place the product in the museum range.
Color temperature: which to choose for the ceiling
The color temperature expressed in kelvin determines the emotional character of the environment.
- 2700K (extra warm white) is the classic choice for living rooms, bedrooms, relaxation environments: it simulates the light of dawn or dusk, favors melatonin production in the evening hours, creates a wrapping effect.
- 3000K (warm white) is the Italian residential reference, slightly more neutral but still welcoming, suitable for living rooms, kitchens, dining rooms.
- 4000K (natural white) is the balance point: bathrooms, studies, work environments, clothing retail.
- 5000–6500K (cool white) is reserved for technical offices, laboratories, garages, industrial environments.
For the LED ceiling strip in Italian residences, the advice is to stay between 2700K and 3000K in living rooms and bedrooms, rising to 3500–4000K only in kitchens and bathrooms.
IP protection degree
The IP degree (Ingress Protection) is composed of two digits: the first indicates protection against solids (0–6), the second against liquids (0–9).
- IP20 is sufficient for dry interiors (living room, bedroom, hallway, study).
- IP65 is required for bathrooms, shower areas, protected exteriors (porches, open attics).
- IP67 and IP68 are for immersion (swimming pools, fountains, floors subject to washing with water jets). An IP65 strip can be installed in the kitchen near the stove, in the laundry room, and in bathrooms at a safe distance from the shower area. For the direct shower area, IP67 is needed.
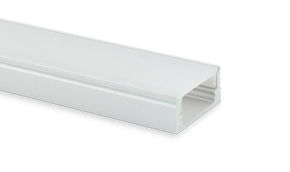
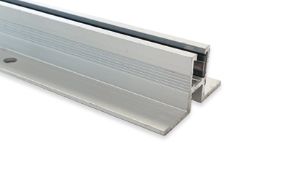
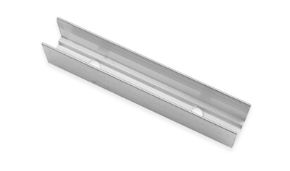
5. Aluminum profiles: trimless, slim, cove, anti-glare
The aluminum profile is not an optional accessory but a determining technical component for the lifespan, performance, and final aesthetics of the ceiling LED strip. The profile has three functions:
- to dissipate the heat produced by the LED chips, prolonging their useful life and keeping the luminous flux stable over time;
- to mechanically protect the strip from impacts, dust, PCB deformations;
- to provide support for the diffuser, which optically shapes the light beam and hides any spotting of the SMD chips. An LED strip installed without a profile loses 30–40% of its useful life and shows a 15–20% drop in luminous flux in the first year.
| Profile Family | Installation Type | Height | Visual Effect | Ideal Application |
|---|---|---|---|---|
| PR-DW07-01 trimless | Plastered plasterboard recess | ~7 mm visible | Recessed light cut | Living and prestigious environments |
| PR-DW16-03 cove | Recess in architectural cove | ~16 mm | Indirect light towards ceiling | Uplighting and ambient light |
| PR-SL08-03 slim | Exposed surface | 8 mm | Minimal visible line | Under-cabinets, shelves, walls |
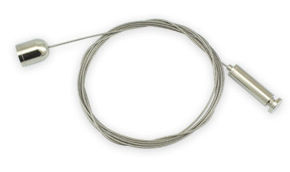
| PR-CL02-07 anti-glare | Surface or suspension | Deep | Laterally shielded light | Offices, workstations |
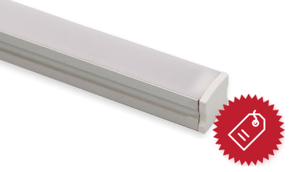
PR-DW07-01 trimless profiles: the recessed light cut
The PR-DW family profiles are designed to be recessed into plasterboard and plastered with the ceiling finish. The result is one of the cleanest ceiling light cuts that contemporary lighting design allows to obtain: no visible lamp body, no lateral light leakage, just a thin luminous line that seems to spring directly from the architecture. Installation requires precision during the plasterboard phase (the recess must be planned at the structural project level, not improvised at the end of the site) and an expert hand in the final plastering. For prestigious residential environments, high-level hospitality, and premium retail, the PR-DW07-01 is the technical reference choice.
PR-DW16-03 cove profiles: indirect lighting
The PR-DW16-03 is specifically designed to be housed inside coves or plasterboard cornices, directing the beam of the LED strip towards the ceiling optimally. The internal geometry of the profile optimizes the emission angle to prevent light from escaping from the cove towards the observer's eye, reducing glare and maximizing the diffuse uplighting effect. This is the classic solution for contemporary style living rooms, conference rooms, hotel lobbies, and commercial environments where a soft base lighting is wanted without aiming for a main functional lighting.
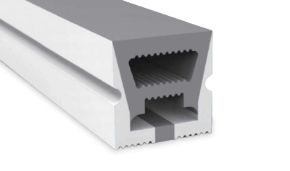
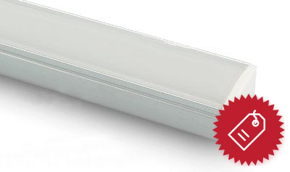
PR-SL08-03 slim profiles: exposed minimalism
When it is not possible to recess the LED strip into plasterboard, because the ceiling is made of laterocement, wood, exposed beams, or simply because the site does not include masonry works, the surface slim profile is the answer. The PR-SL08-03 with only 8 mm in height integrates elegantly on any surface, still guaranteeing adequate thermal dissipation thanks to the choice of professional grade anodized aluminum. It is the natural choice for existing ceilings in renovations, for wall applications as vertical light cuts, for under-cabinets in the kitchen, for illuminating shelves and shelving.
PR-CL02-07 anti-glare profiles
In offices, meeting rooms, intensive VDT workstations, glare from a linear source can generate chronic visual fatigue. The PR-CL02-07 profile responds to this need with a deeper geometry, in which the lateral aluminum walls shield the direct view of the LED from lateral angles. The user sees the light on the work plane but not the source, guaranteeing compliance with the UGR (Unified Glare Rating) requirements provided by the UNI EN 12464 standard for VDT workstations.
6. Plasterboard ceiling LED strips: step-by-step installation
The installation of ceiling LED strips in plasterboard is the most widespread method in contemporary Italian residential projects. It allows maximum architectural integration, invisibility of the source, and compositional freedom in the design of light lines. However, the installation must be planned during the structural design phase of the false ceiling, because all electrical predispositions, cable traces, housings for power supplies, and profiles must be provided before the plasterboard is closed. Improvising LED strips on finished plasterboard is almost always a downward compromise.
Phase 1: designing the LED false ceiling
Even before choosing the strip or the profile, the false ceiling must be drawn. The path of the light lines is defined, their length, with what orientation (uplight towards the ceiling, downlight towards the floor, perimeter). The total luminous flux required for the room is calculated (see section 11). The cove or groove is sized so that the strip is not visible to the observer's eye in a natural position (for uplight, a cove 8–12 cm deep always hides the strip from a standing eye). The power supply points are defined, providing 503 junction boxes with recessed false ceiling boxes, remembering that every power supply must be inspectable.
Phase 2: electrical predispositions before closing
The bipolar extra-low voltage cable that carries the DC current from the power supply to the strip must be of adequate section. For currents up to 5A, 1.5 mm² minimum is used; for currents between 5A and 10A, it rises to 2.5 mm². Voltage drops greater than 5% generate brightness variations along the strip and must be avoided by correctly sizing the cable and distance. The cable must be run in a dedicated corrugated tube, separated from the 220V mains voltage to avoid interference. The 220V power supplies of the LED drivers must be connected to a circuit protected by a dedicated differential circuit breaker for lighting.
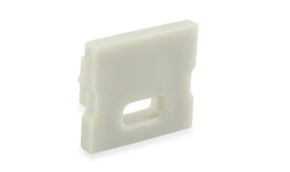
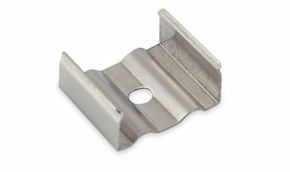
Phase 3: installation of the profile in the plasterboard
Once the plasterboard is closed and plastered, the trimless profile is housed in the predisposed recess. Fixing occurs through metal clips and specific plasterboard screws, guaranteeing a flat support free of mechanical tensions on the profile. For plastered profiles, after installing the profile, a second coat of putty is applied that integrates it with the surrounding surface, leaving only the diffuser visible. This phase requires an expert hand: poorly executed putty generates uneven lines and cracks over time.
Phase 4: laying the LED strip in the profile
The LED strip is unrolled progressively, removing the 3M adhesive film one section at a time and pressing it with a finger along the entire length of the profile. Cuts must be made exclusively at the indicated points (dashed lines with a scissor symbol) and connections between pieces must be made with specific clip connectors (for safer soldering, tin and a 30W soldering iron are used). For 24V strips over lengths greater than 5 linear meters, bilateral power supply (current injected from both ends of the strip) is recommended to avoid voltage drops along the run.
Phase 5: insertion of the diffuser and ignition test
The polycarbonate diffuser (opal for maximum diffusion, satin for balance, transparent only where the source needs to be highlighted) is press-fitted into the profile. Before closing definitively, an ignition test is always carried out on the complete strip, verifying uniformity, absence of flickering, and correct color temperature. Any problems must be resolved now, not after the site is handed over.
7. Ceiling LED strips without plasterboard and without false ceilings
It is not always possible or desirable to build a plasterboard false ceiling. Wooden ceilings with exposed beams, laterocement ceilings with already reduced heights, renovations with historical constraints or limited budgets make it necessary to install the LED strip without plasterboard. The correct technical solution in these cases is the surface profile, like the PR-SL08-03, fixed directly to the existing ceiling with wall plugs or structural adhesives for smooth surfaces.
LED strips without false ceiling: design strategies
Installing LED strips without a false ceiling requires accepting the visibility of the profile as an architectural element, and turning it into a deliberate design detail. Contemporary slim profiles are designed exactly for this: their minimal presence, 8–10 mm in height, reads as a linear drawing on the ceiling, not as a technological invasion. In wooden ceilings with exposed beams, the profile can run hidden on the head of the beam, illuminating the space between one beam and another. In flat ceilings, the profile can draw perimeter frames, central crosses, paths that accompany circulation.
Lighting on vaulted ceilings
Vaulted ceilings, frequent in historical Italian buildings, pose the problem of installing lights on curved surfaces. The flexible LED strip is effectively the only technology that allows following the curvature of the vault without interruptions. Flexible aluminum profiles are used (with lateral incisions that allow bending) or short modular profiles connected in succession. To obtain enhancement effects for frescoed vaults, grazing light is used, pointing the strip parallel to the surface a few centimeters away, so that the light enhances textures and reliefs.
Wooden ceilings and exposed beams
LED lighting on exposed wooden beams is one of the fastest-growing applications in recent years. The LED strip is installed on the upper or lateral side of the beam, hidden from direct view, generating a vertical luminous wash that enhances the wood and indirectly illuminates the environment. For wooden ceilings it is crucial to choose strips with a 2700K color temperature and CRI 90+, because colder temperatures make the wood unnaturally gray and low CRIs flatten its veins. The Ledpoint Sunlike series, with Ra 97, returns the wood with a chromatic naturalism that makes a visual difference.
8. Power supply: 24V vs 220V, sizing power supplies
The power supply is the most underestimated factor and most frequently responsible for failures, flickering, and reduced life of ceiling LED strips. The choice between 220V LED strips with an integrated driver and 24V LED strips with an external power supply is a design decision, not a detail. Both solutions have precise strengths and limits, summarized in the following table.
| Characteristic | 24V DC LED Strip | 220V AC LED Strip |
|---|---|---|
| External power supply | Necessary | Not necessary (integrated driver) |
| Minimum cuts | 2.5–10 cm | 50–100 cm |
| Maximum single length | 5–10 m | 50–100 m |
| Voltage drop | Significant over 5 m | Negligible |
| Contact safety | SELV, intrinsic safety | Mains voltage, insulation required |
| Dimmability | DC dimmer, PWM, DALI, Casambi | Limited, often only on/off |
| Top color rendering | Available up to Ra 98 | Typically Ra 80–90 |
| Ideal application | Residential, retail, hospitality | Long linear exteriors, industrial |
Why 24V is the standard for residential
For the installation of a ceiling LED strip in residential, prestigious commercial, and hospitality environments, the correct choice is almost always 24V. 24V strips offer real dimmability via PWM (Pulse Width Modulation) controllers, support advanced protocols like DALI and Casambi for home automation integration, reach higher levels of luminous efficiency and chromatic quality, and are intrinsically safe to the touch thanks to the SELV (Safety Extra Low Voltage) low voltage. 220V strips are useful in long outdoor perimeter installations (tens of meters) where the voltage drop of 24V would become unmanageable.
Sizing Mean Well power supplies
Mean Well power supplies from the XLG and PWM series are the professional standard for LED strips. The sizing rule is simple: the power supply must have a nominal power 20–25% higher than the total power absorbed by the strip. Example: if you install 5 meters of 12 W/m strip, the load is 60W, and the correct power supply is 75W (Mean Well XLG-75-24-A) or 80W. The 20% margin serves three purposes: to prolong the useful life of the power supply (a PSU that constantly works at 100% of the nominal load has a much shorter life), to absorb ignition peaks, to guarantee space for future system extensions.
How to choose between Mean Well XLG and PWM
The Mean Well XLG series delivers constant current with power regulation, it is indicated for 24V constant voltage LED strips without the need for complex dimming. The Mean Well PWM series delivers constant voltage with a modulable PWM signal, it is the choice for dimmable systems via controllers, compatible with 0-10V, DALI, KNX systems, and Skydance controllers. For automated residential systems the choice is PWM, paired with Skydance V1 (single zone) or V3 (multi-zone) controllers.
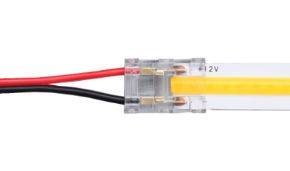
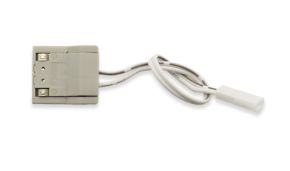
How to connect an LED strip without soldering
To avoid soldering, there are specific clip connectors for each type of strip (8 mm, 10 mm, COB, RGB, CCT width). The connector opens with pressure, the strip cut to the internal mechanical reference is inserted, the clip is closed, and the contact is made. Clip connectors are reliable for standard residential systems; for professional commercial installations with extended warranties, tin soldering with heat shrink tubing remains the technically superior solution. There are also pass-through connectors to join two pieces of strip distant from each other via an intermediate cable: useful when you need to bypass a corner or an obstacle.
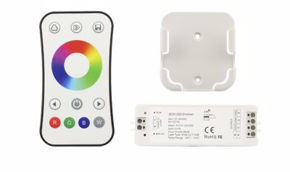
9. Dimmers, Skydance controllers, and home automation integration
The difference between an installed LED strip and a professional lighting system lies almost entirely in the quality of the control. An undimmed LED strip has only one scene (on/off); an LED strip dimmed with a logarithmic curve and home automation integration offers infinite combinations of intensity, color temperature, color, progressive ignition, memorized scenes. Control transforms a component into a system.
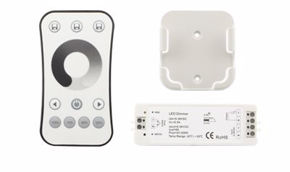
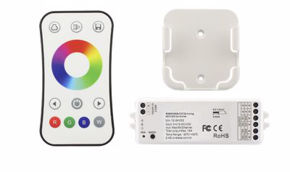
Skydance V1 and V3 controllers: the professional standard
Skydance controllers are the industry reference for the professional control of LED strips. The V1 series manages a single zone of strip (single-white, CCT tunable white, or RGB/RGBW depending on the model) with high-frequency PWM dimming (over 2000 Hz) that eliminates perceivable flickering and that capturable by cameras. The V3 series manages up to 8 independent zones on the same system, ideal for projects where multiple environments are centrally controlled. The distinctive feature of Skydance is the logarithmic dimming curve: the variation of light sent to the strip is not linear but calibrated to the logarithmic response of the human eye, returning a perception of fluid and natural transition even in the phases of progressive turning on and off.
Home automation integration: KNX, DALI, Casambi, Zigbee, WiFi
Skydance controllers and other professional systems integrate into the main home automation protocols:
KNX is the reference wired standard for high-end Italian residential and commercial projects.
DALI is the standard for professional tertiary lighting (offices, retail, hospital), with individual addressing of every fixture.
Casambi uses Bluetooth Mesh and is ideal for retrofit systems without masonry works.
Zigbee is widespread in Philips Hue, IKEA, Amazon ecosystems, and low-cost solutions.
WiFi is the simplest but least reliable protocol for complex systems. The choice between these protocols must be made during the design phase: converting afterwards involves significant costs.
Motion sensors and automations
The integration of presence sensors, twilight sensors, and timers transforms the ceiling LED strip into an automatic system. For hallways, stairs, bathrooms, activation on a presence sensor with gradual dimming avoids brutal nighttime ignitions, reduces consumption, and improves comfort. For environments with variable natural light, the twilight sensor integrates artificial light as a function of daylight, keeping the illumination on the work plane constant (daylight harvesting).
10. Applications by room: living room, kitchen, bedroom, bathroom, hallway
Every domestic environment has specific lighting needs, and the ceiling LED strip must be sized accordingly. The following table summarizes the reference parameters for each destination.
| Environment | Recommended Lux | Color Temp. | Minimum CRI | IP | Recommended Type |
|---|---|---|---|---|---|
| Living Room | 100–200 lux | 2700–3000K | 90 | IP20 | COB or Sunlike, indirect cove |
| Kitchen (work area) | 300–500 lux | 3000–4000K | 90 | IP44–65 | Fx2 high efficiency, under-cabinet |
| Bedroom | 100–150 lux | 2700K | 90 | IP20 | Sunlike, dimmable CCT |
| Bathroom | 200–300 lux | 3000–4000K | 90 | IP65 minimum | COB IP65, perimeter cove |
| Hallway | 100 lux | 3000K | 80 | IP20 | Linear SMD, motion sensor |
| Study | 300–500 lux | 4000K | 90 | IP20 | Anti-glare PR-CL02-07 |
| Children's room | 200–300 lux | 3000–4000K | 90 | IP20 | Dimmable CCT, scenes |
Living room ceiling LED strips
The living room is the environment where the LED strip expresses its maximum aesthetic potential. The standard solution involves a perimeter plasterboard cove with indirect light, sized to generate 100–200 lux of average illumination on the work plane. COB technology series F52-300-320OR2 or Sunlike is recommended for superior chromatic quality, 2700K color temperature for evening atmosphere, and dimming via Skydance V1 to modulate intensity according to activities (conversation, reading, TV viewing, dinner). The living room LED strip should be flanked by accent sources (spotlights, pendant over the table, floor lamps) in a complete layered lighting.
Kitchen ceiling LED lighting
In the kitchen, the ceiling LED strip performs an ambient lighting function, while the work plane must be illuminated separately by dedicated under-cabinet LED strips. Kitchen ceiling LED lighting requires 300–500 lux overall, obtainable with high-efficiency Fx2 strips of 14–18 W/m installed in a perimeter profile or in two parallel lines to the cooking plane. 3000–4000K color temperature to optimize food visibility, CRI 90+ for food chromatic fidelity, IP44 minimum near the cooking area. Under-cabinet strips should be managed with a switch or presence sensor separate from the general one.
Bedroom LED lighting
The bedroom requires delicate light management, with priority on comfort and sleep quality. The bedroom LED strip must always be dimmable, ideally in CCT tunable white technology to offer warm white 2200–2700K in the evening (favors melatonin) and neutral white 4000K for daytime activities (getting dressed, reading). Installation in a perimeter cove or behind the headboard is recommended, so that the source is never visible to the eye in a lying position. CRI 90+, ideally Sunlike Ra 97 for natural rendering of complexions.
Bathroom ceiling LED lighting
The bathroom is a normatively sensitive environment due to the coexistence of electricity and water. The CEI 64-8 standard defines risk zones (0, 1, 2) with specific IP constraints. For the ceiling LED strip in the bathroom, the IP65 degree is the minimum to guarantee, IP67 in proximity to the shower. 3000–4000K color temperature for good mirror rendering, CRI 90 for faithful skin rendering during makeup and personal care, 200–300 lux illumination. Bathroom LED strips allow perimeter cove, behind-mirror, shower perimeter solutions, each with specific aesthetic and functional effects.
Hallway LED strips
In the hallway, the LED strip performs a functional function (path visibility) and an aesthetic function (architectural reading of directionality). The classic installation provides a continuous perimeter line on the ceiling, or two parallel lines along the side walls, managed with a motion sensor for automatic ignition. For night hallways, automatic dimming to 10–20% during night hours is recommended, to avoid abrupt awakenings and reduce consumption.
Lighting on exposed wooden beams
LED lighting for exposed beams is a rapidly growing niche. The LED strip is installed on the upper part of the beam, completely hidden from view, generating a luminous wash that enhances the wood and illuminates the environment by light reflected from the ceiling above. Sunlike series with 2700K temperature and CRI 97 are used to return the warmth of the wood without unnatural grays. This application requires careful sizing of the flux: typically 12–18 W/m are sufficient for ceilings of average height (270–300 cm).
11. Lighting design: how many lumens per room
One of the most frequent questions is "how many meters of LED are needed to illuminate a room?" The answer requires a simple but rigorous photometric calculation, based on the UNI EN 12464 standard for maintained average illuminance. The starting formula is:
Total luminous flux (lm) = Required illuminance (lux) × Surface (m²) × Utilization factor × Maintenance factor
Where the utilization factor takes into account the reflection of surfaces and the geometry of the environment (typically 0.5 for indirect light in residences, 0.7 for direct light), and the maintenance factor takes into account the degradation of flux over time and dirt (0.8 for LED strips in profile, 0.9 for IP65 protected strips). The following table gives the operational reference values.
| Environment Type | Surface | Required Lux | Total Lumens | Meters of strip 1,500 lm/m |
|---|---|---|---|---|
| Living Room | 20 m² | 150 lux | 7,500 lm | 5 m |
| Living Room (indirect light) | 20 m² | 150 lux | 10,700 lm | 7.2 m |
| Kitchen | 12 m² | 400 lux | 9,600 lm | 6.4 m |
| Bedroom | 14 m² | 120 lux | 4,200 lm | 2.8 m |
| Bathroom | 8 m² | 250 lux | 5,000 lm | 3.3 m |
| Study | 10 m² | 400 lux | 8,000 lm | 5.3 m |
| Hallway | 6 m² | 100 lux | 1,200 lm | 0.8 m (not recommended; better full line) |
How many LED watts are needed to illuminate a room
Once the necessary lumens are calculated, dividing by the luminous efficiency of the chosen strip gives the absorbed watts.
Example for a 20 m² living room with indirect light: 10,700 lm required divided by 160 lm/W (Fx2 series efficiency) = 67 total watts. Distributed over 5 meters of perimeter cove, this makes 13.4 W/m, a value consistent with the high-efficiency series.
The same environment with a 100 lm/W strip would require 107 watts, or 21 W/m: a significantly higher consumption and more demanding heat dissipation.
12. Consumption, operating costs, and return on investment
One of the most recurring questions concerns the real consumption of LED strips. The answer depends on four variables: power per meter, total length, annual hours of use, cost per kWh. The table summarizes the most frequent cases at an average Italian rate of €0.30/kWh.
| Length | Power W/m | Total Watts | Hours/year | kWh/year | Annual Cost |
|---|---|---|---|---|---|
| 5 m | 10 W/m | 50 W | 1,500 h | 75 kWh | €22.50 |
| 10 m | 10 W/m | 100 W | 1,500 h | 150 kWh | €45.00 |
| 10 m | 14 W/m | 140 W | 2,000 h | 280 kWh | €84.00 |
| 20 m | 10 W/m | 200 W | 1,500 h | 300 kWh | €90.00 |
| 20 m | 18 W/m | 360 W | 2,500 h | 900 kWh | €270.00 |
Comparison with traditional technologies
To grasp the true impact of LED, a comparison is enough. A 20 m² living room illuminated with indirect light using Fx2 LED strip consumes 67 total watts. The same environment illuminated with 50W halogen bulbs instead of strips would require about 14 spotlights to generate equivalent flux, for a total of 700 watts: over 10 times the consumption. Over 1,500 hours of annual use, the savings are 949 kWh, equivalent to about €285 a year just for a single environment.
Return on investment (ROI)
A professional quality LED strip with profile and power supply has an installed cost of €35–80/m for residential solutions, up to €120–180/m for prestigious installations (Sunlike, plastered trimless, home automation controller). The payback compared to equivalent halogens is between 18 and 36 months in residential contexts, even less in commercial contexts with continuous ignition. Considering the useful life of 50,000–70,000 hours (over 30 years at average domestic use), LED generates a cumulative saving that often exceeds 10 times the initial cost, excluding the additional light quality and visual comfort.
13. Prices of ceiling LED strips and cost factors
The prices of ceiling LED strips vary greatly depending on technology, binning quality, power, brand, certifications. Understanding the cost factors allows you not to pay inflated prices and not to save on critical components. The table summarizes the realistic price ranges on the Italian professional market.
| Component | Economy Range | Professional Range | Premium Range |
|---|---|---|---|
| LED strip per meter | €3–8/m | €15–35/m | €40–80/m |
| Aluminum profile + diffuser | €4–8/m | €10–25/m | €25–60/m |
| Power supply (for 5–10 m) | €15–35 | €50–120 | €120–280 |
| Dimmer controller | €15–40 | €80–200 | €200–600 |
| Installation labor | €10–18/m | €20–35/m | €35–70/m |
| Total installed cost | €30–60/m | €80–150/m | €150–280/m |
Ceiling LED strip price: what justifies the difference
The price difference between a €5/m LED strip and a €40/m one is real and technically justified.
The parameters that make the difference: PCB copper thickness (1 oz vs 2 oz), chip binning quality (color variability between different LEDs on the same strip: ≤3 SDCM in premium vs ≤7 in economy), CRI and R9 (80 vs 95+), actual luminous efficiency (90 lm/W vs 160+ lm/W), declared and verified L70 lifespan (30,000 h vs 70,000 h), 3M adhesive quality, CE/ENEC/CB certifications, warranty (1 year vs 5 years).
An economy strip used in a professional installation may seem like a saving, but the cost of dismantling, replacement, and restoration in case of failure within 2–3 years cancels out any initial saving.
How much does it cost to install an LED strip
Professional installation of a ceiling LED strip in plasterboard requires between 0.5 and 1.5 hours of labor per linear meter, depending on complexity (straight or shaped lines, presence of corners, cove or trimless installation, existing or to-be-made electrical predispositions).
The hourly rate of a qualified electrician in Italy varies between €35 and €60/h, to which consumables are added (trunking, boxes, cables, connectors, screws, putties). The total installation cost typically ranges between €20 and €50 per linear meter, excluding material.
For a complete LED false ceiling in a 20–25 m² residential environment, the total investment (design, materials, installation, controls) is between €1,500 and €4,500.
14. Regulations, certifications, and safety
The installation of ceiling LED strips in Italy is regulated by a precise regulatory framework. The main regulation is CEI 64-8 (user electrical systems with nominal voltage not exceeding 1000V), which defines the general safety rules, risk zones in bathrooms and kitchens, minimum conductor sections, differential protections.
The UNI EN 12464-1 standard regulates the lighting requirements for indoor work environments, defining minimum lux, UGR glare indices, illumination uniformity.
The EMC Directive 2014/30/EU and the LVD Directive 2014/35/EU regulate the electromagnetic compatibility and electrical safety of products placed on the EU market.
Product certifications
A professional quality LED strip must bear the markings:
- CE (compliance with essential EU requirements),
- RoHS (absence of hazardous substances),
- ENEC (voluntary European electrical safety certification, mark of superior quality),
- CB (IECEE international certification).
For specific environments, IP markings (mechanical protection), IK (impact resistance), photobiological safety classes according to IEC 62471 are added (good quality white LED strips are in Risk Group 0 or 1, without photobiological risk for normal use).
Photobiological safety and blue light
The issue of blue light is frequently addressed in a non-rigorous way. Standard white LEDs have a spectral peak in blue around 450 nm, and in subjects exposed for many hours a day this can influence the regulation of the circadian cycle. The most recent technologies (Sunlike, Human Centric Lighting) reduce the blue peak and redistribute spectral energy over a continuous spectrum similar to that of the sun. For bedrooms and environments intended for evening hours, choosing 2700K strips or CCT systems that drop to 2200K in the evening is the correct technical strategy.
15. Maintenance and longevity
One of the distinctive qualities of ceiling LED strips is practically zero maintenance for their entire useful life. A correctly installed professional LED strip requires no replacement, cleaning, or recalibration interventions for 15–25 years. The declared lifespan is expressed in L70 hours (time after which the luminous flux drops to 70% of the initial one), typically 50,000–70,000 hours. At 4 hours a day of average use, we are talking about 34–48 years of operation.
The three main causes of premature failure
When an LED strip fails before the expected times, the causes are almost always three.
- First cause: inadequate thermal dissipation, due to installation without an aluminum profile or with an undersized profile. LED chips operate at junction temperatures below 80°C; beyond that, the useful life drops drastically (Arrhenius rule: every 10°C more halves the life).
- Second cause: undersized or low-quality power supply, which constantly works at the limit and degrades rapidly, dragging the strip with it.
- Third cause: excessive bending of the PCB, beyond the allowed radius of curvature, which breaks the copper traces and generates intermittent interruptions.
Cleaning and ordinary maintenance
The only ordinary maintenance of a ceiling LED strip is the periodic cleaning of the polycarbonate diffuser, which over time accumulates dust and loses up to 10–15% of the luminous flux. An annual cleaning with a slightly damp soft cloth restores original performance. Never use solvents, alcohol, aggressive products: they irreversibly opacify the polycarbonate.
16. Common mistakes and how to avoid them
Ledpoint's experience on thousands of projects realized in recent years allows identifying recurring errors, all avoidable with a minimum of design attention. We report the most frequent ones because knowing them in advance is worth more than a thousand corrective interventions afterwards.
- Error 1 - Installation without an aluminum profile: the LED strip stuck directly to plasterboard or wood overheats, loses efficiency, shows degradation hot spots after a few months. The profile is mandatory, always, even for short pieces.
- Error 2 - Power supply at 100% load: a power supply that constantly works at the maximum nominal power degrades in 2–3 years instead of 10. Oversizing by 20–25% is the rule.
- Error 3 - Cuts outside the provided points: cutting the strip outside the graphic signs interrupts the circuit and makes entire sections unusable. It is the most frequent error in DIY.
- Error 4 - Power supply from only one side on excessive lengths: over 5 linear meters of 24V strip, the voltage drop generates a visible variation in brightness along the run. The solution is to power from both ends (central power supply with two mirrored sections) or switch to a higher voltage (48V) for very extensive projects.
- Error 5 - Choice of inadequate IP: IP20 strips installed in the bathroom or outdoors fail within the first humid season. The IP degree must always be consistent with the environment.
- Error 6 - Clip connectors on professional commercial systems: clips work in residential, but for extended warranties and commercial systems, tin soldering with heat shrink tubing is better.
- Error 7 - Dimmer not compatible with the type of strip: wall triac dimmers for 24V strips with a traditional power supply do not dim and can damage the PSU. A dedicated PWM controller (Skydance or equivalent) is needed.
- Error 8 - Wrong color temperature for the environment: 6000K in the bedroom, 2700K in a working kitchen: both are errors that significantly worsen comfort and functionality. The choice of temperature must always be consistent with the use.
17. Solutions for professionals: architects, designers, builders, retailers
For the architect
For the interior designer working on prestigious residential projects, the added value of the LED strips proposed by Ledpoint is the combination between creative freedom and certified technical reliability. The COB series allows continuous light cuts without visual compromises, the PR-DW07-01 trimless profiles integrate into the architectural design without leaving a trace of the source, and compatibility with KNX, DALI, and Casambi allows integration into any home automation system planned in the project. The CCT tunable white option with Skydance V3 multi-zone controller allows programming differentiated scenes for each environment (day, evening, reading, dinner, cinema) governed by a single interface, an element that today distinguishes a professional lighting project from a simple electrical supply.
For the interior designer
For those who work on the perceptive quality of space, the priority is visual comfort and chromatic fidelity. The Sunlike series, with CRI Ra 97 and R9 greater than 95, returns fabrics, woods, marbles, works of art, and complexions with a naturalism comparable to daylight. For projects requiring invisible integration of the source, the PR-DW16-03 cove profiles and PR-SL08-03 surface slim profiles cover 95% of cases. The ability to dynamically manage color temperature via CCT tunable white allows building lighting scenographies that evolve with the function of the space during the day, an element that today differentiates contemporary interior design from traditional.
For the construction entrepreneur
For those who build or renovate properties to deliver to the end customer, the decisive value is reliability, regulatory compliance, and controlled installation times. The catalog LED strips are integrally CE, RoHS certified. The Mean Well XLG and PWM power supplies offer proven industrial reliability on millions of installations worldwide. Installation times for a ceiling with LED on an already predisposed system are between 0.5 and 1.5 hours per linear meter, predictable and accountably values in the quote phase. The energy saving for the end customer compared to equivalent halogens is between 75% and 85%, a strong commercial argument in the property sales phase.
For the electronics retailer
For the electronics store that wants to offer end customers complete and installable solutions, Ledpoint proposes an articulated line by price ranges and installation complexity, from basic kits with strip, power supply, and profile for advanced DIY, to professional systems with home automation controllers for specialized integrators. The presence of technical documentation, pre- and post-sales support are elements that differentiate Ledpoint from low-cost stores, guaranteeing the retailer a sustainable margin and a satisfied end customer.
18. Frequently asked questions
| FAQ — Ceiling LED Strip | |
|---|---|
Which LED strip to choose for the ceiling?For residential ceilings, the choice depends on the type of installation. For exposed or trimless light lines, COB technology series F52-300-320OR is recommended. For indirect light in coves, high-efficiency SMD Fx2 strips at 14–18 W/m are fine. For prestigious environments where light quality is decisive, move up to the Sunlike series with CRI Ra 97. | |
How to choose the power of an LED strip?The power per meter must be sized based on the required flux. For indirect light in coves, 14–20 W/m with 140–160 lm/W efficiency is needed. For direct light in a ceiling profile, 8–12 W/m are sufficient in residences. For main lighting without other sources, rise to 18–24 W/m in Fx2 technology. | |
How to attach LED strips to the ceiling?LED strips must never be glued directly to the ceiling. They must be installed inside an aluminum profile, which in turn is fixed to the ceiling with metal clips, plasterboard screws, or structural adhesives. The profile dissipates heat, protects the strip, and houses the optical diffuser. | |
How many meters of LED are needed to illuminate a room?For a 20 m² living room with indirect light, about 7–8 meters of high-efficiency strip (1,500 lm/m) are needed. For a 12 m² kitchen, about 6.4 m are needed. For a 14 m² bedroom, 2.8 m are enough. The calculation must be personalized based on surface reflection and target illuminance. | |
How much does a 5-meter LED strip consume?A 5-meter LED strip with a typical power of 10 W/m absorbs 50 W total. At 1,500 hours of annual use (4 hours/day) it consumes 75 kWh/year, equivalent to about €22.50 a year at a rate of €0.30/kWh. More powerful strips (18 W/m) rise to about €40/year for 5 meters. | |
How long do ceiling LED strips last?A professional LED strip has a declared L70 lifespan between 50,000 and 70,000 hours, equivalent to 30–48 years at average domestic use of 4 hours a day. The condition is correct installation in a dissipating aluminum profile and power supply oversized by 20–25%. | |
Are 220V or 24V LED strips better?For residential, retail, and hospitality, the correct choice is 24V. It offers real dimmability, home automation integration, superior chromatic quality, and intrinsic contact safety. 220V strips are useful only in long outdoor perimeter installations (over 30 meters) where 24V voltage drop becomes unmanageable. | |
Are LED strips compatible with home automation?Yes, 24V LED strips dimmable via Skydance V1 or V3 controllers integrate into KNX, DALI, Casambi, Zigbee, and WiFi. The choice of protocol must be made during the design phase in coherence with the general home automation system. | |
How to connect an LED strip without soldering?Specific clip connectors are used for each type of strip (8 mm, 10 mm, COB, RGB, CCT). The connector opens, the strip cut at the provided points is inserted, and it is closed. For commercial installations with extended warranties, tin soldering with heat shrink tubing remains preferable. | |
How much does an installed ceiling LED strip cost?The total installed cost of a professional range ceiling LED strip is between €80 and €150 per linear meter, including strip, profile, power supply, controller, and labor. The premium range with Sunlike, trimless, and home automation rises to €150–280/m. A complete 20–25 m² residential false ceiling invests between €1,500 and €4,500. | |
Can I install LED strips without plasterboard?Yes, with surface profiles like the 8 mm high PR-SL08-03. They are fixed directly to the existing ceiling with wall plugs or structural adhesives. The source remains visible as a minimal line, integrating into the architectural design. It is the solution for renovations without masonry works. | |
Are IP20 LED strips good for the bathroom?No. In the bathroom, the minimum IP degree is IP65, IP67 in direct proximity to the shower. The CEI 64-8 standard defines specific risk zones for environments with the presence of water. IP20 strips installed in the bathroom fail due to condensation and loss of insulation within a few months. |
Ceiling LED strip lighting: room for technical and design versatility
Lighting realized with ceiling-integrated LED strips today represents une of the most technically advanced, versatile, and efficient solutions for residential, commercial, and hospitality environments. However, the boundary between a mediocre installation, subject to performance drops or rapid degradation, and a professional, reliable, and durable lighting system, is determined by the correct selection and combination of six fundamental elements:
- First, the choice of technology of the strip (for example, COB for continuous emission without light points, SMD for high luminous yields, Sunlike for excellent color rendering, or CCT adjustable for variable color temperature) must be consistent with the desired lighting effect.
- Second is the linear power expressed in watts per meter, to be calibrated based on the necessary luminous flux and the destination use of the environment.
- The third element is the aluminum profile, not an accessory but essential for thermal dissipation and protection of the strip, whose shape and section must be chosen according to the type of installation (recessed, surface, angular, or suspended).
- In fourth position, the power supply (preferably branded Mean Well or equivalent professional) must be oversized by 20–25% compared to the actual load, to guarantee its reliability and prevent the phenomenon of flickering or overheating.
- The fifth element concerns the control of light intensity: a professional dimming controller, such as the Skydance V1 or V3 models, ensures fluid regulation, free of electronic noise, and compatible with the most widespread home automation systems.
- In sixth and final place, the installation must be executed in full compliance with regulations CEI 64-8 (low voltage electrical systems) and UNI EN 12464 (lighting of workplaces), indispensable conditions for safety and photometric performance.
Precisely to respond in an integrated way to these six critical aspects, Ledpoint proposes a complete and certified range that covers the entire product chain: from the LED strip to the aluminum profile, from the correctly sized driver to the dimming controller, guaranteeing not only certain technical compatibility between the components, but also an operational lifespan of over fifteen years under ordinary use conditions. For those who intend to design or build a custom LED false ceiling, Ledpoint makes available the technical data sheets of the F52 series (LED strips), the PR-DW and PR-SL profiles, as well as a dedicated technical support service for requesting personalized quotes on a specific project. For more information or to start the consultation, contact Ledpoint technical support.