





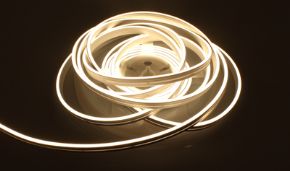
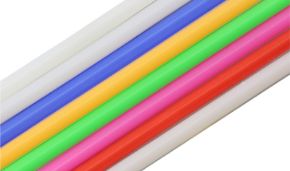
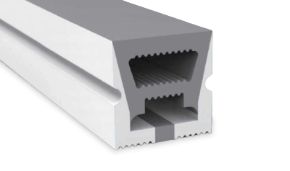
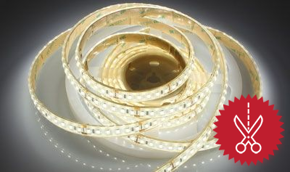

220V LED strips: a technical guide on operation, advantages, and differences from 12V/24V options.

A 220V LED strip is an LED strip that connects directly to the domestic mains electricity (220-230V AC) without a 12V or 24V power supply, thanks to integrated rectifiers and current limiters. It is ideal for long outdoor runs, up to continuous reels of 50 meters, with negligible voltage drops; indoors, it should be paired with an anti-flicker driver.
In the LED lighting landscape, 220V LED strips represent a technologically advanced solution that is gaining increasing consensus among professionals and DIY enthusiasts. This technical article will explore in depth the operation, advantages, and substantial differences between LED strips that operate at mains voltage (220V) and traditional low-voltage ones (12V/24V). Understanding these differences is fundamental to selecting the most appropriate solution for each specific application, ensuring safety, efficiency, and durability over time.
220V LED strips, also known as high-voltage LED strips or AC LED strips, are revolutionizing the way linear lighting systems are designed and installed thanks to their ability to operate directly from mains voltage without the need for bulky external power supplies. This feature makes them particularly suitable for long-distance installations, industrial and commercial applications, but also for residential projects where installation simplicity is a determining factor.
In this in-depth guide, we will analyze every technical aspect of 220V LED strips, from the electronic components that make them up to safety considerations, from optimal installation techniques to maintenance strategies. We will systematically compare the performance, costs, and ideal applications of 220V LED strips with those of 12V and 24V systems, providing the reader with all the necessary elements for an informed and aware choice.
You will also find real data for the 230V LED strips in the Ledpoint catalog, conversion tables between voltages, currents, and cable sections, an interactive configurator that suggests strips, drivers, and profiles based on your project, and a voltage drop calculator designed for electricians, architects, construction companies, drywall installers, and furniture makers. Whether you need to illuminate the perimeter of a villa, the facade of a warehouse, a shop window, or the cove of a false ceiling, you will find operational answers here.
In this article...
1. What is a 220V LED strip and at how many volts does an LED operate
Before talking about wiring, drivers, and profiles, it is advisable to establish some basic concepts, because many questions we receive every day from installers and private individuals arise from a confusion between the voltage of a single LED and the voltage of the entire strip. Understanding at what voltage an LED operates is the first step to understanding why a 220V LED strip can be connected directly to the socket, while a 12V or 24V strip always requires a power supply. In this chapter, we answer the most searched questions in an orderly manner: what is an LED, what is a strip, what voltage is needed to turn on an LED, and what voltage do LED strips have.
What is an LED and what are LEDs used for
The LED (Light Emitting Diode) is a semiconductor diode that emits light when current passes through it in the direction of conduction. Unlike an incandescent light bulb, it does not heat a filament: light is born from the recombination of electrons and holes in the semiconductor junction. The result is much higher efficiency, a lifespan measured in tens of thousands of hours, and the possibility of miniaturizing the source down to a few millimeters. LEDs are used to illuminate with less energy, less heat, and more design freedom: this is why today we find them in light bulbs, spotlights, bars, panels, and especially in LED strips, the most versatile product for linear lighting.
What does strip mean and what is an LED strip
In lighting terminology, "strip" indicates a long and thin flexible printed circuit (PCB) on which tens or hundreds of SMD LEDs are soldered at regular intervals, along with the components that regulate their current. It is, in practice, an LED lighting tape that unrolls from a reel, is cut at the indicated points, and is fixed with double-sided tape or inside a profile. There are 5V, 12V, 24V, 48V, and indeed 220-230V strips: voltage is not a detail, because it determines how it connects, how long it can be, how safe it is to the touch, and what accessories are needed.
At how many volts does an LED operate? The voltage of the single diode
A single LED does not operate at 220 volts or even 12 volts: each diode has its own forward voltage (Vf), which depends on the semiconductor material and therefore on the emitted color. A red LED typically operates between 1.8 and 2.2 V, a white or blue LED between 2.8 and 3.4 V. What voltage is needed to turn on an LED? It is enough to exceed its forward voltage, but what really matters is limiting the current, because the LED is a current-driven component: beyond the threshold, small increases in voltage produce large increases in current and the diode is quickly damaged.
| LED Color | Typical forward voltage (Vf) | Typical SMD current | Frequent use |
|---|---|---|---|
| Red | 1.8 – 2.2 V | 20 – 60 mA | Signaling, 220V LED indicators, RGB component |
| Yellow / amber | 2.0 – 2.4 V | 20 – 60 mA | Signaling, decorative effects |
| Green | 2.8 – 3.4 V | 20 – 60 mA | RGB component |
| Blue | 2.8 – 3.4 V | 20 – 60 mA | RGB component, base of white LEDs |
| White (blue + phosphors) | 2.8 – 3.3 V | 20 – 150 mA | General lighting, white 220V LED strips |
At what voltage do LED strips operate: 5V, 12V, 24V, 48V, and 220V
If a single LED operates at about 3 V, how do you get to a 24 V or 220 V strip? The answer lies in the series connection: by placing multiple LEDs one after another, their voltages add up. In a 12V strip, for example, white LEDs are grouped in modules of 3 LEDs in series plus a resistor; in a 24V strip, the modules are 6-8 LEDs; in a 220V LED strip, the principle is the same but on a much larger scale, with long chains of LEDs in series powered by a bridge rectifier and a current limiter. The modules, in turn, are connected in parallel along the entire reel: this is why the strip can only be cut between one module and another.
| Strip voltage | Required power supply | Typical length per single power supply | Typical cut interval | Contact safety |
|---|---|---|---|---|
| 5V | 5V / USB power supply | 1 – 3 m | 1.6 – 5 cm | SELV |
| 12V | 12V Power supply | about 5 m | 2.5 – 5 cm | SELV |
| 24V | 24V Power supply | 5 – 10 m | 3.33 – 10 cm | SELV |
| 48V | 48V Power supply | 10 – 30 m | 5 – 10 cm | SELV (up to 60V DC) |
| 220-230V | No transformer; anti-flicker driver recommended | up to 50 m (Ledpoint reels) | 10 – 50 cm | Dangerous voltage: isolate and protect |
220V or 230V? A clarification that avoids purchase errors
In common language, people talk about "220 volt LEDs", "220V LED strips", or "220 volt LED lights", but since 1987 the nominal voltage of the harmonized European network is 230V AC at 50 Hz, with tolerances that, in practice, make the actual voltage oscillate between about 207 and 253 V. For this reason, in professional catalogs, including Ledpoint's, you will find the term 230V LED strips: it is exactly the product that many look for as 220V LED strip, 220 V LED strip, or 220V LED strip. To the question in English "can you get 240V LED strips?" the answer is yes: strips designed for 230V work correctly also on 220V and 240V networks, provided the technical data sheet declares the tolerance (on Ledpoint models it is indicated as 230V +0%/-15%).
How to understand the voltage of an LED strip
If you have an unlabeled reel and wonder how to understand the voltage of the LED strip, look at the printed circuit: almost always the voltage is silkscreened near the solder pads ("12V", "24V DC"). A second clue is the cut interval: cuts every 2.5-5 cm typically indicate a 12V, every 5-10 cm a 24V. A 220V LED strip is instead recognized by its thick silicone coating, the cable with a plug or dedicated connector, and the marking AC 220-240V. In case of doubt, never connect it directly to the mains: a low-voltage strip connected to 220V will burn instantly and can create a fire hazard.
2. 220V LED strips: principles of operation
220V LED strips represent a significant evolution in LED lighting, based on an operating principle that differs substantially from low-voltage systems. Understanding these principles is essential to fully exploit their potential and ensure a safe and efficient installation. In this chapter, we see how 220V LED strips work from the inside, what components they contain, why they can flicker, and how much they can heat up.
Electronic architecture of 220V LED strips
220V LED strips integrate specialized electronic components within them that distinguish them from traditional low-voltage strips. The most significant element is the presence of rectifier and current limiter circuits integrated directly into the strip. These circuits convert the alternating current (AC) of the domestic mains into direct current (DC) suitable for powering the LEDs, eliminating the need for a separate external power supply. This is the reason why we talk about a 220V LED strip without a transformer or LED strips without a power supply: the "conversion" takes place along the strip itself, module by module.
Main components of a 220V LED strip
Every meter of 220V LED strip contains a series of modules connected in parallel, each comprising: high-quality SMD LEDs (typically 2835, 5050, or 5730), current limiting resistors calibrated for mains voltage, bridge rectifier diodes for AC/DC conversion, and in some more advanced models, protection circuits against overvoltages and voltage spikes. This integration of components allows the strip to operate directly at 220V AC, significantly simplifying the installation process. In more advanced strips, the resistor is replaced by a constant current integrated circuit (IC), which keeps the current in the LEDs stable even when the mains voltage oscillates, with benefits on brightness uniformity and durability. The rectifier bridge is often a classic four-diode Graetz bridge.
How LEDs are connected in 220V LED strips
While in a 24V strip a module comprises a few LEDs and measures a few centimeters, in a 220V LED strip the voltage to be "consumed" is about ten times higher. Manufacturers solve the problem in two ways: with long chains of LEDs in series (which lead to modules of 50 cm or 1 meter) or, as in the latest generation Ledpoint models, with high-voltage LEDs and driver ICs that allow very short modules. Ledpoint 220V LED strips with 2835 LEDs can be cut every 10 cm (12 LEDs), COB every 12.5 cm, RGB every 50 cm: a 10 cm cut interval, until a few years ago, was unthinkable for a mains voltage strip and today makes these cuttable LED strips suitable even for projects with non-standard measurements.
Operating frequency and flicker
A critical aspect of 220V LED strips is their operating frequency. Since they operate directly from the 50Hz mains (in Europe), they present a light ripple at this frequency. Higher quality models integrate smoothing capacitors that significantly reduce the flicker effect, bringing the effective frequency to 100Hz or higher. This is particularly important for applications in environments where video or photographic shooting is frequent, avoiding the annoying flickering effect that can appear in recordings.
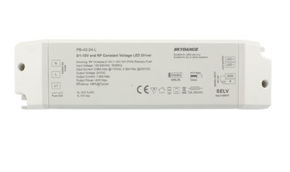
Full-wave rectification indeed produces a 100 Hz ripple: the stationary human eye perceives it little, but flicker becomes evident with smartphones and video cameras (dark bands), with moving objects (stroboscopic effect) and, in sensitive people, it can contribute to visual fatigue. For this reason, Ledpoint clearly indicates its 230V strips as products for outdoor use, where flickering is irrelevant, and offers a 400W anti-flicker LED driver for 230V LED strips for those who want to use them indoors, in shop windows, or in contexts where photography and filming take place.
What temperature can LED lights reach and how to dissipate heat
One of the most frequent questions concerns heat. An LED is not "cold": about 60-70% of the absorbed energy is still transformed into heat, but this heat concentrates on the junction and the PCB, not in the light beam. On a 16.5 W/m 220V LED strip, the surface can reach 40-60°C if laid without dissipation, values that are not dangerous to the touch for a brief contact but which, over time, accelerate the decay of the luminous flux and the yellowing of the silicone. The declared operating temperature for Ledpoint 230V strips ranges from -10°C to +45°C ambient: beyond these values, the useful life is reduced. How to dissipate the heat of LED strips? With an aluminum profile, avoiding closing them in cavities without air recirculation and overlapping them with heat sources.

3. 220V LED strips: advantages and disadvantages
The advantages of 220V LED strips are numerous and significant, but it is important to understand them in their completeness to correctly evaluate the suitability of this technology for specific applications. A good designer does not choose the voltage out of habit: they choose it by comparing length, environment, accessibility, and the required light quality. Below we first analyze the strengths, then the limits, with the same honesty we use when advising our customers on the phone.
Simplified installation over long distances
The most obvious advantage of 220V LED strips is their ability to be installed over considerable distances without significant voltage drops. While 12V strips have strict limitations in terms of maximum length (typically 5 meters per circuit), 220V strips can be connected in series up to 50-100 meters with a single power supply point, depending on the cable section and the specific power of the model. This makes them ideal for continuous linear lighting in warehouses, industrial corridors, building facades, and other large-scale applications. Ledpoint, for example, offers the 50m 4000K white 230V 16.5W/m IP65 LED strip: a continuous reel that with a single power supply illuminates the perimeter of a medium-sized building. Always check the technical data sheet for the maximum length allowed per single power supply point.
Minimization of voltage drops
The physical reason for this superiority over long distances lies in the relationship between power, voltage, and current (P = V x I) and Ohm's law. For the same power, a higher voltage system requires a proportionally lower current. Since voltage drops in cables are proportional to the current (ΔV = R x I), reducing the current drastically reduces losses. For a 100W installation at 12V, the current would be about 8.3A, while at 220V it would be only 0.45A (0.43 A at 230V). The current reduction of over 18 times results in negligible voltage drops even over considerable distances. Moreover, since Joule effect losses grow with the square of the current (P = R x I²), reducing the current by 18 times means reducing conductor losses by over 300 times.
Reduction of installation costs
The absence of a large external power supply represents a significant economic saving in large-scale installations. Power supplies for low-voltage systems, especially for high powers, are expensive components that often require active cooling, thermal protections, and installation in dedicated technical rooms. With 220V LED strips, the only necessary component is a simple power cable connected directly to the mains, possibly via a compatible switch or dimmer.
Optimization of connection materials
The low current required by 220V LED strips allows the use of reduced section cables compared to 12V/24V systems. This translates into further savings on materials, especially in long installations where cables represent a significant cost item. For example, for a 200W installation over 20 meters, a 12V system would require cables of at least 4mm² to limit voltage drops, while a 220V system could use 0.75mm² cables obtaining superior performance. In Italian installation practice, for fixed lighting lines, the minimum section required by the standard is still adopted (typically 1.5 mm²), but the advantage remains: with the 220V LED strip, the section is dictated by protection, not by voltage drop.
Design flexibility
220V LED strips offer greater freedom in designing complex lighting systems. They can be cut to custom lengths (from 10 cm of Ledpoint 2835 models to 50 cm or 1 m of many inexpensive strips, depending on the model) and connected to each other without the complex considerations on load balancing required by low-voltage systems. This feature is particularly advantageous in architectural applications where the required lengths are variable and non-standardized.
Disadvantages of 220V LED strips: what you need to know before buying
Every technology has its compromises and 220-volt LED strips are no exception. Knowing them in advance avoids disappointments and, above all, unsafe installations. The main limit is not the light quality, but the context: the 220V LED strip gives its best outdoors and on long runs, while indoors it requires extra precautions.
| Aspect | Advantage | Disadvantage / limit | How it is managed |
|---|---|---|---|
| Power supply | Direct connection, no transformer | Dangerous voltage on conductors | Insulation, caps, closed profiles, 30 mA differential switch |
| Length | Continuous reels up to 50 m | Weight and bulk of the reel on site | Plan the starting point and unroll without twists |
| Light quality | CRI >80, 105-110 lm/W on Ledpoint models | 100 Hz flicker without driver | 230V anti-flicker driver for interiors and video shooting |
| Cut | Every 10 cm (2835) or 12.5 cm (COB) | Less fine step than a 24V (3.33 cm) | Design measurements on multiples of the step |
| Indoor humid environments | IP65/IP67 resistant to splashes and water | Not SELV: not recommended in bathroom zones 0-1-2 | Choose a 24V with power supply outside the zone |
| Dimming | Possible with Triac or 0/1-10V driver | Not with any lamp dimmer | Use the dedicated driver indicated in the data sheet |
| Costs | Fewer power supplies, fewer cables, less labor | Higher cost per meter than 24V | Convenient beyond 10 continuous meters |
4. Technical comparison between 220V and 12V/24V LED strips
To fully understand the differences between technologies, it is necessary to systematically analyze every aspect of performance, installation, and safety. Many comparisons on the web stop at "220V doesn't want a power supply, 24V does": it's true, but it's only the beginning. In this chapter, we compare efficiency, energy balance, light quality, durability, safety, and maximum lengths, with numbers you can use directly in your quotes.
Complete comparative table: 12V, 24V, 48V, and 220V LED strips
| Criterion | 12V Strip | 24V Strip | 48V Strip | 220V / 230V LED strip |
|---|---|---|---|---|
| Power supply | Mandatory | Mandatory | Mandatory | Not necessary (anti-flicker driver recommended indoors) |
| Current for 100 W | 8.33 A | 4.17 A | 2.08 A | 0.43 A |
| Length per single power supply | ≈ 5 m | 5 – 10 m | 10 – 30 m | up to 50 m |
| Cut interval | 2.5 – 5 cm | 3.33 – 10 cm | 5 – 10 cm | 10 – 50 cm |
| Flicker | Absent with quality power supply | Absent with quality power supply | Absent | Present at 100 Hz without driver |
| Safety | SELV | SELV | SELV | Mains voltage: mandatory insulation |
| Typical IP degree | IP20 – IP68 | IP20 – IP68 | IP20 – IP67 | IP65 – IP67 (always protected) |
| Ideal use | Furniture, small niches, automotive | Residential and commercial interiors | Long indoor lines | Outdoors, perimeters, facades, warehouses |
Chart: current absorbed for the same power (100 W)
The following chart makes it immediately visible why a 220V LED strip does not suffer from voltage drops: for the same power, the current drops inversely proportionally to the voltage.
Energy efficiency and luminous efficacy
A common misconception to debunk is that 220V LED strips are less efficient than low-voltage ones. In reality, the overall efficiency of an LED lighting system depends on multiple factors: the efficiency of the LEDs themselves, the efficiency of the driver electronics, and the losses in the connecting cables. While it is true that the integrated circuits in 220V LED strips may have slightly lower efficiencies (85-90%) compared to high-quality switching power supplies for 12V/24V systems (90-95%), this disadvantage is often compensated by the negligible losses in the distribution cables thanks to the low current. For reference, Ledpoint 230V strips with 2835 LEDs declare a luminous efficacy of 105-110 lm/W, values in line with many professional-grade 24V strips.
Complete energy balance analysis
Considering a real installation over 30 meters with a total power of 300W: a 12V system would have cable losses of 10-15% (30-45W), while a 220V system would have losses of less than 1% (3W). Even considering the slightly lower efficiency of the integrated electronics, the 220V system would turn out to be overall more efficient in this configuration. This demonstrates how the choice between different voltages must consider the specific installation context rather than relying on generalizations.
| Voltage | Current | Line resistance (20 m of copper) | Voltage drop | Drop % | Outcome |
|---|---|---|---|---|---|
| 12V | 12.5 A | 0.233 Ω | 2.92 V | 24.3% | Unacceptable: reddish and uneven light |
| 24V | 6.25 A | 0.233 Ω | 1.46 V | 6.1% | Borderline: requires power supply from multiple points |
| 48V | 3.13 A | 0.233 Ω | 0.73 V | 1.5% | Good |
| 230V | 0.65 A | 0.233 Ω | 0.15 V | 0.07% | Negligible |
The values are calculated with a copper resistivity of 0.0175 Ω·mm²/m. You can redo the calculation with your data in the voltage drop calculator later in this guide.
Light quality and color rendering index
The quality of light emitted by 220V LED strips is comparable to that of low-voltage systems when using high-end products. The LEDs used are identical, and the main difference lies in the driver electronics. Premium models of 220V LED strips use integrated constant current drivers that guarantee chromatic stability and absence of flicker, with color rendering indices (CRI) reaching 95+ for high-quality applications. For applications requiring maximum chromatic fidelity, such as art galleries or clothing stores, it is essential to select 220V LED strips with technical specifications that guarantee these performances; alternatively, for CRIs above 90 indoors, 24V lines like Sunled remain the most suitable choice.
Durability and reliability over time
The durability of 220V LED strips is influenced by different factors compared to low-voltage systems. The absence of a centralized power supply eliminates a potential single point of failure, but exposes the integrated electronic components directly to mains fluctuations. Higher quality models integrate multiple protections: NTC thermistors to limit inrush current, MOV varistors to protect against transient overvoltages, and regulation circuits that keep the current constant despite mains voltage variations. These protections are fundamental to guarantee a useful life that reaches the 50,000 hours declared by premium manufacturers. An objective indicator of quality is the compliance of the LEDs with the LM-80 standard (measurement of luminous flux maintenance over time), reported on Ledpoint 230V strips with 2835 LEDs.

5. The Ledpoint 220V LED strip range: real technical data
Talking about technology in the abstract is of little use if you then don't know which product to order. In this chapter, you will find a reasoned list of the 220V LED strips available on Ledpoint.it, with the data declared in the technical data sheets: flux, efficiency, cut interval, protection, and length. These are verifiable product data, not generic estimates: it is the fastest way to compare and choose.
2835 white 220V LED strips: high brightness in 3000K and 4000K
The most requested family is the one with 2835 LEDs at 120 LEDs/m and 16.5 W/m: these are high-brightness 220-volt LED strips, with about 1,540-1,585 lumens per meter, IP65 extruded silicone tube coating, 3M 9495LE double-sided tape on the back, and cut every 10 cm. They are available in 3000K warm white, ideal for residential, hospitality, and historical facades, and in the 4000K 220V LED strip version, the natural light most requested by warehouses, workshops, parking lots, and shops.
| Product | Code | Color | Lumen/m | Efficiency | Total power |
|---|---|---|---|---|---|
| 5m 3000K 230V LED strip | K52-30s-1208ZH | 3000K | 1,535 | 105 lm/W | 82.5 W |
| 5m 4000K 230V LED strip | K52-40s-1208ZH | 4000K | 1,585 | 110 lm/W | 82.5 W |
| 10m 3000K 230V LED strip | KA2-30s-1208ZH | 3000K | 1,535 | 105 lm/W | 165 W |
| 10m 4000K 230V LED strip | KA2-40s-1208ZH | 4000K | 1,585 | 110 lm/W | 165 W |
| 25m 3000K 230V LED strip | K252-300-1208ZH | 3000K | 1,540 | 105 lm/W | 412.5 W |
| 25m 4000K 230V LED strip | K252-400-1208ZH | 4000K | 1,585 | 110 lm/W | 412.5 W |
| 50m 3000K 230V LED strip | K502-300-1208ZH | 3000K | 1,540 | 105 lm/W | 825 W |
| 50m 4000K 230V LED strip | K502-400-1208ZH | 4000K | 1,585 | 110 lm/W | 825 W |
All models report: dimensions 12 x 5 mm, voltage 230V (+0%, -15%), operating temperature from -10°C to +45°C, CRI Ra>80, LM-80 compliant LEDs. The 3M double-sided tape requires surfaces and strips between 21 and 38°C at the time of installation and reaches full adhesion after about 72 hours; it does not guarantee holding on painted surfaces. This is a practical detail that makes a difference on site, especially in winter outdoor installations.
220V COB LED strips: continuous line of light without dots
When the strip remains visible or the diffuser is close to the LEDs, the "dotted" effect can ruin a project. COB LED strips solve the problem with a continuous phosphor coating on the chips, which generates a homogeneous line of light with a 180° emission angle. Ledpoint also offers them at 230V: the 25m 4000K 230V 11W/m COB LED strip (990 lm/m, 95 lm/W) and the 25m 3000K 230V 11W/m COB LED strip (935 lm/m, 90 lm/W), both with 296 chips/m, cut every 12.5 cm, IP65, and indicated in the data sheet as dimmable.
220V RGB LED strips: what are RGB LEDs used for
What are RGB LEDs used for? By combining three red, green, and blue emitters in the same package, they allow obtaining millions of colors and dynamic scenarios, from intense red for events and signs to slow color changes for facades and gardens. In 220V RGB LED strips, the goal is not to illuminate, but to color and communicate: for this reason, the luminous efficiency is lower than that of white ones. In the catalog, you will find the 25m RGB 2835 230V 11W/m IP65 LED strip and the 25m RGB 5050 230V 12W/m IP67 LED strip in solid silicone, more robust for installations exposed to heavy rain; both can be cut every 50 cm.
| Product | Code | Power | Lumen/m | Protection | Cut | Use |
|---|---|---|---|---|---|---|
| COB 25m 4000K 230V | K252-400-296ORH | 11 W/m | 990 | IP65 | 12.5 cm | Coves, eaves, visible lines |
| COB 25m 3000K 230V | K252-300-296ORH | 11 W/m | 935 | IP65 | 12.5 cm | Facades, outdoor residential |
| RGB 25m 2835 230V | K252-RGB-0968ZH | 11 W/m | 235 | IP65 | 50 cm | Decorative, gardens, signs |
| RGB 25m 5050 230V | L252-RGBT-07251H | 12 W/m | 400 (estimate) | IP67 solid silicone | 50 cm | Exposed outdoors, pool edges out of water, events |
The 230V anti-flicker driver: the power supply that improves the 220V LED strip
Among Ledpoint power supplies, there is a specific category, the 230V anti-flicker drivers, designed precisely for mains voltage strips. The CMP-DR-AC-400W anti-flicker LED driver manages up to 400W, is IP65, and accepts both Triac regulation (phase-cut dimmer) and 0/1-10V signal. In practice, it transforms an outdoor LED strip into a source suitable also for interiors, shop windows, and photographic sets, adding dimming. In the configurator below, the number of drivers is calculated automatically based on the total power.
6. Selection of 220V LED strips: technical parameters and quality
Choosing the appropriate 220V LED strips requires understanding specific technical parameters and the ability to distinguish quality products from inferior imitations. So, how to choose LED strips without getting lost in acronyms and numbers? The method we recommend is to start from the environment and the desired effect, then move on to power, color temperature, CRI, protection, and length, finally verifying certifications and warranty.
Fundamental technical parameters to evaluate
As with other strips, 220V LED strips are also available in multiple categories and characteristics, it is important to know how to orient yourself. The criteria we use in our consultations are seven: luminous efficiency (lm/W), flux per meter (lm/m), power per meter (W/m), color temperature (K), color rendering (CRI), degree of protection (IP), and cut interval. To these are added materials, certifications, and warranty.
LED density and power per meter: how to choose the power of an LED strip
LED density (expressed in LEDs/m) determines the uniformity of the emitted light and the total luminous power. For general applications, densities of 60 LEDs/m (about 10W/m) offer a good compromise between cost and performance. For applications requiring maximum uniformity or brightness, densities of 120 LEDs/m or higher can be considered, with powers up to 25W/m. It is important to note that higher densities require more effective thermal dissipation and adequately sized power cables. How to choose the power of an LED strip in practice? Think in lumens per meter, not in watts: for accent lighting, 300-600 lm/m is enough, for diffuse cove lighting 800-1,200 lm/m, to illuminate a work area or an outdoor perimeter 1,400 lm/m and beyond, like the 1,585 lm/m of the Ledpoint 4000K 220V LED strip.
Color Rendering Index (CRI and Ra)
The CRI (Color Rendering Index) measures the ability of the light source to faithfully reproduce the colors of the illuminated objects. For residential and commercial applications, a minimum CRI of 80 is advisable, while for shops, galleries, or environments where light quality is critical, CRIs of 90 or higher are necessary. Inexpensive products often do not declare the CRI or have values below 70, resulting in "dull" and unnatural colors.
Color temperature and LED bin
The color temperature (expressed in Kelvin) must be selected based on the environment and the desired atmosphere: 2700-3000K for a warm and welcoming atmosphere (residential); 4000K neutral for work environments; 5000-6500K cold for industrial or work environments requiring maximum concentration. Serious manufacturers use LEDs with accurate binning, guaranteeing chromatic uniformity between strips of the same batch and between different batches. The "3step" wording present on some Ledpoint 230V strips refers precisely to the chromatic tolerance expressed in steps of the MacAdam ellipse: 3 steps means differences in hue that are hardly perceptible from one section to another.
| Environment | Recommended temperature | Indicative flux | Recommended 220V LED strip |
|---|---|---|---|
| Historical facade, portico, garden | 3000K | 900 – 1,500 lm/m | 2835 3000K or COB 3000K |
| Villa perimeter, low walls, driveways | 3000K – 4000K | 1,000 – 1,600 lm/m | 2835 3000K / 4000K |
| Warehouse, storage, canopy | 4000K | 1,500 lm/m and beyond | 2835 4000K 25 or 50 m |
| Workshop, covered work area | 4000K | 1,500 lm/m and beyond | 2835 4000K + anti-flicker driver |
| Shop window, sign, shop outdoors | 3000K – 4000K or RGB | 900 – 1,500 lm/m | COB or 2835 + anti-flicker driver |
| Events, scenic gardens | RGB | decorative | RGB 5050 IP67 |
Length of the 220V LED strip and reel format
Length is one of the most underestimated purchasing criteria. Ledpoint 220V LED strips are available in 5, 10, 25, and 50-meter reels: choosing the reel closest to the actual length reduces waste, joints, and power supply points. For a perimeter of 38 meters, for example, a 50 m reel cut to size is preferable to four 10 m reels, because it avoids three mains voltage joints which represent as many potential weak points.
Build quality and materials
The build quality of 220V LED strips is evaluated through: the thickness of the printed circuit board (PCB), which should be at least 2oz (70μm) of copper to ensure good conductivity and dissipation; the quality of the solder mask, which must be uniform and resistant; the quality of the covering silicone (for IP65+ models), which must be flexible, UV-resistant, and adherent to the PCB. Inexpensive products often use thin PCBs (1oz or less) that overheat quickly, drastically reducing the useful life of the LEDs. The degree of protection follows the IP (IEC 60529) standard: IP65 indicates total protection from dust and water jets, IP67 also from temporary immersion.
Certifications and warranties
Quality 220V LED strips should have recognized certifications: CE marking attesting compliance with European directives (low voltage, electromagnetic compatibility); RoHS certification guaranteeing the absence of hazardous substances; any specific certifications for particular applications (e.g., certification for food environments). The warranties offered by manufacturers are a good indicator of quality: professional products offer 3-5 year warranties, while consumer products rarely exceed 2 years. Every strip sold in the EU must also report the energy class according to the Ecodesign regulation: you can find all the information in the Ledpoint blog section dedicated to the ErP energy label.
Quality products and "220V LED strip without transformer": installers' opinions
Those looking for "220V LED strip without transformer opinions" often find conflicting judgments. In our experience, criticisms almost always arise from three situations: inexpensive strips without declared CRI or protections, indoor use without an anti-flicker driver, improvised mains voltage connections. When the product is certified, the installation is correct, and the environment is the intended one, installers' reviews are very positive, especially for the speed of installation on long runs. Beware of prices that are too low, incomplete technical data sheets, and lack of assistance in Italian.

7. 220V LED strip configurator and voltage drop calculator
We have collected the questions that electricians, architects, construction companies, drywall installers, and furniture makers ask us every week and transformed them into a tool. Enter sector, environment, length, tone, effect, and installation type: the configurator indicates the suitable Ledpoint 220V LED strip, how many reels are needed, the total power, the current, how many 230V anti-flicker drivers to install, and which family of aluminum profiles to evaluate, with specific advice for your profession. The second tool calculates the voltage drop at 12V, 24V, and 230V on your actual cable.
Ledpoint 220V LED strip configurator
Voltage drop calculator: 12V vs 24V vs 220V LED strip
How to best use the configurator: enter the actual length measured on site, not the rounded one; if the project involves multiple separate sections, calculate them one at a time. The results are indicative and must always be confirmed by the product technical data sheets and the electrical system project. If your CMS does not execute scripts, the same logic is reported in the tables of this guide.
8. Practical guide to installing 220V LED strips
This section provides detailed instructions for a professional installation of 220V LED strips, from planning to commissioning. It is the part that answers the most searched questions absolutely: how to connect a 220V LED strip, how LED strips are connected to the current, how to install an LED strip without a transformer, how to connect it to a switch, and how to cut it. Fundamental premise: any intervention on 230V circuits must be carried out without voltage and, for fixed systems, by an installer authorized pursuant to DM 37/08.
Preliminary planning and sizing
The planning phase is fundamental for the success of an installation with 220V LED strips. It begins with calculating the total required power: total length (in meters) multiplied by the power per meter of the selected strip. To this value, a 20% safety margin is added to compensate for any inaccuracies. Subsequently, the position of the power supply point is determined, preferably central with respect to the total length to be powered to minimize the lengths of the branch cables. Practical example: 32 m of 16.5 W/m 4000K 220V LED strip = 528 W; with a 20% margin, it is sized for about 634 W, i.e., 2 anti-flicker drivers of 400W if the installation is indoor or dimmed.
Tools necessary for LED strip installation
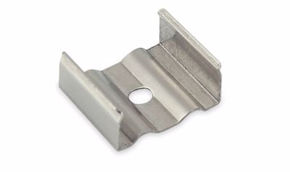
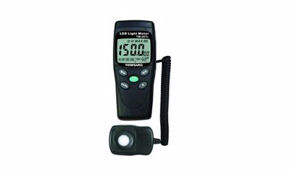
An essential kit to work well includes: multimeter or continuity tester, voltage tester, sharp scissors or cutter for cutting on the markings, heat gun for heat shrink tubing, wire strippers, tape measure and laser level to align the profiles, degreaser (isopropyl alcohol) to prepare the surfaces, cutter or hacksaw for aluminum profiles, screwdriver for mounting clips. Many of these accessories are available in the Ledpoint tools section.
Choice of installation materials
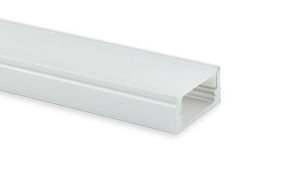
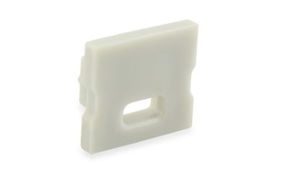
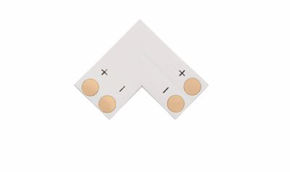
The choice of installation materials significantly influences the final result and the durability of the installation. For 220V LED strips, it is recommended: extruded aluminum profiles with opal diffuser for uniform light distribution and optimal dissipation, copper connection cables of at least 0.75mm² for branches, increasing the section for lengths greater than 10 meters, IP67 waterproof connectors for joints, preferably crimped rather than soldered for greater reliability over time. Complete the material with LED strip end caps to close the ends and with dedicated connectors.
How to cut a 220V LED strip
Cutting is the moment when most mistakes are made. A 220V LED strip is cut exclusively on the silkscreened markings (every 10 cm on Ledpoint 2835 models, every 12.5 cm on COB, every 50 cm on RGB), with the reel completely disconnected from the mains. A cut outside the marking turns off the entire module and, worse, can leave conductors exposed. After cutting, the free end must be sealed with the end cap and neutral silicone to maintain the IP degree; the end to be powered receives the connector with cable.
How to make a 90-degree angle without cutting the LED strip
Strips in silicone tube are flexible on the vertical plane but rigid on the width plane. To turn a 90° angle without cutting the 220V LED strip, you can: bend it "on edge" on a wide radius (never less than 5-6 cm, without crushing the PCB); create an "ear" fold by rotating it 45° and then again in the opposite direction, if the profile allows it; or, a cleaner solution, use two angular profiles with profile joints, cutting the strip on the nearest marking and reconnecting it with connectors. Never bend at a sharp edge: the breaking of the internal tracks is the primary cause of dead zones in DIY installations.
Step-by-step installation procedure
- Surface preparation: ensure that the installation surfaces are clean, dry, and free of grease or dust. For aluminum profiles, use a high-quality double-sided adhesive specific for LED applications, possibly integrated with mechanical fixing screws for permanent installations. Remember that the 3M double-sided tape of Ledpoint 230V strips requires an installation temperature between 21 and 38°C and does not guarantee holding on painted surfaces.
- Positioning of the strips: remove the protective film from the adhesive and position the strip inside the profile, pressing evenly along the entire length. Pay attention to the cut points, which must coincide with the markings present on the strip to avoid damaging the integrated circuits.
- Electrical connections: connect the power cables to the strip terminals, respecting polarity even if the 220V LED strips contain bridge rectifiers (still connect phase and neutral correctly). Use crimp connectors with heat shrink tubing to ensure watertightness in outdoor applications.
- Protection of connections: all connections must be insulated with quality electrical tape or, preferably, with heat shrink tubing. For outdoor installations, use IP65 or higher waterproof junction boxes.
- Connection to the line: bring the line from the panel, protected by differential and circuit breaker, to the control switch and from there to the anti-flicker driver (if provided) or directly to the strip cable.
How to connect an LED strip to 220V and to the current
How an LED strip is connected to the current depends on the voltage. A 12V or 24V strip must never be connected directly to 220V: a power supply is always needed, and those who ask "how to connect an LED strip without a power supply" should actually choose a native 220V LED strip. The latter is connected as follows: from the strip's power cable (with dedicated connector), phase (L) and neutral (N) exit towards a waterproof junction box, where they are connected to the controlled line. On strips with a bridge rectifier, L/N inversion does not damage the LEDs, but for safety, the switch must always disconnect the phase. 220V adhesive LED strips are connected in the same way: the double-sided tape concerns only the fixing.
How to connect a 220V LED strip to a switch
The connection to a switch is identical to that of a light point: phase from the panel to the switch, phase return to the appliance, direct neutral. With the anti-flicker driver, the command can occur with a simple switch, with a compatible Triac dimmer, or with a 0/1-10V signal. Avoid buttons with a neon or LED indicator light in parallel with the switch: the small leakage current can leave the strip weakly lit or flashing when the switch is off.
How to connect LED strips in series: what can be done and what cannot
In common language, "connecting in series" means putting one strip after another. Electrically, however, the modules of a strip are in parallel and the voltage remains the same along the entire reel. With 220V LED strips, multiple sections can be connected in cascade with dedicated connectors, provided that the overall length does not exceed the maximum declared for a single power supply; beyond that, it is powered in parallel from a junction box. Strips of different voltages are never connected to each other.
How to put LEDs on the ceiling, in coves, and in false ceilings
For indirect ceiling lighting, the most elegant solution is the drywall light cove, with the strip placed on a hidden profile and facing the ceiling or wall. Indoors, for living environments, we recommend a 24V strip; the 220V LED strip with anti-flicker driver is instead perfect for large spaces like showrooms, warehouses, and porticoes, where tens of meters are covered. How to hide LED strips for a more elegant effect? Distance between strip and diffuser, profile with opal screen, and a COB instead of punctiform LEDs.
Testing and commissioning
Before connecting the system to the mains, perform a visual check of all connections and verify continuity and absence of short circuits with a multimeter. At the first connection, observe the behavior of the strips: immediate ignition without flickering or dark zones. For the first 24 hours, periodically monitor the temperature of the profiles and connection points, which should not exceed 60°C under continuous operating conditions. Complete the testing with the differential test and note the power, protections, and position of the drivers in the documentation delivered to the client.
How to install LED strips without interrupting work (workshops and shops)
The advantage of a 220V LED strip in a workshop or shop is that it requires few power supply points: profiles and strips can be laid in sections, during closing hours or in delimited areas, and a single final power interruption can be made for connection to the panel. Working with the dedicated lighting circuit already prepared reduces downtime to less than an hour.
9. Aluminum profiles for 220V LED strips: dissipation, protection, and aesthetics
A profile is not a decorative accessory: for a mains voltage strip, it is a safety and durability component. It dissipates heat, mechanically protects the strip, prevents accidental contacts, and transforms a line of LEDs into an architectural element. In this chapter, we see how to choose among the families in the Ledpoint aluminum profiles category based on the installation type and the trade of the installer.
Thermal and ventilation considerations
Although LEDs are efficient, a part of the energy is still dissipated as heat. 220V LED strips, especially high-density ones (60 LEDs/m or more), require adequate thermal dissipation to ensure durability and chromatic stability. Installation on aluminum LED profiles is not only aesthetic but functional: aluminum dissipates the generated heat, keeping the LEDs at an optimal temperature. In environments with high temperatures or in applications with powers greater than 10W/m, the use of profiles with cooling fins or even forced ventilation may be necessary. Ledpoint 230V strips of 16.5 W/m fall into this category: in a closed profile in the summer sun, cooling is what separates an installation that lasts ten years from one that yellows in two seasons.
Which profile for which installation: table for professionals
| Installation / professional | Profile or accessory | Why | Note for 220V LED strip |
|---|---|---|---|
| Surface – electrician | 17x8mm aluminum profile (also 2 m, 3 m, and white painted) | The most versatile, quick installation with clips | Check internal useful width ≥ 12 mm |
| Recessed – furniture maker, steps | 23x8mm recessed profile | Flush surface, stop fins | Ideal for outdoor furniture and external plinths |
| Drywall – drywall installer | Profile with drywall 44x12mm | Flush with the sheet, "frameless" line | Provide hatch for driver and joints |
| Angle – architect, interior designer | 16mm angular profile, 2 m, 3 m, with rear groove | 45° light on edges, shop windows, shelves | Check compatibility with strip width |
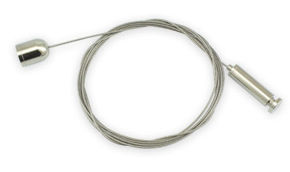
| Suspension – lighting designer | Suspension cables + profile | Suspended light lines on counters and offices | Prefer 24V in residential interiors |
| Closure and finishing – all | End caps, diffusers, joints | Aesthetics, protection, continuity of the line | Opal diffuser to reduce the dotted effect |
| Fixing – construction company | Mounting clips, tapes for LED strips | Mechanical holding even on difficult surfaces | Always integrate mechanical fixing outdoors |
| Special projects – contract | Profile and accessory kits, custom profiles, display boxes | Custom sizes and finishes, displays | Dedicated section for 230V strip on request |
Technical note: the Ledpoint 220V LED strip with sheath measures 12 mm in width and 5 mm in height (COB: 10 x 5 mm). Before ordering, compare these values with the internal useful width of the profile indicated in its data sheet: a profile that is too tight constricts the strip, worsens dissipation, and can damage the sheath.
How to hide LED strips: techniques for an elegant result
Interior architects often ask us how to obtain a light that "is seen but not seen". There are three rules. First: move the source away from the diffuser, because the more space there is, the more the light homogenizes. Second: use opal diffusers and deep profiles. Third: orient the strip towards a surface (ceiling, wall, floor) and never towards the eye. The 230V COB, with its 296 chips per meter, eliminates the dotted effect even with shallow diffusers, while the 2835 give their best in indirect light.

10. Safety and regulations in the installation of 220V LED strips
The installation of devices operating at mains voltage requires particular attention to safety regulations. This section details the necessary precautions and best practices for safe and compliant installations. It is the chapter that an electrical installer should read first, and that a private individual should never skip: the safety of a 220V LED strip depends not only on the product, but on how and where it is installed.
Electrical risk and fundamental protections
220V LED strips operate at voltage dangerous to people (220V AC), unlike 12V/24V systems that fall into the SELV (Safety Extra Low Voltage) safety category. This imposes additional precautions during installation and maintenance. It is fundamental that all connections are made with the system off, using insulated tools and following current electrical regulations (CEI in Italy). For accessible applications, strips must be installed inside LED profiles with a diffuser that offer mechanical protection and insulation from accidental contacts.
Differential and thermal-magnetic protection
All circuits powering 220V LED strips must be protected by a differential switch (RCD) with sensitivity not exceeding 30mA and by an adequately sized thermal-magnetic circuit breaker. It is advisable to dedicate separate circuits for LED lighting, avoiding overloading existing circuits with additional loads. For installations with power greater than 500W, it is advisable to consult a qualified electrician for the correct sizing of cables and protections. Also take into account the inrush current: many drivers and strips absorb brief peaks much higher than the nominal current at startup, which can trip curve B circuit breakers; for lines with multiple drivers, curve C is preferred.
Reference regulations for 220V LED strips
| Reference | Scope | What it means in practice |
|---|---|---|
| CEI 64-8 | Low voltage user electrical systems | Protections, sections, cable laying; sec. 701 for bathrooms, sec. 714 for outdoor lighting |
| DM 37/08 | Installation of systems in buildings | Fixed systems carried out by an authorized company with a declaration of conformity |
| Directive 2014/35/EU (LVD) | Low voltage electrical material | Product safety requirements, basis of CE marking |
| Directive 2014/30/EU (EMC) | Electromagnetic compatibility | The product must not disturb nor be disturbed |
| Directive 2011/65/EU (RoHS) | Hazardous substances | Limits on lead, mercury, cadmium, and other substances |
| EU Regulation 2019/2020 (Ecodesign) | Light sources | Minimum efficiency, energy label, flicker requirements |
| IEC/EN 60598 | Lighting fixtures | Construction safety of fixtures |
| IEC 60529 | IP protection degrees | Classification of dust and water tightness |
| UNI EN 12464-1/-2 | Lighting of indoor and outdoor workplaces | Minimum illuminance and light quality in workshops, warehouses, offices |
What is the best 220V LED strip for humid environments?
The question is frequent among installers. For humid outdoors (eaves, porticoes, perimeters, gardens), the answer is an IP65 220V LED strip in extruded silicone tube, like the Ledpoint 2835 and COB; for heavy rain or direct splashes, the IP67 version in solid silicone. For bathrooms, shower areas, and easily accessible indoor humid environments, however, the correct choice remains a 24V SELV strip with a power supply outside the respect zones, as required by CEI 64-8 section 701. Never install strips of any voltage immersed in water unless expressly certified IP68.
Protection against overvoltages
The electronic components integrated in 220V LED strips are sensitive to transient mains overvoltages, caused by lightning or operations on electrical systems. For installations in areas subject to thunderstorms or in industrial plants with inductive loads, it is advisable to install surge protective devices (SPD) upstream of the lighting system. Some high-end 220V LED strips already integrate basic MOV protections, but for maximum safety, it is advisable to provide additional protections at the electrical panel level.
Precautions for using 220V LED strips: the checklist
Before applying voltage, check: ends closed with a cap and sealed; no section of sheath cut or pierced; connections in a waterproof box; strip out of reach of children and impacts; no reel lit while still wrapped (it overheats); cables fixed without traction on the connector; profiles mechanically connected in a stable manner. Never turn on a 220V LED strip rolled up on the reel to "test it": the accumulated heat can damage it in a few minutes.
11. Dimmability, flickering, and control of 220V LED strips
The control of light intensity is a common requirement in many applications. 220V LED strips have specific characteristics regarding dimmability that are important to understand. A dimmable 220V LED strip exists, but dimming does not depend only on the strip: it depends on the entire dimmer-driver-strip chain. In this chapter, we see how to dim a 220V LED strip, how to eliminate flickering, and how to create dynamic effects.
Types of Dimmers for 220V LED strips
220V LED strips can be dimmed using different systems, not all compatible with every strip model. The main ones are: leading edge phase dimmers, similar to those for halogen lamps; trailing edge phase dimmers, more suitable for electronic loads; 0-10V signal dimmers that require a separate control cable; PWM dimmers that modulate the power supply at high frequency; DALI or DMX control for professional installations and building automation systems. Phase-cut dimmers exploit a TRIAC, hence the widespread expression "Triac dimmer".
Compatibility and selection of the correct dimmer
Compatibility between dimmer and 220V LED strip depends on the electronics integrated in the strip. It is fundamental to consult the strip manufacturer's specifications to identify tested and certified compatible dimmers. In general, 220V LED strips with integrated constant current regulation work better with trailing edge dimmers or 0-10V control. The use of incompatible dimmers can cause flickering, buzzing, reduction of the dimming range, or even permanent damage to the strips. The safest way with Ledpoint products is to interpose the 230V Triac and 0/1-10V anti-flicker driver, designed precisely for this family of strips, and connect a Triac command or devices from the 0/1-10V category upstream.
How to eliminate flickering of the 220V LED strip
How to eliminate flickering of the 220V LED strip and 220V LED lamps in general? There are four causes: direct rectification of the mains (structural flicker at 100 Hz), an incompatible dimmer, loose connections, and heat-degraded components. Structural flicker is eliminated only with an anti-flicker driver, which levels the current supplied to the LEDs; the other three are resolved with the diagnosis described in the maintenance chapter. A simple test: frame the strip with the smartphone camera in slow motion mode; if bands or pulsations appear, flicker is present.
How to make an LED strip dimmable
A 12V/24V strip becomes dimmable with a monochromatic dimmer between the power supply and the strip, or with a dimmable power supply. A 220V LED strip becomes dimmable with the dedicated driver. On the other hand, there is no safe way to dim a 230V strip by connecting it to a halogen lamp dimmer "at random": it is the most common cause of problems reported in negative reviews.
Advanced control systems and dynamic RGB light
For applications requiring dynamic control (RGB/RGBW color variation, preset scenarios, integration with home automation systems), there are specialized controllers for 220V LED strips. These devices are designed to handle the specific characteristics of high-voltage strips, with integrated protections and appropriate control interfaces (WiFi, Bluetooth, Zigbee, KNX, etc.). It is important to verify that the controller is correctly sized for the total power of the controlled strips, with a safety margin of 20-30%. For complex indoor scenographies, however, the most flexible system remains a low-voltage strip with an RGB controller, DMX and DALI decoders, or ZigBee devices.

12. Ideal applications for professionals and sectors
Identifying the applications where 220V LED strips offer significant advantages is crucial to maximize the return on investment and ensure optimal performance. In this chapter, we combine the analysis by environment type with that by profession, because the same 220V LED strip is used in very different ways by an electrician, an architect, a construction company, or a shopkeeper.
Industrial and commercial lighting
Industrial applications represent the ideal field for 220V LED strips. Warehouses, production plants, logistics centers, and covered parking lots often require linear lighting over distances that can reach tens or hundreds of meters. In these contexts, the possibility of powering long runs from a single point, using reduced section cables and without the need to multiply power supplies, translates into significant savings both in initial costs and in maintenance over time.
Case study: warehouse lighting
Let's consider a 50x20 meter warehouse that requires continuous lighting along the perimeter and between the shelves. With 12V LED strips, at least 20 150W power supplies strategically distributed would be necessary, with complex and expensive wiring. With 220V LED strips, the entire system could be powered from a few strategic points, with simplified wiring and minimal maintenance. Furthermore, the absence of power supplies subject to overheating in an industrial environment further improves the reliability of the system. Translated with catalog products: the 140 m perimeter is covered with three 50 m reels of 4000K 220V LED strips, about 2,310 W and over 220,000 total lumens, with only three power supply points.
What is the best type of 220V LED strip for industrial environments and workshops
For a mechanical workshop, the priorities are visibility, safety, and robustness. The technical choice is a high-brightness 4000K 220V LED strip, in a closed profile, with an anti-flicker driver: 4000K improves contrast and detail perception, the profile protects from impacts, oils, and dust, the driver avoids the stroboscopic effect that can make rotating parts appear stationary, a concrete risk near lathes, drills, and lifting platforms. Remember that the linear strip integrates, does not replace, the general lighting required by UNI EN 12464-1.
Architectural and outdoor applications
220V LED strips are excellent for architectural lighting, building contours, eaves, and facades. Their resistance to voltage drops over long distances allows creating continuous lighting effects without interruptions or variations in color/brightness. For outdoor applications, it is fundamental to select models with an IP67 or higher protection degree, which guarantee water and weather resistance, and with construction in UV-resistant materials to prevent the degradation of the covering silicone. 220V IP65 outdoor LED strips in extruded tube are suitable for eaves and sheltered surfaces; for direct rain, choose the IP67 in solid silicone.
Residential applications: when to choose 220V
In the residential sector, 220V LED strips find application mainly in outdoor contexts where: lengths greater than 10 continuous meters are required, such as in perimeter areas of the house or low walls, access for maintenance is difficult and it is preferred to minimize possible failure points, and where a particularly clean and minimal installation is desired, without the need to hide bulky power supplies. Pergolas, pool edges (out of the water and respect zones), fences, driveways, and balconies are typical cases.
220V LED strips by profession: application table
| Professional | Typical applications | Recommended product | Operational suggestion |
|---|---|---|---|
| Electrician / installer | Perimeters, signs, eaves, warehouses | 2835 4000K 25/50 m + anti-flicker driver | Dedicated line with 30 mA differential, joints in IP65 boxes |
| Architect / lighting designer | Facades, grazing wall washing, external coves | COB 3000K or 2835 3000K | Define driver position, inspection points, and cut intervals in the project |
| Construction company | Residential complexes, parking lots, porticoes | 2835 4000K 50 m | Provide corrugated pipes and boxes in the rough construction; fewer light points = less work |
| Drywall installer | Coves and light cuts in showrooms and large spaces | COB 4000K + drywall profile | Flush the profile with the sheet and leave a hatch for the driver |
| Furniture maker / interior designer | Outdoor furniture, external plinths, outdoor bar counters | COB in recessed profile | For indoor within reach, use 24V SELV |
| Retail | Shop windows, signs, outdoors, shop facades | 2835 or COB + dimmable anti-flicker driver | Day/night scenarios and no bands in customers' videos |
| Workshop / industry | Work lines, shelves, canopies | 2835 4000K in closed profile + driver | Avoid stroboscopic effect; semi-annual inspection |
| Influencer / home decor | Terraces, gardens, outdoor photographic sets | RGB IP67 or 3000K + anti-flicker driver | For photos and videos without bands, the driver is indispensable |
Retail: most effective lighting solutions for shops
A businesswoman who wants to renovate her shop usually asks us for three things: attract attention from the outside, enhance the products, consume little. The 220V LED strip works above all on the first point: signs, shop window contours, and facades illuminated with continuous lines are visible from a distance and cost little to manage. For the products inside, however, a high CRI and flicker-free light are needed: here the anti-flicker driver or a 24V line with CRI >90 make the difference. For dynamic effects in the shop window, RGB allows changing the atmosphere for seasons, sales, and holidays.
Home decor and social: which light colors are most popular
For those who create lifestyle content, light is part of the scenery. The most appreciated tones remain warm white 2700-3000K, which makes terraces and gardens welcoming at sunset, and colored RGB accents in purple, blue, and amber for evening shoots. How to use 220V LED strips to create visual effects in photos? Grazing light on textured walls, continuous COB lines that draw architectures, and always an anti-flicker driver to avoid bands in video. To easily install LED strips at home without damage, indoors it is convenient to choose 24V strips with removable double-sided tape and entrust 230V connections to an electrician.
13. Cost analysis: 220V LED strips vs 12V/24V in the life cycle
A complete economic evaluation must consider not only the initial cost of materials, but all costs in the installation life cycle. It is the part that interests companies, retailers, and clients the most, and it is the one where 220V LED strips most often surprise. The price per meter is only one of the items: power supplies, cables, labor, energy, and maintenance completely change the picture.
Initial cost of materials
220V LED strips generally have a higher cost per meter than equivalent low-voltage strips, due to the more complex integrated electronics. However, this additional cost is often compensated by the absence of external power supplies. For small installations (up to 5-10 meters), the low-voltage system may be more economical. Beyond these lengths, the economic crossover point shifts in favor of 220V LED strips, especially when considering simplifications in wiring and installation materials. For updated prices, consult directly the data sheets of the 230V LED strips and any LED strips on offer.
Installation and labor costs
The installation time for 220V LED strip systems is significantly reduced compared to equivalent low-voltage systems, especially over medium-long distances. The absence of planning for power supply positioning, the reduction of connection points, and the possibility of using reduced section cables translate into labor savings that can vary from 30% to 50% depending on the complexity of the installation.
Operating and maintenance costs: how to save energy with LED strips
Operating costs depend mainly on the overall efficiency of the system. As previously analyzed, over medium-long distances, 220V LED strips can be more efficient thanks to lower cable losses, resulting in lower energy consumption. Maintenance costs are generally lower for 220V systems, as they have fewer components subject to failure (no centralized power supply) and the replacement of damaged segments is simpler and faster. To save further: pair with twilight sensors or timers (see the sensors category), dim during night hours, and choose the power based on the lumens actually needed.
| Length | Power | 4 h/day | 8 h/day | 12 h/day | Annual cost at 8 h/day |
|---|---|---|---|---|---|
| 10 m | 165 W | 241 kWh | 482 kWh | 723 kWh | ≈ €120 |
| 25 m | 412.5 W | 602 kWh | 1,205 kWh | 1,807 kWh | ≈ €301 |
| 50 m | 825 W | 1,205 kWh | 2,409 kWh | 3,614 kWh | ≈ €602 |
| 50 m dimmed at 60% | ≈ 495 W | 723 kWh | 1,445 kWh | 2,168 kWh | ≈ €361 |
Return on investment (ROI) analysis
To correctly evaluate the ROI, consider: initial cost difference; installation savings; estimated energy savings (considering annual operating hours and energy cost); expected maintenance costs; expected system useful life. In many commercial and industrial applications, 220V LED strip systems show faster ROI thanks to significant installation savings and reduced maintenance. What are the average installation and maintenance costs of 220V LED strips? They vary greatly with accessibility and masonry work, but the item that weighs the most is almost always labor: reducing power supply points and joints is the most effective way to contain it.

14. Maintenance and troubleshooting with 220V LED strips
Proper maintenance and the ability to diagnose problems are essential to maximize the useful life of installations with 220V LED strips. The good news is that it is a light activity, planned in a few minutes a year. Here you will find a maintenance plan, the diagnosis of common problems, and a quick cause-solution table.
Scheduled preventive maintenance and cleaning
220V LED strips require minimal but regular maintenance to maintain optimal performance. Every six months, visually inspect all sections of the strips, checking for absence of damage to the covering silicone, oxidation of contacts, or discoloration of the LEDs. Clean the profile diffusers with a soft cloth and neutral detergent to remove dust and deposits that reduce luminous efficiency. Check the tightness of connections, especially in outdoor applications subject to thermal excursions that can loosen mechanical contacts. Do not use solvents, alcohol in large quantities, or pressure washers on the silicone: they accelerate its opacification.
Durability of 220V LED strips and how to prolong their life
What is the average lifespan of a quality 220V LED strip? With LM-80 certified LEDs, good dissipation, and overvoltage protection, 30,000-50,000 hours can be exceeded; at 8 hours a day, this means 10-17 years. How to prolong the life of the LED strip? Keep the temperature low, protect from direct UV rays with profiles and diffusers, avoid mains spikes with SPD, and dim when maximum brightness is not needed. For every 10°C less on the junction, the expected life of the electronic components grows significantly.
Diagnosis of common problems
There are several problems you may encounter during the installation of 220V LED strips, let's see which ones.
220V LED strips that do not turn on
If a section or the entire installation does not turn on, proceed with a systematic diagnosis process: 1) Check for voltage at the power supply point with a tester; 2) Check the differential and thermal-magnetic circuit breaker in the electrical panel; 3) Inspect intermediate connectors for oxidation or loosening; 4) Test strip continuity with a multimeter in diode mode (with power disconnected). If a specific section is faulty, it is often more economical to replace the affected segment rather than attempt repairs on the integrated components.
Flickering or variations in brightness
Flickering in 220V LED strips can have several causes: loose connections creating variable resistance; circuit overload when the total length exceeds the capacity of the power cable; interference from other devices on the same circuit; deterioration of integrated electronic components due to overheating or aging. To diagnose, progressively isolate sections of the installation until the problematic point is identified. If the flickering is uniform along the entire line and visible especially in video, it is structural mains flicker: the solution is the anti-flicker driver.
Premature degradation or chromatic variations
If some sections show discoloration or significant reduction in brightness compared to others, the probable causes are: inadequate thermal dissipation accelerating LED degradation; direct exposure to UV radiation (for non-specific models); voltage variations in the mains that differently affect sections further from the power supply point. In these cases, consider installing additional heat sinks or dividing the power supply into multiple points.
| Symptom | Probable cause | Solution |
|---|---|---|
| Everything off | Differential tripped, connector disconnected | Check panel, voltage at connector, insulation |
| A 10 cm section off | Module damaged by bend or incorrect cut | Replace the segment between two markings |
| Bands in video, "pulsing" light | Mains flicker, incompatible dimmer | 230V anti-flicker driver; compatible dimmer |
| Weak light when strip is off | Switch with indicator light, phase leakage | Replace switch, disconnect phase |
| Yellowing of silicone | Heat and UV | Aluminum profile with diffuser, installation in shade |
| Detachment of double-sided tape | Cold installation, painted or dirty surface | Degrease, install between 21 and 38°C, add clips |
| Circuit breaker tripping at startup | Inrush current of multiple drivers | Curve C, staggered startups, dedicated line |
Replacement and repair of components
220V LED strips are generally considered non-repairable components at the single LED or integrated circuit level, due to the high density of components and difficulty of access. Replacement of damaged segments is the most practical and economical approach. Always keep a small stock of strips from the same production batch to ensure perfect chromatic correspondence in future repairs. For small integrations, you can also consider LED strips - cut-offs.
15. Market, future trends, and technological developments in 220V LED strips
220V LED strip technology continues to evolve, with promising developments that will further expand their applications and improve performance. To guide today's choices, it is useful to understand where the market is going. LED is now the dominant lighting technology and flexible linear is one of the most dynamic segments, driven by architecture, retail, and outdoor.
Market context
According to the International Energy Agency, in 2024 building and outdoor space lighting absorbed about 8% of global electricity demand, around 2,200 TWh, and in more advanced markets like China and India, LEDs exceed 85% and 75% of sales, respectively; the IEA now speaks of a "second wave" of LEDs, smarter, circular, and more efficient (in-depth in the IEA analysis on the new wave of LED lighting). In Europe, the Ecodesign regulation has progressively eliminated less efficient sources and introduced requirements on flicker and stroboscopic effect: a further push towards quality drivers and anti-flicker systems even for mains voltage strips.
What are the current trends in LED strip lighting
The trends we see in our clients' projects are five: continuous COB light lines instead of punctiform LEDs; warm light 2700-3000K in living and hospitality spaces; total architectural integration with profiles flush in drywall; circadian lighting with variable tones throughout the day (see the Circadian Light line); smart control via app and voice assistants. For 220V LED strips, the main trend is adoption in increasingly large buildings and outdoor spaces, with increasingly shorter cut intervals.
Integration with smart systems and IoT
The most significant trend is the integration of intelligent control circuits directly into 220V LED strips. Some manufacturers are developing strips with integrated microcontrollers that allow individual addressing of segments even a few centimeters long, fault self-diagnosis, and direct communication with building automation systems without the need for external controllers. This evolution could revolutionize architectural and scenic lighting, allowing complex dynamic effects with simplified installations.
Improvements in efficiency and light quality
Advances in LED technology and power electronics are leading to ever-increasing efficiencies for 220V LED strips. New LED chips with efficiencies exceeding 200 lm/W, combined with ultra-high efficiency integrated drivers (>95%), are further reducing consumption for the same luminous flux. In parallel, color rendering indices improve (CRI >95 becoming standard) and chromatic stability over time, with increasingly tight MacAdam coefficients to guarantee perfect uniformity even in extensive installations.
Developments in materials and thermal dissipation
Materials research is leading to flexible PCBs with high thermal conductivity that allow better heat dissipation without the need for massive aluminum profiles. Materials such as copper deposited on flexible substrates with advanced thermal properties will allow more compact, flexible 220V LED strips with higher power densities without compromising durability. This will open new applications in sectors such as automotive, aerospace, and interior design where space is limited.

16. Frequently asked questions about 220V LED strips
We have collected the questions that come to us most often from installers, designers, and private individuals. Click on each question to open the answer.
What is a 220V LED strip?It is an LED strip designed to operate directly with mains voltage (220-230V AC) thanks to integrated rectifiers and current limiters. It does not require a 12V or 24V power supply, it connects with a special cable or connector and, in the Ledpoint range, is available in continuous reels up to 50 meters. |
Does a 220V LED strip really work without a transformer?Yes. The 220V LED strip without a transformer integrates the AC/DC conversion electronics along the circuit. However, for indoor use, in shop windows, or with dimming, a 230V anti-flicker driver is recommended, which eliminates 100 Hz flickering and allows Triac or 0/1-10V regulation. |
What is the difference between 220V and 12V/24V LED strips?12V/24V strips are at safety extra-low voltage (SELV), require a power supply, and offer finer cuts and flicker-free light. 220V LED strips connect to the mains, absorb a current 10 to 19 times lower, and therefore do not suffer from voltage drops on long outdoor runs. |
At what voltage do LED strips operate?LED strips exist at 5V, 12V, 24V, 48V, and 220-230V. A single white LED works around 3 V: the strip voltage depends on how many LEDs are connected in series in each module and on the integrated electronics. The voltage is always silkscreened on the circuit or indicated in the technical data sheet. |
What power supply is needed for an LED strip?For a 12V or 24V strip, a power supply of the same voltage with power equal to that of the strip plus a 20% margin is needed. For a 220V LED strip, a power supply is not needed: the 400W Ledpoint 230V anti-flicker driver can be used to eliminate flickering and dim. |
How is a 220V LED strip connected to the current?With the system off, the strip cable, equipped with a dedicated connector, is connected to the phase and neutral of the line controlled by the switch, inside a waterproof junction box. The line must be protected by a 30 mA differential and circuit breaker. For fixed systems, contact an authorized installer. |
How do you dim a 220V LED strip?A driver dedicated to 230V strips is used, such as the 400W Ledpoint anti-flicker driver, which accepts phase-cut Triac dimmers or 0/1-10V signal. Generic halogen lamp dimmers can cause flickering, buzzing, or damage: always check compatibility in the technical data sheet. |
How to eliminate flickering of the 220V LED strip?Structural flickering derives from the direct rectification of the 50 Hz mains and is eliminated with a 230V anti-flicker driver. If the problem is localized, check loose connections, incompatible dimmers, and overheating. A quick test is slow-motion recording with a smartphone. |
How often can a 220V LED strip be cut?It depends on the model: Ledpoint 230V strips with 2835 LEDs can be cut every 10 cm, COB every 12.5 cm, RGB every 50 cm. Cut only on the markings, always with the strip disconnected, and close the free end with the appropriate cap to maintain the degree of protection. |
What is the best 220V LED strip for outdoors?For eaves, porticoes, and sheltered perimeters, an IP65 outdoor 220V LED strip in extruded silicone tube, in 3000K or 4000K, is indicated. For heavy rain or direct splashes, the IP67 in solid silicone is preferable. In both cases, the aluminum profile is convenient for dissipation and UV protection. |
Can I use a 220V LED strip in the bathroom?In easily accessible indoor humid zones, near the shower and bathtub, a 24V SELV strip with a power supply installed outside the zone is preferable, as required by CEI 64-8 section 701. The Ledpoint IP65 220V LED strip is designed primarily for outdoor use. |
How much does a 220V LED strip consume?A Ledpoint 2835 strip absorbs 16.5 W/m: 10 meters lit 8 hours a day consume about 480 kWh per year. 230V COB strips absorb 11 W/m. Dimming, timers, and twilight sensors reduce consumption by 30-40% even without changing the strip. |
How long does a quality 220V LED strip last?With LM-80 compliant LEDs, good dissipation in an aluminum profile, and overvoltage protection, a 220V LED strip can exceed 30,000-50,000 hours, i.e., over 10 years at 8 hours a day. Heat, direct UV rays, and mains spikes are the factors that most reduce its life. |
How to make a 90° angle without cutting the LED strip?The strip can be bent on the side with a wide radius, never at a sharp edge, or two angular profiles with a joint can be used and the sections reconnected with connectors after cutting on the nearest marking. Tight bends damage the tracks and create dead sections. |
What temperature can LED lights reach?The surface of a 16.5 W/m strip laid without dissipation can reach 40-60°C. Ledpoint 230V strips work with an ambient temperature between -10°C and +45°C. The aluminum profile lowers the operating temperature and prolongs the life of the LEDs. |
What are RGB LEDs used for?RGB LEDs combine red, green, and blue emitters and allow obtaining millions of colors and dynamic scenarios. They are used for decoration, signs, facades, and events rather than for illumination: efficiency is lower than white strips. Ledpoint offers 230V RGB in IP65 and IP67. |
Where to buy quality 220V LED strips?It is advisable to buy from specialized retailers that publish complete technical data sheets (lm/m, lm/W, CRI, IP, cut interval, certifications) and offer technical assistance. On Ledpoint.it you will find 230V LED strips with declared data, dedicated drivers, aluminum profiles, and support in Italian. |
17. 220V LED strips: the optimal solution for long lengths
220V LED strips represent a mature and advantageous technology for a wide range of applications, especially those involving medium-long distances, simplified installations, and reduction of installation costs. The choice between 220V LED strips and low-voltage systems (12V/24V) must be based on a careful evaluation of the specific requirements of each project: total length, accessibility for maintenance, installation complexity, available budget, and technical skills of the installer.
For most commercial and industrial applications over distances greater than 10 meters, 220V LED strips offer significant advantages in terms of installation simplification, reduction of material and labor costs, and greater reliability over time thanks to the absence of centralized power supplies as potential single points of failure. For small residential applications or where low-voltage safety is a primary requirement (e.g., in easily accessible humid environments), 12V/24V systems remain the preferable choice.
Regardless of the technological choice, it is fundamental to select quality products from reliable suppliers, with appropriate certifications and valid warranties. Investing in professional products translates into superior performance, greater durability, and, in the long term, lower total cost of ownership. For complex or large-scale projects, consulting a lighting designer or a qualified electrician can help optimize the solution and ensure maximum safety and regulatory compliance.
LEDPoint.it offers a complete range of high-quality 220V LED strips, with different technical specifications to meet every application need. Our team of experts is available to support professionals and enthusiasts in selecting the most appropriate solution and optimizing lighting projects: you can write to us from the contacts page, download the catalogs, or read other in-depth articles on the Ledpoint blog.
This article was developed with the support of artificial intelligence and subsequently reviewed, corrected, and validated by the technical team of Ledpoint.it, which guarantees its reliability and compliance with official sources.