




Designing the lighting of open spaces with outdoor ceiling lights does not simply mean "attaching a light to the porch ceiling." It means simultaneously managing four variables that constantly conflict with each other outdoors: aesthetics, lighting performance, electrical safety, and durability over time. A luminaire installed outdoors faces thousands of thermal cycles, driving rain, ultraviolet radiation, condensation humidity, salt spray, fine dust, insects, hail, and vibrations every year: an environment that mercilessly exposes any compromise made at the time of purchase within a few months.
This guide is designed to take you from theory to installation. You will find market data updated to 2026, calculation tables, regulatory reference values, sizing diagrams, step-by-step installation procedures, a complete troubleshooting section, and over thirty frequently asked questions with technical and verifiable answers. The goal is to put you in a position to choose, design, and install an outdoor LED ceiling light that, after ten years, is still exactly as it was on the first day.
Whether you are a designer drafting specifications, an installer looking for the most reliable solution for a demanding client, or a homeowner who wants to understand why the porch lights went out after two winters, you will find the answer in this guide.
In this article...
1. Outdoor ceiling lights: what they are, how they work, and why LED won
Before addressing protection ratings, photometric curves, and illuminance calculations, it is essential to precisely define the semantic and technical scope of what we are discussing. In commercial language, the term "ceiling light" is used extremely flexibly, often referring to products that are profoundly different in terms of optics, mounting, and intended use. Understanding the difference between a ceiling light, a wall light, a spotlight, and a floodlight is the first step to avoiding the most costly design error: buying the wrong type of luminaire.
Technical definition of an outdoor ceiling light
An outdoor ceiling light is a surface-mounted lighting luminaire (typically on the ceiling, but in some variations on a high wall) designed to emit a wide, diffused luminous flux that is predominantly directed downward, with the goal of ensuring general and uniform illumination of the area below. The distinguishing feature compared to other outdoor luminaires is the extended photometry: while a spotlight concentrates its beam within a few degrees, the ceiling light typically distributes it over 100-160°, eliminating shadow cones and drastically reducing luminance contrasts.
When we talk about outdoor LED ceiling lights, we refer to the modern evolution of this category, where the light source is no longer a replaceable lamp (halogen, compact fluorescent, metal halide) but a solid-state module — LED strip, dedicated PCB, or COB — integrated into a body that simultaneously performs three functions: mechanical containment, waterproof sealing, and heat dissipation. This integration is what makes the design of the luminaire infinitely more delicate than in the past: in LED lighting, the luminaire body is not an aesthetic accessory; it is an active electrotechnical component.
Ceiling light, wall light, spotlight, and floodlight: the comparative table
Many lighting failures stem from confusion between these four product families. Each serves a specific need, and using one instead of another creates glare, dark spots, or unjustified energy consumption. The following table summarizes the fundamental operational differences.
| Type | Mounting | Typical beam angle | Primary function | Ideal outdoor application |
|---|---|---|---|---|
| Ceiling light | Ceiling / horizontal surface | 100° – 160° | Uniform general lighting | Porches, gazebos, canopies, carports, entrance halls |
| Wall light | Vertical wall | Up&down or 90°–120° | Scenographic effect + local lighting | Facades, entrances, stairs, perimeter walls |
| Spotlight | Recessed or surface | 15° – 60° | Accent lighting on objects | Trees, sculptures, architectural details |
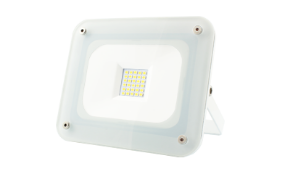
| Floodlight | Adjustable bracket | 30° – 120° asymmetric | Large surfaces, high power | Squares, fields, maneuvering areas, construction sites |
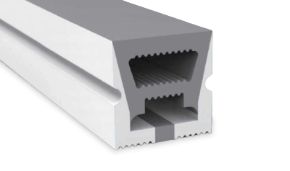
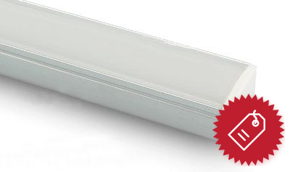
| LED linear profile | Surface, recessed, suspended | 120° (opal) / 30°–60° (microprismatic) | Continuous light line, architectural integration | Soffits, beams, cornices, external suspended ceilings |
The key point is this: the ceiling light is the only outdoor luminaire designed to illuminate a space, not an object. When the goal is the evening usability of an area (being able to set a table under the gazebo, read on the porch sofa, park without tripping), the ceiling light is the correct choice.
How LEDs work: electroluminescence in three steps
Understanding the physical principle behind LED light is not an academic exercise: it is the key to understanding why heat is the number one enemy of an outdoor ceiling light and why two apparently identical products can have lifespans that differ by a factor of ten.
The phenomenon of electroluminescence
An LED (Light Emitting Diode) is a semiconductor junction doped to create a P region (with an excess of holes) and an N region (with an excess of electrons). When we apply a forward voltage above the threshold voltage, electrons cross the junction and recombine with holes. Each recombination releases a quantum of energy equal to the bandgap width of the material: if the semiconductor is chosen correctly (indium gallium nitride for blue, aluminum gallium indium phosphide for red), that energy is emitted as a photon in the visible spectrum.
From blue to white: the role of phosphor
White LEDs do not exist in nature. The white light we see is almost always obtained with the "blue pump + phosphor" technique: a high-efficiency blue chip (about 450 nm) is coated with a layer of phosphors (typically YAG:Ce) that convert part of the blue radiation into broad-spectrum yellow-green emission. The sum of residual blue and yellow conversion is perceived by the eye as white light. The quality, thickness, and uniformity of the phosphor deposit simultaneously determine the color temperature, color rendering index, and chromatic stability over time: this is where most of the difference between an inexpensive LED and a professional one lies.
Heat: where does the energy that doesn't become light go?
A high-end LED converts about 35-45% of the electrical energy it absorbs into light. Everything else becomes heat, and this heat is not radiated away by the light beam (as happened with halogens) but remains concentrated in the junction, a few tenths of a millimeter from the chip. If it is not quickly extracted through the PCB and the luminaire body, the junction temperature (Tj) rises, efficiency drops, phosphors degrade, and useful life plummets. This mechanism is why a cheap ceiling light stops working after two summers.
The seven technical advantages of LED in outdoor applications
The transition to LED in outdoor lighting is not a commercial fad but the result of an overwhelming performance advantage in every relevant parameter. Let's look at them one by one, with numbers.
- Off-the-chart luminous efficacy (lm/W): current professional LED strips reach and exceed 110-160 lm/W system efficacy. A halogen lamp stopped at 15-20 lm/W, a compact fluorescent at 55-65 lm/W, metal halides at 70-90 lm/W. For the same light output, LED reduces consumption by 80-88% compared to halogen.
- L70/L80 useful life from 30,000 to 60,000 hours: the correct parameter is not "when it burns out" but when the flux drops below 70% (L70) or 80% (L80) of the initial value. A well-dissipated system easily exceeds 50,000 hours: over 15 years at 8 hours/day.
- Solid-state robustness: no filament, no glass bulb, no pressurized gas. LED chips tolerate vibrations, shocks, and switching cycles practically indefinitely. In windy climates or on lightweight structures like pergolas, this is decisive.
- Instant 100% ignition: essential outdoors, where light is often controlled by motion sensors: metal halides took up to 4 minutes to reach full output and did not tolerate hot restrikes.
- Native and deep dimmability: with suitable drivers, you can go down to 1% and even 0.1% of the flux, opening the way to very low consumption night light scenarios with less impact on wildlife.
- No UV and IR in the beam: white LEDs do not emit ultraviolet: they do not attract insects like traditional sources and do not fade fabrics, woods, and outdoor furniture.
- Formal freedom: sources just a few millimeters thick allow continuous light lines, slits, and integrations impossible with any previous technology.
Direct comparison between technologies: the numbers table
The following table compares technologies on a standardized case: illuminating a 20 m² porch with a maintained average illuminance of 100 lux, for 1,500 hours per year, with an energy cost of €0.28/kWh.
| Parameter | Halogen | Compact Fluorescent | Metal Halide | Professional LED |
|---|---|---|---|---|
| Efficacy (lm/W) | 18 | 60 | 85 | 130 |
| Required power (W) | 185 | 56 | 39 | 26 |
| Annual consumption (kWh) | 278 | 84 | 59 | 39 |
| Annual energy cost | €77.80 | €23.50 | €16.50 | €10.90 |
| Useful life (hours) | 2,000 | 8,000 | 15,000 | 50,000 |
| Replacements in 15 years | 11 | 3 | 1 | 0 |
| Full power start-up | Instant | 30–120 s | 120–240 s | Instant |
| 15-year total cost (energy + replacements) | ~€1,560 | ~€470 | ~€370 | ~€164 |
Ledpoint elaboration based on average industry values. Costs do not include replacement labor, which outdoors (height access, scaffolding, disassembly of suspended ceilings) can easily double the gap in favor of LED.
2. The outdoor lighting market: data, statistics, and 2026 trends
Knowing the market direction is not only useful for industry professionals: it helps anyone investing in a system to understand which technologies will be supported, which components will be available in ten years, and where research and innovation are concentrating. The outdoor segment is currently the most dynamic in the entire lighting industry, and the numbers clearly demonstrate this.
Size and growth of the global and European market
The macroeconomic picture is that of a mature sector in terms of volume but undergoing profound technological transformation. The most recent market analyses converge on one point: while indoor grows slowly, outdoor accelerates, driven by urban redevelopment, regulatory requirements, and residential demand for livable outdoor spaces.
| Indicator | Value | Horizon | Reading for the designer |
|---|---|---|---|
| Global lamps and lighting market | $139.6 billion (2026) → $170.3 billion (2031), CAGR 4.05% | 2026–2031 | Stable sector: supplies and spare parts guaranteed in the long term |
| European LED lighting market | $25.9 billion (2026) → $32.6 billion (2031), CAGR 4.74% | 2026–2031 | Europe grows above the global average thanks to regulatory push |
| European outdoor segment | CAGR 5.51% (fastest by end user) | up to 2031 | Outdoors is where product innovation is concentrated today |
| Retrofit share of European LED market | 62.2% (2025), CAGR 5.36% | 2025–2031 | Two out of three systems are replacements: dimensional compatibility matters |
| Global LED driver market | $24.7 billion (2026), CAGR 22.4% | 2026–2031 | Power electronics is the real technological battleground |
| LED share of global luminaire shipments | 68% of total | 2024 | Traditional technologies are now residual |
The most significant data for those designing outdoor ceiling lights is twofold. On the one hand, the outdoor segment grows faster than any other European end user (5.51% compound annual growth rate): this means that the supply of specialized components (waterproof profiles, IP68 cable glands, waterproof drivers) will continue to expand and become more accessible. On the other hand, the explosive growth of the driver market (over 22% per year) signals that value is shifting from the light source to the control electronics: those who save on the power supply today are saving on precisely the component in which the industry is investing the most.
Why outdoor is growing: the four structural drivers
Behind the percentages are concrete and easily observable phenomena, which are worth clarifying because they directly influence design choices.
Driver 1 – The rediscovery of the domestic outdoor space
Starting from 2020, the garden, terrace, and porch have shifted from accessory spaces to genuine additional rooms of the home. This has changed lighting expectations: it is no longer enough to "see"; visual comfort comparable to that indoors is needed. Hence the demand for high CRI, warm color temperatures, dimming, and absence of glare: parameters that fifteen years ago in residential outdoor were not even considered.
Driver 2 – European regulatory pressure on efficiency and repairability
The European regulatory cycle now covers minimum efficiency, declared lifetime, repairability, recycled content, and digital traceability. The progressive ban on fluorescent tubes has triggered a multi-year replacement cycle that continues to support volumes. For the designer, this translates into a concrete advantage: compliant products must declare verifiable photometric and lifetime data, finally making luminaires from different brands comparable.
Driver 3 – Energy cost as a decision-making lever
With electricity prices sustainably high, the payback time of an outdoor lighting refurbishment has been reduced to 2-4 years in most residential cases and below 18 months in commercial settings with long operating hours. This is why retrofit represents over 62% of the European market today.
Driver 4 – Convergence with home automation
Dusk sensors, presence detectors, wireless protocols like ZigBee and control systems like DALI and DMX have made outdoor lighting a subsystem of the smart home. An outdoor system designed today without provision for digital control is already obsolete at birth.
3. Anatomy of an outdoor LED ceiling light: the 7 critical components
A professional-quality outdoor ceiling light is not an object; it is a system. Each of its components performs multiple functions simultaneously, and the failure of just one compromises the entire luminaire. The logic to adopt is that of the chain: overall robustness equals that of the weakest link, and outdoors, the weakest link is almost always the one on which you decided to save five euros. Let's analyze the seven elements that determine the real quality of the product, in the order in which they affect durability.
The load-bearing body: structure, heatsink, and barrier
The body of the ceiling light simultaneously performs three tasks that were separate in traditional lighting. It is a structural element, because it must support the weight of the luminaire and withstand wind stresses and differential thermal expansion. It is a thermal dissipator, because it must extract and dissipate the heat produced by the LED junction. And it is an environmental barrier, because it constitutes the first defense against water, dust, and insects.
For outdoor use, the material of choice is extruded aluminum from the 6000 series (typically 6063 or 6060), with thermal conductivity between 200 and 220 W/m·K. The comparison with alternatives is merciless: polycarbonate stops at 0.20 W/m·K, ABS at 0.17, steel at about 50. This means that a plastic body dissipates about a thousand times worse than an aluminum body. In low-end products, this is masked by drastically reducing the power density of the LEDs, producing luminaires that heat up little but also emit little light.
Wall thickness: the parameter no one declares
For the same material, the dissipating capacity depends on the mass and the exchange surface. For outdoor applications, a wall thickness of no less than 1.2-1.5 mm is recommended, with 2 mm as a reference for high power density installations or hot climates. Thin profiles of 0.8 mm, common in products intended for indoor use, are inadequate outdoors both thermally and mechanically: they deform, open the gasket seats, and let water in.
The diffuser: PMMA versus polycarbonate
The diffuser is the most exposed component and, statistically, the first to show signs of aging. It must transmit light with minimal loss, homogenize it by hiding the individual LED points, resist ultraviolet radiation without yellowing, and withstand mechanical shocks. The choice of material is therefore a conscious technical compromise, not an aesthetic preference.
| Characteristic | PMMA (acrylic) | Polycarbonate (PC) | Tempered glass |
|---|---|---|---|
| Light transmittance (clear) | 92% | 88–89% | 90% |
| Impact resistance | Low (brittle) | Very high (200x glass) | Medium |
| UV stability | Excellent by nature | Good only if UV co-extruded | Total |
| Max operating temperature | 80 °C | 120 °C | >200 °C |
| Scratch resistance | Good | Poor (without hard coating) | Excellent |
| Specific weight | 1.19 g/cm³ | 1.20 g/cm³ | 2.50 g/cm³ |
| Achievable IK class | IK06–IK07 | IK08–IK10 | IK08–IK10 |
| Recommended outdoor use | Sheltered and unreachable areas | Standard for exposed outdoors | Severe, industrial environments |
The operational summary is clear: for an exposed outdoor ceiling light, polycarbonate with UV co-extrusion is the correct choice in 90% of cases. It sacrifices two percentage points of transmittance compared to acrylic but returns them multiplied in resistance to hail, football kicks, falling branches, and vandalism. Further information on the chemical-physical properties of this polymer is available in the technical data sheet on polycarbonates.
Diffuser finish: clear, opal, or microprismatic?
The finish determines the appearance of the light just as the material determines its longevity. The three main families, all available in the Ledpoint diffusers range, meet different needs.
- Clear: maximum transmittance (up to 92%), but individual LEDs remain visible, creating an annoying "dotted" effect and a high risk of glare. Suitable only when the luminaire is not in the direct field of view, for example in light coves or behind cornices.
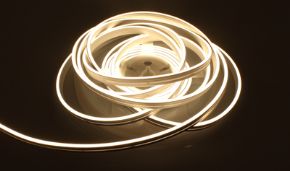
- Opal (milky): typical transmittance loss of 25-35%, but returns a perfectly homogeneous and glare-free light line. It is the correct finish for ceiling lights in porches, gazebos, and areas where people look up. With high-density strips (240-384 LED/m or COB), a perfectly continuous effect without points is achieved.
- Microprismatic: 15-20% loss, but with active control of the photometric distribution. It reduces UGR by concentrating the flux downwards and limiting emission at wide angles. It is the technical solution for soffits and facades where upward and sideward dispersion must be avoided.
The sealing system: gaskets, silicone, and cable glands
This is where the longevity battle is won or lost. Over 60% of premature failures in outdoor ceiling lights are attributable to water infiltration, and in almost all cases, the entry point is not the diffuser, but one of the three singular points of the system: the end caps, the cable entry, and the interface with the mounting surface.
Perimeter gaskets
They must be made of silicone or EPDM, never natural rubber or soft PVC, which harden, lose elasticity, and crack within two or three seasons. Silicone maintains its characteristics over a range from −50 °C to +200 °C and resists ozone and UV rays. Sealing is achieved through uniform and controlled compression: a gasket compressed beyond 30% of its thickness deforms permanently and no longer seals. This is why the closing screws must be tightened progressively and in a cross pattern, never fully one at a time.
End caps
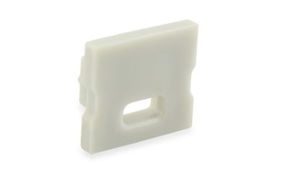
In linear profiles, the end caps are the most critical point. A blind end cap must have its own gasket and be sealed; a drilled end cap for cable passage must integrate a cable gland with at least IP67 rating, sized for the exact diameter of the cable used. An M12 cable gland tightened on a 4 mm cable does not seal, regardless of how tightly it is screwed.
Orientation of cable entries
Golden rule too often ignored: cable entries must always be lateral or bottom, never top. An entry facing upwards collects water by gravity, and sooner or later (due solely to the expansion and contraction of internal air during day/night cycles) it sucks it inside the luminaire. This phenomenon, called "breathing" or thermal pumping, is the hidden cause of many inexplicable condensations in apparently sealed luminaires.
The light source: LED strip, density, and binning
The light source is the component over which the end user has the greatest freedom of choice when building their own ceiling light with a profile and strip, as we will see in chapter 14. The parameters that matter are five, and they should be evaluated in this order of priority.
- IP rating of the strip itself: even inside a waterproof profile, a strip with conformal coating or silicone encapsulation provides a second barrier that proves decisive in the event of internal condensation. Never use bare IP20 strips in non-perfectly sealed profiles outdoors.
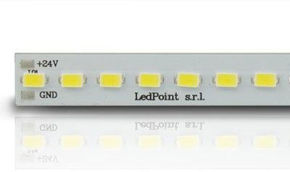
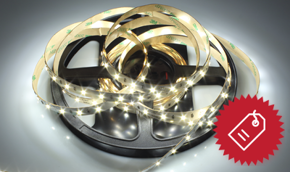
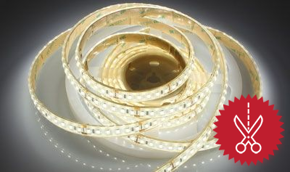
- LED density per meter: determines uniformity under the diffuser. With 60 LED/m and a 15 mm opal diffuser, you see the points; with 120 LED/m the result is acceptable; with 240 LED/m or COB technology, the line is perfectly continuous. The Ledpoint range covers the entire spectrum, from 60 LED/m strips up to versions over 384 LED/m and COB strips.
- PCB copper thickness: a parameter almost never declared by inexpensive manufacturers, yet decisive: a PCB with 2 oz copper (70 µm) dissipates and conducts significantly better than a 1 oz (35 µm) one, reducing voltage drop along the strip and operating temperature.
- Chromatic binning (SDCM): 3-step MacAdam binning ensures that two sections from the same batch have visually identical hues. On a ceiling light made up of multiple adjacent profiles, 5 or 6-step binning produces clearly perceptible and unrecoverable color differences.
- Supply voltage: 24V strips are the recommended standard for outdoor use: for the same power, they halve the current compared to 12V, reducing cable losses by four times and allowing longer runs.
The power supply: the component that decides the life of the system
If we had to indicate a single component on which never to skimp, it would be this one. Statistically, when an LED ceiling light "burns out," in the majority of cases the failure is in the power supply, not in the LEDs. Electrolytic capacitors age with temperature according to an exponential law: every 10 °C increase halves their useful life. A cheap driver installed in a closed, sun-exposed box can go from 50,000 to 8,000 hours of life.
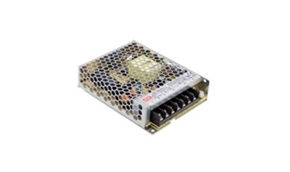
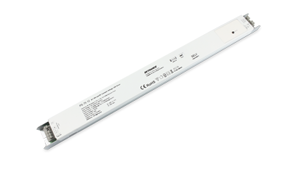
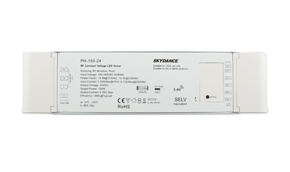
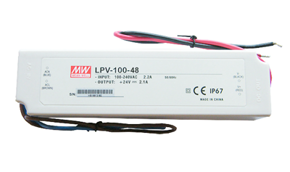
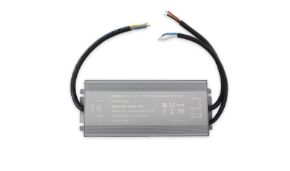
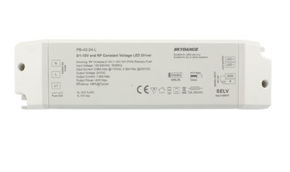
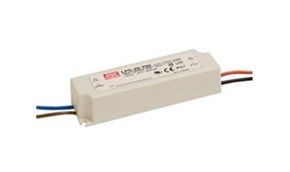
The essential selection criteria for outdoor use are: IP rating appropriate for the location, declared maximum ambient temperature (Ta) consistent with the actual installation, a power margin of at least 20-25%, integrated protections against overvoltage, overload, short circuit, and overtemperature. The complete range can be found in the power supplies section, with families dedicated to 24V and smart versions for connected systems.
Wiring, connections, and fixing accessories
The seemingly minor details are what determine whether after five years the luminaire can still be opened for maintenance or will have to be cut off with a grinder. Outdoors, all hardware must be stainless steel, and the choice of alloy is not indifferent.
| Hardware material | Designation | Suitable environment | Notes |
|---|---|---|---|
| Zinc-plated steel | 8.8 zn | Indoor only | Avoid outdoors: rust within 12-24 months |
| Austenitic stainless | A2 (AISI 304) | Continental, urban outdoor | Excellent performance/price ratio |
| Molybdenum stainless | A4 (AISI 316) | Marine, pool, industrial environments | Mandatory within 5 km of the coast |
| Nylon / polyamide | PA6.6 | Non-structural fixings | Check UV stabilization |
The same applies to electrical connections. Using electrical tape outdoors should be considered a serious mistake: it absorbs moisture, loses adhesion in the heat, and triggers galvanic corrosion on the conductors. The only acceptable solutions are soldering protected by internally glued heatshrink tubing, waterproof crimp connectors, and dedicated PCB connectors used inside already sealed volumes.
The fixing system to the structure
The last component, often dismissed in a couple of lines of instructions, actually conditions both sealing and safety. The essential rules are three. First: never create a flat top surface where water can stagnate; if the geometry requires it, provide drainage holes at the low points. Second: fixing holes passing through the sealed volume must be sealed with sealing washers or made in special housings external to the LED compartment. Third: the thermal expansion of aluminum is about 2.3 mm per 10 meters for every 10 °C of variation; on a 3-meter external profile subjected to a 60 °C annual variation, this means over 4 mm of movement, which must be absorbed with slots rather than round holes, otherwise the luminaire will deform.
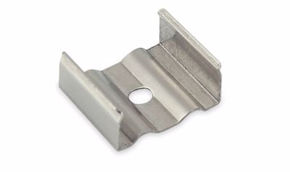
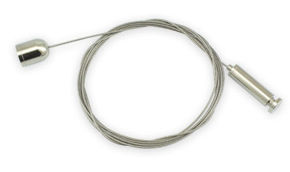
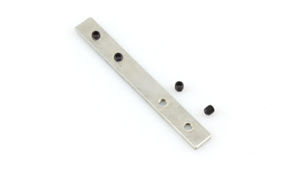
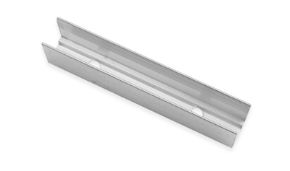
For structural fixing, the Ledpoint range offers dedicated mounting brackets, suspension cables for suspended installations, and profile joints for continuous lines.
4. Aluminum profiles: the structural, optical, and thermal core
If there is one concept that distinguishes a professional installation from an amateur one, it is the awareness that the profile is not a container but an active component of the lighting system. Changing the profile, with the same LED strip, can modify the operating temperature of the chips by over 20 °C, the perceived uniformity of the light radically, and the useful life of the luminaire by a factor of three. This chapter addresses the profile for what it is: a structural optical heatsink.
Why extruded aluminum has no real alternatives
The superiority of aluminum in outdoor LED applications is based on a combination of properties that no other material at a comparable cost can offer simultaneously.
Thermal conductivity and heatsink function
The profile absorbs the heat produced by the junction through the strip's PCB, conducts it throughout its mass, and releases it to the air by convection and radiation. The parameter governing this process is the junction-to-ambient thermal resistance (Rth j-a), measured in °C/W. The lower it is, the cooler the junction operates. A good 20×10 mm aluminum profile with a 14.4 W/m strip keeps Tj within 55-65 °C; the same strip glued to a plastic surface easily reaches 95-110 °C.
The consequences are directly readable in the following table, which reports the effect of junction temperature on useful life and luminous flux of a medium-power white LED. This is the most important data in this entire chapter. The underlying physical concept (and the calculation of the dissipation factor) is what separates a luminaire that lasts ten years from one that lasts ten months.
| Junction temperature Tj | Relative luminous flux | Estimated L70 useful life | Typical context |
|---|---|---|---|
| 45 °C | 102% | > 70,000 h | Generous profile, low power density |
| 65 °C | 100% | 50,000 h | Correct design, reference condition |
| 85 °C | 95% | 30,000 h | Undersized profile or recess without air circulation |
| 105 °C | 88% | 12,000 h | Strip on plastic or without profile |
| 125 °C | 78% | < 5,000 h | Failure condition: phosphor degradation and delamination |
The message is unequivocal: increasing the junction temperature from 65 °C to 105 °C does not reduce life by 20% or 30%, it reduces it by four times. And this is exactly what happens when you buy a quality LED strip and install it without a dissipating profile, thinking you have saved money.
Dimensional stability and mechanical resistance
Extruded aluminum from the 6000 series offers a breaking load of around 200-240 MPa and a rigidity that allows significant free spans without visible deflection. A 20×10 mm profile supports a span of about 1 meter without appreciable bending; for longer spans, the section height must be increased or fixing points must be closer together. Outdoors, this directly translates into sealing: a profile that bends opens the gasket seats.
Anodizing and surface protection
Raw aluminum naturally oxidizes, forming a passivating layer of a few nanometers, insufficient in aggressive environments. Anodizing is an electrochemical process that controllably thickens this layer. For outdoor use, the references are: 10-15 µm for normal continental environments, 20-25 µm for polluted urban or coastal environments. A 5 µm anodizing, typical of profiles intended for indoors, gives way within a few years in a marine environment.
Electrical continuity and earthing
Often forgotten advantage: a metal body can be connected to the protective conductor, resulting in a Class I luminaire with a higher level of electrical safety in humid environments. A plastic body does not allow this and forces reliance exclusively on double insulation.
Profile families and when to use them
The aluminum profiles catalog includes dozens of geometries. To navigate outdoors, it is useful to think in terms of functional families.
| Family | Distinctive feature | Achievable IP | Typical outdoor use |
|---|---|---|---|
| Surface waterproof | Perimeter gasket + waterproof end caps | IP65–IP67 | Porches, beams, soffits, walls |
| Suspended round | 360° or 270° emission, clean aesthetics | IP65–IP67 | Gazebos, pergolas, outdoor dining areas, suspensions |
| 45° angular | Downward inclined emission | IP65 | Steps, cornices, door jambs |
| Flush recessed | Total integration into the structure | IP65 (with kit) | External suspended ceilings, waterproof plasterboard cornices |
| Walkable | Reinforced diffuser, high IK | IP67–IP68 | Walkways, pool edges, stairs |
| Enlarged fins | Extended heat exchange surface | IP65–IP66 | High power, hot climates, south-facing exposure |
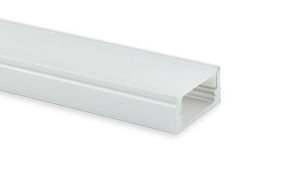
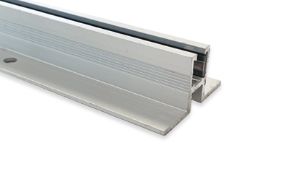
Among the most used solutions for outdoor ceiling lights, we highlight the round waterproof profile with 30 mm diameter, ideal for creating luminous suspensions under gazebos and pergolas, and the 21×10 mm waterproof profile, the minimal choice for discreet light lines on beams and soffits. The entire waterproof selection can be filtered in the waterproof profiles section.
How to size a profile: the practical rule of W/m
There is an empirical rule that allows you to verify in a few seconds whether a profile-strip combination is thermally sustainable outdoors. It involves comparing the linear power of the strip with the profile section.
| Strip power | Recommended minimum profile section | Wall thickness | Outdoor notes |
|---|---|---|---|
| up to 5 W/m | Minimal profile 12×7 mm | 1.0 mm | No thermal criticality |
| 5–10 W/m | 16×8 / 17×9 mm | 1.2 mm | Standard for most ceiling lights |
| 10–15 W/m | 20×10 / 23×10 mm | 1.5 mm | Avoid blind recesses without air circulation |
| 15–20 W/m | 30×15 mm or with fins | 1.5–2.0 mm | Verify Ta in direct sunlight exposure |
| over 20 W/m | Dedicated finned profile | 2.0 mm+ | Requires specific thermal verification |
A fundamental warning for outdoor use: summer ambient temperature under a south-facing canopy can exceed 45-50 °C, and a dark profile exposed to direct sunlight can reach 70 °C even with LEDs off. Sizing should always be based on the worst-case condition, not the average annual temperature. In hot climates or with critical exposure, it is good practice to go down one power category from the table, or switch to a finned profile.
The uniformity criterion: LED-diffuser distance
The other key parameter of the profile, besides thermal performance, is the depth of the channel, which determines the distance between the LEDs and the diffuser. This distance determines whether under the opal diffuser we will see a continuous line or a row of dots.
The established practical rule is as follows: the distance between the LED plane and the inner face of the diffuser must be at least equal to the distance between two consecutive LEDs (the pitch). With a 60 LED/m strip, the pitch is 16.7 mm, so a profile almost 17 mm deep would be needed: unrealistic for a minimal profile. With 120 LED/m, the pitch drops to 8.3 mm, with 240 LED/m to 4.2 mm, and with COB strips, the concept of pitch disappears entirely. This explains why high-density or COB technology is always preferred for quality outdoor ceiling lights: they allow thin profiles with perfect uniformity.
5. IP and IK ratings: protection is everything
This is the chapter that, more than any other, determines whether your installation will last ten years or ten months. Choosing insufficient protection does not mean having a "slightly less good" product: it means having a product that will certainly fail, and it is only a matter of when. Water entering an LED luminaire does not cause an immediate, visible failure, but initiates a slow and inexorable process of electrochemical corrosion of the copper traces and ionic migration between contacts, which manifests months later with flickering, dead sections, and finally total darkness.
How to truly read the IP code
The IP code (International Protection, defined by standard IEC/EN 60529) consists of two digits. The first indicates protection against the ingress of solid bodies, the second against the ingress of liquids. Contrary to popular belief, the two scales are not linearly cumulative: an IP67 luminaire is not automatically suitable for high-pressure water jets typical of IPX5 and IPX6, because the tests are of a different nature.
First digit: solid particle protection
| Digit | Protection | Outdoor relevance |
|---|---|---|
| 0 | No protection | Unusable |
| 2 | Objects > 12.5 mm (finger) | Indoor only |
| 4 | Objects > 1 mm (wires, large insects) | Minimum for sheltered areas |
| 5 | Dust protected (non-harmful ingress) | Recommended outdoor standard |
| 6 | Dust-tight | Dusty, agricultural, coastal environments |
Second digit: liquid ingress protection
| Digit | Standard test | Corresponding real condition |
|---|---|---|
| 1–2 | Vertical dripping (also at 15°) | Condensation, dripping: insufficient outdoors |
| 3 | Rain up to 60° from vertical | Light rain without wind |
| 4 | Splashing from any direction | Deep canopy, closed gazebo |
| 5 | Water jets, 6.3 mm nozzle, 12.5 l/min | Driving rain + wind: the outdoor standard |
| 6 | Powerful jets, 12.5 mm nozzle, 100 l/min | Pressure washer cleaning, severe exposure |
| 7 | Temporary immersion 1 m for 30 min | Flood-prone areas, walkways, pool edge |
| 8 | Continuous immersion beyond 1 m | Submerged: fountains, basins, pools |
Which IP for which location: the decision table
Translating codes into concrete decisions is the real goal. The following table cross-references the physical location with the minimum and recommended IP rating, including the climatic factor that is ignored in most guides.
| Location | Minimum IP | Recommended IP | In coastal / mountain areas |
|---|---|---|---|
| Deep porch > 2.5 m, closed on 3 sides | IP44 | IP65 | IP65 + A4 stainless |
| Shallow canopy or open on sides | IP65 | IP65 | IP66 |
| Gazebo with side curtains | IP44 | IP65 | IP65 |
| Open / bioclimatic pergola | IP65 | IP66 | IP66/IP67 |
| Exposed soffit | IP65 | IP66 | IP66 + A4 |
| Perimeter wall / facade | IP65 | IP66 | IP66/IP67 |
| Carport / covered parking | IP54 | IP65 | IP65 |
| Pool edge (outside zone 0/1) | IP65 | IP67 | IP67 + A4 |
| Walkable pathway | IP67 | IP67 + IK10 | IP68 |
| Flood-prone area | IP67 | IP68 | IP68 |
The most common conceptual mistake about IP rating
This deserves a separate paragraph because it recurs systematically. IP rating refers to the complete assembled system, not to individual components. Mounting a declared IP20 LED strip inside a declared IP65 profile does not produce an IP65 system if even one of the following elements is deficient: perimeter gaskets, end caps with their gasket, cable gland, sealing between the profile and the mounting surface.
The reverse is equally true and equally ignored: an IP67 luminaire can be made IP20 by an installer who passes the cable through a hole drilled with a drill and seals it with acetic silicone (which, incidentally, releases acetic acid corrosive to copper and aluminum: only neutral oxime silicone should be used outdoors). IP classification is a property of the installation, not a label on the box.
The problem of internal condensation
There is a phenomenon that surprises many installers: a perfectly sealed luminaire can fill with water without a single drop having entered from the outside. The mechanism is simple. The air trapped at the time of assembly contains a certain level of humidity; during the night, the luminaire cools below the dew point, and that vapor condenses on the internal walls. If the luminaire was sealed on a humid day, the amount of water that can accumulate is significant.
The professional countermeasures are three: assemble in a dry environment, provide breathable compensating membranes (breather vents) in products that support them, or (in craft installations) insert a small silica gel sachet into the volume before sealing. In long linear profiles, the most effective solution remains installation with a slight slope and a 1 mm drainage micro-hole at the lowest point, which allows any condensation to escape without allowing jets to enter.
IK rating: the forgotten protection
While IP rating is now common knowledge, the IK rating (standard EN 62262) remains largely ignored, yet outdoors it is far from secondary. It measures the enclosure's resistance to external mechanical impacts, expressed in joules of impact energy.
| IK Class | Impact energy | Practical equivalence | Where it is needed |
|---|---|---|---|
| IK02 | 0.2 J | Negligible impact | Protected indoor |
| IK06 | 1 J | 250 g object from 40 cm | Outdoor at height, unreachable |
| IK08 | 5 J | 1.7 kg object from 30 cm; large hail | Recommended outdoor minimum |
| IK09 | 10 J | 5 kg object from 20 cm | Play areas, condominium courtyards |
| IK10 | 20 J | 5 kg object from 40 cm | Public spaces, walkways, vandalism-prone areas |
The diffuser is almost always the element that limits the IK rating of the entire luminaire, and this is precisely why polycarbonate is preferable to acrylic in exposed outdoor settings: for the same thickness, it guarantees two or three IK classes higher. In residential settings with children, animals, or play areas, IK08 should be considered a non-negotiable minimum requirement.
Other often overlooked resistance parameters
In addition to IP and IK, three parameters complete the environmental resistance profile of an outdoor ceiling light and are worth checking in the technical data sheets.
- Operating temperature range (Ta): a luminaire declared Ta −20…+40 °C is not suitable for a south-facing attic where summer temperatures exceed 50 °C. If Ta is exceeded, the driver's thermal protections reduce power or shut down the luminaire, and without protections, useful life plummets.
- Salt spray resistance (EN ISO 9227): relevant within 5-10 km of the coast. Standard tests are 240, 480, or 720 hours; for marine environments, at least 480 hours without significant corrosion should be targeted.
- Electrical insulation class: Class I (with protective conductor) or Class II (double insulation). In humid environments, Class II offers an intrinsically higher safety margin, while Class I requires an efficient and tested earthing system.
6. Lumens, lux, and watts: how outdoor light is really designed
We are at the lighting core of the guide. The question we receive most frequently is "how many lumens do I need for my porch?" , and to answer it, a precise and repeatable calculation method is required that anyone can apply in five minutes with a calculator. In this chapter, we present it step by step, with regulatory reference values and three fully worked examples.
Photometric quantities: understanding them once and for all
Confusion between lumens, lux, watts, and candelas is the primary cause of sizing errors. Clarifying it takes two minutes and solves 90% of doubts.
| Quantity | Unit | What it measures | Analogy |
|---|---|---|---|
| Luminous flux | lumen (lm) | The total light emitted by the source | Liters of water coming out of the tap |
| Illuminance | lux (lx) = lm/m² | The light reaching a surface | How much water wets a square meter of ground |
| Luminous intensity | candela (cd) | Light emitted in a specific direction | The force of the jet in one direction |
| Luminance | cd/m² | The light perceived by the eye from a surface | How much what we look at "shines" |
| Power | watt (W) | The electrical energy absorbed | The cost on the bill, not the light |
| Luminous efficacy | lm/W | How much light I get for each watt | The "kilometers per liter" of lighting |
The key concept is this: watts do not measure light. In the incandescent era, there was a stable correspondence (a 100 W bulb always produced about 1,300 lm), and from there came the habit of "thinking in watts." With LED, that correspondence has disappeared: two 20 W luminaires can emit 1,400 lm or 2,800 lm depending on efficiency. The correct parameter to compare at the time of purchase is always the luminous flux in lumens, even better if declared as the luminaire flux (and not the bare source) and as maintained value.
How many lux are really needed: reference values
The starting point for every lighting design is the required maintained average illuminance for the visual task. For outdoor work areas, the regulatory reference is UNI EN 12464-2; for residential spaces, where there is no obligation, values of good design practice are used. The following table combines both.
| Environment / visual task | Recommended illuminance | Min. uniformity (U0) | Notes |
|---|---|---|---|
| Pedestrian path, walkway | 20–50 lx | 0.25 | Sufficient for safe orientation |
| Garden, green rest areas | 30–75 lx | 0.25 | Prefer multiple low-power light points |
| Porch, veranda, relaxation area | 75–150 lx | 0.40 | Reading and conversation comfort |
| Outdoor dining area, table | 150–200 lx | 0.40 | On the table plane, with CRI ≥ 90 |
| Main entrance, front door | 100–150 lx | 0.40 | Facial recognition and lock visibility |
| External stairs and level changes | 100 lx | 0.40 | Illuminate the riser, not the landing |
| Carport, covered parking | 75–100 lx | 0.40 | 200 lx if small maintenance tasks are performed |
| Work / maneuvering area outdoors | 150–300 lx | 0.40–0.50 | UNI EN 12464-2 reference |
| Commercial dehors, outdoor seating | 100–200 lx | 0.40 | Check municipal regulations |
| Pool edge | 50–100 lx | 0.40 | Avoid reflected glare on water |
An observation that makes the difference between an amateur and a professional project: the value to be respected is the maintained average illuminance, i.e., that at the end of the system's life and with dirty surfaces, not that on the day of commissioning. For this reason, a maintenance factor (MF) typically between 0.80 and 0.90 for closed LED luminaires in a clean outdoor environment, and up to 0.70 in dusty environments, is introduced into the calculations.
The total flux calculation formula
The total flux method (or utilization factor method) is more than sufficient for sizing outdoor ceiling lights in residential and small business settings. The formula is as follows.
Φtot = (E × S) / (U × MF)
where:
Φtot = total required luminous flux (lumens)
E = desired illuminance (lux)
S = area to illuminate (m²)
U = utilization factor (0.4–0.7 outdoors)
MF = maintenance factor (0.75–0.90)
How to choose the utilization factor U
The utilization factor represents the proportion of emitted flux that actually reaches the useful surface. Outdoors, it is always lower than indoors, because the walls and ceiling that in a room reflect light are absent. As a practical reference:
- U = 0.40–0.50 — completely open space, no reflecting surfaces, luminaires at high height (> 4 m).
- U = 0.50–0.60 — porch or gazebo with dark ceiling and one or two closed sides, height 2.5-3.5 m.
- U = 0.60–0.70 — semi-enclosed environment with light ceiling and walls, low height, controlled beam diffusers.
Three worked examples step by step
The theory is truly understood only by applying it. Let's look at three typical situations, with all the explicit steps.
Case 1 – 20 m² porch for relaxation area
Data: area 20 m², target illuminance 100 lx, light ceiling with walls on two sides (U = 0.60), clean environment (MF = 0.85).
Φtot = (100 × 20) / (0.60 × 0.85) = 2,000 / 0.51 = 3,922 lumens.
With an LED strip of 1,100 lm/m, about 3.6 linear meters are needed, ideally distributed over two or three parallel lines to guarantee uniformity. In terms of power, with an efficacy of 120 lm/W, we are at about 33 W total: less than an old incandescent bulb, to illuminate an entire porch at comfort level.
Case 2 – 12 m² dining gazebo
Data: area 12 m², target illuminance 180 lx on the table plane, open structure on the sides with dark wooden ceiling (U = 0.50), MF = 0.85.
Φtot = (180 × 12) / (0.50 × 0.85) = 2,160 / 0.425 = 5,082 lumens.
Here, however, a qualitative consideration comes into play: 180 lx constant throughout the gazebo would be excessive and not very atmospheric. The professional solution is layering: a dimmable linear ceiling light of about 3,000 lm for general lighting (adjustable to 30% during dinner) plus a suspended element focused on the table of about 1,500-2,000 lm. The total installed remains similar, but dynamic control multiplies the perceived quality.
Case 3 – Perimeter soffit on 30 linear meters
Here the goal is not illuminance on a surface but an architectural effect with a perimeter security function. The reasoning is reversed: start from the desired effect and verify the consumption.
With a 9.6 W/m strip on 30 meters, you get about 288 W total and 33,000 lm: a lot, perhaps too much for a residential context, and with a consumption that at 5 evening hours for 365 days exceeds 525 kWh per year. Dropping to a 4.8 W/m strip halves everything (144 W, about 16,500 lm) while still achieving a very present perimeter effect. Adding 40% dimming after 11:00 PM reduces annual consumption below 200 kWh, with a saving of over 60% and a much more respectful nighttime light impact.
Quick table: how many lumens and watts per square meter
For those looking for an immediate answer without going through the formula, here are the summary values, calculated with U = 0.55 and MF = 0.85, i.e., realistic average conditions.
| Area | Soft use (50 lx) | Relax use (100 lx) | Functional use (150 lx) | Indicative watts (relax, 120 lm/W) |
|---|---|---|---|---|
| 5 m² | 535 lm | 1,070 lm | 1,605 lm | ~9 W |
| 10 m² | 1,070 lm | 2,140 lm | 3,210 lm | ~18 W |
| 15 m² | 1,605 lm | 3,210 lm | 4,815 lm | ~27 W |
| 20 m² | 2,140 lm | 4,280 lm | 6,420 lm | ~36 W |
| 30 m² | 3,210 lm | 6,420 lm | 9,630 lm | ~54 W |
| 50 m² | 5,350 lm | 10,700 lm | 16,050 lm | ~89 W |
Practical rule to remember: for comfortable residential use in covered outdoor spaces, an average of 200-215 lumens per square meter is needed, equivalent to about 1.8 W/m² with good efficiency LEDs. Anyone proposing 5 or 6 W/m² is significantly oversizing, with consequences on costs, glare, and light pollution.
Uniformity and positioning: where the light goes, not just how much
An installation can have the total flux perfectly correct and still be unpleasant, if that flux is poorly distributed. The parameter that measures this quality is uniformity U0, defined as the ratio between minimum illuminance and average illuminance. A U0 of 0.40 means the darkest point receives 40% of the average: below this threshold, the eye clearly perceives shadow areas and the feeling of safety decreases.
To achieve good uniformity with ceiling lights and linear profiles, three simple and reliable geometric rules apply:
- Maximum spacing between point luminaires ≈ 1.5 times the installation height. At 2.8 m height, do not exceed 4.2 m between one point and another.
- Distance from walls ≈ half the spacing. Perimeter walls receive less flux and need to be served more closely.
- With continuous linear profiles, uniformity is intrinsically higher: the extended source eliminates the shadow cones typical of point sources. This is the main reason why, in contemporary design of porches and pergolas, the light line has largely replaced the traditional round ceiling light.
7. Color temperature, CRI, SDCM, and flicker: light quality
So far, we have talked about how much light is needed. Now we address an equally decisive and much more neglected topic: what kind of light it is. Two ceiling lights emitting exactly the same lumens can create perceptually opposite environments: one welcoming, natural, restful; the other cold, flat, almost hospital-like. The difference lies in four parameters that rarely appear in mass-market product sheets but are the hallmark of a professional product.
Correlated color temperature (CCT)
Expressed in kelvin, CCT describes the "shade" of white light by analogy with the color emitted by a black body heated to that temperature. Contrary to intuition, the higher the number, the cooler the light appears: 2,700 K is warm and amber, 6,500 K is cool and bluish.
| CCT | Name | Perception | Recommended outdoor application |
|---|---|---|---|
| 2,200 K | Amber / extra warm | Flame, sunset | Natural areas, wildlife protection zones, atmosphere |
| 2,700 K | Warm white | Intimate, welcoming | Residential porches, terraces, gazebos |
| 3,000 K | Warm white | Warm but crisp | The standard for residential outdoor |
| 4,000 K | Neutral white | Objective, energetic | Carports, commercial entrances, functional areas |
| 5,000–6,500 K | Cool white | Clinical, technical | Industrial, security, video surveillance |
| Variable CCT (tunable) | 2,700–6,500 K | Adaptive | Smart installations, multi-purpose dehors |
The design advice is clear: in residential outdoor settings, do not exceed 3,000 K. There are three reasons. First, perceptual comfort: warm light is associated with rest and evening socializing. Second, the impact on wildlife: the blue component of cool sources disorients insects, migratory birds, and bats disproportionately. Third, the perception of fog and humidity: warm light penetrates mist better and produces less luminous "veil" than cool light.
One final operational recommendation that prevents unpleasant results: within the same visual environment, CCT must be homogeneous. Seeing a 3,000 K line next to a 4,000 K one produces a "chromatic dirt" effect that no amount of lumens can compensate. The Ledpoint range allows precise selection of the hue in the warm white 2200-3500K, white 3800-5300K, and cool white 5500-8700K categories, as well as adjustable CCT solutions.
Color rendering index (CRI/Ra) and TM-30
CRI measures how faithfully a source renders object colors compared to an ideal reference. It is expressed on a scale up to 100 and is calculated as the average of the rendering on eight pastel chromatic samples (R1-R8). It is an imperfect metric but remains the universal commercial reference.
| CRI value | Rating | Visible effect outdoors | Where it is acceptable |
|---|---|---|---|
| < 70 | Poor | Dull greens, grayish skin tones | No residential applications |
| 70–79 | Sufficient | Recognizable but dull colors | Technical areas, external warehouses |
| 80–89 | Good | Correct rendering for everyday use | Minimum for residential outdoor |
| 90–95 | Excellent | Faithful plant greens and natural woods | Recommended for gardens and dining areas |
| > 95 | Reference | Almost solar rendering | Luxury hospitality, retail, photography |
The R9 value: the parameter that reveals the truth
There is one figure that exposes inflated CRI values: R9, the rendering of saturated red. It is not included in the average CRI calculation, and this is precisely why many cheap LEDs sacrifice it completely, reaching R9 values of zero or even negative while claiming CRI 80. The practical result is that the red of flowers, the wood of outdoor furniture, and especially people's skin tones appear dull and sickly. A professional product declares R9 ≥ 50, while high-end versions exceed 90.
For outdoor spaces where natural colors are appreciated (gardens, dining areas, dehors), choosing strips with CRI 90+ is an immediately perceptible investment. In the Ledpoint range, the Sunlike and Circadian Light lines push the concept further, reconstructing a spectrum much closer to sunlight.
SDCM and binning: chromatic consistency between luminaires
Imagine installing four identical linear ceiling lights under the same porch and discovering, once switched on, that one tends towards pink and another towards greenish. This is not a defect: it is binning tolerance, and it is measured in MacAdam steps (SDCM, Standard Deviation of Colour Matching).
| SDCM | Perception of difference | Product grade |
|---|---|---|
| 1–2 steps | Imperceptible even in direct comparison | High-end professional |
| 3 steps | Not perceptible in real use | Recommended quality standard |
| 4 steps | Visible when directly adjacent | Acceptable for non-contiguous applications |
| 5–7 steps | Clearly visible | Budget products, avoid in continuous lines |
The operational rule is simple: for any installation where two or more luminaires are visible simultaneously, request binning within 3 MacAdam steps and, when possible, purchase all material from the same production batch. This is a zero-cost precaution that eliminates one of the most frustrating and unrecoverable aesthetic defects.
Flicker and visual comfort: the invisible parameter
Flicker is the periodic oscillation of luminous flux due to the power supply. The eye does not consciously perceive it above 100 Hz, but the nervous system registers it anyway, and it is associated in the literature with visual fatigue, headaches, and, in susceptible individuals, more serious disorders. Outdoors, the stroboscopic effect adds to this: moving objects (a fan, fountain water, a ceiling fan blade) appear still or jerky, with safety implications.
The reference parameters are Percent Flicker and the Stroboscopic Visibility Measure (SVM). Good European practices indicate SVM ≤ 1.0 for environments where people stay. In practice, flicker depends almost entirely on the quality of the driver: a well-filtered constant current power supply produces practically zero flicker, while cheap drivers with low filtering capacity can exceed 40% modulation. For this reason, in direct 230 V installations, it is advisable to opt for specifically designed solutions, such as 230V anti-flicker drivers.
Glare and UGR outdoors
Outdoor visual comfort is mainly about glare control. A ceiling light mounted at 2.4 m with a clear diffuser and visible LEDs produces a luminance contrast between source and night background that can exceed 1:10,000, creating debilitating glare and, paradoxically, reducing the ability to see what is around it.
The countermeasures are four, in order of effectiveness: always use opal or microprismatic diffusers in positions within the field of view; increase the installation height when possible; reduce power while increasing the number of light points, distributing the flux over more, less bright sources; shield mechanically with fins, coves, or angular profiles that hide the source from direct view. This last point is the principle of light without luminaire: you see the effect of light on the surface, not the luminaire producing it. It is the approach that characterizes contemporary quality design and can be achieved simply and economically with linear profiles.
8. Where to install outdoor ceiling lights: 10 real-world scenarios
Each outdoor location presents a unique combination of exposure, structural constraints, aesthetic needs, and functional requirements. In this chapter, we address ten concrete scenarios, indicating for each the degree of protection, type of profile, color temperature, target illuminance, and specific errors to avoid. This is the section to consult when moving from theory to your own project.
Deep porch and canopy
This is the classic location for outdoor ceiling lights, and apparently the simplest: the luminaire is sheltered from vertical rain and does not receive direct sunlight. However, this simplicity is deceptive, because the porch concentrates three less intuitive critical issues: poor air circulation that penalizes dissipation, rising and condensing humidity that stagnates on cold days, and wind gusts that can push oblique rain all the way to the back of the structure.
Recommended configuration: ceiling-mounted or suspended waterproof profile, IP65, opal diffuser, 3,000 K, CRI 90, illuminance 100-150 lx. For the thermal component, avoid embedding the profile in blind coves without air circulation: if the architectural design requires it, go up one profile section. Typical mistake to avoid: installing the profile flush with the ceiling with a flat top surface and without drainage, creating a collection surface for condensation dripping from the slab.
Wooden gazebo and pergola
The gazebo poses a specific structural problem: wood moves. A wooden structure exposed outdoors varies dimensionally with humidity in a not insignificant way, and an aluminum profile rigidly fixed to two different beams can be subjected to considerable tension.
Recommended configuration: suspended round profile or linear profile fixed to a single beam, IP65, 2,700-3,000 K, dimmable, general illuminance 75-100 lx integrated with a point focused on the table. Fixing should be done with slots rather than round holes, to absorb differential movements. Pre-treat the wood with a preservative and never fix directly onto unseasoned wood. For suspensions, adjustable suspension cables allow height calibration on site, which is valuable on structures that are not perfectly level.
Bioclimatic pergolas and louvered structures
Bioclimatic pergolas present a particular challenge: when the louvers are open, the luminaire is effectively in an exposed outdoor location. Many installations fail because they are designed considering the closed configuration as the reference condition.
Recommended configuration: IP66 as a minimum, profile with drainage, A2 stainless hardware (A4 in coastal environments), cables with UV-resistant sheathing. If integrating into the perimeter aluminum beams of the structure, verify that the cavity does not act as a rainwater drainage channel: this is a recurring and devastating error.
Facade and architectural lighting
Illuminating a facade with continuous lines is one of the most requested applications today and one where component quality is immediately visible, because grazing light on a wall amplifies any non-uniformity: a dead LED, a CCT difference, a shadow cast by a poorly positioned bracket are visible from tens of meters away.
Recommended configuration: IP66, jointable profiles with waterproof joining kits, microprismatic diffuser for controlling upward emission, mandatory binning within 3 steps, 3,000 K or 4,000 K depending on facade materials. Note on ULOR (Upward Light Output Ratio): many Italian regional regulations on light pollution impose zero flux emitted towards the upper hemisphere for luminaires installed outdoors. We discuss this extensively in chapter 13.
Perimeter soffit
The light line under the eaves is an elegant solution but as insidious as it is elegant. The eaves are by definition the point where all the water from the roof slope is concentrated, and in case of blockage or overflow, the ceiling light is hit by a volume of water far greater than direct rain.
Recommended configuration: IP66 minimum, IP67 in areas with intense precipitation, profile installed with the emission face facing downwards and never upwards, lateral cable entry, distance from the gutter sheet sufficient to avoid direct dripping onto the body. The practical check to do before installation is trivial but conclusive: wet the gutter with a hose and observe where the flow ends up.
Perimeter walls and fences
Lighting boundary walls has a dual function: defining boundaries and deterrence. Here the ceiling light works in conditions of total exposure and often at low height, which introduces the issue of mechanical resistance.
Recommended configuration: IP66 and IK08 minimum, 2,700-3,000 K to avoid creating unpleasant cold light barriers for neighbors, low illuminance (30-50 lx) with strictly controlled downward emission. The most concrete risk in this scenario is not technical but relational: light invading neighboring properties or windows is one of the most frequent causes of neighbor disputes in the lighting field. Profiles with microprismatic diffusers or mechanical shielding solve the problem at the root.
External stairs and level changes
External stairs are the highest risk point for accidents in the entire outdoor space, and lighting here has a function that is primarily about safety. The guiding principle is counterintuitive: you should not illuminate the step, you should make its edge readable.
Recommended configuration: grazing light from the side or from the riser, 45° angular profile, IP65-IP67 if subject to washing or water accumulation, 100 lx, CCT 3,000 K. Avoid frontal light directed at the person climbing at all costs: it causes glare and nullifies the perception of level changes, achieving the opposite effect. Also pay attention to cast shadows: a single source placed high produces long shadows that can mask the steps.
Carport and covered parking
Here the need is purely functional and priorities change: objective light is needed that allows maneuvering, finding objects in the trunk, recognizing license plates and people. This is one of the few residential scenarios where 4,000 K is fully justified.
Recommended configuration: IP65, 4,000 K, 75-100 lx (up to 200 lx if small maintenance tasks are performed), linear profile running longitudinally to the entry direction. Combining with a motion sensor is particularly recommended: it reduces consumption to a few kWh per year and adds a deterrent function. The sensors range includes PIR and microwave solutions suitable for this application.
Pool edge and wet areas
The presence of water introduces stringent regulatory constraints related to the safety zones defined by standard CEI 64-8 section 702. Simplifying: zone 0 is inside the pool, zone 1 extends up to 2 m from the edge and 2.5 m in height, zone 2 for a further 1.5 m. In zones 0 and 1, only very low safety voltage (SELV, 12 V) luminaires with very high IP requirements are allowed.
Recommended configuration (outside zone 1): IP67, SELV 12 V or 24 V with power supply positioned outside the zone, A4 hardware mandatory (chlorine is extremely aggressive), 3,000 K, illuminance 50-100 lx with control of specular reflections on the water surface. Resistance to chlorine and treatment products must be explicitly verified: many luminaires that brilliantly pass salt spray tests fail in chlorinated environments.
Marine environment and aggressive climates
We close with the most severe scenario. Within five kilometers of the coast, the salt aerosol carried by the wind attacks aluminum, steel, and even gaskets at a speed that surprises those who do not have direct experience. Installations made with "generic outdoor" components in these contexts show signs of corrosion after the first season.
Recommended configuration: IP66 minimum, anodizing 20-25 µm or powder coating with primer, hardware exclusively in A4 stainless steel (AISI 316), silicone gaskets, completely encapsulated connections, avoid pairing different metals that trigger galvanic corrosion (never a common steel screw on aluminum in a saline environment). Maintenance should be intensified: washing with fresh water at least twice a year, a simple operation that drastically extends the life of the system.
Summary table of scenarios
We summarize all cases in a single quick-reference table, designed to be printed and taken to the site.
| Scenario | IP / IK | CCT | Target lux | Diffuser | Main criticality |
|---|---|---|---|---|---|
| Deep porch | IP65 / IK07 | 3000 K | 100–150 | Opal | Air circulation |
| Wooden gazebo | IP65 / IK07 | 2700–3000 K | 75–100 | Opal | Wood movement |
| Bioclimatic pergola | IP66 / IK08 | 3000 K | 100 | Opal | Exposure with louvers open |
| Facade | IP66 / IK08 | 3000–4000 K | variable | Microprismatic | ULOR and uniformity |
| Soffit | IP66/67 / IK08 | 3000 K | 30–75 | Opal/microprism. | Water concentration |
| Perimeter walls | IP66 / IK08 | 2700–3000 K | 30–50 | Microprismatic | Intrusive light on neighbors |
| External stairs | IP65/67 / IK08 | 3000 K | 100 | Opal | Glare and shadows |
| Carport | IP65 / IK08 | 4000 K | 75–200 | Opal | Management with sensor |
| Pool edge | IP67 / IK09 | 3000 K | 50–100 | Opal | CEI 64-8 zones, chlorine |
| Marine environment | IP66+ / IK08 | 3000 K | variable | Polycarbonate | Salt corrosion, A4 |
9. Step-by-step installation: the professional procedure
An impeccable project can be undone by half an hour of hasty installation. In this chapter, we describe the complete procedure that we follow and recommend, from preliminary planning to final testing. Each phase contains the checks that, in our experience, make the difference between a system that is forgotten and one that calls the installer every winter. Before starting, a non-negotiable premise: work on the fixed electrical system must be carried out by qualified personnel according to DM 37/08, and each operation must be carried out with the system isolated and verified to be de-energized.
Phase 1 – Planning and preliminary verification
The time spent here pays off many times over. Planning answers five questions that, if left open, turn into improvisations at height with a drill in hand.
Support verification
The mounting surface must be flat, dry, solid, and stable. On degraded plaster or untreated wood, no fixing is reliable. A linear profile fixed to a non-planar surface does not close the gaskets uniformly: a flatness tolerance exceeding 1 mm per meter is already sufficient to compromise the IP seal. If the surface cannot be recovered, provide a distribution plate or suspension installation.
Cable routing and power supply location
Deciding in advance where the driver will be is the choice with the most consequences for the entire project. The power supply must be in a dry, ventilated, inspectable place as close as possible to the load. An internal technical panel, a meter compartment, a waterproof IP65 box in a sheltered position: never in a blind box embedded in the wall, never exposed to direct sunlight, never in a compartment where summer temperatures exceed the declared Ta.
Voltage drop verification
This is the most overlooked calculation and the most frequent cause of what users describe as "LEDs fading towards the end." In very low voltage, drops are percentage-wise enormous: losing 1 V on a 24 V system means losing 4% of the voltage, compared to 0.4% on a 230 V system. The following table shows the recommended maximum cable lengths between driver and strip to keep the drop within 3%.
| Load | Voltage | Cable 2×0.75 mm² | Cable 2×1.5 mm² | Cable 2×2.5 mm² |
|---|---|---|---|---|
| 30 W | 24 V | ~9 m | ~18 m | ~30 m |
| 60 W | 24 V | ~4.5 m | ~9 m | ~15 m |
| 100 W | 24 V | ~2.7 m | ~5.4 m | ~9 m |
| 30 W | 12 V | ~2.2 m | ~4.5 m | ~7.5 m |
| 60 W | 12 V | ~1.1 m | ~2.2 m | ~3.7 m |
The numbers speak for themselves and lead to two operational conclusions. First: outdoors, where distances are almost always greater than indoors, 24 V is clearly preferable to 12 V (for the same power, it allows four times longer runs). Second: when distances are truly significant, the correct strategy is to bring 230 V close to the load and install a waterproof driver there, rather than pulling tens of meters of low voltage. For more extensive systems, 48V systems offer an additional margin.
Phase 2 – Profile preparation
Working on the profile determines the quality of the final result, both aesthetically and functionally. It is a bench operation, to be performed before going up the ladder.
- Cut to size. Use an aluminum miter saw with fine-tooth blade or a fine-tooth hacksaw with a guide. The cut must be perfectly orthogonal: a crooked cut of 1° prevents the end cap from seating evenly and compromises the seal.
- Deburring. Remove all burrs with a fine file and sandpaper. Burrs cut the gaskets, damage cable insulation, and can damage the strip's PCB.
- Channel cleaning. Vacuum or blow out chips and aluminum dust: metal chips inside a powered profile are a potential short circuit.
- Degreasing. Wipe the bonding surface with isopropyl alcohol and allow it to evaporate completely. 3M double-sided tape develops 50% of its adhesion in 20 minutes and 100% after 72 hours at room temperature: on an un-degreased surface, it never reaches full value.
- Drilling for fixings. Drill holes now, not on site. Where the profile will be subject to expansion, make slots instead of round holes.
Phase 3 – LED strip installation
Applying the strip seems like the simplest operation, yet it is where irreversible errors are concentrated, because a strip with 3M tape that is removed and repositioned loses most of its adhesion and with it the thermal contact with the profile.
- Check the dry length before removing the protective film, ensuring that the strip's cut points fall where needed.
- Cut only on the marked lines, at the copper pads. A cut in the wrong place makes the entire subsequent segment unusable.
- Apply starting from one end and pressing progressively with a soft cloth, avoiding air bubbles: each bubble is a thermal insulation point.
- Respect the minimum bending radius. Standard strips should not be bent sideways or at sharp corners; for corners, use dedicated connectors or foldable strips.
- Never power a strip still rolled on the reel, not even for a quick test: without dissipation, the temperature rises to destructive levels in seconds.
Phase 4 – Wiring and connections
Connections are the point where the reliability of an outdoor system is definitively decided. A poorly made joint does not fail immediately: it oxidizes slowly, increases its resistance, heats up, and fails after two or three years, typically in the middle of winter.
The hierarchy of connections, from best to unacceptable
| Method | Outdoor reliability | Notes |
|---|---|---|
| Soldering + adhesive-lined heatshrink | Excellent | The professional standard; internal adhesive seals |
| IP67/IP68 waterproof crimp connectors | Very good | Ideal for inspectable joints |
| Terminal blocks in waterproof IP65 box | Good | Only with correct cable glands and verified tightening |
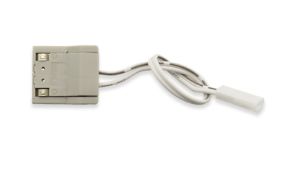
| Clip-on PCB connectors | Acceptable only inside already sealed volumes | Convenient for testing, not recommended as permanent outdoor connections |
| Unprotected screw terminals | Insufficient | Rapid oxidation |
| Electrical tape | Unacceptable | Loses adhesion, traps moisture, triggers corrosion |
Two additional precautions that make the difference. First: observe polarity and verify it before sealing; LEDs are diodes and do not work if reversed, and on CCT or RGB strips, a reversal can damage the controller. Second: always provide a drip loop in the cable before entering the luminaire, so that water running along the cable drips at the lowest point instead of reaching the cable gland. This is a three-second detail that eliminates one of the most common entry paths.
Phase 5 – Sealing and closing
Closing the system is the operation that "certifies" the IP rating. It must be carried out methodically, in a dry environment, and possibly on a day with low relative humidity.
- Inspect the gaskets: they must be clean, intact, correctly seated in their groove along the entire perimeter, without twists or overlaps.
- Insert the diffuser: snap-in or sliding depending on the profile, without forcing that could crack the polycarbonate at the edges.
- Mount the end caps: with their gasket and, where applicable, with a thin layer of neutral oxime silicone. Never use acetic silicone (the one that smells like vinegar): it releases acetic acid that corrodes copper and aluminum.
- Progressive and cross-tightening of screws, in two or three passes, to achieve uniform compression of the gasket.
- Seal the interface with the support: for wall mounts, a bead of neutral silicone on the upper and side edges, leaving the lower side open to allow any drainage. Sealing all four sides means creating a pocket that collects water without letting it out.
Phase 6 – Testing and commissioning
Testing is not switching on and seeing if it works. It is the verification that the system operates within the expected parameters, and it allows you to catch in five minutes problems that would otherwise emerge in two years.
- Measure no-load and loaded voltage at the beginning and end of the run: the deviation should not exceed 3-5%.
- Thermal check after 60 minutes of continuous operation: the surface temperature of the profile should not exceed 55-60 °C by touch under normal ambient conditions. An infrared thermometer costing a few euros makes this check immediate.
- Visual uniformity check with the system on and in the dark, from all intended viewing positions.
- Seal test: with the system off and cold, spray water with a hose on the luminaire from multiple directions for at least one minute, then wait and check for internal condensation.
- Check electrical protections: RCD trip, continuity of the protective conductor in Class I systems.
- Documentation: note the strip model, CCT, batch, power, driver model, and wiring diagram. In five years, when a chromatically compatible replacement is needed, this sheet will be worth gold.
10. Power supplies, dimming, and smart control
We have already anticipated that the power supply is the component that decides the life of the system. This chapter addresses it systematically, together with the topic of control, because in contemporary outdoor lighting, intelligent management is not a luxury: it is the main tool for energy savings and reducing light pollution.
Constant voltage and constant current: which one is needed
The first choice is topological and depends on the load. LED strips almost always work at constant voltage (CV), because they already integrate limiting resistors on the PCB; power modules and COBs work instead at constant current (CC).
| Driver type | Controlled quantity | Typical load | Advantage |
|---|---|---|---|
| Constant voltage (CV) | Fixed 12 / 24 / 48 V | LED strips, Neon Flex, bars | Parallelable loads, simple sizing |
| Constant current (CC) | 350 / 500 / 700 mA | Power modules and COBs | Maximum flux and thermal stability |
The dedicated range can be found in the 24V power supplies and constant current power supplies sections.
How to correctly size a power supply
Sizing requires three steps and a margin. The margin is what almost everyone forgets, and it determines whether the driver will last three years or fifteen.
Pdriver = Pstrip (W/m) × L (m) × 1.25
The coefficient 1.25 represents the minimum 25% margin. Outdoors, with high ambient temperatures, it is prudent to increase to 1.3.
Practical example: 8 meters of 14.4 W/m strip absorb 115.2 W. With a 25% margin, at least 144 W is needed: so a 150 W power supply is chosen. A 120 W driver on this load would operate at 96% of capacity, heating up enormously and reducing its useful life to a fraction of the declared one.
Three important clarifications that are often overlooked:
- Thermal derating: many drivers declare nominal power at 25 °C ambient and progressively reduce it above 40-50 °C. Outdoors, always check the derating curve: a 150 W driver at 25 °C may be worth only 105 W at 55 °C.
- Inrush current: at switch-on, drivers absorb currents 20-40 times higher than nominal for a few milliseconds. With many drivers on the same line, this can trip the circuit breaker: the solution is to distribute them over multiple circuits or use appropriate trip curves.
- Power factor (PF): above 25 W, regulations require power factor correction. A PF ≥ 0.9 reduces the absorbed current for the same useful power and limits network disturbances.
Dimming: technologies compared
Being able to adjust light intensity outdoors is what transforms a functional system into a livable one. The same ceiling light that at 100% serves for dinner can drop to 15% after midnight, maintaining visual orientation and reducing consumption and disturbance. The available technologies are not equivalent.
| Technology | Dimming depth | Pros | Cons |
|---|---|---|---|
| PWM on low voltage | 0–100% | Cost-effective, no chromatic shift | Possible flicker if frequency is low |
| 0/1-10V | 1–100% | Robust, simple, suitable for long runs | Requires dedicated control line |
| DALI / DALI-2 | 0.1–100% | Addressable, diagnostics, professional standard | Higher cost and complexity |
| DMX512 | 0–100% per channel | Scenographic, dynamic, RGB/RGBW | Oversized for simple residential use |
| Wireless (ZigBee, RF, Wi-Fi) | 1–100% | No additional cabling, home automation integration | Check range through exterior walls |
| TRIAC (phase-cut) | 10–100% | Compatible with existing wall dimmers | Risk of flicker and noise, compatibility must be verified |
For residential outdoor use, the most effective combination in our experience is constant voltage driver + high-frequency PWM receiver controlled via radio or ZigBee: low cost, no additional control cabling, integration with home automation scenarios. The range includes monochromatic dimmers, CCT controllers, 0/1-10V and ZigBee systems.
Sensors and automation: where real savings are made
Automation applied to outdoor lighting yields savings that no other optimization can match, simply because the most efficient light is the one that is not turned on when it is not needed.
Dusk sensor
Turns the light on and off according to natural light. By eliminating the risk of forgetting to turn it on during the day, it reduces operating hours by 15-25% compared to manual control. It must be installed in a position not influenced by the light from the system itself, otherwise it triggers continuous on/off cycles.
PIR or microwave presence detector
In transit areas — paths, carports, service entrances — switching to an on-demand logic reduces operating hours by 80-95%. PIR detects heat variations and is economical but sensitive to hot air currents; microwave sensors detect movement through non-metallic materials and are more stable outdoors, but require careful sensitivity adjustment to avoid false alarms.
Two-level logic (corridor function)
This is the most elegant strategy: the system remains on at 10-20% as orientation lighting and rises to 100% only when presence is detected. It eliminates the unpleasant effect of total darkness, maintains the security function, and preserves almost all of the energy savings.
Timed scheduling and night-time reduction
During very low traffic hours (typically from one to six in the morning), a reduction to 30-40% is imperceptible in terms of perceived safety but has a substantial impact on annual consumption. Combining dusk sensor, night-time reduction, and presence detection, an outdoor system can reduce annual consumption by 60-75% compared to simple manual evening switching.
Overvoltage protection
A topic as neglected as it is costly to ignore. Outdoor systems, with their long lines often at height, act as antennas for lightning-induced overvoltages, even when the lightning strikes hundreds of meters away. LED electronics, powered at very low voltage, are particularly vulnerable.
Proportionate countermeasures for a residential context are: a Type 2 SPD (Surge Protective Device) on the main distribution board, a driver with integrated surge protection of at least 2 kV common mode (professional models reach 4-10 kV) and, in particularly exposed installations such as isolated pergolas or garden poles, a dedicated SPD at the start of the outdoor line. The cost is on the order of a few tens of euros against the risk of losing the entire system in a summer thunderstorm.
11. Scheduled maintenance and troubleshooting
A well-designed outdoor LED ceiling light requires very little maintenance, but very little does not mean none. The difference between a system that lasts ten years and one that lasts twenty lies in three operations a year that take less than an hour total. In this chapter, we define the maintenance plan and provide a diagnostic table to independently resolve the most frequent problems.
Annual maintenance plan
| Frequency | Operation | Objective | Time |
|---|---|---|---|
| 2 times/year | Clean the diffuser with a microfiber cloth and neutral soapy water | Recover up to 15-20% of flux lost to dirt | 10 min |
| 1 time/year | Visual inspection for condensation, stains, internal halos | Detect infiltration before failure | 5 min |
| 1 time/year | Check tightening of screws and brackets | Compensate for loosening from thermal cycles | 10 min |
| 2 times/year (marine areas) | Rinse with fresh water | Remove salt deposits | 15 min |
| every 2-3 years | Check gasket elasticity | Replace before the seal fails | 20 min |
| every 3-5 years | Instrumental check of voltage and temperature | Identify driver degradation | 20 min |
A warning on cleaning: never use solvents, denatured alcohol in large quantities, ammonia, or abrasive products on polycarbonate. These products trigger crazing, a surface micro-cracking that irreversibly opacifies the diffuser and compromises its mechanical resistance. Warm water and neutral soap are sufficient in 99% of cases.
Diagnostic table: symptom, cause, solution
The following table collects the problems we encounter most frequently in technical support, with the real causes in order of probability. In most cases, the fault is not where it seems.
| Symptom | Probable causes | Solution |
|---|---|---|
| Light fades towards the end of the line | Voltage drop: undersized cable or run too long | Increase cable gauge, feed from both ends, switch to 24/48V |
| Visible flicker | Inadequate or overloaded driver; incompatibility with dimmer; oxidized connection | Check load against capacity, replace with low-ripple driver, redo joints |
| One section has gone out | Broken copper trace due to bending or corrosion | Cut at the nearest pad and replace the section; check for moisture ingress |
| Internal condensation in the diffuser | Sealing done in a humid environment; gasket misaligned; inadequate cable gland | Open, dry, reassemble on a dry day with silica gel; check all seals |
| Color has become uneven over time | Phosphor degradation due to overtemperature; poor initial binning | Check thermal performance; for replacement, demand binning ≤ 3 SDCM |
| Diffuser has yellowed | PMMA or PC without UV protection exposed to sunlight | Replace with UV-stabilized polycarbonate |
| Luminaire turns off after a few minutes and restarts | Driver thermal protection triggered | Improve ventilation, move the driver, reduce load |
| RCD trips when it rains | Infiltration causing earth leakage | Isolate immediately and have the system checked by a qualified technician |
| Audible hum | Magnetostriction in the driver; incompatibility with TRIAC dimmer | Replace the driver or change dimming technology |
| General light reduction after a few years | Chronic overtemperature (Tj too high) | Review profile sizing; reduce power density |
Why LEDs "don't last long": the six real causes
This is perhaps the most frequently asked question of all, and it stems from a legitimate expectation: if the manufacturer claims 50,000 hours, why did my ceiling light fail after two years? The answer, in almost all cases, falls into these six categories.
- Insufficient heat dissipation (by far the number 1 cause). Strip without a profile, undersized profile, recess without air circulation. As shown in the table in chapter 4, the jump from 65 to 105 °C in junction temperature reduces life by four times.
- Poor quality or overloaded power supply. This is the component that fails first and takes the luminaire with it.
- Water infiltration or condensation. Degradation is slow and invisible until it becomes a clear failure.
- Unfiltered grid overvoltages. A single event can irreversibly damage the driver.
- Thermal cycles and mechanical stress. Uncompensated expansions that fatigue SMD component solder joints.
- Undersized cables. Voltage drops cause the driver to operate outside its optimal point, increasing its internal temperature.
The common denominator of all six causes is that none concerns the LED chip itself. This is why the conscious choice of the system (profile, driver, wiring, sealing) matters much more than the brand of chip printed on the box.
12. Costs, consumption, and return on investment (TCO)
Discussing price without discussing total cost of ownership is, in outdoor lighting, an economic error before a technical one. An outdoor system typically operates between 1,200 and 2,000 hours per year for ten or fifteen years: the purchase price often represents less than a third of what that system will actually cost. In this chapter, we present all the numbers.
How much does an outdoor ceiling light really consume
The consumption calculation is immediate: power in kW multiplied by the hours of operation. The table translates this formula into concrete figures, considering an energy cost of €0.28/kWh and average use of 5 hours per day for 365 days (1,825 hours/year).
| Installed power | Indicative flux | Annual consumption | Annual cost | Cost over 10 years |
|---|---|---|---|---|
| 10 W | ~1,200 lm | 18.3 kWh | €5.11 | €51 |
| 20 W | ~2,400 lm | 36.5 kWh | €10.22 | €102 |
| 30 W | ~3,600 lm | 54.8 kWh | €15.33 | €153 |
| 50 W | ~6,000 lm | 91.3 kWh | €25.55 | €256 |
| 100 W | ~12,000 lm | 182.5 kWh | €51.10 | €511 |
| 200 W (extensive system) | ~24,000 lm | 365 kWh | €102.20 | €1,022 |
The figure that always surprises is how contained the energy cost of a well-designed residential outdoor LED system is: a 20 W ceiling light on for five hours a day costs just over ten euros per year. This is precisely why, with LED, the economically relevant variable is no longer consumption but reliability: a premature replacement of the luminaire costs more than ten years of energy.
How much does it cost to install a system
The cost items of an outdoor ceiling light system built with profiles and LED strips are five. We provide indicative ranges for a medium-complexity residential installation, useful for orienting yourself in a quote.
| Item | Typical incidence | Notes |
|---|---|---|
| LED strips | 20–30% | Varies greatly with density, CRI, and binning |
| Profiles, diffusers, end caps, brackets | 25–35% | The item to not skimp on |
| Power supplies and control | 15–25% | Increases with dimming and home automation |
| Cables, connectors, stainless hardware | 5–10% | Often underestimated in quotes |
| Labor | 20–40% | Depends on accessibility and masonry work |
One element worth noting: outdoors, replacement labor is almost always higher than first installation labor, because it involves disassembly, restoration, and sometimes height access. This greatly amplifies the economic advantage of a reliable component: saving €40 on a power supply that will force a €200 intervention in three years is a bad deal.
Calculating the return on investment
Let's consider a realistic refurbishment case: a porch and perimeter illuminated with six 150 W halogen luminaires (900 W total), on for 4 hours a day, replaced with a 110 W total linear LED system with night-time dimming and dusk sensor.
| Item | Halogen system | Refurbished LED system |
|---|---|---|
| Installed power | 900 W | 110 W |
| Effective hours/year | 1,460 | 1,240 (dusk sensor + reduction) |
| Annual consumption | 1,314 kWh | 111 kWh |
| Annual energy cost | €368 | €31 |
| Lamp replacements/year | ~€45 | €0 |
| Total annual cost | €413 | €31 |
| Annual savings | €382 (−92%) | |
| Estimated investment | ~€1,100 materials + installation | |
| Payback period | ~2 years and 10 months | |
| Net savings over 15 years | ~€4,630 | |
Payback under three years is typical for outdoor refurbishment from traditional technologies, and drops below eighteen months in commercial establishments with extended operating hours. The tables also do not account for the value of light quality, comfort, and additional usability of the outdoor space, which are real benefits but not monetizable in a budget line.
Tax deductions and incentives
In Italy, the replacement of lighting fixtures can in some cases fall among the eligible works, typically when included in a building renovation or energy efficiency intervention. The conditions, rates, and caps change frequently and depend on the type of property and intervention. Always check with your tax advisor or a qualified technician before starting work, and keep all documentation (invoices, technical data sheets, declarations of conformity) intact. We note that regulatory information on tax matters changes rapidly: what is reported here is purely indicative and does not constitute tax advice.
13. Regulations, electrical safety, and light pollution
The regulatory dimension of outdoor lighting is more complex than most users imagine, and ignoring it can lead not only to technical risks but also to administrative sanctions. In Italy, national technical standards, European product directives, and regional regulations on light pollution coexist, the latter often more stringent than expected. Let's look at the essential framework.
Reference technical standards
| Reference | Subject | Relevance to outdoor ceiling lights |
|---|---|---|
| CEI 64-8 | Electrical installations | Section 702 for pools, 714 for outdoor lighting |
| EN 60598-1 / -2-x | Safety of luminaires | Construction requirements and product tests |
| IEC/EN 60529 | Degrees of protection IP | Definition and tests of the IP code |
| EN 62262 | Degrees of protection IK | Resistance to mechanical impacts |
| UNI EN 12464-2 | Lighting of outdoor workplaces | Illuminance and uniformity values |
| UNI 10819 | Limits on upward light dispersion | Technical basis of regional laws |
| DM 37/08 | System safety | Obligation for qualified installer and declaration of conformity |
| EU Reg. 2019/2020 and 2019/2015 | Ecodesign and energy labeling | Minimum efficiency and information requirements |
Light pollution: concrete obligations
This is the point where residential projects most often find themselves out of compliance without knowing it. Numerous Italian regional laws require, for luminaires installed outdoors, a luminous flux emitted towards the upper hemisphere equal to zero (ULOR = 0%), with limits on luminance and intensities at certain angles. Some regions also prescribe switching off or reduction during night hours and limits on color temperature.
The practical implications for those installing outdoor ceiling lights are three and are easily respected if known in advance:
- Orient emission downwards: ceiling lights and linear profiles installed with downward emission are by design compliant; problematic are globe luminaires, those with unshielded up&down emission, and floodlights aimed upwards.
- Limit lateral dispersion: with microprismatic diffusers or mechanical shielding, avoiding illuminating neighboring properties.
- Check the regulations of your Region and Municipality: before designing, especially near astronomical observatories or protected areas, where constraints are stricter.
It is worth emphasizing that these obligations are not a bureaucratic complication for its own sake. Light dispersed upwards is, by definition, paid-for and unused light: respecting the limits almost always means consuming less and achieving a better visual result, because the light remaining on the useful surface increases contrast and legibility of the space.
Impact on fauna and responsible choices
Ecological research in recent years has clearly documented the effect of artificial night light on pollinating insects, bats, migratory birds, and amphibians. The most problematic component is short-wavelength radiation (blue), abundant in high color temperature sources.
The good design practices that reduce impact without sacrificing functionality are four: prefer low CCT (2,200-3,000 K) in green areas and near hedges, trees, and watercourses; strictly orient the flux downwards; use scheduled night-time dimming; illuminate only what is needed, when needed. The collateral advantage is not negligible: warm, shielded light attracts significantly fewer insects, with immediate benefits on the livability of porches and outdoor dining areas.
Markings and documentation to demand
At the time of purchase, a professional product must be accompanied by verifiable documentation. The absence of these elements is in itself a warning signal on quality.
- CE marking and the manufacturer's EU declaration of conformity.
- Technical data sheet with flux, power, CCT, CRI, IP, IK, Ta, insulation class, and declared useful life (L70/L80 with relative B).
- Photometric file (IES or LDT) for design verification, essential in a professional context.
- RoHS declaration and WEEE information for end-of-life.
- Explicit warranty conditions regarding outdoor use conditions.
14. Building a custom outdoor ceiling light: the Ledpoint method
We come to the most operational and, for many readers, the most interesting part. Building a custom outdoor ceiling light by combining an LED strip, profile, and power supply is not a crafty workaround: it is the approach that allows you to achieve exactly the length, power, color temperature, and light quality required by the project, often at a lower cost than a finished luminaire of the same level. Here is the method in eight steps.
Step 1 – Define the lighting objective
Before looking at any catalog, answer three questions: what surface do I need to illuminate, with what illuminance, for what activity? From here, applying the formula from chapter 6, the total required flux is derived. Without this number, every subsequent choice is arbitrary.
Step 2 – Choose the LED strip
The selection is made on five parameters, in this order: flux per meter (which, divided by the total flux, gives the required meters), color temperature, CRI, LED density per meter (based on the desired uniformity), and voltage. The Ledpoint LED strips catalog is filterable by each of these criteria; for outdoor use, we recommend starting from the high efficacy selection.
Step 3 – Select the profile
The profile must be chosen by simultaneously verifying dimensional compatibility (channel width relative to the strip, with at least 1-2 mm margin), thermal capacity (according to the W/m table in chapter 4), achievable IP rating with the intended gasket kit, and mounting geometry suitable for the structure. The complete range is in the profiles section, with waterproof versions filterable among the waterproof profiles. For special requirements, there is also a custom profiles service.
Step 4 – Choose the diffuser
As seen in chapter 3: opal for positions in the field of view, microprismatic for emission control, clear only where the source is not visible. Check compatibility with the chosen profile in the diffusers section and consider that each diffuser introduces a flux loss to be accounted for in sizing.
Step 5 – Size the power supply
Apply the formula from chapter 10 (linear power × meters × 1.25), verify the IP rating required by the installation location, and check the thermal derating curve. The selection is available in the power supplies section.
Step 6 – Define the control system
Decide now, not later, whether the system will be dimmable and with what technology, because the choice influences the type of driver. Options range from the simple monochromatic dimmer to ZigBee systems, up to professional solutions with DMX and DALI decoders. Consider possible integration with presence or dusk sensors.
Step 7 – Complete with sealing and fixing accessories
The minimum list for a professional outdoor installation includes: end caps with gaskets, IP67 cable glands, perimeter gaskets, fixing brackets or clips, A2 or A4 stainless hardware, cable of adequate gauge, adhesive-lined heatshrink tubing, neutral oxime silicone. The items are available in the end caps, mounting brackets, cables, and accessories sections. For continuous lines, profile joints are also needed.
Step 8 – Verify and assemble
Before final sealing, always perform a bench test: power the complete system, verify ignition, uniformity, absence of flicker, and temperature after one hour. Only then proceed with closing and installation according to the procedure in chapter 9.
Complete example: linear ceiling light for a 20 m² porch
We close with a complete bill of materials, to make the method immediately applicable.
| Element | Choice | Rationale |
|---|---|---|
| Objective | 20 m², 100 lx, relaxation area | Φ = 3,922 lm (chapter 6) |
| Strip | 9.6 W/m, 3000 K, CRI 90, 120 LED/m, 24 V | Good efficiency/uniformity compromise |
| Length | 2 lines of 2 m = 4 m total | ~4,400 lm, superior uniformity on two lines |
| Profile | 2 × waterproof profile 21×10 mm | Adequate for 9.6 W/m, minimal aesthetics |
| Diffuser | Opal polycarbonate | No glare, impact resistance |
| Total power | 38.4 W | 4 m × 9.6 W/m |
| Power supply | 24 V – 60 W IP67 | 38.4 × 1.25 = 48 W → next size up |
| Control | PWM receiver + remote control/ZigBee | Dimming for evening scenarios |
| Accessories | 4 end caps with gasket, 2 cable glands, brackets, A2 screws | Guaranteed IP65 seal |
| Annual consumption | ~70 kWh (5 h/day) = about €20/year | |
15. The 15 most common mistakes (and how to avoid them all)
We conclude the technical part with a control checklist. These fifteen mistakes, in our support experience, cover almost all the problems reported to us on outdoor installations. Scanning them before starting work takes three minutes and can avoid years of problems.
- Using an LED strip without a dissipating profile: this is the number one mistake: it reduces useful life by up to four times.
- Confusing the IP rating of the component with that of the system: IP is a property of the complete installation.
- Installing the cable entry facing upwards: a direct invitation to infiltration by gravity.
- Sealing all four sides in wall mounting: creates a pocket that collects water without draining it.
- Using acetic silicone: corrodes copper and aluminum; outdoors, neutral oxime silicone is required.
- Undersizing the power supply: without the 25% margin, the driver operates at its limit and fails prematurely.
- Placing the driver in a blind, hot compartment: every 10 °C increase halves the life of the capacitors.
- Undersizing the cable gauge in low voltage: causes voltage drops and uneven light.
- Using electrical tape or unprotected terminals outdoors: guaranteed oxidation within a few years.
- Using zinc-plated hardware instead of stainless steel: visible rust within the first or second season.
- Mixing different color temperatures in the same visual environment: an unrecoverable aesthetic defect.
- Neglecting binning (SDCM): adjacent luminaires with visibly different hues.
- Using clear diffusers in the field of view: glare and dotted effect.
- Lighting upwards or towards boundaries: violation of light pollution regulations and neighbor disputes.
- Not documenting the installation: without model, CCT, and batch, a compatible replacement in five years will be a lottery.
16. Frequently asked questions about outdoor ceiling lights
We have collected the questions we receive most frequently from our customers, professionals and individuals, and organized them in a single consultable section. Click on each question to open the full answer. The answers are intentionally concise but technically rigorous: for further details, each topic refers to the corresponding chapter of the guide.
What IP rating should outdoor ceiling lights have?IP65 is the recommended standard for most outdoor installations (porches, canopies, gazebos, walls). IP44 is the absolute minimum and only in very sheltered positions. For direct exposure to driving rain and strong wind, go up to IP66, while IP67 is indicated in flood-prone areas, pool edges, and walkable pathways. Remember that the IP rating refers to the complete assembled system, not to individual components. |
How many lumens are needed to illuminate 20 sqm outdoors?For relaxation use at 100 lux with average conditions, about 4,280 lumens are needed; for soft use at 50 lux, 2,140 lumens are enough, while for functional use at 150 lux, 6,420 lumens are needed. In watts, with 120 lm/W LEDs, this is respectively about 36 W, 18 W, and 54 W. The complete formula is Φ = (E × S) / (U × MF). |
How many lumens per square meter are needed outdoors?As a practical rule, 200-215 lumens per square meter guarantee residential comfort in covered outdoor spaces. Drop to 100-120 lm/m² for paths and transit areas, rise to 300-350 lm/m² for dining areas and work zones. In terms of power, we are around 1.8 W/m² with efficient LEDs. |
How many watts should an outdoor ceiling light have?It depends on the area and use. For a small entrance, 10-15 W is enough; for a 20 m² porch, about 36 W is needed; for a 50 m² area, about 90 W. However, the watt does not measure light: always compare lumens, not absorbed power. |
How much does an outdoor LED ceiling light consume?A 20 W ceiling light on for 5 hours a day consumes about 36.5 kWh per year, equivalent to just over 10 euros with an energy cost of €0.28/kWh. A 50 W one reaches about 91 kWh and 25 euros per year. Adding a dusk sensor and night-time reduction can reduce these values by 40-60%. |
How long do outdoor LED ceiling lights last?A quality system, correctly dissipated and powered, reaches 30,000-50,000 hours of L70 useful life, i.e., 15-25 years with an average use of 5-6 hours per day. The actual life depends almost entirely on the junction temperature: increasing from 65 °C to 105 °C reduces life by four times. |
Why do outdoor LEDs not last long?The six real causes, in order of frequency: insufficient heat dissipation (the number one cause), poor quality or overloaded power supply, water infiltration or condensation, unfiltered grid overvoltages, mechanical stress from thermal cycles, and undersized cables. Notably, none of these causes concern the LED chip itself. |
Which color temperature should I choose for outdoors?3,000 K is the standard for residential outdoor: warm but crisp. 2,700 K for more intimate atmospheres on terraces and gazebos, 2,200 K in sensitive natural areas. 4,000 K only for carports, commercial entrances, and purely functional areas. Above 5,000 K, the light appears aggressive in residential settings and has a greater impact on nocturnal wildlife. |
Is PMMA or polycarbonate better for the diffuser?For exposed outdoor use, polycarbonate with UV co-extrusion: it sacrifices two points of transmittance compared to acrylic but offers incomparably higher impact resistance (IK08-IK10 against IK06-IK07) and tolerates temperatures up to 120 °C. PMMA remains valid in sheltered and unreachable positions, where its superior scratch and UV resistance is an advantage. |
Is the aluminum profile really necessary?Yes, and it is the single factor that most affects longevity. The profile performs three functions simultaneously: it dissipates heat (aluminum conducts about a thousand times better than plastic), protects mechanically, and guarantees waterproof sealing. An LED strip without a profile can operate at 105-125 °C junction temperature, with useful life reduced to a few thousand hours. |
How can condensation inside the ceiling light be avoided?Assemble and seal the luminaire in a dry environment on a day with low humidity, insert a silica gel sachet into the volume before closing, provide a breather membrane where supported, and for linear profiles, install with a slight slope and a 1 mm drainage micro-hole at the lowest point. |
Is 12V or 24V better for an outdoor system?24V, almost always. For the same power, it halves the current, reducing cable losses by four times and allowing runs four times longer. At 60 W with 1.5 mm² cable, 24V allows about 9 meters compared to 2.2 meters for 12V. For very extensive systems, 48V systems are also available. |
How is the power supply sized?Strip power (W/m) × meters × 1.25 as a minimum margin (1.3 in hot outdoor conditions). Example: 8 m of 14.4 W/m strip = 115.2 W → at least 144 W is needed → choose a 150 W driver. Also check the thermal derating curve: a 150 W driver at 25 °C may be worth only 105 W at 55 °C. |
What is CRI and what value is needed outdoors?CRI (or Ra) measures the color rendering fidelity on a scale up to 100. CRI 80 is the minimum acceptable for residential outdoor, CRI 90+ is recommended for gardens and dining areas, where the greens of plants and skin tones must appear natural. Also check the R9 value (saturated red), which should be at least 50. |
What does 3-step MacAdam binning mean?It indicates the chromatic tolerance between one LED and another. Within 3 steps (SDCM), differences are not perceptible in real use; at 5-7 steps, they become clearly visible when two luminaires are adjacent. For continuous lines or multiple ceiling lights in the same environment, always demand 3 steps or less and purchase material from the same batch. |
Can outdoor ceiling lights be dimmed?Yes, and it is highly recommended. Available technologies are PWM on low voltage, 0/1-10V, DALI, DMX, wireless (ZigBee, RF), and TRIAC. For residential outdoor use, the most effective combination is a constant voltage driver plus a high-frequency PWM receiver controlled via radio: low cost and no additional control cabling. |
Where should the power supply be installed?In a dry, ventilated, inspectable location as close as possible to the load: technical panel, meter compartment, or waterproof IP65 box in a sheltered position. Never in a blind box embedded in the wall, never exposed to direct sunlight, never in a compartment where summer temperatures exceed the declared maximum ambient temperature (Ta). |
Why does the light fade towards the end of the strip?It is a voltage drop, caused by undersized cable or too long a run. Solutions are to increase the cable gauge, feed the strip from both ends, reduce the length of the single run, or switch from 12V to 24V/48V. |
What screws should be used to fix outdoor ceiling lights?Exclusively stainless steel: A2 (AISI 304) in continental and urban environments, A4 (AISI 316) mandatory within 5 km of the coast, near pools, and in industrial environments. Zinc-plated steel outdoors shows rust within 12-24 months. Avoid pairing different metals that trigger galvanic corrosion. |
How are outdoor ceiling lights cleaned?With the system off, using a microfiber cloth and warm water with neutral soap, twice a year. Never use solvents, large amounts of alcohol, ammonia, or abrasives on polycarbonate: they trigger crazing, a micro-cracking that irreversibly opacifies the diffuser. Cleaning alone can recover 15-20% of the flux lost to dirt. |
What is IK rating and which one is needed?IK rating measures resistance to mechanical impacts in joules. Outdoors, the recommended minimum is IK08 (5 J, equivalent to a 1.7 kg object falling from 30 cm or large hail). In accessible areas, play areas, or vandalism-prone zones, go up to IK09-IK10. It is almost always the diffuser that limits the IK rating of the luminaire. |
Can I install an LED ceiling light near a pool?Yes, but in compliance with standard CEI 64-8 section 702, which defines safety zones: in zones 0 and 1, only very low safety voltage (SELV) luminaires with very high IP are allowed. Outside zone 1, the recommended configuration is IP67, SELV with power supply positioned outside the zone, and A4 hardware to resist chlorine. |
Do outdoor LED lights attract insects?Much less than traditional sources, because white LEDs do not emit ultraviolet. Attraction depends mainly on the blue component of the spectrum: choosing low color temperatures (2,200-3,000 K) significantly reduces the effect further. Adding shielding that avoids lateral emission completes the result. |
What is light pollution and what obligations does it entail?It is the dispersion of artificial light outside the surfaces to be illuminated. Numerous Italian regional laws require ULOR equal to zero, i.e., no emission towards the upper hemisphere, with possible limits on luminance, schedules, and color temperature. Ceiling lights and profiles with downward emission are by design compliant; always check the regulations of your Region and Municipality. |
Can a burnt-out integrated LED be replaced?In LED strips, individual chips cannot be replaced individually: in case of failure, the segment is cut at the nearest pad and the section is replaced, restoring the connection with soldering or a connector. In ceiling lights with dedicated LED modules, the module is often replaceable; in cheap monobloc luminaires, generally not. This is one of the reasons why modular systems with profile and strip are more cost-effective in the long run. |
Is a traditional ceiling light or an LED linear profile better?It depends on the effect. The traditional ceiling light is a concentrated point source, simple to install; the linear profile distributes light along its entire length, offering superior uniformity, no shadow cones, architectural integration, and the ability to precisely size power and length. In contemporary design of porches and pergolas, the light line has largely replaced the round ceiling light. |
How much does it cost to build an outdoor ceiling light system?The items are five: LED strips (20-30%), profiles and optical accessories (25-35%), power supplies and control (15-25%), cables and hardware (5-10%), labor (20-40%). The payback period compared to an old halogen system is typically under three years and drops below eighteen months in commercial settings with long operating hours. |
Is overvoltage protection needed?Yes, and it is largely underestimated. Outdoor lines, long and often at height, pick up lightning-induced overvoltages even at hundreds of meters distance. Proportionate countermeasures are a Type 2 SPD on the main distribution board and a driver with integrated surge protection of at least 2 kV common mode. The cost is a few tens of euros against the risk of losing the entire system. |
Which LED strip should I choose for outdoors?It must have at least IP65 (or be protected by a waterproof profile), high density (120-240 LED/m or COB) for uniformity, CRI ≥ 90, binning within 3 SDCM, and 24V power supply. Prefer chips from recognized manufacturers and PCBs with 2 oz copper for better dissipation and lower voltage drop. |
How to correctly illuminate an external staircase?The principle is counterintuitive: do not illuminate the step, but make its edge readable. Use lateral grazing light or light from the riser, with 45° angular profiles, IP65-IP67, about 100 lux, and 3,000 K. Absolutely avoid frontal light directed at the person climbing: it causes glare and nullifies the perception of level changes. |
How much do I save with sensors and automation?A dusk sensor reduces operating hours by 15-25%; a presence detector in transit areas reduces switching on by 80-95%; scheduled night-time reduction adds further significant savings. Combining the three strategies, an outdoor system can reduce annual consumption by 60-75% compared to simple manual evening switching. |
Can I install outdoor ceiling lights myself?The assembly of the system (strip, profile, diffuser, end caps) can be done independently following the procedure in chapter 9. Work on the fixed electrical system, however, must be carried out by qualified personnel under DM 37/08, who issues the declaration of conformity. Each operation must in any case be carried out with the system isolated and verified to be de-energized. |
17. Investing in quality for safe lighting
If we had to condense the over ten thousand words of this guide into a single sentence, we would choose this: in outdoor LED lighting, quality is not an attribute of the product but a property of the system. There is no LED strip good enough to compensate for an inadequate profile, nor a profile well-designed enough to save an undersized power supply, nor a luminaire so well-built to survive an installation that lets water in.
We have seen all the variables that truly determine the result, and they are surprisingly few. Thermal management, which decides whether the system will last five years or twenty-five. Effective waterproof sealing, which must be built on site and not bought on a label. Lighting design, which with a four-term formula avoids both darkness and waste. The spectral quality of light, which transforms a simply illuminated space into a pleasant one to inhabit. Control, which today represents the main lever for savings available.
There is also a consideration that goes beyond the technical. Lighting an outdoor space safely means three things simultaneously. It means choosing safe products, with verifiable certifications and protections adequate for the actual installation environment. It means illuminating sufficiently to prevent falls, trips, and intrusions, but without exceeding, because excess light causes glare, disturbs neighbors, harms wildlife, and costs. And it means thinking long-term, where the quality of materials and care in installation translate into years of service without unexpected costs and without height interventions.
The path of modular systems (quality LED strip, correctly sized aluminum profile, diffuser suitable for the position, power supply with margin, consistent sealing accessories) is the one that offers the best ratio of design freedom, performance, and longevity. It allows you to achieve exactly the light required by the project, with the certainty of being able to source each individual component even in ten years.
We hope this guide is useful to you whenever you need to choose, design, or install outdoor ceiling lights. For any technical questions, compatibility verification, or design support, the Ledpoint team is at your disposal with competence, experience, and passion for well-made light.