



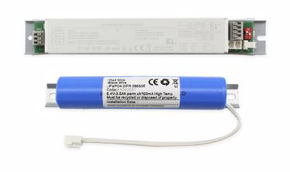
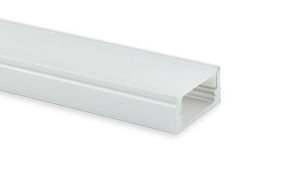
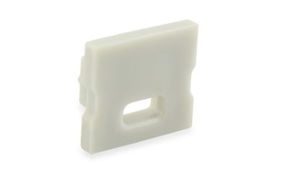
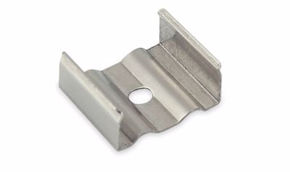


LED Lamps: What They Are, Advantages, and How to Build Them with LED Strips – Professional Guide 2026
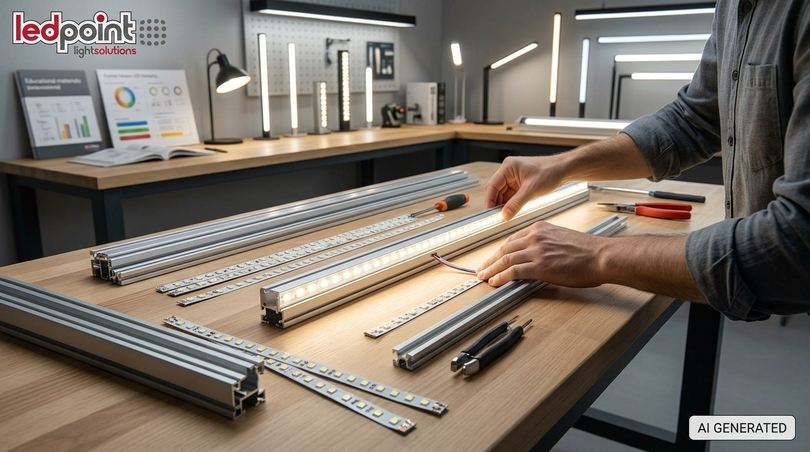
LED lamps are lighting fixtures that produce light via semiconductor diodes (LEDs), with a luminous efficiency that in professional strips exceeds 150 lm/W, a useful life between 30,000 and 70,000 hours, and consumption up to 85% lower than incandescent lamps. With LED strips, aluminum profiles, and a suitable power supply, custom LED lamps can be built for any environment.
Anyone who works with light every day knows this: today, talking about LED lamps no longer means just talking about light bulbs to screw in place of old halogens. It means designing. Professional LED strips, paired with aluminum profiles, diffusers, and dimmable drivers, allow electricians, interior designers, architects, and DIY enthusiasts to create artisanal, customized, and technically superior LED lamps compared to many mass-produced items, because every parameter (lumens, color temperature, CRI, IP rating, type of dimming) is chosen based on the real environment and not a generic catalog.
In this guide, written by the Ledpoint technical team in Faenza, we start from the basics (what LED lamps are, how they work, why they consume less) to arrive at nine complete, step-by-step projects, with real product codes present in the Ledpoint.it catalog: from the floor lamp for the living room to the linear suspension for the dining table, from the backlit bathroom mirror to under-cabinet kitchen lamps, down to the display window lamp for a clothing store and the IP67 garden path light. Each project includes a wiring diagram, power supply sizing, lumen calculation, and errors to avoid.
You will also find comparison tables, consumption and return on investment data, a section dedicated to replacing halogen lamps with LED, a guide to compatibility with dimmers and home automation, and a collection of FAQs designed to answer the questions professionals receive daily from clients. Take the time you need: by the end, you will have a working method, not just a few ideas.
In this article...
1. What are LED lamps and how they work
Before picking up a roll of LED strip and a soldering iron, it is essential to have a clear understanding of what happens inside an LED light source. Understanding the physical principle is not an academic exercise: it explains why LED lamps consume less, why they fear heat, why they require a dedicated power supply, and why two LED lamps with the same wattage can produce completely different light. In this section, we answer the most searched questions: what is an LED lamp, what does LED mean, how does an LED light bulb work, and who invented LED lamps.
What LED means and what an LED lamp is
LED is the English acronym for Light Emitting Diode, which is a light-emitting diode. It is a semiconductor electronic component that, when crossed by current in the correct direction, emits photons. An LED lamp (or LED lamp, or LED lamp: the three expressions are equivalent) is therefore a lighting fixture in which the light source consists of one or more LED diodes, mounted on a printed circuit board, powered by a driver, and thermally managed by a heat sink.
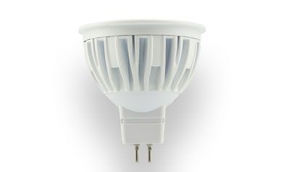
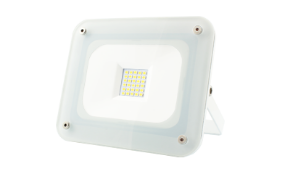
When speaking of LED lamps in a commercial sense, very different families are included: LED bulbs with E27, E14, GU10, G9, G4, or R7s bases designed to replace traditional sources; integrated LED fixtures such as ceiling lights, recessed spotlights, pendants, and wall sconces; table, floor, and bedside LED lamps; linear sources such as LED strips, neon flex, and luminous profiles. This guide focuses precisely on the last family, because it offers the maximum design freedom to those who want to build custom LED lamps.
How an LED lamp works: the principle of electroluminescence
The heart of the LED is a junction between two layers of semiconductor: one of type N, rich in electrons, and one of type P, rich in "holes" (absence of electrons). By applying a forward voltage, electrons and holes recombine in the junction zone, and the excess energy is released in the form of light. This phenomenon is called electroluminescence. Unlike the incandescent lamp, which produces light by heating a filament to 2,500 °C and dissipating over 90% of the energy as heat, the LED directly transforms electrical energy into light, with much lower thermal losses.
The color of the emitted light depends on the semiconductor material. The white LEDs used in lighting are actually blue LEDs (indium gallium nitride) coated with a layer of phosphors that convert part of the blue radiation into yellow, green, and red. The dosage of the phosphors determines the color temperature (warm, natural, or cool light) and the color rendering index. This is why, with the same chip, a 2700K LED generally has slightly lower efficiency than a 4000K LED: more phosphor is needed to "warm up" the light.
Why LED lamps consume less
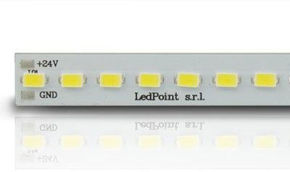
LED lamps consume less because they have a much higher luminous efficiency: an incandescent lamp produced about 12-15 lumens for every watt absorbed, a halogen 15-25 lm/W, a compact fluorescent 50-70 lm/W. A modern professional LED strip exceeds 120-150 lm/W: the Ledpoint strip F52-30s-240DF2 - LED strip 5m warm white 3000K 3step 2835 240led/m 24V 19.2W/m declares 2,100 lm/m with 120 lm/W, while the 14.4 W/m version of the same family reaches 2,000 lm/m with 155 lm/W. This means that, to obtain the same amount of light as an old 100 W halogen, today only about 12-15 W are needed.
How an LED lamp is made: the components
An LED lamp, whether it is an E27 bulb or a linear lamp built with a strip, is always composed of the same functional blocks. Knowing them helps to understand how to recognize a quality LED lamp and where the weak points hide.
| Component | Function | In lamps built with LED strips | What to check |
|---|---|---|---|
| LED Chip | Light source | SMD 2835, 5050 or COB mounted on the strip | Chip brand, binning, lm/W efficiency |
| Printed Circuit Board (PCB) | Electrical and thermal support and conduction | Flexible copper PCB, 5-12 mm width | Copper thickness, width, 3M adhesive |
| Resistors or IC | Regulate current on each segment | Cutable segments every 2.5-10 cm | 12V, 24V or 48V voltage; cut pitch |
| Heat sink | Dissipates junction heat | Extruded aluminum profile | Section, surface, anodization |
| Optics or diffuser | Distributes light and reduces glare | Opal, satin, or transparent diffuser | Percentage of light retained |
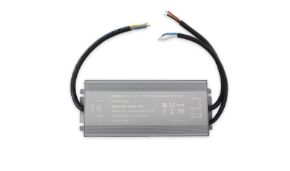
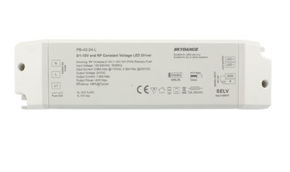
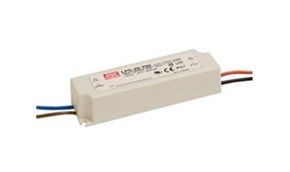
| Driver/power supply | Converts 230V AC to low voltage DC | Constant voltage 24V power supply | Power with margin, PF, type of dimming |
| Control | Switching, regulation, color, scenarios | Dimmer, RF controller, DALI, sensors | Compatibility with driver and strip |
Who invented LED lamps: a brief history
The first visible light LED (red) was created in 1962 by Nick Holonyak at General Electric. For decades, LEDs remained as indicator lights on appliances and electronic devices, because the indispensable color for obtaining white was missing: blue. The breakthrough came in the 1990s thanks to Japanese researchers Isamu Akasaki, Hiroshi Amano, and Shuji Nakamura, who developed efficient blue gallium nitride LEDs and for this received the 2014 Nobel Prize in Physics. From there, phosphor white LEDs were born and, within twenty years, LED lamps went from a technological curiosity to the global standard for lighting.
Difference between a normal light bulb and an LED light bulb
The question "what is the difference between a normal light bulb and an LED light bulb?" has a precise technical answer, summarized in the following table. The values are average and indicative; for Ledpoint products, the technical data sheets of each item apply.
| Technology | Typical efficiency (lm/W) | Average life (hours) | Heat emitted | Ignition | Dimmability | EU regulatory status |
|---|---|---|---|---|---|---|
| Incandescent | 12-15 | 1,000 | Very high | Immediate | Total | Off the market |
| Halogen | 15-25 | 2,000-4,000 | Very high | Immediate | Total | Almost all off the market since 2018-2023 |
| Compact fluorescent (CFL) | 50-70 | 8,000-10,000 | Medium | Delayed | Limited | Withdrawn since 2023 |
| T8 fluorescent tube | 70-90 | 12,000-20,000 | Medium | Delayed | With dedicated ballast | Withdrawn since 2023 |
| Retrofit LED bulb | 90-150 | 15,000-25,000 | Low | Immediate | Only dimmable models | Current standard |
| Professional 24V LED strip in profile | 100-155 | 35,000-70,000* | Low, managed by the profile | Immediate | Total with suitable driver | Current standard |
*Lifespan depends heavily on operating temperature: on an aluminum profile, the useful life can more than triple compared to installation on a non-dissipating surface, as illustrated in the Ledpoint guide to angular LED profiles.
2. Advantages and disadvantages of LED lamps: real data
The advantages of LED lamps are often summarized with slogans like "save 80%". The reality is more nuanced and, for a professional who has to explain to a client why to invest, it is better to reason with verifiable numbers. In this section, we analyze strengths and limitations, indicating for each the practical impact in a project.
The strengths of LED lamps
Energy efficiency and bill savings
This is the most well-known advantage. Switching from halogen to LED reduces consumption by an average of 80-85% for the same amount of light; compared to fluorescent, the saving is 40-55%. To the recurring question "is it true that you save 80% with LED lamps?" the answer is yes, if the comparison is with incandescent or halogen and if the LED lamp is sized in lumens and not in watts. A complete calculation with rates and hours of use is in section 19.
Long lifespan and reduced maintenance
The useful life of LED lamps is expressed with the parameter L70 or L80: the number of hours after which the luminous flux drops to 70% or 80% of the initial value. Professional LED strips compliant with the LM-80 testing standard reach values of tens of thousands of hours if installed correctly. In a store open 12 hours a day, 50,000 hours correspond to over 11 years of operation without replacements.
Immediate ignition and unlimited cycles
LED lamps reach 100% of their flux in milliseconds and do not suffer from frequent switching like fluorescents. They are therefore ideal with motion sensors, twilight sensors, and timers: corridors, stairs, cellars, garages, service bathrooms.
Freedom of shape and color
An LED strip is a few millimeters thick and can be cut every 2.5-10 cm: it can be integrated into shelves, mirrors, steps, false ceilings, furniture, and signs. With RGB, RGBW, RGB+CCT, or addressable pixel strips, colored, color-changing, and dynamic LED lamps controllable from a smartphone can be obtained.
Absence of UV and IR in the beam, low heat emission
White LEDs for general lighting do not emit significant amounts of ultraviolet and infrared in the luminous beam: they do not fade fabrics and do not heat the illuminated objects. This is a decisive advantage in clothing display windows, food counters, and museum showcases.
Sustainability
LED lamps do not contain mercury (unlike fluorescents), consume less energy over their life cycle, and, thanks to their long lifespan, produce less waste. However, they are still WEEE and must be disposed of correctly.
Disadvantages and limitations of LED lamps
Initial cost
A quality LED lamp costs more than a traditional source. In lamps built with strips, the cost includes the strip, profile, diffuser, power supply, and labor. The investment is recovered with energy savings and the absence of maintenance: in commercial contexts, the return is often less than two years.
Sensitivity to heat
Heat is the number one enemy of LED lamps. A junction that works too hot loses flux, shifts in color, and ages prematurely. For this reason, high-power strips must always be mounted on an aluminum profile; Ledpoint data sheets explicitly indicate this, recommending metal heat sinks, preferably anodized aluminum, and never conductive in direct contact with the tracks.
Compatibility with dimmers and existing systems
A dimmer designed for resistive loads (incandescent) can make an LED lamp flicker or buzz. Compatibility must be verified between the dimmer and the driver: we see this in detail in section 18.
Highly variable quality on the market
The market is full of cheap LED lamps with optimistic nameplate data, low CRI, approximate binning, and unprotected drivers. Knowing how to read a technical data sheet (section 23) is the best defense.
| Aspect | LED Advantage | LED Limitation | How to manage it in the project |
|---|---|---|---|
| Consumption | -80/85% vs halogen | None if well sized | Size in lumens, not in watts |
| Lifespan | Up to 50,000-70,000 h | Plummets if overheated | Aluminum profile, driver with margin |
| Cost | Low operating cost | Higher initial investment | Payback calculation |
| Dimming | Smooth regulation 0.1-100% | Requires compatibility | Dedicated triac, PWM, 0-10V or DALI driver |
| Color | From 2700K to 6500K, RGB, CCT | Risk of dominant tints with poor products | Strip with tight binning (3 MacAdam steps) |
| Shape | Integrable anywhere | Dotted effect with low-density strips | COB or high density + opal diffuser |
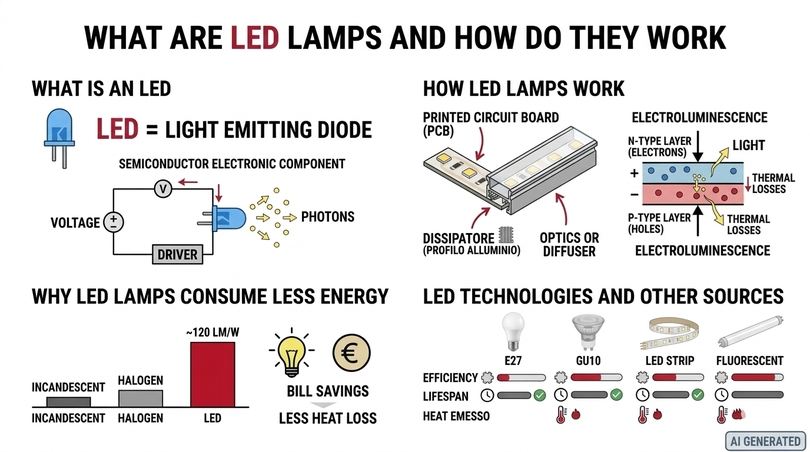
3. Lighting parameters to know: lumens, Kelvin, CRI, IP
Choosing LED lamps well means knowing how to read five numbers: luminous flux in lumens, power in watts, color temperature in Kelvin, color rendering index, and IP protection rating. To these, for those building lamps with strips, add supply voltage, LED density per meter, and cut pitch. In this section, we explain them one by one, with the tables we use every day at Ledpoint to advise installers and designers.
Lumens and watts: how much light an LED lamp produces
The lumen measures the total amount of light emitted by a source; the watt measures the energy absorbed. With incandescent lamps, these two values were linked in an almost fixed way, and we got used to thinking in watts. With LED lamps, you must think in lumens: two 10 W LED lamps can emit 800 or 1,500 lumens depending on efficiency.
Watt-lumen equivalence table (incandescent, halogen, LED)
| Luminous flux | Incandescent | Halogen | LED lamp (100 lm/W) | 24V LED strip (≈120-150 lm/W) | Example of use |
|---|---|---|---|---|---|
| 250 lm | 25 W | 18 W | 2.5 W | ≈ 0.3 m of 2,000 lm/m strip | Accent light, bedside |
| 470 lm | 40 W | 28 W | 4.7 W | ≈ 0.25 m of 2,000 lm/m | Reading lamp |
| 806 lm | 60 W | 42 W | 8 W | ≈ 0.4 m of 2,000 lm/m | Table lamp |
| 1,055 lm | 75 W | 53 W | 10.5 W | ≈ 0.55 m of 2,000 lm/m | Floor lamp |
| 1,521 lm | 100 W | 70 W | 15 W | ≈ 1 m of COB 528 (1,590 lm/m) | Pendant over table |
| 2,000 lm | ≈130 W | ≈100 W | 20 W | 1 m of 2,000 lm/m | General living room light |
| 4,000 lm | ≈ 250 W | ≈ 200 W | 40 W | ≈ 1 m of COB 1600 LED/m (3,910 lm/m) | Display window, laboratory |
To the question "what does 4000 lumens correspond to?" the answer is: to about 250 W of incandescent, 200 W of halogen, or 30-40 W of LED. And "what does 50 watts LED correspond to?": with an efficiency of 100-150 lm/W, to 5,000-7,500 lumens, the equivalent of over 300 W of halogen. Be careful, however: the diffuser retains a part of the light. In Ledpoint profiles, the loss is declared for each diffuser: on the shelf profile PR-SH01-03, for example, it goes from 19% for the transparent diffuser to 39% for the satin one. It must always be subtracted from the strip's flux.
How many lumens are needed to illuminate a room
To correctly size LED lamps, we start from illuminance, measured in lux (lumens per square meter). The UNI EN 12464-1 standard sets the values for workplaces; for the home, good practice values are used. The simplified formula is:
Necessary lumens = surface area (m²) × desired lux ÷ utilization factor (0.5-0.7)
| Environment | Recommended lux | Lumens per m² (indicative) | Typical room | Total indicative lumens | Recommended temperature |
|---|---|---|---|---|---|
| Living room (general) | 100-200 | 150-300 | 25 m² | 3,750-7,500 | 2700-3000K |
| Kitchen (worktop) | 300-500 | 400-700 | 12 m² | 4,800-8,400 | 3000-4000K |
| Bedroom | 100-150 | 150-200 | 14 m² | 2,100-2,800 | 2700K |
| Bathroom (mirror) | 300-500 on the face | 400-600 | 6 m² | 2,400-3,600 | 3000-4000K, CRI ≥ 90 |
| Office (desk, UNI EN 12464-1) | 500 | 600-800 | 15 m² | 9,000-12,000 | 4000K, UGR ≤ 19 |
| Clothing store | 300-750 (window up to 1,000+) | 500-1,000 | 60 m² | 30,000-60,000 | 3000-4000K, CRI ≥ 90 |
| Corridor, stairs | 100-150 | 100-150 | 8 m² | 800-1,200 | 3000K |
| Garden, pathways | 5-20 | - | - | Path light 100-300 lm/m | 2700-3000K |
How to calculate the watts to illuminate a room? Divide the total lumens by the source efficiency. Example: 25 m² living room at 150 lux with a utilization factor of 0.6 → 25 × 150 ÷ 0.6 = 6,250 lm. With a 120 lm/W strip in a profile with an opal diffuser (30% loss), 6,250 ÷ (120 × 0.7) ≈ 75 W are needed, i.e., about 4 meters of 19.2 W/m strip. With halogens, over 350 W would have been needed.
Color temperature: warm, natural, or cool light
The color temperature is measured in degrees Kelvin (K) and describes the tone of the white light. The lower the value, the warmer (yellow, enveloping) the light; the higher it is, the cooler (bluish, stimulating) the light. It is one of the most frequent questions: what is the difference between warm and natural light? What is the difference between white and cool light? Does warm or cool light illuminate more?
| Denomination | Kelvin | Perception | Ideal environments | Reference Ledpoint strip |
|---|---|---|---|---|
| Extra warm white | 2200-2400K | Candlelight, amber | Restaurants, decorative filament-effect lamps | Strip and neon flex in special versions |
| Warm white | 2700-3000K | Welcoming, relaxing | Living room, bedroom, hotel, restaurant | F52-30s-240DF2, F52-300-528OR2 |
| Natural / neutral white | 3500-4500K | Neutral, sharp | Kitchen, bathroom, office, store | 4000K strip CRI ≥ 90, 4000K neon flex |
| Cool white | 5000-6500K | Bright, technical | Workshops, warehouses, laboratories, garages | 6000K strip |
| Tunable white (CCT) | 2700-6500K adjustable | Variable during the day | Offices, schools, circadian lighting | CCT strip with dedicated controller |
Warm and cool light, with the same lumens, illuminate in the same way: the perception changes. Cool light appears more "brilliant" because it increases the perceived contrast, but it does not produce more lumens. At the same wattage, however, a cool source usually emits a few more lumens because it requires fewer phosphors. How to choose warm or cool light? Practical rule: warm where you rest, neutral where you work or look in the mirror, cool where maximum sharpness and technical functions are needed.
MacAdam binning: why "3 step" matters
Two strips declared as 3000K can have visibly different tones. MacAdam binning (SDCM) indicates how close the LEDs in a batch are to the nominal color: 3 steps means differences almost imperceptible to the eye. Many Ledpoint strips report "3step" directly in the name: it is an essential requirement when the same LED lamp is replicated in multiple points of a project.
Color Rendering Index (CRI or Ra)
The color rendering index (CRI, or Ra) indicates how faithfully a source reproduces colors compared to a reference source, on a scale from 0 to 100. Sunlight has a CRI of 100.
| CRI (Ra) | Quality | Recommended use |
|---|---|---|
| < 80 | Poor | Only technical areas, not recommended at home |
| 80-89 | Good | General lighting, corridors, garages |
| 90-94 | Very good | Home, kitchen, bathroom, restaurants, high-end offices |
| ≥ 95 | Excellent | Clothing stores, galleries, photography studios, make-up |
What is the best CRI index for the home? At least Ra 90 in living environments. Ledpoint COB strips like the F52-300-320OM2 - COB LED strip 5m warm white 3000K CRI Ra>93 320led/m 24V 8W/m reach Ra > 93, and the catalog also includes 4000K strips with CRI > 95 (Ra > 97), suitable for those who need to enhance fabrics, food, and works of art.
IP protection rating
The IP protection rating (IEC 60529 standard) consists of two digits: the first indicates protection against solids, the second against liquids.
| IP Rating | Protection | Where to use it | Ledpoint example |
|---|---|---|---|
| IP20 | None against water | Dry interiors, inside closed profiles | IP20 COB and 2835 strips |
| IP44 | Water splashes | Bathroom outside zones 0-1, attics | IP44 controllers and accessories |
| IP65 | Water jets | Protected outdoors, kitchens, bathrooms | IP65 silicone strips |
| IP67 | Temporary immersion | Exposed outdoors, gardens, facades | Polyurethane IP67 neon flex, IP67 COB strips |
| IP68 | Continuous immersion | Pools, fountains, tanks | Specific IP68 products |
What IP protection rating must an outdoor LED lamp have? At least IP65 under canopies and protected porches, IP67 if exposed to rain, stagnation, or irrigation. And it's not just the strip: connectors, junctions, and the power supply must also have a consistent IP, otherwise the weak point becomes the wiring.
Voltage: 12V, 24V, 48V, or 230V LED strips?
Low voltage LED strips (12V, 24V, 48V DC) are the most used to build LED lamps because they are safe to handle and can be cut finely. For artisanal lamps, we almost always recommend 24V: at the same power, it halves the current compared to 12V, reduces voltage drop, and allows longer runs without loss of brightness at the end of the line. 230V strips are used for long runs without an intermediate power supply, but they require electrician skills and adequate protections. The Ledpoint guide dedicated to amperes and LED strips contains complete tables for cable section and power supply selection.
Energy class of LED lamps
Since September 2021, the European energy label for light sources has been rescaled (EU Regulation 2019/2015): class A is now reserved for sources with very high efficiency (over 210 lm/W), so most excellent quality LED lamps are found in class D, E, or F. Do not be surprised: a class D strip with over 140 lm/W is an excellent product. The energy class is indicated for each item on Ledpoint data sheets.
4. Why build LED lamps with LED strips
Why should a professional build LED lamps instead of buying them ready-made? The reasons are technical, aesthetic, and economic, and concern all the profiles we meet every day: the electrician who wants to offer reliable and easy-to-install solutions, the interior designer looking for custom atmospheres, the architect who must respect regulatory parameters, the shopkeeper who wants to enhance the merchandise, the homeowner who wants to save money, the DIY enthusiast who wants a customized LED lamp controllable from a smartphone.
Total control of parameters
With a self-built LED lamp, you choose every parameter: lumens per meter, Kelvin, CRI, emission angle (via profile and diffuser), dimming protocol. It is the only way to get exactly the designed light, without catalog compromises.
Custom sizes and shapes
The strip is cut at the indicated pitch (for example, every 2.5 cm on the F52-30s-240DF2 or every 5 cm on the 320 LED/m COBs). A 187 cm long suspension for a non-standard table, a 172 cm high floor lamp, a 63 cm luminous shelf: everything becomes possible.
Maintainability and durability
An LED lamp built with separate professional components is repairable: if after ten years a power supply fails, it is replaced in a few minutes without throwing away the fixture. The aluminum profile, moreover, acts as a heat sink and extends the life of the source.
Integration with home automation and sensors
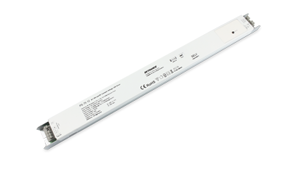
By choosing the right power supply, the same lamp can be controlled by a button (push-dim), triac dimmer, 0-10V signal, DALI bus, RF remote control, or app. Ledpoint proposes, for example, the 40W 24V 5in1 DALI + Push Dim + PWM + 0-10V + Rx LiFud Power Supply, which accepts five different interfaces in a single driver.
Market data: where LED lighting is heading
LED lamps are today the reference technology globally, driven by European regulations that have progressively excluded incandescent, most halogens (EU Regulation 2019/2020 on eco-design), and, since 2023, compact fluorescent lamps and T5/T8 tubes from the market due to mercury restrictions under the RoHS directive. The practical consequence for installers and stores is a strong demand for retrofit, energy refurbishment, and custom LED solutions, particularly in the mid-to-high-end residential, retail, and hospitality segments, where light customization is a distinctive element.
5. Components, equipment, and safety
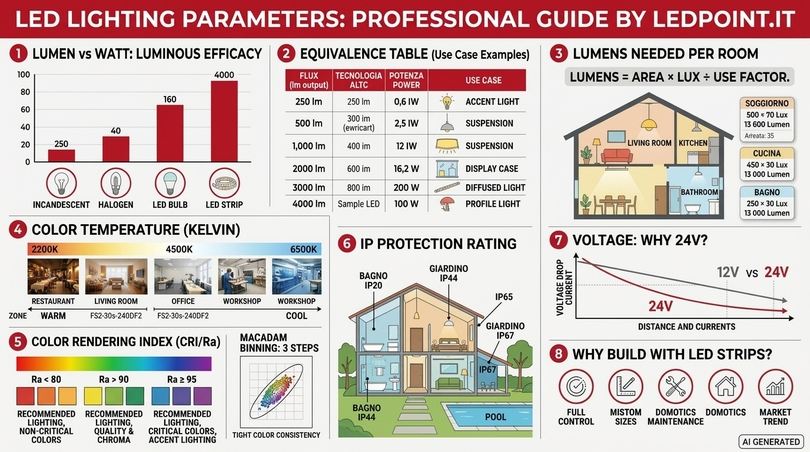
Before the projects, let's organize the workbench. All the LED lamps described in this guide are built with the same family of components; only dimensions, powers, and protection ratings change. Having a clear "basic kit" avoids duplicate purchases and, above all, compatibility errors.
The source: which LED strip to choose
| Type of strip | Characteristics | Pros | Cons | Ideal for |
|---|---|---|---|---|
| High density SMD 2835 (240 LED/m) | High efficiency, 2,000-2,100 lm/m | Lots of light, low consumption | Requires a diffuser to eliminate dots | General light, pendants, floor lamps |
| COB (320-528 LED/m) | Continuous line of light, CRI > 90 | No dotted effect even without a diffuser | Slightly lower efficiency than the best 2835s | Visible lamps, thin profiles, furniture |
| High power COB (1600 LED/m, 3 cm PCB) | Up to 3,910 lm/m | Linear projector power | Requires a highly dissipating profile | Display windows, stores, laboratories |
| RGB + white (COB 784 LED/m) | Color + 3000K white | Atmosphere and functional light in the same line | 4-channel controller | Bedroom, living room, hospitality |
| COB Control / pixel | Individually manageable segments | Dynamic effects, trails, progressive ignitions | Dedicated controller | Stairs, design, installations |
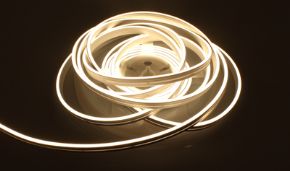
| Neon Flex IP67 | Flexible PU or silicone tube | Waterproof, homogeneous light | Cutting only at indicated points, minimum radius | Outdoors, signs, garden |
| COB IP67 in spherical extruded silicone tube (3 mm) | Very thin luminous wire | Filament effect | Contained flux (270 lm/m) | Decorative, vintage lamps |
The aluminum profile and the diffuser
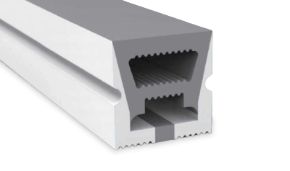
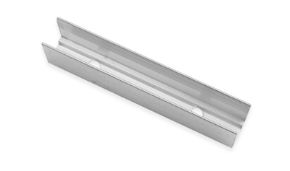
The profile has three functions: dissipate heat, protect the strip, and define the aesthetic of the light. Ledpoint offers surface, recessed, angular, shelf, mirror, walkable floor, and plasterboard profiles. The diffuser must be chosen knowing how much light it retains: transparent (minimal loss, visible dots), semi-opaque, opaque, or satin (maximum homogeneity). The complete profile catalog can be consulted on the Ledpoint Catalogs page.
The power supply: how to size it
LED strips work at constant voltage (CV): a power supply with the same nominal voltage as the strip and a power higher than the load is required. The Ledpoint rule is clear: strip power × length + at least 20-30% margin. The margin compensates for thermal derating and extends the driver's life. The same Ledpoint guide on amperes reminds us that a 150 W 24V power supply delivers 6.25 A and, with a 30% margin, powers about eight meters of 14.4 W/m strip.
| Strip power | Length | Load | Load +25% | Current at 24V | Recommended power supply |
|---|---|---|---|---|---|
| 8 W/m | 2 m | 16 W | 20 W | 0.67 A | 24V 30-40 W |
| 9 W/m | 3 m | 27 W | 34 W | 1.13 A | 24V 40 W |
| 14.4 W/m | 3 m | 43 W | 54 W | 1.8 A | 24V 60 W |
| 15.5 W/m | 4 m | 62 W | 78 W | 2.6 A | 24V 100 W |
| 19.2 W/m | 3 m | 58 W | 72 W | 2.4 A | 24V 75-100 W |
| 21 W/m (RGB+W) | 2 m | 42 W | 53 W | 1.75 A | 24V 60-75 W |
| 40 W/m (COB HP) | 2 m | 80 W | 100 W | 3.3 A | 24V 150 W |
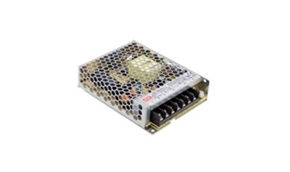
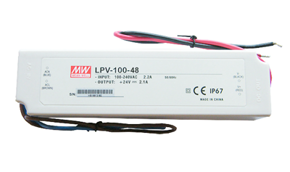
In the Ledpoint 24V Power Supplies category, you can find DIN rail drivers, slim furniture drivers, RF wireless, DALI, and push-dim; for outdoors, there are Mean Well IP67 power supplies like the MW-XLG150-24A (150 W 24V IP67).
Connections, cables, and voltage drop
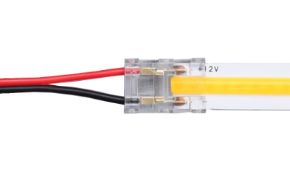
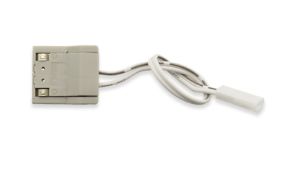
Junctions are made with temperature-controlled soldering or with quick connectors dedicated to the PCB width (8 mm, 10 mm, 12 mm). For lamps that must last, soldering remains the most reliable solution; connectors are useful for prototypes and repairs. Beyond 5 meters of run, it is advisable to power the strip from both ends or at multiple points. Ledpoint data sheets point out that, by powering a 5-meter roll from one end only, the absorbed power drops by about 15%: this is the physical signal of voltage drop along the tracks.
| Current | Cable length (one way) up to | Minimum recommended section at 24V |
|---|---|---|
| up to 2 A | 5 m | 0.75 mm² |
| 2-4 A | 5 m | 1.0-1.5 mm² |
| 4-6 A | 5 m | 1.5-2.5 mm² |
| over 6 A | 5 m | 2.5 mm² or divide into multiple lines |
Indicative values for a voltage drop contained within 3%; for longer runs, consult the Ledpoint technical guide on amperes.
Recommended equipment
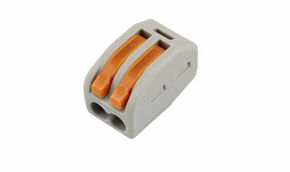
Temperature-controlled soldering iron (320-350 °C) with chisel tip, 0.5-0.8 mm flux-cored solder, heat shrink tubing, wire strippers, shears, hacksaw or aluminum cutter with fine-toothed blade, file, isopropyl alcohol for degreasing, multimeter, insulated screwdrivers, drill with metal bits, lever wiring terminals, possibly neutral silicone for IP sealing.
Safety and regulations
Self-built LED lamps that are then installed in the system must comply with the rules of the art. On the 230V side, connections must be made by a qualified installer according to the CEI 64-8 standard and, where required, DM 37/08. Lighting fixtures refer to the CE marking and the IEC/EN 60598 series; photobiological risk is evaluated with EN 62471. Use only certified power supplies, with SELV insulation, short-circuit, overload, and overtemperature protections: this is the first guarantee of safety for those who build the lamp and for those who will use it.
6. The basic 8-step method valid for every lamp
Every LED lamp built with a strip follows the same work sequence. We describe it completely here once; in subsequent projects, we will recall the steps indicating only the specific variants. Always following the order avoids the most costly errors: strips cut off-pitch, profiles that are too short, undersized power supplies.
Step 1 - Light design
Define the function (general, accent, work, decorative light), desired lux, color temperature, CRI, and IP rating. Calculate the necessary lumens with the formula in section 3.2 and derive the meters of strip by dividing by the lumens per meter, already deducted for the diffuser loss.
Step 2 - Measure and cut the profile
Cut the aluminum profile to the final size with a fine-toothed blade, deburr with a file, clean with isopropyl alcohol. The profile must always be slightly longer than the strip (at least 1-2 cm) to leave room for the end caps and the input cable.
Step 3 - Cut the strip at the correct pitch
Identify the cut points on the strip (copper pads marked with a scissor symbol) and cut exactly in the center. Cutting outside the line leaves a dead segment.
Step 4 - Soldering the power cable
Tin the pads and conductors slightly, then join them respecting the polarity (+ red, - black). Insulate with heat shrink tubing. On RGB or RGB+W strips, respect the channel sequence indicated on the PCB (V+, R, G, B, W).
Step 5 - Bench test
Before gluing, always connect the strip to the power supply and verify operation, color, and the absence of dead segments. Measure the voltage at the ends with a multimeter: on a 24V strip, it must remain within a few tenths of a volt from the nominal value.
Step 6 - Application in the profile
Remove the 3M adhesive film and apply the strip to the center of the channel, pressing evenly without bending the PCB. Avoid tight curves on the plane of the circuit.
Step 7 - Diffuser, end caps, and fixing
Snap or slide the diffuser in, mount the end caps (one with a hole for the cable), and fix the profile with the appropriate clips or brackets. For outdoors, seal the end caps and cable exit with neutral silicone.
Step 8 - Driver connection and final testing
Connect the secondary of the power supply to the lamp and the primary to the mains (work for a qualified electrician). Verify dimming across the entire range, the temperature of the profile after an hour of operation (it should be warm to the touch, not boiling), and the absence of flickering even when recorded on video with a smartphone.
7. Project 1 - Floor LED lamp for the living room
The first project is a corner floor LED lamp: a vertical luminous blade about 150 cm high that illuminates the two walls meeting in the corner of the living room at 45°. It is one of the design LED lamps most requested by interior designers because it creates soft indirect light, visually widens the space, and, with a dimmer, transitions from conversation light to cinema light. It is also the most elegant way to replace an old 300 W R7s halogen floor lamp.
Lighting objective
About 2,000 effective lumens, 3000K, CRI ≥ 80 (indirect ambient light), complete dimming from the existing button or a wall triac dimmer.
Ledpoint bill of materials
| Quantity | Code | Description | Function |
|---|---|---|---|
| 1.40 m | F52-30s-240DF2 | LED strip 5m warm white 3000K 3step 2835 240led/m 24V 19.2W/m, 2,100 lm/m | Source |
| 1 bar | PR-AN02-08-S2 (see angular LED profiles range) | 16mm angular aluminum profile, 2 meters, with matching opal diffuser | Dissipation and 45° emission |
| 1 | PW-LTH75-24-TD | 75W 24V Triac LED driver power supply, 0-100% dimming (ignition from 0.1%), push-dim | Dimmable driver |
| 1 | - | Steel or solid wood base 25×25 cm, ballasted | Stability |
| 2 m | - | Bipolar cable 2×0.75 mm² | Connection |
Calculations
Power: 1.4 m × 19.2 W/m = 26.9 W; with a 25% margin, 34 W are needed: the 75 W driver works below 50%, so it stays cool and long-lasting. Flux: 1.4 × 2,100 = 2,940 lm; with an opal diffuser (estimated 30% loss), about 2,060 effective lumens, the equivalent of a halogen floor lamp of about 130-150 W. Current at 24V: 1.12 A.
Step-by-step realization
- Cut the angular profile to 145 cm and the strip to 140 cm (56 segments of 2.5 cm).
- Drill the base in the center (Ø 8 mm) for the cable passage; prepare an L-shaped steel plate to fix the profile to the base with two M4 screws.
- Solder the cable to the lower end of the strip; test on the bench with the driver.
- Glue the strip into the channel of the angular profile, insert the opal diffuser, mount the end cap with a hole at the bottom and the blind one at the top.
- Fix the profile to the plate and the base; run the cable under the base in a milled groove.
- House the PW-LTH75-24-TD driver in a wall junction box or in a technical compartment near the switched socket.
- Connect the driver to the triac dimmer (or push-dim button) and test the entire regulation range.
Variants
For a stem floor lamp with upward light (uplight), use two 60 cm runs of 528 LED/m COB strip in a square section profile at the top of the stem: with 1,590 lm/m you get about 1,900 lm at 18.6 W. For an arc floor lamp, replace the blade with a bendable profile and a COB strip, which tolerates bending better thanks to its continuous density.

8. Project 2 - Suspended LED lamp for the dining table
The linear suspension above the dining table is the project where LED lamps built with strips most clearly beat mass-produced products: the length adapts exactly to the table (usually 60-70% of the top length), the light is uniform from end to end, and the high color rendering enhances food, tablecloths, and faces. It is the answer to interior designers' question "what are the best suspended LED lamps for a dining table?".
Lighting objective
200×90 cm table, 130 cm long suspension at 70-75 cm from the top; about 400-500 lux on the table; 3000K, CRI ≥ 90; dimming by button or DALI system.
Ledpoint bill of materials
| Quantity | Code | Description | Function |
|---|---|---|---|
| 1.30 m | F52-300-528OR2 | COB LED strip 5m warm white 3000K CRI Ra>90 528led/m 24V 15.5W/m, 1,590 lm/m, 115 lm/W, cut every 4.55 cm | Main source |
| 1 bar | Surface profile for 10 mm PCB | Aluminum profile with opal diffuser and cable suspension kit | Lamp body and heat sink |
| 1 | 40W 24V 5in1 LiFud Power Supply | DALI + Push Dim + PWM + 0-10V + Rx | Multi-protocol driver |
| 1 | - | Ceiling rose with 2 adjustable steel cables and transparent cable 2×0.5 mm² | Suspension |
Calculations
The strip is cut every 4.55 cm: 28 segments = 127.4 cm. Power: 1.274 × 15.5 = 19.7 W; with a 25% margin, about 25 W: the 40 W driver is adequate. Flux: 1.274 × 1,590 = 2,026 lm; with an opal diffuser, about 1,420 lm emitted downwards. On a surface of about 1.8 m² under the lamp, at a distance of 70 cm, indicatively 450-550 lux are obtained in the center of the table: an ideal value for dining and also for board games or homework.
Step-by-step realization
- Cut the profile to 130 cm; drill two Ø 4 mm holes 15 cm from the ends for the cable clamps.
- Cut the COB strip into 28 segments and solder the transparent cable to one end.
- Apply the strip, insert the opal diffuser, and close with the end caps.
- Mount the steel cables and adjust the height: 70-75 cm from the top for standard tables.
- Connect the power cable to the driver, housed in the ceiling rose or in an accessible false ceiling.
- Configure the driver in push-dim (existing NO button) or address it on the DALI bus if the home is automated.
Double emission variant
For a suspension that also illuminates the ceiling, use a dual-channel profile: 528 LED/m COB downwards and an 8 W/m COB strip upwards. Connect the two lines to two separate channels: in DALI, you can create "dinner" scenes (only direct light at 70%) and "party" scenes (direct and indirect at 100%).

9. Project 3 - Bedside LED lamp and headboard for the bedroom
In the bedroom, light must accompany rest: warm tones, low intensity, absence of glare, and the possibility of creating a colorful atmosphere. In this project, we build an RGB + warm white backlit headboard and two small bedside LED lamps, controlled by remote control or app. It is the concrete answer to those who ask "how to choose an RGB LED lamp for the bedroom" and "how to choose the ideal color temperature for a bedroom".
Lighting objective
Headboard: indirect light on the wall, 3000K for daily use and RGB for atmosphere. Bedside tables: about 250-300 lm each, 2700-3000K, for reading in bed. Everything adjustable down to a few percentage points so as not to disturb sleep.
Ledpoint bill of materials
| Quantity | Code | Description | Function |
|---|---|---|---|
| 1.64 m | F52-R300-784OR2 | LED strip 5m RGB + warm white 3000K COB CRI Ra>90 784led/m 24V 21W/m, cut every 7.14 cm, 12 mm PCB | Headboard backlighting |
| 2 × 0.30 m | F52-300-320OM2 | COB LED strip 5m warm white 3000K CRI Ra>93 320led/m 24V 8W/m, 780 lm/m, cut every 5 cm | Bedside lamps |
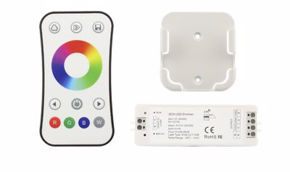
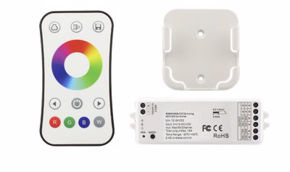
| 1 | 4-channel RF RGBW Controller | 24V receiver with remote control or app | Color and white management |
| 1 | AcTEC ultra slim 60W 24V Power Supply | Thin driver to install behind the headboard | Headboard power supply |
| 1 | Power supply with integrated dimmer | 24V driver with built-in regulation | Bedside tables |
Calculations
Headboard: 23 segments × 7.14 cm = 164 cm; 1.64 × 21 W/m = 34.4 W at maximum (all channels at 100%, a rare situation); the 60 W driver leaves a 74% margin. Bedside tables: 2 × 0.30 × 8 W/m = 4.8 W total; each lamp emits 234 nominal lm, about 170 lm after the diffuser: perfect for reading without illuminating the whole room.
Headboard realization
- Fix on the back of the headboard, 3-4 cm from the top edge, a surface profile for a 12 mm PCB oriented towards the wall.
- Solder the 5-pole cable (V+, R, G, B, W) to the RGB+W strip respecting the silk screen.
- Connect the channels to the RGBW controller, the controller to the AcTEC driver, the driver to the socket or the switched light point.
- Pair the remote control with the receiver and test the scenes: 3000K white at 30% for the evening, amber (red + white) at 5% as a night light.
Bedside lamp realization
- Build a small L-shaped lamp body in oak plywood (base 15×12 cm, upright 30 cm) with a 10×10 mm milling on the back of the upright.
- Insert a mini aluminum profile with an opal diffuser into the milling, glue the 30 cm COB strip, and let the cable exit from the base.
- Connect both lamps to the driver with an integrated dimmer, positioned behind the bed, so they can be regulated with a single command.
Well-being tip
In the bedroom, in the evening, choose tones below 3000K and low intensities: blue and cool light at high intensity is associated with greater stimulation. The "amber" scenarios with a red dominant, obtainable with the RGB+W strip, are ideal as a night light for children or for getting up without being dazzled.

Project 3: headboard in warm white at 30% and wooden bedside lamps.
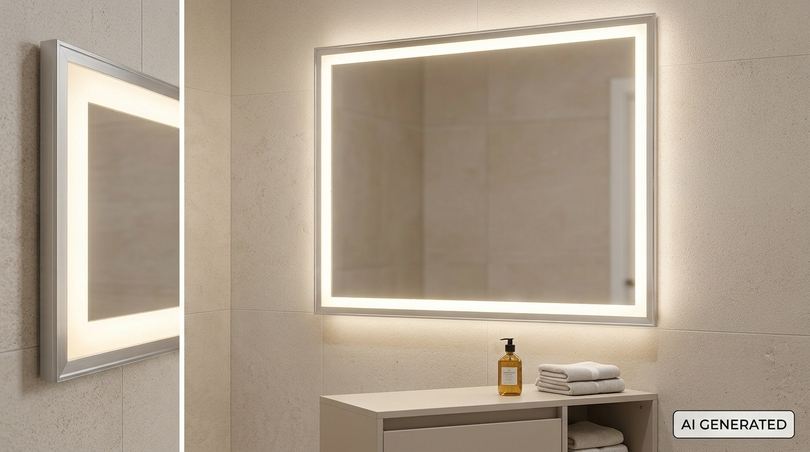
10. Project 4 - Mirror with LED lamps for the bathroom
The backlit mirror or the one with a luminous frame is the project most often requested by homeowners renovating their bathroom. Good mirror light must illuminate the face frontally and laterally, without shadows under the eyes and chin, with high color rendering for makeup and shaving. LED lamps for bathroom mirrors built with dedicated profiles allow achieving all this with thicknesses of just a few millimeters.
Lighting and regulatory objective
80×60 cm mirror, diffuse perimeter light; 3000-4000K; CRI ≥ 90; about 1,500-1,800 emitted lumens. In bathrooms, the position relative to the safety zones (CEI 64-8, section 701) is decisive: the mirror must be installed outside zones 0 and 1, the fixtures must have an IP rating consistent with the zone (at least IPX4 in zone 2), and the SELV power supply must be placed away from water, in an accessible position.
Ledpoint bill of materials
| Quantity | Code | Description | Function |
|---|---|---|---|
| 2 bars | PR-MR01-03 | Aluminum mirror profile, 2 m, silver or black, for PCB up to 12 mm; opaque (-62%) or satin (-67%) diffuser | Luminous frame |
| 2.80 m | F52-300-528OR2 | COB LED strip 3000K CRI Ra>90 528led/m 24V 15.5W/m, 1,590 lm/m | Source |
| 1 | CT-REL02-24V | 24V demisting relay (accessory indicated on the mirror profile data sheet) | Anti-fog film control |
| 1 | AcTEC ultra slim 60W 24V Power Supply | Thin driver | Power supply |
Calculations
Perimeter: 2 × (80 + 60) = 280 cm → 61 segments of 4.55 cm (277.6 cm). Power: 2.776 × 15.5 = 43 W; with a 25% margin, 54 W are needed: the 60 W driver is correct. Nominal flux: 4,414 lm; with the opaque diffuser of the mirror profile (-62%), about 1,680 lm remain, soft and without glare. Why choose a COB and not a 2835? Because in such a thin profile, a few millimeters from the diffuser, only a continuous source guarantees a perfectly homogeneous line.
Step-by-step realization
- Cut the profiles at 45° to form the frame (80 + 80 + 60 + 60 cm) and verify the dry fit.
- Cut the strip into four runs and connect them in series at the corners with short soldered jumpers, maintaining polarity; the input should be positioned at the bottom right, near the cable exit.
- Glue the strip into the profiles, insert the opaque diffuser, join the corners, and fix the frame to the mirror according to the product data sheet mounting diagram.
- Connect the demisting relay in parallel to the driver output or to a dedicated channel, based on the mirror manufacturer's diagram.
- Position the driver in an accessible compartment outside zones 0-1 and connect the primary under a dedicated switch.
Ceiling LED lamps for the bathroom
For general bathroom lighting, which LED lamps are suitable for humid environments? Ceiling lights and spotlights with IP44-IP65 depending on the zone, or a luminous cove in a false ceiling with an IP65 strip in a closed profile. Avoid exposed IP20 strips above the shower and bathtub.
11. Project 5 - Under-cabinet LED lamps for the kitchen
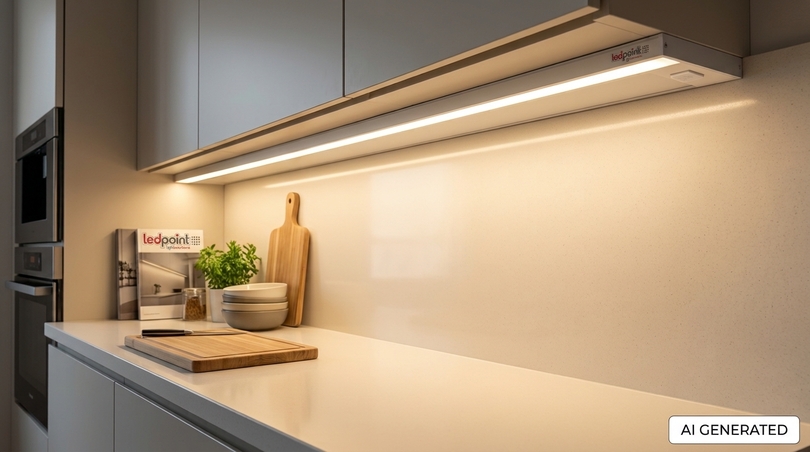
Under-cabinet light is the work light par excellence: it illuminates the surface where you cut, knead, and read a recipe. A central ceiling light, even a powerful one, casts the shadow of the person working right onto the surface. Under-cabinet LED lamps solve the problem and, with a sensor, turn on with a hand gesture without touching switches with dirty hands.
Lighting objective
240 cm long worktop, 60 cm depth; at least 500 lux on the surface; 3000-4000K; CRI ≥ 90 to recognize the freshness of food; sensor ignition and dimming.
Ledpoint bill of materials
| Quantity | Code | Description | Function |
|---|---|---|---|
| 2.20 m | F52-30s-240DF2 | LED strip 3000K 3step 2835 240led/m 24V 19.2W/m, 2,100 lm/m | Source |
| 2 bars | PR-AN02-08-S2 | 16mm angular aluminum profile, 2 meters, with opal diffuser | Beam inclined towards the splashback |
| 1 | SK-PBL-60-24 | Smart furniture power supply 60W 24V, combinable with the SK-CV1 dimmer interface (with radio frequency) or SK-CV0 and compatible sensors | Driver and control logic |
| 1 | SK-CV1 | Dimmer interface with radio frequency | Regulation |
| 1 | - | Infrared "wave" sensor compatible with the system | Contactless ignition |
Calculations
Power: 2.2 × 19.2 = 42.2 W; with a 25% margin, 53 W are needed: the 60 W driver is adequate. Flux: 2.2 × 2,100 = 4,620 nominal lm, about 3,200 lm after the opal diffuser. On the 1.32 m² surface, with a utilization factor of 0.6, well over 1,000 lux are exceeded at full power: professional light that, dimmed to 50%, still remains above the recommended 500 lux. The Ledpoint guide on angular profiles confirms that for a powerful strip under cabinets, the angular aluminum profile is the correct choice for dissipation.
Step-by-step realization
- Fix the angular profiles under the front edge of the cabinets, with the light oriented at 45° towards the wall: this way the beam hits the surface without dazzling the person cooking.
- Cut the strip into two runs (e.g., 120 + 100 cm), solder the cables, and test on the bench.
- Apply the strips, diffusers, and end caps; run the cables in the back of the cabinets.
- Install the SK-PBL-60-24 driver above a cabinet, in a ventilated and accessible position; connect the SK-CV1 interface and sensor according to the manufacturer's diagram.
- Adjust the sensor sensitivity and default brightness.
Variant with luminous shelves
For open kitchen shelves, use the PR-SH01-03 aluminum shelf profile, which integrates the strip into the edge of the shelf. Remember the declared diffuser losses: -19% transparent, -23% semi-opaque, -37% opaque, -39% satin. For gastronomic counters and refrigerated displays, Ledpoint has published a dedicated guide to food lighting with LED strips.
12. Project 6 - Desk LED lamp and linear lamp for the office
In the office, LED lamps must meet precise requirements: 500 lux illuminance on the visual task according to UNI EN 12464-1, glare control (UGR ≤ 19 for VDT work), color rendering Ra ≥ 80 (better ≥ 90), and uniformity. In this project, we build a design desk LED lamp and a linear suspension for a double workstation. It is the ideal project for purchasing managers and architects who want efficient, replicable, and documentable solutions.
Desk LED lamp
A desk lamp built with a COB strip offers linear, uniform light free of pinpoint reflections on the screen. The structure is simple: a heavy base, a bent arm in steel or aluminum tubing, and a 60 cm long linear head.
| Quantity | Code | Description | Function |
|---|---|---|---|
| 2 × 0.60 m | 4000K COB strip CRI Ra>93 400 LED/m 5 mm PCB 11 W/m (Ledpoint COB LED strips range) | 980 lm/m, 100 lm/W, cut every 2 cm | Source on two side-by-side rows |
| 1 | Surface profile for 2 × 5 mm PCB or dual channel | Anodized aluminum with opal diffuser | Lamp head |
| 1 | Power supply with integrated dimmer | 24V driver with regulation | Power supply and dimmer |
Calculations: 1.2 m × 11 W/m = 13.2 W; flux 1,176 nominal lm, about 820 lm after the diffuser. At 45 cm from the surface, indicatively over 500 lux are obtained in the reading area, combined with the general office light. The 4000K temperature favors concentration without the coldness of 6000K.
Realization
- Cut the profile to 62 cm and the two strips to 60 cm (30 segments of 2 cm each).
- Solder the two strips in parallel to a single bipolar cable that runs inside the tubular arm.
- Glue the strips into the two channels, mount the diffuser and end caps.
- Fix the head to the arm with a friction hinge to adjust its inclination.
- House the driver with dimmer in the ballasted base, with cable exit and plug.

Linear suspension for double workstation
For two side-by-side desks (total 320×80 cm), a 240 cm long suspension is made with a 4000K CRI Ra>90 high-density 2835 strip (238 LED/m, 22 W/m) and a large section profile with an opal diffuser. Power: 2.4 × 22 = 52.8 W, with margin 66 W. To integrate it into the company's building automation, a DALI driver is used, such as the 150W 24V DALI + Push Dim LiFud Power Supply, which also allows managing two suspensions from the same driver.
Glare control
To contain UGR: orient the suspension parallel to the direction of gaze, use low-luminance opal diffusers, maintain a height of 70-80 cm from the surface, and verify with a lighting calculation (DIALux or similar) using the available photometric files. In projects for workplaces, calculation verification is always necessary: artisanal construction does not exempt from compliance with UNI EN 12464-1.

13. Project 7 - LED lamps for shop and window display
For a clothing store owner, light is a sales tool: it must attract attention from the street, faithfully reproduce the colors and textures of fabrics, eliminate shadows and reflections, and, if possible, reduce a bill that with old halogen and metal halide spotlights was often one of the heaviest items. In this project, we build high-power linear LED lamps for the window display and exhibition walls.
Lighting objective
120 cm deep and 300 cm wide window display: 1,000-1,500 lux on the mannequins; exhibition walls: 500-750 vertical lux; 3000K for elegant clothing or 4000K for sportswear and denim; CRI ≥ 93 to correctly show the colors of the clothes, avoiding a midnight blue looking black or a beige turning gray.
Ledpoint bill of materials
| Quantity | Code | Description | Function |
|---|---|---|---|
| 2 × 1.40 m | F52-300-1600OR2 (COB LED strips range) | COB LED strip 5m warm white 3000K CRI Ra>93 1600led/m 24V 40W/m 3 cm PCB, 3,910 lm/m; also available in 4000K (F52-400-1600OR2, 3,700 lm/m, 44 W/m) | Window display luminous blades |
| 6 m | FA2-300-320OR2-S1 | COB LED strip 10m warm white 3000K CRI Ra>93 320led/m 24V 9W/m, 785 lm/m | Exhibition shelves and niches |
| 2 | High dissipation finned profile for 30 mm PCB | Anodized aluminum with satin diffuser | Heat sink for HP strip |
| 1 | 150W 24V DALI + Push Dim LiFud Power Supply | Dimmable driver | Window display |
| 1 | 40W 24V 5in1 LiFud Power Supply | Multi-protocol driver | Niches |
Calculations
Window display: 2.8 m × 40 W/m = 112 W; with a 25% margin, 140 W are needed: 150 W driver. Nominal flux: 2.8 × 3,910 = 10,948 lm; with a satin diffuser (estimated 25-30% loss), about 7,700-8,200 lm on a 3.6 m² surface, so over 1,200 average lux. How many lumens are needed to illuminate a window display? As a rule of thumb, 2,000-3,000 lumens per square meter of window display in shopping centers and high-luminosity streets; half in quieter contexts. Niches: 4 m of 9 W/m COB = 36 W, 40 W driver is a bit tight: better 3.5 m per run or two drivers.
Step-by-step realization
- Install the finned profiles in the ceiling of the window display, 30-40 cm from the glass, oriented at 20-30° towards the mannequins to avoid reflections on the glass.
- Apply the HP COB strips: with 40 W/m, the finned profile is mandatory, as specified in the Ledpoint data sheets.
- Power each blade from one end with a 2×1.5 mm² cable (current about 2.3 A per blade).
- Connect the drivers to the DALI bus or push-dim button; program different scenes for the day (100%) and evening (60-70%) and a night scenario with the window closed (30%).
- In the niches, insert the 9 W/m COB into recessed profiles under the shelves, with an opal diffuser, for a grazing light on folded garments.
How much the investment is recovered
Calculation hypothesis (to be adapted to real data): store with 20 75 W halogen spotlights (1,500 W), open 12 hours a day for 310 days a year (3,720 hours). Current consumption: 5,580 kWh/year. Replacing with LED lamps with the same illuminance reduces the load to about 300 W, i.e., 1,116 kWh/year. Saving: 4,464 kWh/year; with an energy cost of €0.25/kWh, this is about €1,116 a year, to which is added the lower load on the summer air conditioning system. With an investment in materials and installation of €1,500-2,500, the return occurs in about 1.5-2.5 years, then the saving is net for the entire useful life.

14. Project 8 - Outdoor and garden LED lamps IP67
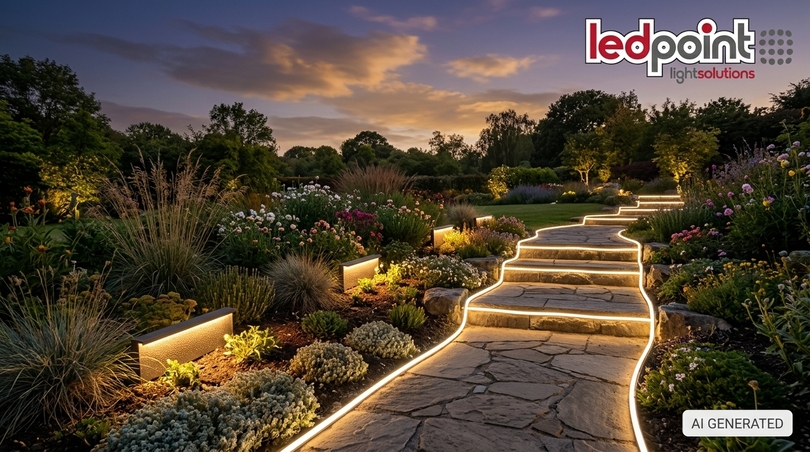
Outdoors, LED lamps must resist rain, frost, UV rays, and thermal shocks. For this reason, instead of normal strips, IP67 polyurethane or silicone neon flex tubes, sealed accessories, and waterproof power supplies are used. The project includes a linear path light for the driveway, step highlighting, and a blade garden lamp, plus an RGB+white variant for facades and signs.
Lighting objective
12 m long driveway: grazing orientation light, 3000-4000K. Steps: continuous line under each riser. 80 cm high garden blade next to the flower beds. IP67 on all exposed components, IP67 power supply or installed in a weatherproof panel.
Ledpoint bill of materials
| Quantity | Code | Description | Function |
|---|---|---|---|
| 2 rolls of 5 m | Neon Flex PU 16x15 mm 4000K | LED Neon Flex in polyurethane 16x15mm top view white 4000K 2835 CRI Ra>90 24V 13.3W 160led/m IP67 5m, about 1,300 lm/m, minimum bending 1.5 cm, cut every 5 cm | Driveway and steps |
| 1.60 m | U52-300W-480OR2-W3 | COB LED strip 3000K 480led/m 24V 6W/m 3mm PCB, IP67 spherical extruded silicone tube, 270 lm/m | Garden blades |
| 1 | MW-XLG150-24A (Mean Well IP67 power supplies range) | Mean Well 150W 24V IP67 power supply | Waterproof power supply |
| - | - | End caps, connectors, and neon kit clips (15 clips with screws and 2 end caps per roll), neutral silicone, IP68 waterproof junctions | Mounting and sealing |
Calculations
Driveway: 10 m of neon flex × 13.3 W/m = 133 W. Garden blades: 1.6 m × 6 W/m = 9.6 W. Total 142.6 W: the 150 W driver would be at 95%, too close to the limit. Correct solution: two separate lines, with the XLG150 dedicated to the driveway (133 W, at the limit of the recommended minimum margin: better to reduce to 9 m or switch to a 200 W driver like the MW-XLG200-24A) and a small IP67 driver for the blades. Each 5 m neon run must be powered from one end with a 2×1.5 mm² cable (about 2.8 A).
Step-by-step realization
- Fix the kit clips along the driveway curb every 25-30 cm, with the light facing the path.
- Cut the neon flex only at the indicated points, apply the system's end caps and connectors, and seal with neutral silicone, allowing 24 hours to polymerize before powering.
- Under each step riser, install a piece of neon flex in a small C-profile that protects against impacts and hides the source.
- For the garden blades, insert the IP67 COB wire into an opal polycarbonate tube Ø 20 mm, closed with siliconized end caps, fixed to a stainless steel stake.
- Position the IP67 power supply in a ventilated pit or on the wall, connect it to a twilight switch or astronomical clock (electrician's work, with dedicated differential protection).
Variant: RGB + white facade and signs
To highlight cornices, arches, or lettering of a venue, the NEO11ES-R30-0705L2-5 - LED Neon Flex 11x20mm side view RGB+3000K 5050 24V 16.7W/m 70led/m IP67 5m combines warm white (540 lm/m) and color; for architectural installations managed by a light director, there is the DMX version NEO11-DMX-56512-10S - LED Neon Flex 11mm RGB DMX 5050 24V 12W 56led/m IP67 10m, with writable DMX address. The entire range is in the Ledpoint Neon Flex category.
Solar LED lamps: when do they make sense
Solar garden LED lamps are convenient where a cable does not reach, but they have modest fluxes and variable autonomy in winter. For reliable lighting of paths and entrances, a 24V line with an IP67 power supply and twilight switch remains the professional solution.
15. Project 9 - Decorative filament-effect LED lamp
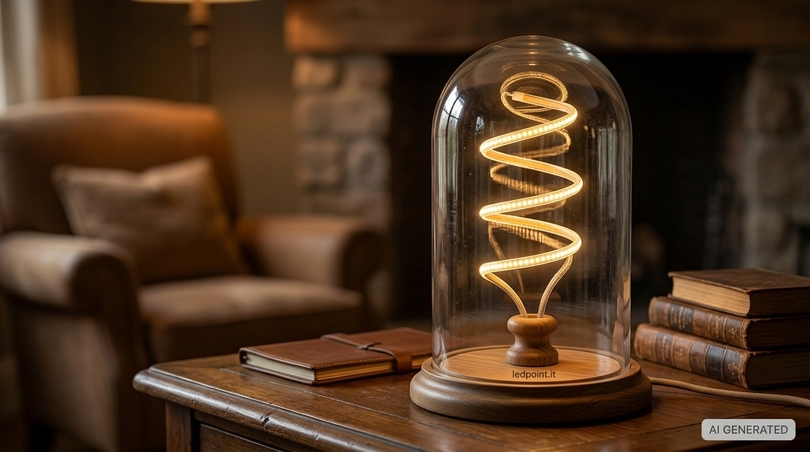
Filament and vintage LED lamps are among the most sought-after for bars, restaurants, industrial-style homes, and luminous favors. With the 3 mm IP67 COB wire in a spherical silicone tube, a unique decorative lamp can be built: a continuous luminous wire, modeled in a spiral or written shape inside a glass bell, which reproduces the filament aesthetic with the consumption and safety of low voltage.
Ledpoint bill of materials
| Quantity | Code | Description | Function |
|---|---|---|---|
| 0.75 m | U52-300W-480OR2-W3 | COB LED strip 3000K 480led/m 24V 6W/m 3mm PCB IP67 in spherical silicone tube, cut every 2.5 cm | Luminous filament |
| 1 | Power supply with integrated dimmer | Adjustable 24V driver | Power supply and regulation |
| 1 | - | Blown glass bell Ø 20 cm, ceiling rose, textile cable 2×0.75 mm², internal support in Ø 2 mm stainless steel wire | Lamp body |
Calculations and realization
0.75 m × 6 W/m = 4.5 W; flux 200 lm: it is an atmospheric lamp, comparable to a 20-25 W decorative filament light bulb. Lowering it to 20% achieves the typical "ember" effect of venues.
- Model the stainless steel wire into a conical spiral (or written shape) and fix it to the ceiling rose lamp holder.
- Cut the COB wire into 30 segments (75 cm), solder the cable, and seal the end with the silicone cap.
- Wrap the COB wire around the support respecting a wide radius of curvature, fixing it with small dots of transparent silicone.
- Pass the textile cable through the ceiling rose, connect to the driver with dimmer, close the bell.
Dynamic variant with COB Control
For a "progressive ignition" or "luminous trail" effect on stairs, frames, and artistic installations, the F52-Co300-320OS2 - COB Control LED strip 5m warm white 3000K CRI Ra>90 320led/m 24V 11W/m can be used, which allows segment control with a dedicated controller.
16. Summary table of the projects
The table summarizes the nine projects with key data: useful as a reminder on site and for preparing a quote for the client.
| Project | Environment | Main strip | Kelvin / CRI | Power | Effective lumens (estimate) | Driver | IP | Difficulty |
|---|---|---|---|---|---|---|---|---|
| 1. Corner floor lamp | Living room | F52-30s-240DF2 | 3000K / Ra>80 | 27 W | ≈ 2,060 | PW-LTH75-24-TD triac | IP20 | Medium |
| 2. Table suspension | Dining room | F52-300-528OR2 | 3000K / Ra>90 | 20 W | ≈ 1,420 | LiFud 40W 5in1 | IP20 | Medium |
| 3. Headboard and bedside tables | Bedroom | F52-R300-784OR2 + F52-300-320OM2 | RGB+3000K / Ra>90 | 34 + 5 W | variable | AcTEC 60W + RF controller | IP20 | Medium |
| 4. Mirror | Bathroom | F52-300-528OR2 | 3000K / Ra>90 | 43 W | ≈ 1,680 | AcTEC 60W | Profile outside zones 0-1 | High |
| 5. Under-cabinet | Kitchen | F52-30s-240DF2 | 3000K / Ra>80 | 42 W | ≈ 3,200 | SK-PBL-60-24 + sensor | IP20 | Low |
| 6. Desk and suspension | Office | 4000K COB 400 LED/m + 4000K 2835 | 4000K / Ra>90 | 13 + 53 W | ≈ 820 + estimate from calculation | Integrated dimmer / LiFud DALI 150W | IP20 | Medium |
| 7. Window display | Shop | F52-300-1600OR2 + FA2-300-320OR2-S1 | 3000K / Ra>93 | 112 + 36 W | ≈ 8,000 + 2,200 | LiFud DALI 150W + 40W | IP20 | High |
| 8. Driveway and garden | Outdoor | Neon Flex PU 4000K + U52-300W-480OR2-W3 | 4000K / 3000K | 143 W | ≈ 13,000 | Mean Well XLG 200W IP67 | IP67 | High |
| 9. Decorative filament | Bar, home | U52-300W-480OR2-W3 | 3000K | 4.5 W | ≈ 200 | Integrated dimmer | IP67 (source) | Low |
17. Replacing halogen lamps with LED: practical guide
Many clients come to the electrician with a simple question: "which LED lamps are most suitable for replacing old halogen bulbs?". The answer depends on the base, the type of power supply, and, increasingly, the opportunity to transform the fixture instead of just changing the bulb. Since 2018-2023, most halogens have left the European market: replacing them with LED is no longer just a choice of savings, but a necessity.
Table of the most common bases
| Base | Typical voltage | Use | LED substitute | Watch out for |
|---|---|---|---|---|
| E27 | 230V | Chandeliers, table and floor lamps | LED bulb, globe, or filament E27 | Bulb dimensions, dimmability |
| E14 | 230V | Table lamps, wall sconces, candle chandeliers | LED E14 candle, olive, sphere | Heat in closed shades |
| GU10 | 230V | Recessed spotlights | GU10 LED spot, 36° or 60° beam | Beam angle, CRI |
| GU5.3 / MR16 | 12V | Low voltage spotlights | MR16 12V LED spot | Electronic transformers with minimum load |
| G9 | 230V | Wall sconces and modern chandeliers | G9 LED capsule | Size and heat |
| G4 | 12V | Furniture lamps, hoods, campers | G4 12V LED capsule | AC/DC, polarity |
| R7s 78 / 118 mm | 230V | Floor lamps, projectors | R7s linear LED or conversion with strip | Heat, horizontal position |
When it is convenient to transform the fixture with LED strips
For 300-500 W R7s floor lamps, the linear LED bulb is often a compromise: narrow body, limited dissipation, little light. Transforming the floor lamp with 24V LED strips in an aluminum profile and a dimmable driver (as in Project 1) gives more light, durability, and smooth regulation. The same applies to old G4 halogen under-cabinets and ceiling coves with T5 fluorescent tubes: conversion to strip in profile is today the most efficient solution.
How to safely replace halogen lamps with LED
- Remove voltage from the panel and verify the absence of voltage.
- Identify the base and voltage (230V or 12V); if there is a transformer, verify if it is electronic or toroidal.
- With 12V spotlights on electronic transformers for halogens, consider replacing the transformer with a 12V DC LED power supply: many transformers require a minimum load that LED lamps do not reach, causing flickering.
- If the circuit has a dimmer, verify compatibility (section 18).
- Choose the LED lamp based on the halogen's lumens, not watts (table in section 3.1).
18. Dimmable, smart, and home automation LED lamps
Light regulation is the function that transforms a good LED lamp into a lighting system. But it is also the main source of problems: flickering, buzzing, LED lamps that remain slightly on when off, step regulation. There is only one key: the dimming protocol must be the same on the command and the driver.
Dimming protocols
| Protocol | How it works | Pros | Cons | Ledpoint driver example |
|---|---|---|---|---|
| TRIAC (phase cut) | The wall dimmer cuts the 230V sine wave | Uses existing dimmers, no extra cable | Compatibility to verify, possible buzzing | PW-LTH75-24-TD |
| Push-dim | Normally open button: short press on/off, long press regulates | Economical, uses system buttons | Synchronization of multiple drivers to manage | LiFud 40W 5in1, LiFud 150W DALI |
| 0-10V / 1-10V | Analog signal on two dedicated wires | Standard in tertiary sector | Additional wiring | LiFud 40W 5in1, Mean Well ELG-B |
| DALI | Addressable digital bus | Scenes, groups, diagnostics, building automation | Requires programming | LiFud 150W DALI, Mean Well ELG-DA |
| PWM | Pulse width modulation on low voltage side | Regulation down to very low values | Low frequency = flicker in video | Controllers and drivers with PWM input |
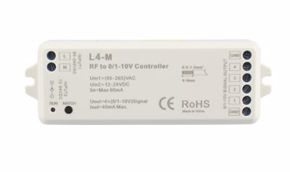
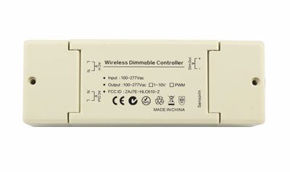
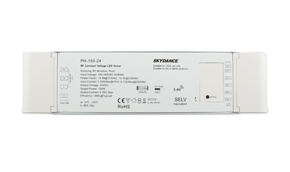
| RF wireless | Radio frequency remote control or panel | No command cable, ideal in renovations | Limited range through thick walls | SK-PH-75-24 (2, 3, 4 channels), SK-LN-150-24-RF |
| Wi-Fi / Zigbee / Bluetooth | Smart controller via app and voice assistants | Control from smartphone, Alexa, Google Home | Network dependence, configuration | Ledpoint controllers range |
How to verify compatibility between LED lamp and dimmer
- Verify that the lamp or driver is declared dimmable and with which protocol. A non-dimmable LED lamp connected to a dimmer will be damaged.
- For triac dimmers, check the type (leading or trailing edge cut) and minimum power: many dimmers require a minimum load higher than that of a few LED lamps.
- Consult the compatibility lists of dimmer and driver manufacturers.
- With strips, it is always preferable to regulate the driver (triac, push-dim, DALI) or a downstream controller, not the mains voltage generically.
- Test the regulation across the entire range: if flickering appears at low levels, set the dimmer's minimum level or change the protocol.
Smart LED lamps: Alexa, Google Home, and apps
Smart LED lamps are controlled from the phone, by voice, or with automations (timers, presence, sunrise and sunset). With strips, the "smart" part is in the controller: it connects between the power supply and the strip and communicates with the app via Wi-Fi, Zigbee, or Bluetooth. Do smart LED lamps consume more energy than traditional ones? No: in operation, they consume the same as the source; in standby, the controller typically absorbs less than half a watt, a negligible fraction of the savings obtained with regulation and automatic switch-offs.
How to choose LED lamps suitable for a home automation system
For KNX or proprietary BUS systems, the most robust solution is a DALI gateway and DALI driver on each line; for homes without a bus, RF or Zigbee controllers on board the lamp; for light renovations, push-dim on existing buttons. Decide the protocol before choosing the lamps to avoid having to replace drivers after the work is finished.
19. Consumption, bill savings, and return on investment
"How much is saved on the bill by switching to LED lamps?" is the question that decides many quotes. Answering with a transparent calculation builds trust and shows the client that the investment is measurable. Below is the method, a comparison table, and a domestic example.
How to understand the consumption of an LED lamp
Annual consumption (kWh) = power (W) × hours of ignition per day × days ÷ 1,000. For strips, the power per meter multiplied by the length is considered, plus driver losses (typical efficiency 85-92%). Example: 3 m of 14.4 W/m strip = 43.2 W; with a driver at 87% efficiency, the absorption from the grid is about 50 W.
Consumption comparison for the same light (≈ 1,500 lm)
| Technology | Power | Hours/year | kWh/year | Annual cost at €0.25/kWh | Cost over 10 years |
|---|---|---|---|---|---|
| Incandescent 100 W | 100 W | 1,500 | 150 | €37.50 | €375 |
| Halogen 70 W | 70 W | 1,500 | 105 | €26.25 | €262 |
| Compact fluorescent 23 W | 23 W | 1,500 | 34.5 | €8.63 | €86 |
| 14 W LED bulb | 14 W | 1,500 | 21 | €5.25 | €52 |
| 24V LED strip in profile (≈ 12 W + driver) | 13.5 W | 1,500 | 20 | €5.06 | €51 |
Indicative values; the actual rate depends on the contract. The table does not include replacement costs, which for incandescent and halogen would further multiply the gap.
Example: a 100 m² house
Hypothesis: 12 medium 60 W halogen light points, on average 3 hours a day (720 W × 3 h × 365 = 788 kWh/year). Replacing with LED lamps of about 9 W equivalent reduces this to 118 kWh/year: saving of about 670 kWh, equal to about €168 a year at €0.25/kWh. In ten years, over €1,600, with an investment that in the domestic sector is generally recovered in one to two years.
How to calculate the return on investment of an LED project
Payback (years) = intervention cost ÷ (annual energy saving + annual maintenance saving). In warehouses, offices, and stores, maintenance savings (replacements, work at height, downtime) can be worth as much as energy savings. For corporate buildings, it is advisable to include in the calculation the reduction of summer thermal load and, where applicable, the energy efficiency incentives in force at the time of the intervention, to be verified with your tax consultant.
20. Lifespan, maintenance, and common problems
"Why do LED light bulbs last a short time?" If an LED lamp fails early, in the vast majority of cases the cause is not the LED but heat, the driver, or the installation. Let's see how to prolong the life of LED lamps and how to diagnose the most frequent problems.
How long an LED lamp lasts
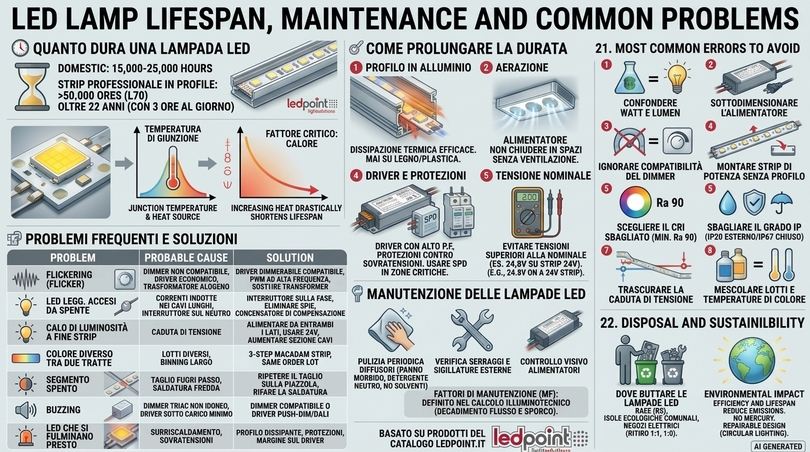
A domestic LED bulb usually declares 15,000-25,000 hours; a professional strip in a profile can exceed 50,000 hours L70. At 3 hours a day, 25,000 hours are over 22 years. The actual lifespan depends above all on temperature: every extra degree at the junction accelerates flux decay.
How to prolong the life of LED lamps
- Always mount power strips on an aluminum profile, never on wood or plastic without dissipation.
- Do not enclose LED lamps in shades or compartments without ventilation.
- Size the power supply with a 20-30% margin and install it in a ventilated position.
- Use drivers with high PF and overvoltage protections; in areas subject to lightning, provide SPD.
- Avoid voltages higher than nominal: a 24V strip powered at 24.8V works overloaded.
Frequent problems and solutions
| Problem | Probable cause | Solution |
|---|---|---|
| Flickering | Incompatible dimmer, cheap driver, low frequency PWM, halogen transformer | Compatible dimmable driver, high frequency PWM, replace transformer |
| LED lamps that remain slightly on or flash when off | Induced currents in long cables, switch on neutral, buttons with light indicator | Switch on phase, eliminate indicators, compensation capacitor/load |
| Drop in brightness at the end of the strip | Voltage drop | Power from both ends, use 24V, increase section |
| Different color between two runs | Different batches, wide binning | 3 MacAdam step strips, same batch |
| Dead segment | Cut off pitch, cold solder joint | Repeat the cut on the pad, redo the soldering |
| Buzzing | Unsuitable triac dimmer, driver under minimum load | Compatible dimmer or push-dim/DALI driver |
| LEDs that burn out early | Overheating, overvoltages | Dissipating profile, protections, margin on driver |
Maintenance of LED lamps
Maintenance is minimal: periodic cleaning of diffusers with a soft cloth and neutral detergent (never solvents on polycarbonate), checking of tightenings and sealings in outdoor systems, visual inspection of power supplies. In professional projects, a maintenance factor is defined in the lighting calculation, which takes into account flux decay and dirt over time.
21. The most common mistakes to avoid
In years of technical assistance to installers, we have seen the same errors repeating themselves. Here they are, with the solution.
Confusing watts and lumens
Buying "a 10 W LED lamp" without looking at the lumens leads to rooms that are too dark or too bright. You choose in lumens, you verify in watts.
Undersizing the power supply
A driver at 100% of the load heats up, loses efficiency, and fails. The 20-30% margin is not excessive prudence but compensation for derating.
Ignoring dimmer compatibility
This is the primary cause of flickering and buzzing. Always verify the protocol.
Mounting power strips without a profile
Gluing 20 W/m onto a wooden cabinet means halving the life of the source. The aluminum profile is an integral part of the LED lamp.
Choosing the wrong CRI
A CRI of 80 in a clothing store or in a bathroom with a mirror makes colors look dull. At home, at least Ra 90.
Getting the IP rating wrong
An IP20 strip outdoors, even under a porch, will oxidize in a few months. But the opposite is also a mistake: an IP67 silicone inside a closed cabinet retains heat unnecessarily.
Neglecting voltage drop
Beyond 5 meters, power from both ends or at multiple points, with adequately sized cables.
Mixing batches and color temperatures
Two runs with different batches can have different tones. Buy all the strip for a project in the same order and choose 3-step binning.
22. Disposal and sustainability of LED lamps
LED lamps are more sustainable than previous technologies, but at the end of their life they are waste electrical and electronic equipment (WEEE) and must not be thrown in unsorted waste or glass.
Where to throw away LED lamps
Exhausted LED lamps are delivered to municipal ecological islands (grouping R5 for light sources; fixtures such as ceiling lights and drivers fall into other WEEE groupings) or to electrical material stores which, according to the "one for one" and "one for zero" withdrawal regulations, must accept small WEEE. Strips and drivers should be separated when possible.
Environmental impact over the life cycle
The largest share of the environmental impact of a lamp is linked to the energy consumed during use: for this reason, the efficiency and durability of LED lamps substantially reduce overall emissions compared to halogens and incandescents. To this is added the absence of mercury. Building repairable lamps, with a replaceable driver, is a further step towards circular lighting.
23. Prices, quality, and how to recognize a good LED lamp
The price of LED lamps varies enormously: from a few euros for a generic bulb to hundreds of euros for a professional fixture. To build or purchase LED lamps with the best value for money, it is advisable to evaluate the cost per lumen and per hour of life, not the sticker price.
How to understand if an LED lamp is of good quality
- Complete technical data sheet: real lumens, lm/W, CRI, MacAdam binning, L70/L80, operating temperature, energy class.
- Chip brand and LM-80 tests: many Ledpoint strips indicate the manufacturer and version of the chips (for example, Honglitronic) and LM-80 compliance.
- PCB and adhesive: adequate copper thickness and quality double-sided tape (Ledpoint data sheets indicate 3M 9495LE).
- CE marking and RoHS compliance, with declaration of conformity available.
- Certified drivers with declared efficiency, PF, and protections.
- Warranty and real technical assistance, with an interlocutor capable of answering questions on compatibility and sizing.
What certifications must LED lamps have for professional use
CE marking (with applicable low voltage, electromagnetic compatibility, RoHS, and ecodesign directives), compliance with the EN 60598 series for fixtures, EN 62471 for photobiological safety, EU energy label for sources, any voluntary marks (ENEC). For large corporate purchases, it is good practice to request technical data sheets, declarations of conformity, and photometric files before ordering.
Bulk purchases and professionals
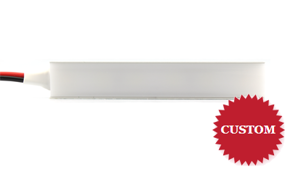
For installers, retailers, and purchasing offices that need large quantities of strips, profiles, and power supplies, Ledpoint offers dedicated conditions for professionals and the possibility of customizing LED strips (lengths, wiring, special versions). To request a quote or consult the technical catalogs, visit the Ledpoint Catalogs page.
| Criterion | Generic cheap LED lamp | LED lamp built with professional components |
|---|---|---|
| Declared lumens | Often optimistic | Declared per meter and verifiable |
| CRI | ≈ 80 or not declared | Ra > 90 / > 93 / > 95 to choose |
| Color uniformity | Wide binning | 3 MacAdam steps |
| Dissipation | Minimal | Sized aluminum profile |
| Driver | Integrated, not replaceable | Separate, certified, replaceable |
| Dimming | Absent or limited | Triac, push-dim, 0-10V, DALI, RF, smart |
| Cost per hour of life | High | Low |
24. Frequently asked questions about LED lamps
We have collected the questions that electricians, interior designers, architects, shopkeepers, purchasing managers, DIY enthusiasts, and homeowners ask us most often about LED lamps. Click on each question to open the answer.
What are LED lamps?LED lamps are lighting fixtures that produce light with semiconductor diodes. Compared to halogens and incandescents, they consume up to 85% less, last tens of thousands of hours, turn on instantly, and, if built with LED strips and aluminum profiles, can be custom-made for any environment. |
Which LED lamps are most suitable for replacing old halogens?It depends on the base: E27, E14, GU10, G9, and G4 have direct LED substitutes chosen in lumens. For R7s floor lamps, G4 under-cabinets, and coves with fluorescent tubes, it is convenient to convert the fixture with 24V LED strips in an aluminum profile and a dimmable driver, obtaining more light, durability, and smooth regulation. |
How do I check if an LED lamp is compatible with my dimmer?Check that the lamp or driver is declared dimmable and with which protocol: triac, push-dim, 0-10V, DALI, or RF. For triac dimmers, verify the cut type and minimum load, consult the compatibility lists, and test the entire range. With strips, a dedicated dimmable driver is preferable. |
What is the difference between warm, natural, and cool light?Warm light (2700-3000K) is yellow and relaxing, ideal for the living room and bedroom; natural or neutral light (3500-4500K) is sharp, suitable for the kitchen, bathroom, office, and stores; cool light (5000-6500K) is bright and technical, for workshops and warehouses. With the same lumens, they illuminate equally: the perception changes. |
How many lumens are needed to illuminate a room?Multiply the surface area by the desired lux and divide by a utilization factor of 0.5-0.7. Indicatively: living room 150-300 lm/m², kitchen 400-700 lm/m², bedroom 150-200 lm/m², office 600-800 lm/m². A 25 m² living room therefore requires about 4,000-7,500 distributed lumens. |
How long does an LED lamp last?A domestic LED bulb declares 15,000-25,000 hours, a professional strip in an aluminum profile can exceed 50,000 hours L70. The actual lifespan depends above all on the operating temperature: correct dissipation, power supply with margin, and absence of overvoltages are the decisive factors. |
How much is saved on the bill with LED lamps?Compared to halogen and incandescent, 80-85% is saved for the same light. In a 100 m² house with 12 60 W halogen light points on for 3 hours a day, the saving is about 670 kWh a year, about €168 with energy at €0.25/kWh. |
What color rendering index is needed for a clothing store?To faithfully show the colors and textures of fabrics, a CRI of at least Ra 90 is needed, better Ra 93-95. Ledpoint COB strips with Ra greater than 93 and versions with CRI over 95 prevent blues, beiges, and blacks from appearing altered, enhancing the merchandise in the window display and on the shelves. |
What IP rating must an outdoor LED lamp have?At least IP65 under protected canopies and porches, IP67 if exposed to rain, irrigation, or stagnation, IP68 for continuous immersion such as pools and fountains. Connectors, junctions, and the power supply must also have a consistent protection rating, otherwise the weak point becomes the wiring. |
Can I build an LED lamp with strips myself?Yes: with 24V LED strips, an aluminum profile, a diffuser, and a certified power supply, table, floor, suspended, and under-cabinet lamps can be built. Cutting, soldering, and low-voltage assembly are within the reach of an expert enthusiast; connection to the 230V mains must be performed by a qualified electrician. |
Why do LED lamps flicker or remain on when off?Flickering often depends on incompatible dimmers, cheap drivers, or halogen transformers. The weak glow when off is caused by induced currents in cables, switches on the neutral, or buttons with a light indicator. It is solved with adequate drivers, a switch on the phase, and, if necessary, a compensation load. |
Is it better to use 12V or 24V LED strips to build a lamp?For artisanal lamps, 24V is preferable: at the same power, it halves the current compared to 12V, reduces voltage drop, and allows longer runs without loss of brightness. 12V remains useful for small appliances, campers, nautical use, or where the existing system is already 12V. |
Are LED lamps harmful to health?LED lamps compliant with the EN 62471 standard on photobiological safety are safe for normal use. For comfort, it is advisable to choose drivers without flicker, avoid direct viewing of very bright sources, and prefer warm, low-intensity light in the evening, especially in the bedroom. |
Which LED lamps are compatible with Alexa and Google Home?Dedicated smart bulbs or LED strips paired with a Wi-Fi, Zigbee, or Bluetooth controller compatible with voice assistants. The controller is installed between the power supply and the strip and allows switching, regulation, color, and scenarios from an app or by voice, with negligible standby consumption. |
How is the power supply of an LED lamp with a strip sized?Multiply the watts per meter of the strip by the length and add a 20-30% margin. Example: 3 meters of 14.4 W/m strip absorb 43.2 W; with the margin, about 54-56 W are needed, so a 60 W 24V power supply. The voltage of the driver and the strip must match. |
Where do you throw away exhausted LED lamps?LED lamps are WEEE: they must be taken to municipal ecological islands or delivered to electrical material stores, which collect small WEEE according to the one-for-one and one-for-zero rules. They must not be thrown in unsorted waste or glass collection. |
25. LED lamps: a design tool
LED lamps are no longer just low-consumption light bulbs: they are a design tool. Knowing lumens, Kelvin, CRI, IP rating, and dimming protocols allows choosing the right source for every environment; knowing how to work with strips, profiles, and power supplies allows going beyond the catalog and building custom LED lamps that are more efficient, more durable, and repairable.
The nine projects in this guide, from the corner floor lamp to the window display with high color rendering COB, down to the IP67 path light and the decorative filament, share the same method: design the light, size with margin, dissipate heat, choose the control before the components. It is the method we use every day at Ledpoint with installers, designers, and retailers.
If you are preparing a project, start from the technical data sheets of the cited products: COB LED strips, IP67 Neon Flex, 24V power supplies, controllers, and aluminum profiles. For current and cable calculations, keep the Ledpoint technical guide on amperes and LED strips at hand, and for particular configurations, contact our technical office for a dedicated quote.
This article was developed with the support of artificial intelligence and subsequently reviewed, corrected, and validated by the Ledpoint.it technical team, which guarantees its reliability and compliance with official sources.