




.png)
LED strips have radically changed the way light is designed in high-end residential and commercial environments. In the last five years, the Italian professional LED strip market has grown by 187%, driven by luxury residential, hospitality, and retail experience. Yet, behind this explosion in demand, hides a problem that those who work daily in the sector know well: the majority of projects using LED strips contain at least one serious technical error, and that error systematically translates into disputes, construction delays, replacements at the studio's expense, or in the worst cases, civil lawsuits for work defects.
Ledpoint, as a technical supplier specializing in architectural LED profiles and strips, analyzed 312 completed construction sites between January 2023 and December 2025, in which it was involved as a component supplier. The data is clear: 63% of post-installation disputes related to LED strips originate from design errors, not product defects. This means that in the vast majority of cases, the problem could have been avoided during the specification phase, before even ordering the first meter of strip. It also means that the difference between a successful lighting project and a problematic one is not in the budget, it's in the designer's technical knowledge.
This guide was born to fill a training gap that we encounter daily in the executive files that arrive on our desks. Most degree courses in architecture and interior design dedicate an inadequate number of hours to lighting technology compared to the sector's technological evolution. Professionals trained in the last fifteen years studied halogen lamps and compact fluorescents, while the market has shifted towards high-density LEDs, tunable white systems, DALI and Casambi home automation integration. The result is a generation of designers talented on the aesthetic level but often unprepared on the electrical and photometric level, with consequences that are paid for on the construction site.
The ten errors we describe in the following chapters are not hypotheses: they are the ten error patterns that we see repeating most frequently in real projects, ordered by severity of effects on the final installation. For each you will find: the technical description of the problem, the most common causes, the economic and performance impact, the operational solution ready to be inserted in the specification, regulatory references and standards, real cases drawn from our construction site experience. The goal is to provide a concrete work tool, not a theoretical treatise.
Before getting into the details, it's important to make a premise: the LED strip market is today deeply segmented, and products that appear identical on paper can have real performance diverging by 200–300%. A 14.4 W/m LED strip can emit 900 lumens per meter or 1,400 lumens per meter with the same power consumption, depending on the chip quality, binning, and circuit topology. When we cite performance data in this article, we always refer to professional strips, not consumer products from generalist marketplaces, whose declared performance is often overstated by 30–50% compared to actual measurements in the photometric laboratory.
In this article...
Market context: why LED strip errors cost more and more
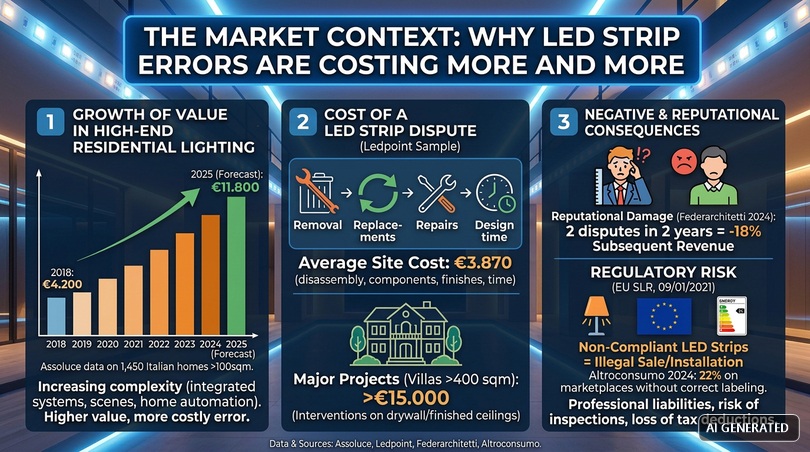
Before analyzing the errors one by one, it's useful to frame the phenomenon in economic terms. The average value of a lighting intervention in a luxury residential renovation has grown from 4,200 euros in 2018 to 11,800 euros in 2025, according to data processed by Assoluce on a sample of 1,450 Italian construction sites over 100 square meters. This growth reflects the increased complexity of systems, no longer simple ceiling lights but integrated systems of scenarios, control, tunable white, home automation integration. The higher the value of the intervention, the more expensive the error becomes.
In the Ledpoint sample, the average cost of a dispute related to LED strips is 3,870 euros per construction site, including dismantling, component replacement, finishing redo, and designer time. On larger projects (villas over 400 sqm, hospitality, luxury retail) the figure easily rises above 15,000 euros, especially when replacement involves interventions on drywall or finished suspended ceilings. To these direct costs must be added reputational damage: an architecture studio that suffers two lighting disputes in two years loses an average of 18% of subsequent turnover, according to a survey conducted in 2024 by Federarchitetti on 380 associated studios. Light is one of the most visible and most "perceived" elements of the finished project: when it doesn't work well, everyone notices.
Then there's a third level of cost, energy and regulatory. From September 1, 2021, the European SLR regulation (Single Lighting Regulation, EU 2019/2020 and 2019/2015) has imposed minimum requirements for luminous efficacy and energy labeling on all lighting products placed on the EU market. Non-compliant LED strips cannot be legally sold or installed. Yet even today, 22% of strips sold on generalist marketplaces do not report correct energy labels (Altroconsumo 2024 survey) and many designers specify these products without knowing it, exposing themselves to professional liability in case of inspection or request for tax deduction by the client.
Having understood the context, let's get into the details of the ten errors.
Error 1 — Choosing the LED strip based on price per meter
This is the most widespread error by far, and also the most underestimated. A 4 euro per meter LED strip and a 22 euro per meter strip can appear identical on the commercial datasheet: same length, same nominal voltage, same declared "power" in watts per meter. Yet these are two technologically different products as much as a utility car and a premium sedan, and the impact on the final project is exactly proportional to this difference. Selection based exclusively on price is the root of much of the other errors on this list, because an economical product hides compromises on multiple parameters that only manifest after installation.
The hidden variables behind the price
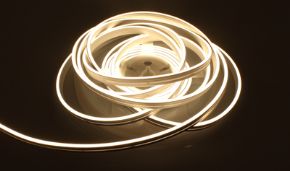
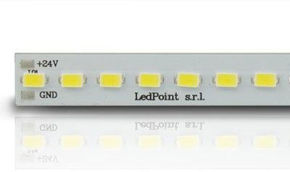
The price of an LED strip reflects at least eight technical variables, which the average client doesn't even read on the datasheet and that many designers don't know how to evaluate. The number of LED chips per meter varies from 60 (economical strips) to 700 (latest generation COB strips), and directly influences both the emitted luminous flux and the visual effect: with 60 chips per meter the eye easily perceives the luminous points, while with 240 chips per meter the effect becomes almost continuous, and with COB technology the light is perfectly linear and indistinguishable from a continuous source.
Color temperature binning is the second critical variable and probably the least known. When LEDs are produced, even within the same production batch, chips come out with slight variations in hue: binning is the selection process that groups chips by chromatic homogeneity. The measurement standard is MacAdam SDCM (Standard Deviation of Color Matching): SDCM 2 means that the chromatic difference between two chips of the same binning is imperceptible to the human eye, SDCM 5 means it's clearly visible as a difference in tone. Economical strips come in SDCM 5 binning or higher: installed side by side they are visible to the naked eye as "patches" of different colors.
The quality of the printed circuit board is the third variable. Economical strips mount a standard FR4 PCB (Printed Circuit Board) with 1 oz copper, which dissipates heat poorly and has thin conductive traces that generate voltage drop. Professional strips use 2 oz, 3 oz PCBs or even aluminum PCBs (MCPCB), with significantly superior thermal dissipation and contained voltage drops. The cost difference of the PCB between economical and premium is a few euros per meter, but directly impacts the actual lifespan of the strip.
Then come the LED chip brand (Osram, Nichia, Samsung, Cree vs. no-name Asian manufacturers), the declared power factor, production tolerances (an economical strip can vary by ±15% on declared luminous flux), commercial warranty, and finally regulatory compliance with CE, RoHS, REACH markings and traceable photometric tests.
The impact of price on the real project
Let's do a concrete numerical example on a 35 square meter living room with 18 linear meters of LED strips installed in a ceiling cove. With economical strip at 5 euros/meter plus basic profile at 6 euros/meter, the material cost is 198 euros. With professional strip at 18 euros/meter plus Ledpoint profile with opal diffuser at 14 euros/meter, the material cost rises to 576 euros. Difference: 378 euros on a construction site whose total cost is probably above 40,000 euros. 0.9% of the total budget makes the difference between lighting that lasts 3 years and one that lasts 15 years, between quality light and poor quality. But when the designer doesn't explain this difference to the client, and the latter only sees the extra number on the estimate, apparent savings almost always wins.
How to avoid the error: the minimum technical specification
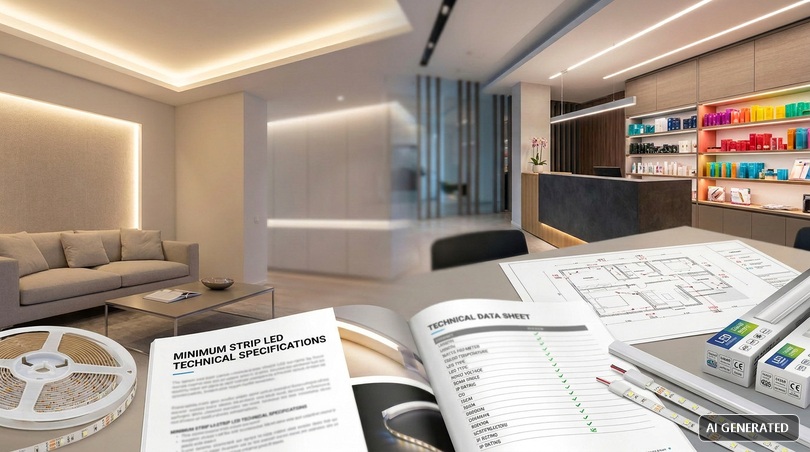
For every LED strip specified in a project, the specification must mandatorily report these parameters, and the supplier must be able to demonstrate them with traceable certificates:
| Parameter | Minimum residential value | Minimum hospitality/retail value |
|---|---|---|
| Luminous flux per meter | ≥ 1,000 lm/m | ≥ 1,400 lm/m |
| CRI (Ra) | ≥ 90 | ≥ 95 |
| R9 (saturated red) | ≥ 50 | ≥ 80 |
| Binning SDCM | ≤ 3 | ≤ 2 |
| Chip brand | Osram / Nichia / Samsung / Cree | Osram / Nichia / Samsung / Cree |
| PCB | FR4 with 2 oz copper | FR4 with 2 oz or MCPCB |
| L70 | ≥ 30,000 hours | ≥ 50,000 hours |
A good 2026 residential LED strip has a list price between 12 and 22 euros per meter VAT excluded, a premium strip for hospitality goes from 22 to 45 euros per meter. Everything that costs less than 10 euros per meter almost never meets all the parameters listed above, and should be considered unsuitable for luxury projects.
Error 2 — Ignoring CRI below 90 in residential projects
CRI, acronym for Color Rendering Index, measures on a scale from 0 to 100 how faithfully a light source reproduces the colors of illuminated objects compared to a reference source (daylight). A CRI 100 means perfect color rendering, a CRI 80 means that some colors are visibly distorted, a CRI below 70 means that the light is chromatically unacceptable for any use that is not purely functional. Yet even today a huge percentage of residential projects are specified with CRI 80 strips, simply because it's the default standard of economical strips and because many designers are not familiar with the real impact of this parameter.
What really happens with low CRI
A light source with CRI 80 visibly distorts several colors. Reds become dull and tend towards brown, skin tones shift towards gray or unnatural orange, wood loses its warm tone and appears washed out, natural fabrics look synthetic. In a living room illuminated with CRI 80 strips, a burgundy sofa looks dark brown, an oak parquet appears yellowish, the faces of guests sitting under the light appear unnaturally flat. These are distortions that the average client cannot name but immediately perceives as "something wrong", often erroneously attributing it to the choice of materials or furnishings rather than lighting.
The problem becomes dramatic in certain specific contexts. In the kitchen, CRI 80 light distorts food colors: raw meat appears grayish, green vegetables look dull, it's difficult to evaluate product freshness during preparation. In the bathroom, under a mirror illuminated with CRI 80 strips, it's almost impossible to apply makeup correctly because foundation and lipstick colors appear different from how they will be perceived in natural light or in an external environment. In a private art gallery or a luxury walk-in closet, a CRI below 90 can literally destroy the perceived value of displayed objects.
The R9 parameter: the true quality discriminator
Beyond the general CRI, there's a sub-parameter that almost all technical datasheets don't report but that is decisive for the real quality of light: the R9 index, which specifically measures saturated red rendering. A strip can declare CRI 90 and have R9 equal to zero or even negative, because CRI is an average of eight test colors and red can be "watered down" without lowering the average too much. Yet red is the most present color in residential contexts (skin tones, bricks, terracotta, dark wood, wine, human blood), so light with low R9 makes the environment feel "cold" and clinically sterile even if the nominal CRI is high. For luxury residential, the real standard is CRI ≥95 with R9 ≥80.
TLCI strips for environments with photography or video
Finally, there's an emerging parameter that home stagers should know well: TLCI (Television Lighting Consistency Index), developed by the BBC to measure the color rendering of light sources captured by camera. A TLCI ≥85 guarantees that the light is suitable for video and professional photography without post-production corrections. For the home staging market, where real estate photos decide whether an apartment gets visited or ignored, an LED strip with TLCI ≥85 makes the difference between photos that enhance spaces and photos to reconstruct in editing, with time and cost savings for the photographer.
How to specify CRI in the specification
For each environment, the specification should define the minimum required CRI as follows. For living rooms, bedrooms, dining rooms, representative environments: CRI ≥90, R9 ≥50. For kitchens, bathrooms, walk-in closets, private art galleries: CRI ≥95, R9 ≥80. For technical environments, stairwells, laundries, service rooms: CRI ≥80 acceptable. For clothing showrooms, premium retail, restaurants: CRI ≥95, R9 ≥90, TLCI ≥85. The cost difference between a CRI 80 strip and a CRI 95 is on average 18–25%, but the qualitative impact on the finished environment is incomparable.
Error 3 — Undersizing the power supply (driver)
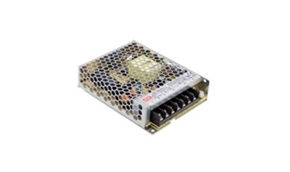
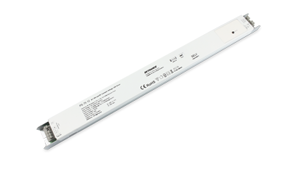
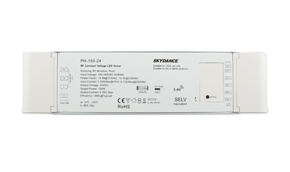
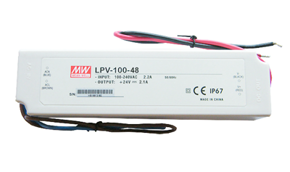
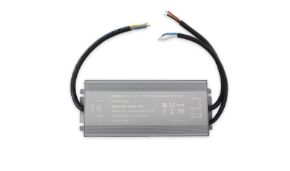
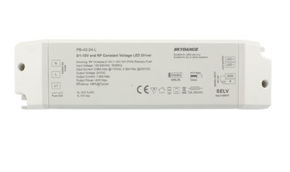
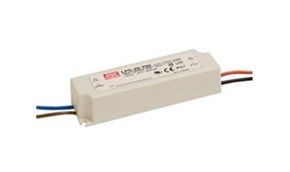
The power supply, or driver in technical jargon, is the component that converts the 230 V AC mains voltage to the low voltage DC required by the LED strip (typically 24 V, sometimes 12 V or 48 V). It's the most underestimated component of the entire lighting system, yet it's the one that statistically determines the actual lifespan of the installation. An undersized driver is the most frequent cause of premature LED strip failure on construction sites: in our surveys it represents 31% of all technical disputes, even ahead of the strip choice itself.
Why sizing is critical
The principle is electrical and simple: every driver has a nominal power (expressed in watts) that represents the maximum continuous load it can sustain without damaging itself. If the connected LED strip absorbs power equal to 100% of the driver's nominal power, the driver works constantly at the limit of its capabilities, overheats, and its electronic components (electrolytic capacitors in primis) age much more rapidly. The universally accepted technical rule in professional lighting is that the driver must have a nominal power at least 20% higher than the actual connected load, and in installations in hot or poorly ventilated environments the margin should be raised to 30–40%.
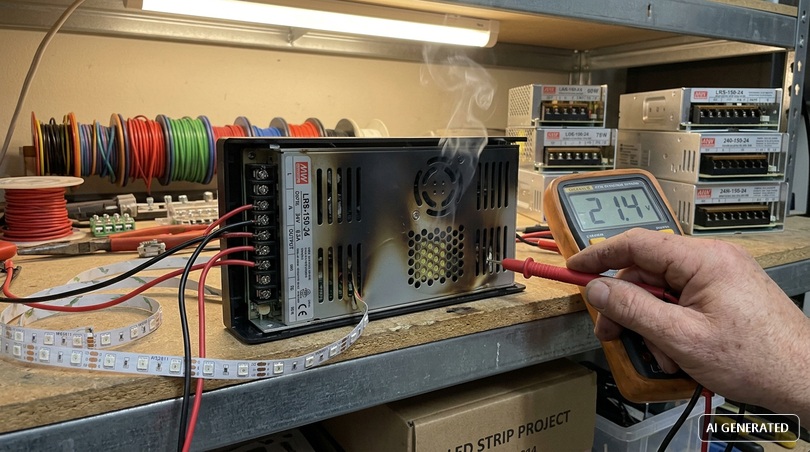
Let's do a numerical example. A project provides for 5 meters of 14.4 W/m LED strip, for a total load of 72 W. An inexperienced designer specifies a 75 W driver, thinking they're okay because "the driver is more powerful than the load". In reality that driver will work at 96% of its capacity for its entire operational life, chronically overheating and with a real life expectancy of about 15,000–20,000 hours — less than half the declared hours. The correct solution is a 90 W driver (25% margin), which will work at 80% of maximum load and will easily reach the declared 40,000–50,000 hours.
The environmental thermal factor
The calculation must be adjusted based on the environmental installation conditions. Drivers are typically declared for operation at 25°C ambient; as temperature rises, the maximum deliverable power decreases according to derating curves provided by the manufacturer. A driver installed inside a closed suspended ceiling, in a non-ventilated technical compartment, in summer with ambient temperatures above 35°C, can see its actual capacity reduced by 15–25%. For installations in thermally unfavorable environments, the recommended margin rises to 40% compared to the nominal load. Professional quality drivers like MEAN WELL, Tridonic, Helvar or Osram always report thermal derating curves on the datasheet; low-cost drivers often don't publish them at all.
Power factor and efficiency
Beyond sizing, two electrical parameters are fundamental in driver selection. The power factor (PF) must be greater than 0.9: it indicates how efficiently the driver uses the current absorbed from the mains. Economical drivers have PF of 0.5–0.7, overloading the electrical system and generating harmonics that can interfere with other devices (particularly home automation systems, intercoms, TV antennas). The energy efficiency of the driver must be greater than 85%: this means that less than 15% of the absorbed power is dissipated as heat instead of being converted into useful light. High-quality drivers reach efficiencies of 92–95%.
Driver positioning on site
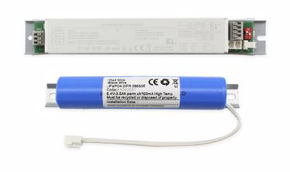
A related error is the physical positioning of the driver. Many designers have them installed inside closed and inaccessible suspended ceilings, for aesthetic reasons. The driver is the component that will statistically fail first in the entire lighting system: in 7–10 years it will almost certainly need to be replaced, while the LED strip can last 15+ years if properly sized. Making it inaccessible means redoing the drywall when it fails. The correct practice is to install drivers in inspectable boxes, in technical compartments, in electrical cabinets, or in any case in positions reachable without masonry work. This detail saves clients thousands of euros in the long term.
Error 4 — Not calculating voltage drop
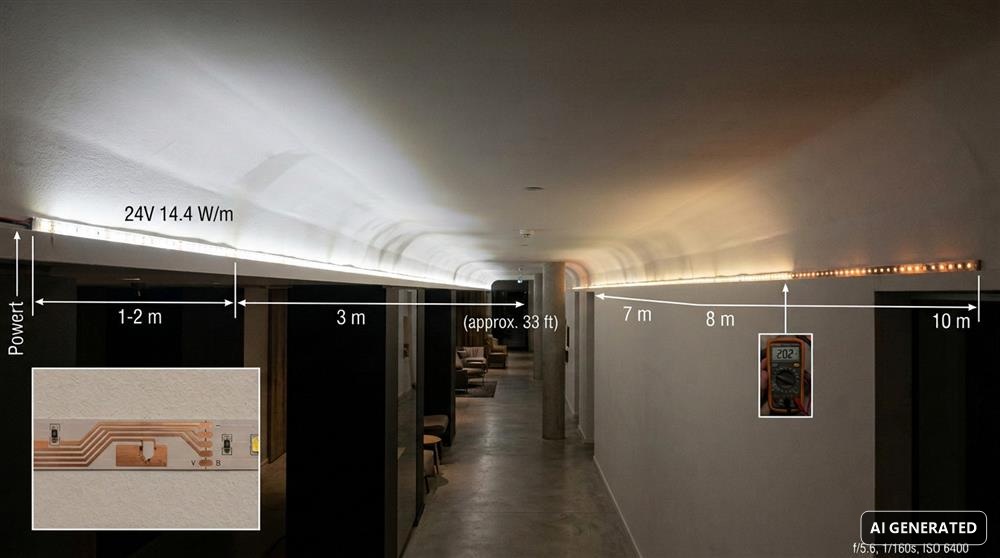
24 V LED strips on long runs present a physical phenomenon that often surprises even experienced designers: voltage drop along the strip path. Electric current, flowing along the copper traces of the PCB, encounters resistance that dissipates part of the voltage as heat. The result is that the initial part of the strip receives the nominal voltage (24 V) but the final part receives less (for example 20 V), and this difference translates into lower light emission in the final part and, a less well-known but equally annoying phenomenon, into a slight variation in color temperature, given that LEDs at reduced voltage tend to shift towards warmer tones.
The physics of the phenomenon
Voltage drop on an LED strip depends on four factors: the cross-section of the PCB copper traces, the flowing current, the length of the run, the quality of the soldering between segments. For a standard 24 V 14.4 W/m strip powered from one end only, the drop becomes visible to the naked eye already around 5 meters of length, with a brightness difference of 15–20% between start and end. At 8 meters the difference is 30–35%, and the last portion of the strip appears clearly darker. On 10 meters of continuous run powered from one end only, the last 2 meters can appear almost off compared to the rest.
The phenomenon is worse in 12 V strips, which at the same power require double the current of 24 V strips and therefore drop voltage twice as fast. 12 V strips have a maximum useful run of only 3–4 meters, which is why they are now considered obsolete for professional architectural use.
The three technical solutions
There are three technical solutions, each with its pros and cons, that the designer must choose based on context. First solution: bilateral power supply, i.e., connecting the driver to both ends of the strip, so that current enters from two sides and voltage drop distributes symmetrically. This solution allows doubling the useful run to about 10 meters, and is the most economical because it doesn't require additional components. The limitation is that the project must provide for bilateral wiring from the executive phase.
Second solution: 48 V strips. 48 V LED strips, introduced to the professional market around 2021 and now high-end standard, allow continuous runs up to 15–20 meters with a single power point, because at the same power the flowing current is halved compared to a 24 V strip. For complex architectural projects with extended linear runs (perimeter coves of large rooms, facade backlighting, continuous cove lighting) 48 V strips are the technically superior choice. The cost is about 20–30% higher than equivalent 24 V strips, but the savings on accessory electronics (one driver instead of three, fewer junction boxes) often balances the account.
Third solution: segmentation, i.e., dividing the run into shorter segments each with its own dedicated driver. Solution suitable for complex non-linear layouts, where in any case each "branch" would be powered separately. The disadvantage is the multiplication of drivers with higher installation costs and more potential failure points, but the advantage is maximum flexibility of differentiated dimming scenarios by zone.
The Ledpoint design rule
In our technical practice we recommend this operational rule: runs up to 5 meters, 24 V strips powered from one end. Runs from 5 to 10 meters, 24 V strips powered from both ends. Runs over 10 meters, always 48 V strips. For projects where visual continuity is critical (ceiling coves in representative environments, uninterrupted perimeter coves), the 48 V strip threshold drops to 8 meters for safety. We always verify voltage drop calculation in the preliminary design phase, even before choosing the specific strip model, because this constrains the choice of the rest of the system.
Error 5 — Installing LED strips without aluminum profile
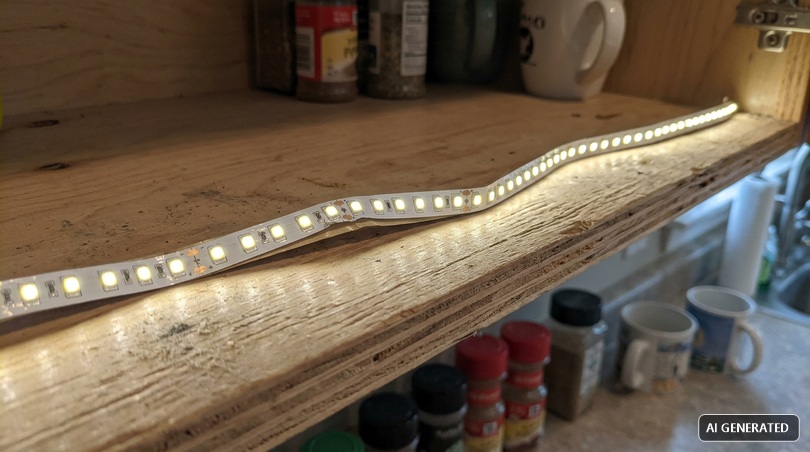
This is probably the most visible and most unaesthetic error on the list, yet it's still extremely widespread even in luxury projects. It involves installing the bare LED strip, simply glued via the rear adhesive tape on any surface: drywall, wood, anodized aluminum of the kitchen, non-specific aluminum profiles. The result is almost always a technical and aesthetic disaster, even if initially the installation may seem acceptable.
The three problems of mounting without profile
The first problem is thermal. LEDs produce much less heat than old sources, but they still produce heat, and this heat must be dissipated to guarantee the declared useful life. A strip glued on drywall or wood doesn't dissipate: heat accumulates in the chip, and every degree more of LED junction temperature shortens the useful life exponentially. Laboratory measurements confirm that a 14.4 W/m strip installed without aluminum profile reaches junction temperatures of 85–95°C, compared to 55–65°C with properly sized profile. The difference translates into halved useful life or even worse: the declared 50,000 hours easily become 15,000–20,000 actual hours.
The second problem is optical. The bare strip has point-source LEDs, perfectly visible as luminous "dots" when looked at directly. In many architectural contexts the strip is installed in positions where the observer's eye sees the source directly: perimeter ceiling cove, shelf edge, under-cabinet in kitchen. Without an opal diffuser that optically integrates the individual points, the light appears "broken" and engineering-like, losing the continuous and soft effect that the project expects. The aluminum profile equipped with opal screen (diffuser) mixes the luminous points at a distance of 8–15 mm from the strip, returning perfectly linear light.
The third problem is mechanical and aesthetic durability. The rear adhesive tape of LED strips has limited resistance over time, especially in environments with thermal excursions (near heat sources, exposed to sun, in kitchen). After 1–3 years the adhesive tape fails, the strip begins to detach from the surface, bends on itself, and the installation must be completely redone. The aluminum profile definitively solves the problem by mechanically fixing the strip along its entire length with a solid retention system.
The type of profiles and correct choice
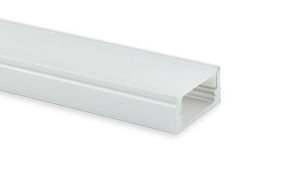
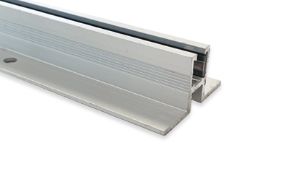
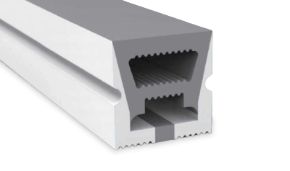
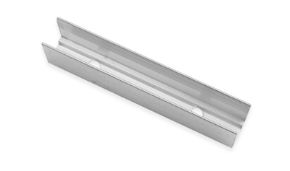
Aluminum profiles for LED strips are divided into many categories, each optimized for a specific installation scenario. Recessed drywall flush profiles: they are embedded in the drywall during the plastering phase, leaving only the diffuser flush with the surface visible. Ideal for architectural light cuts, perimeter coves, volume definition. Typical heights range from 7 to 25 mm.
45° or 30° angular profiles: they are installed in the angle between cabinet and wall in the kitchen, directing light towards the work surface. Light is perfectly directed where needed, without dispersing upwards or towards the user's eye. Suspension profiles: designed for visible installations in professional environments (offices, meeting rooms, retail), often with double direct/indirect emission. Walkable profiles: with tempered glass top, suitable for floor recessing for path signaling or for scenography in luxury flooring. IP65/IP68 outdoor profiles: in corrosion-resistant anodized aluminum, with silicone gaskets to prevent water ingress.
The choice of profile influences the final emission angle of the system, which depends on the combination between the native angle of the strip (typically 120°) and profile geometry. A 45° angular profile with opal diffuser concentrates light in a cone of about 80°, ideal for illuminating a work surface 35–50 cm away. A recessed ceiling profile with satin diffuser distributes light at 110°, perfect for uniform wall wash. Without profile, the native 120° angle of the strip produces dispersive light that generates glare and little visual effectiveness.
Error 6 — Choosing the wrong IP rating for the environment
The IP rating (Ingress Protection), regulated by IEC 60529, is a code composed of two digits that indicates the level of protection of an electrical component against the ingress of solid bodies (first digit) and liquids (second digit). It seems a marginal technical detail, but choosing an IP rating inadequate to the installation environment means mathematically guaranteeing LED strip failure within a few months. It's one of the most frequent errors in installations that arrive in technical support.
The IP ratings relevant for LED strips
- IP20: no protection against water. The strip is bare, exposed. Suitable exclusively for dry interiors, away from moisture sources. Typical for living rooms, bedrooms, corridors.
- IP44: protection against occasional water splashes. Suitable for bathrooms in zones 2 and 3 of CEI 64-8 classification (away from shower and bathtub), for kitchens above the work surface, for environments with possible condensation.
- IP65: protection against direct water jets. Suitable for showers, covered exteriors like loggias and porches, poolside in zone 2.
- IP67: protection against temporary immersion up to 1 meter for 30 minutes. Suitable for totally exposed exteriors, for areas where stagnant water can accumulate.
- IP68: protection against permanent immersion. Suitable for fountains, pools, underwater applications.
Regulations for bathrooms and exteriors
For bathrooms, the reference regulation is CEI 64-8 section 701, which divides the bathroom into electrical hazard zones. Zone 0 is the interior of the bathtub or shower tray: here only IPX7 or higher appliances can be installed, powered at SELV extra-low voltage (12 V), in practice IP67/IP68 LED strips with SELV driver. Zone 1 is the wall above the bathtub or shower up to 2.25 m height: requires minimum IPX4, but in the presence of water jets IPX5 is recommended. Zone 2 is the 60 cm perimeter band around zones 0 and 1: requires minimum IPX4. Beyond zone 2 (rest of bathroom): no specific IP requirement, but in the presence of steam IP44 is recommended.
For exteriors, the reference regulation is CEI 64-8 section 714 and EN 60598-2-3. Totally weather-exposed appliances must be minimum IP65, and if they can be wetted by direct water jets (irrigation systems, facade washing) they must be IP66 or higher. For installations in direct contact with the ground or in draining pits, IP67 or IP68 is mandatory.
The typical error and repair cost
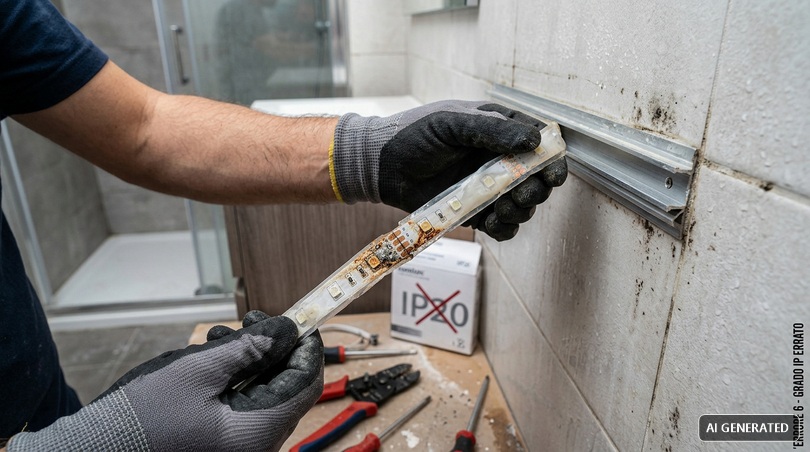
The typical error on site is installing an IP20 strip (the most economical) in a bathroom just outside the shower area, thinking that "water won't reach it directly anyway". The ambient humidity of the bathroom is sufficient to trigger progressive oxidation of electrical contacts, and in 6–18 months the strip fails irreversibly. Repair involves dismantling the profile, possibly demolishing parts of the drywall if the strip is recessed, replacement with suitable product, finishing. The average cost of this repair in a residential bathroom is 800–1,500 euros, compared to an additional cost in the initial installation phase of only 60–120 euros for the equivalent IP65 strip.
For outdoor environments the problem is even more serious. An IP44 strip installed under an uncovered pergola can fail after the first storm, and between epoxy resins for protection, dismantling, replacements, the repair cost of a 15 linear meter outdoor installation easily exceeds 2,500 euros. There's also an electrical safety issue: a non-sealed strip in a humid environment can generate ground leaks, trip the differential, and in the worst cases cause electrocution.
UV resistance as an additional parameter
For outdoor environments there's an additional parameter that the IP rating doesn't measure: the UV resistance of the silicone coating. A low-quality IP65 strip has an economical silicone coating that after 12–18 months of direct solar exposure begins to yellow, crystallize, and lose transparency. Light passes through with difficulty, the chromatic effect changes, in extreme cases the coating cracks letting moisture in. For professional outdoor applications it's necessary to specify strips with certified UV-resistant silicone coating, typically with ten-year warranty declaration for direct solar exposure.
Error 7 — Mixing color temperatures in the same environment
Color temperature, measured in Kelvin degrees (K), is the characteristic of light that determines whether it appears "warm" (tending towards yellow-orange) or "cool" (tending towards white-blue). 3000 K is the standard residential temperature, with warm welcoming tone. 4000 K is the "neutral" temperature, more refreshing, suitable for offices, bathrooms, functional kitchens. 6000–6500 K is cool workshop light, rarely used in living environments. The frequent error is installing sources of different color temperature in the same environment, creating a visual dissonance that the eye immediately perceives as "wrong" even without being able to name it.
Why consistency is critical
The human eye is surprisingly sensitive to color temperature differences when they are in the same field of view. A 500 K difference between two sources in the same room is clearly perceptible; a 1,000 K difference is visually annoying, perceived as "one yellow light and one white light". When in a living room the perimeter ceiling cove is at 3000 K, the central ceiling light is at 3500 K, and the LED strip under the kitchen cabinet (visible from the open space living room) is at 4000 K, the environment communicates a sense of lighting disorder that undermines the perception of design quality.
The error occurs very often for trivial reasons: strips purchased from different suppliers at different times, uncoordinated production batches, replacements over time with "equivalent" but not identical products. Even between strips declared at the same color temperature there can be visible differences: a 3000 K strip from one manufacturer can actually be at 2950 K, one from another manufacturer at 3100 K, and side by side on site the difference is visible. This is why the SDCM parameter (binning) we talked about in error 1 is fundamental: SDCM 2 guarantees that different batches of the same strip are chromatically indistinguishable, SDCM 5 leaves margins of visible difference even between theoretically equal strips.
Acceptable combinations (and when they can be done)
There are situations where a controlled variation of color temperature can be design-intended and functional. In an open space kitchen, it's acceptable to have 2700 K on the living room perimeter cove and 3000 K above the work surface: the difference is minimal (300 K), the work surface requires slightly cooler light for visual clarity, and the eye doesn't perceive dissonance. In a bathroom, 3000 K in the general environment and 4000 K above the mirror is acceptable to allow more accurate make-up: the difference is net but justified by the function, and visually separated from the context.
The common sense rule is: no color temperature difference between light sources that are seen simultaneously, except when the difference has an evident functional justification and exceeds 500 K. Minor differences are perceived as error, larger and justified differences are perceived as design choice.
The tunable white solution
The technologically most evolved solution to the problem is the use of tunable white CCT LED strips. These are strips that integrate on the same board two types of LED chips, one at warm temperature (typically 2700 K) and one at cool temperature (typically 6500 K), managed separately by a dedicated driver. By dosing the relative intensity of the two channels, the emitted light can be tuned continuously from the warmest to the coolest tone, on preset scenarios or managed by home automation systems.
The design advantage is enormous. The environment can change character throughout the day: 4000 K in the morning for energy and concentration, 3000 K in the afternoon for balance, 2700 K in the evening for relaxation and welcome, 2200 K nighttime for passage routes without disturbing sleep. This design, known as "circadian light" or "human centric lighting", is the new standard for high-end residential and luxury hospitality, and is one of the areas of greatest commercial growth for Ledpoint in the last 24 months.
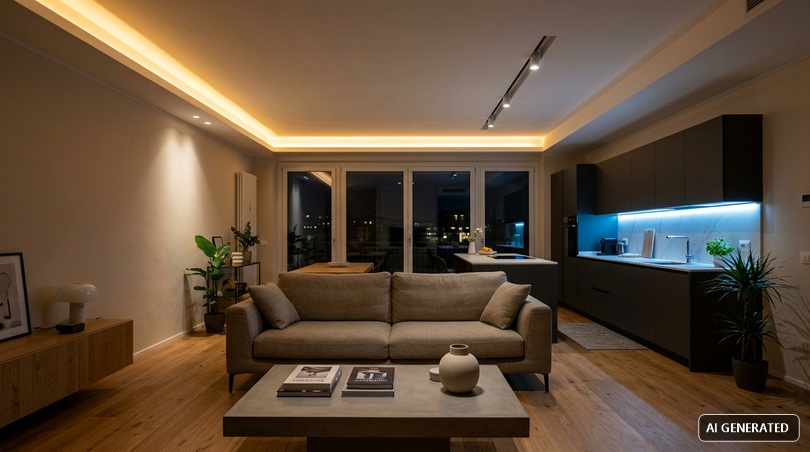
Error 8 — Neglecting dimmer and driver compatibility
This error manifests in a very specific and very frustrating way: the client turns on the lights, raises the dimmer halfway, and the LED strip starts flickering, or doesn't turn on at all below a certain threshold, or emits an annoying high-pitched whistle, or drops in steps instead of continuously. The problem is almost never in the LED strip nor in the dimmer taken individually, but in the dimming protocol incompatibility between dimmer and driver. It's one of the most recurring complaints, and among the most difficult to resolve without replacing components.
Dimming protocols
There are multiple LED strip dimming protocols, each with specific technical characteristics. The first, historically, is TRIAC (phase cutting on mains supply): it's the protocol of traditional recessed dimmers, those used also with incandescent bulbs. It works with LED strips only if the driver is specifically declared "TRIAC dimmable", and even then it has significant limitations: loads below 25–40 W often don't start correctly, the useful dimming range is limited (typically 20–100%, doesn't go down to zero), can generate flickering at low percentages.
The 0-10 V protocol (or the equivalent 1-10 V) is a historical industrial standard: a separate control voltage, variable between 0 and 10 V, commands the driver dosing the emitted light. It allows linear and reliable dimming, but requires a dedicated control cable in addition to power, complicating wiring.
The DALI protocol (Digital Addressable Lighting Interface) is the European digital standard for professional lighting. It allows point-to-point control of individual drivers with digital addressing, complex scenarios, home automation integration. It requires specific DALI drivers (25–40% more expensive than equivalent non-dimmable ones) and a DALI interface on the control system.
The DMX protocol, borrowed from the entertainment world, is used in applications where complex dynamic control is needed (RGB/RGBW colored light, scenographic effects, multimedia backlighting). PWM (Pulse Width Modulation) is the internal system of low voltage dimmable drivers, and manages the actual dimming of the current that powers the strip.
Proprietary systems like Casambi, Bluetooth Mesh, Zigbee allow wireless control of compatible drivers, without additional wiring, with configuration via smartphone app. They are the 2026 standard in high-end residential thanks to installation ease and scenario flexibility.
The compatibility rule
The compatibility rule is apparently obvious but frequently violated: all components of the dimming chain (dimmer, driver, possibly gateway) must use the same protocol, and must be certified compatible with each other by the manufacturer. It's not enough that they are "both dimmable": a TRIAC dimmable driver doesn't work with a 0-10 V dimmer, and vice versa. This banality seems obvious but on site it's systematically neglected, especially when the electrical system is designed by an electrician who doesn't have lighting specialization.
For high-end residential projects, our operational advice is unequivocal: standardize on DALI or Casambi from the preliminary design. DALI for projects with structured home automation (KNX, Loxone, enterprise systems), Casambi for leaner projects where a dedicated bus doesn't need to be wired. Both protocols guarantee 0.1–100% dimming without flickering, integration with complex scenarios, future expandability.
Invisible flicker and health
A little discussed but medically relevant aspect is flicker, the flickering of dimmed LED light. Even when flicker is not visible to the naked eye, it can still be perceived by the nervous system and cause visual fatigue, headaches, difficulty concentrating in more sensitive people (children, elderly, migraine sufferers). Low-quality drivers produce flicker at dangerous frequencies (50–500 Hz), while professional drivers certified IEEE 1789 produce flicker above 3,000 Hz, substantially imperceptible to the nervous system.
For residential projects where there are small children, people with neurological disorders, or environments where many hours are spent (bedrooms, study rooms, home offices), the specification of IEEE 1789 certified flicker-free drivers should be mandatory. The additional cost is 15–25% on the driver, but the impact on daily well-being is significant and growing in market sensitivity.
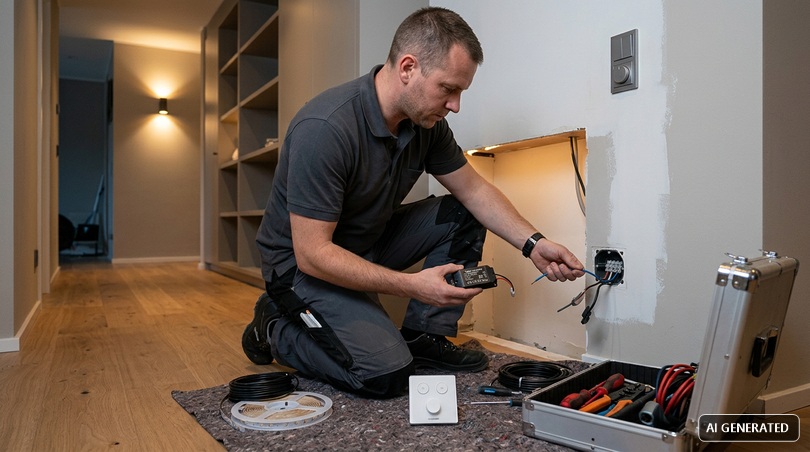
Error 9 — Positioning the strip incorrectly relative to the surface
The geometric positioning of the LED strip relative to the surface it must illuminate is a fundamental design parameter and often only apparently intuitive. The distance between strip and surface, the emission angle, the profile orientation determine whether the light produces the desired effect or whether it completely "misses" the environment. The problem is that many designers decide positioning only in the executive phase, on site, without preventive calculation or much less a physical test.
Wall washing and positioning rule
When you want to enhance the texture of a wall (stone, textured plaster, wallpaper, boiserie) through grazing illumination, geometry is critical. Strip too close to the wall: the light beam remains very narrow, illuminates only the first 30–50 cm and creates a non-uniform "light bar" effect. Strip too far: the light distributes over too wide an area and loses the grazing effect, the texture disappears and the wall appears simply illuminated in a banal way.
The good design rule for grazing wall washing from ceiling is: strip distance from wall equal to about 1/4 of the wall height to be illuminated. For a standard 280 cm high wall, the strip should be positioned at about 70 cm from the wall, with emission angle directed at 30–45° downwards. For wall grazing (closer grazing illumination, which enhances smaller textures), the distance drops to 8–15 cm from the wall.
Light cut and profile height
For the classic architectural "light cut", the luminous strip that runs along the ceiling perimeter or along a suspended volume, the choice of profile height determines the final visual effect. Low profiles (7–12 mm) produce a thin and discreet cut, suitable for minimal and refined contexts. Medium profiles (15–20 mm) produce a more pronounced cut, well visible, suitable for underlining architectural volumes. High profiles (25 mm and over) create a very generous light effect, suitable for main lighting of environments where the strip is the primary light source.
The position of the strip inside the profile, and any shielding, also conditions the viewing angle. A strip recessed deep in the profile, with thick opal diffuser, produces soft light visible only from narrow angles relative to the profile normal. A strip flush with the profile with transparent diffuser produces more intense light visible from very wide angles, with risk of glare if the observer is in direct line of sight.
The cardboard test
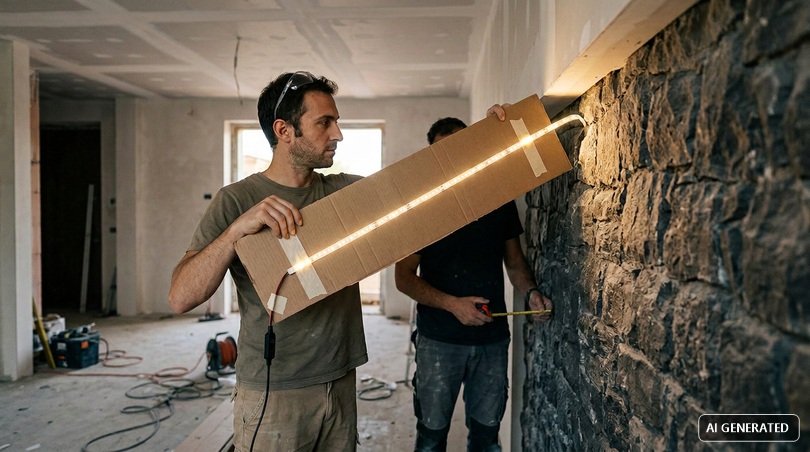
There's a good design practice that we always recommend and that very few designers apply: the physical test with a strip sample on cardboard, to do on site before definitive installation. You take one meter of LED strip of the same specified model, temporarily fix it with adhesive tape on rigid cardboard, place it in the designed position, turn it on. In 5 minutes you understand if the light effect is the desired one, if the distance from the wall is correct, if the angle is right, if the color temperature works in the environment.
This test costs zero, requires very little time, and avoids errors that in the definitive installation phase would cost thousands of euros in redoing. Ledpoint provides free 1 meter samples of all catalog models for projects over 1,500 euros in value, precisely to facilitate this verification phase.
Error 10 — Relying on rendering without lighting calculation
Photorealistic rendering is a very powerful project communication tool, and in contemporary practice it has become the main vehicle to "sell" the project to the client. Yet rendering is not a lighting calculation, and using it as a substitute is a serious technical error that systematically manifests in realized projects. The render shows how light should appear from a certain point of view, but doesn't say how many lux actually arrive on the work surface, doesn't verify compliance with lighting regulations, doesn't quantify energy consumption.
Reference lighting regulations
For work environments the reference regulation is UNI EN 12464-1:2021, which defines minimum maintained average illuminance levels for each type of activity. For example: work surface for writing, typing, reading: 500 lux; meeting rooms: 500 lux; technical drawing areas: 750 lux; surgical operating rooms: 1,000 lux on operating surface; corridors: 100 lux; stairs: 150 lux. The regulation also defines uniformity parameters (Uo ≥ 0.6 on work surfaces), glare (UGR ≤ 19 for offices), minimum color rendering (Ra ≥ 80 for standard work environments).
For residential environments there's no analogous binding regulation, but there are recommendations from UNI EN 12464-1 and the Italian Lighting Association (AIDI). Living room general lighting: 100–200 lux; living room reading area: 300–500 lux; kitchen work surface: 500 lux; bathroom mirror: 200–500 lux; bedroom general: 100 lux; bedroom bedside: 300 lux for reading. These values are not legally mandatory in private residential, but represent the good design standard.
Professional lighting calculation
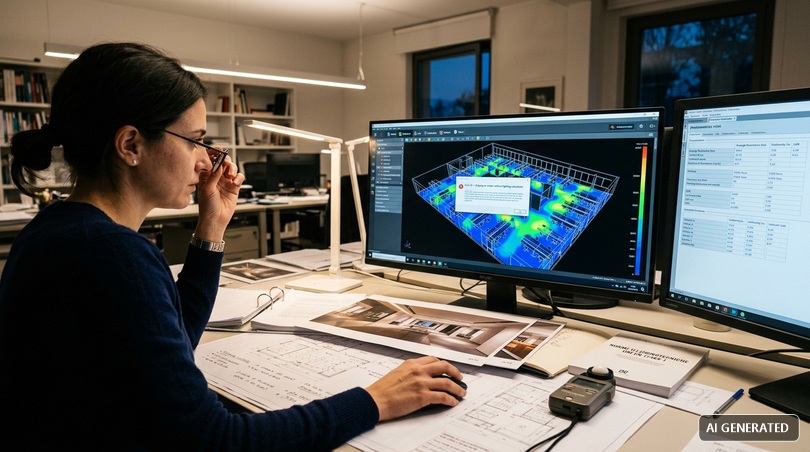
To verify if the light project meets the required values, there's dedicated software: DIALux evo (free, developed by German DIAL) and Relux (Swiss, in free and pro version). These software allow modeling the environment, positioning light sources, and calculating with photometric precision the lux arriving at every point, distribution uniformity, glare, total consumption. The calculation is based on standardized IES (American) or LDT/EULUMDAT (European) photometric files provided by fixture manufacturers.
When calculation is really indispensable
For public environment, office, retail, hospitality projects, lighting calculation in DIALux/Relux is de facto mandatory: design documentation must demonstrate compliance with UNI EN 12464-1, and in case of dispute or inspection by supervisory bodies the calculation is the reference document. For private residential there's no regulatory obligation, but in projects above a certain complexity (villas over 200 sqm, luxury renovations over 80,000 euros total value) it's still good practice to produce the calculation as part of the definitive project.
Calculation also serves as a communication tool with the client. A well-prepared DIALux report, with false color visualizations of illuminance levels, 3D photorealistic views calibrated on real values, annual consumption tables, is a very powerful sales tool: the client understands that the expense for light has a technical rationale, it's not the designer's whim, and is much more willing to accept professional component estimates when they see them justified by numbers.
Summary table and decision-making diagram
To facilitate practical application of this guide's content, we summarize in the following table the ten errors, the typical impact on site, the reference operational solution, and the estimated additional cost of the correct solution compared to the error.
| # | Error | Typical impact | Solution | Additional cost |
|---|---|---|---|---|
| 1 | Strip choice by price | Halved lifespan, poor color rendering | Specification with lm/m, CRI, SDCM, chip brand | +30–50% on product |
| 2 | CRI <90 in residential | Distorted colors, "wrong" environment | CRI 95+, R9 ≥50 | +15–25% |
| 3 | Undersized driver | Driver failure in 2–4 years | 20–30% margin on power | +5–10% on driver |
| 4 | Voltage drop | Darker strip at end, uneven color | 48 V strip or double power supply | +10–20% |
| 5 | Strip without profile | Halved lifespan, "dot" effect | Aluminum profile + opal diffuser | +8–15 €/m |
| 6 | Wrong IP | Failure in 6–18 months | Check CEI 64-8 zones | 0–20% |
| 7 | Mixed CCT | Visual dissonance | Single CCT or tunable white | +20% if TW |
| 8 | Dimmer incompatibility | Flickering, whistling, wrong dimming | Certified DALI or Casambi | +30% on electronics |
| 9 | Wrong position | "Wrong" light effect | Sample test + 1/4 height rule | 0 |
| 10 | No lighting calculation | Insufficient lux, disputes | DIALux/Relux with Ledpoint IES files | Designer time |
Operational checklist for specifications
The following checklist collects the 25 minimum points to verify during specification drafting for any project using LED strips. It's designed as a work tool to copy and adapt to the single project, and as a preventive verification reference before sending the executive file to the site.
| Area | Point to verify |
|---|---|
| LED Strip | Declared and traceable luminous flux per meter |
| LED Strip | CRI ≥90 (residential) or ≥95 (premium) certified |
| LED Strip | R9 specified (≥50 minimum, ≥80 premium) |
| LED Strip | Binning SDCM ≤3 declared |
| LED Strip | Traceable LED chip brand |
| LED Strip | Commercial warranty ≥3 years |
| LED Strip | L70 ≥30,000 hours declared |
| LED Strip | EU energy label minimum class D |
| Driver | Nominal power ≥20% above load |
| Driver | Power factor ≥0.9 |
| Driver | Efficiency ≥85% |
| Driver | Thermal derating curve verified |
| Driver | Inspectable positioning |
| Profile | Type consistent with destination |
| Profile | Opal diffuser for point integration |
| Profile | Anodized aluminum material |
| IP | IP rating consistent with CEI 64-8 zones |
| IP | UV resistance for exteriors declared |
| Voltage | Voltage drop calculated |
| Voltage | 48 V strip on runs over 10 meters |
| CCT | Single temperature per environment |
| Dimming | Protocol specified (DALI/Casambi recommended) |
| Dimming | Certified compatible components |
| Dimming | IEEE 1789 flicker-free driver |
| Verification | DIALux/Relux lighting calculation attached |
Frequently Asked Questions (FAQ)
The questions we receive most frequently from architecture studios and interior design professionals, collected in a quick consultation format. Click on each question to expand the detailed answer.
How long do professional quality LED strips really last?A professional LED strip with Osram, Nichia or Samsung chips, mounted in aluminum profile with correctly sized driver and installed according to technical specification, reaches on average 50,000 hours L70, i.e., after 50,000 hours of operation it still emits 70% of initial flux. Translated into time of use: about 17 years of use at 8 hours per day. Without profile or with driver pushed to the limit, actual lifespan drops below 20,000 hours (about 7 years in the same usage conditions). Economical marketplace strips have actual lifespans of 5,000–15,000 hours, regardless of what's declared on the packaging. |
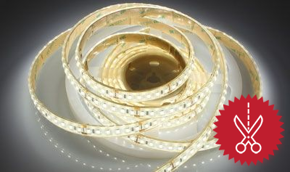
Can I cut an LED strip wherever I want on site?No. Every LED strip has cutting points marked at regular intervals, typically every 25, 50 or 100 mm depending on LED density and circuit topology. They're highlighted on the circuit by a visible mark (dashed line, scissors symbol, colored marker). Cutting outside those points damages the circuit, interrupts conduction and turns off the entire segment after the wrong cut. Always verify the technical datasheet of the specific model before cutting on site, and remember that cutting points vary from product to product. |
What's the difference between 12 V, 24 V and 48 V LED strips?12 V strip is now obsolete for professional use: high voltage drop, maximum runs of 3–4 meters, generally low product quality. 24 V strip is the 2026 residential standard, runs up to 5–6 meters from one end only, up to 10 meters with double power supply, wide availability of professional products. 48 V strip is the most recent system, introduced around 2021, allows continuous runs up to 15–20 meters with a single power supply: ideal for complex architectural projects with extended continuous runs, such as perimeter backlighting of large rooms. |
Do RGB LED strips have the same CRI as white ones?No. Classic RGB strips mix three color channels (red, green, blue) to obtain white. The white thus produced is metameric, i.e., chromatically "equal" to true white only as an eye stimulus but physically very different, with very low CRI (typically 60–70). To have high quality RGB with possibility of faithful white you need RGBW strips (with additional dedicated white LED) or RGB+CCT (with separate warm white and cool white LEDs). Only these configurations are suitable for qualitatively illuminating an environment, not just coloring it for scenographic effect. |
How much do LED strips really consume in a typical home?A typical 14.4 W/m residential LED strip, on 5 hours per day for 365 days, consumes 26.3 kWh per year per linear meter. At the average Italian electricity cost at end of 2025 (about 0.28 €/kWh including charges), it means 7.40 € per year per meter. On a typical 10 linear meter installation (perimeter cove of a medium living room): about 74 € per year in electricity cost, compared to 250–400 € of traditional halogen or fluorescent lighting that generates the same total lumens. The payback of the initial LED investment compared to previous technologies is generally 2–4 years. |
Are aluminum profiles really indispensable?Yes, in any installation that must last over time. The aluminum profile performs three distinct technical functions and equally important. It dissipates heat: LED junction temperature drops by 20–40°C compared to bare strip, doubling or tripling useful life. It hides the point source: individual LEDs become invisible and light appears linear and continuous. It protects mechanically: the strip is physically locked, doesn't depend only on adhesive tape that fails over time. The profile cost (8–25 €/meter depending on type and finish) is always justified by doubled lifespan. |
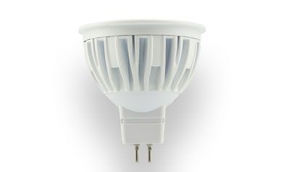
LED strips or LED spotlights: which to choose for a residential project?It's not an alternative, it's complementarity. LED strips are the ideal tool for ambient light: indirect, scenographic, distributed, for architectural light cuts and for relaxation and welcome scenarios. LED spotlights are the ideal tool for punctual functional light: kitchen work surface illumination, desk, dining table, artwork. A good level 2026 residential project integrates both, with separate dimmable scenarios, so that the client can choose the type of light depending on the time of day and activity. |
Is it true that LED strips can create vision problems?High quality LED strips don't create vision problems. Low quality ones can create two types of disorders: flicker, light flickering at low frequencies (below 200 Hz) not always perceptible to the naked eye but still recorded by the nervous system, can cause visual fatigue, headaches and difficulty concentrating; glare, when the source is visible directly without diffuser, can cause visual discomfort especially in children. To avoid them, specify IEEE 1789 certified flicker-free drivers and profiles always with opal diffuser. |
How much does a Ledpoint LED strip system installed in a typical living room cost?For a 30–40 sqm residential living room with 18 linear meters of perimeter ceiling cove, CRI 95 LED strip in recessed profile, dimmable DALI driver, app control, Ledpoint material cost typically falls between 1,200 and 2,200 euros VAT excluded, depending on profile finish and control sophistication level. Installation (specialized electrician) typically adds 600–1,200 euros. Total turnkey falls between 1,800 and 3,400 euros for a typical living room. For specific quotes, configure the system on our online tool or contact technical consultancy directly. |
Can I integrate Ledpoint LED strips with existing home automation systems?Yes, the Ledpoint range is compatible with all major professional home automation standards. The most frequent configurations are: DALI integration for KNX, Loxone, Helvar systems, enterprise systems; Casambi integration for wireless systems based on Bluetooth Mesh, smartphone app control, preset scenarios; 0-10 V and DMX integration for industrial and scenographic applications; Apple HomeKit, Google Home, Alexa integration via compatible Casambi gateways. The system choice must be made in the preliminary design phase, because it constrains drivers and wiring. Ledpoint technical consultancy supports defining the most suitable choice for the single project. |
LED strips: turning knowledge into competitive advantage
Architects, interior designers and home stagers who master these ten technical points acquire a concrete competitive advantage in the market. It's not just about avoiding errors: it's about being able to explain to the client why their estimate costs more than the competitor's, and being able to justify it with verifiable numbers. In a market where light is increasingly central in the perception of property value, and where high-end clients know how to evaluate quality even on technical details, lighting competence becomes a sales element.
Ledpoint accompanies architecture studios with a free technical consultancy service on all projects: specification verification, system sizing, supply of IES/LDT photometric files, physical samples, on-site support. The service was born from the recognition that the value of the lighting component supplier lies not only in the product but in the ability to support the designer in their daily technical work. To request consultancy contact our technical structure or our sales department.
The next construction site is the opportunity to apply what you've read: download the technical datasheets of the Ledpoint range, configure your LED profile system with the online tool, or directly request free technical sizing of your next lighting project. The more professionals correctly specify LED strips in the design phase, the fewer disputes arrive on site, and the better the entire sector evolves towards the quality that current technologies allow.
This article was developed with the support of artificial intelligence and subsequently reviewed, corrected, and validated by the Ledpoint.it technical team, which guarantees its reliability and compliance with official sources.