



In the daily work of those who install LED lighting, the cutter is not a secondary accessory: it is the tool that decides whether an LED strip or a neon flex will be cut at the right point, with a clean edge and without compromising the circuit's functionality. A wrong cut means meters of ruined product, joints that do not hold, and skyrocketing costs. A correct cut, on the other hand, takes a few seconds and leaves no room for error. In this in-depth guide, we explain when to use the cutter in neon flex and LED strips, how to choose it, how to maintain it, and what the differences are between a professional and an amateur cutter, with particular attention to cutting Ledpoint's 2nd generation Neon Flex.
Whether you are an artisan, a carpenter, an electrician, or an interior designer, the goal is the same: to obtain precise, repeatable, and safe cuts. To do this, two things are needed: understanding when the cutter is the right tool (and when a router is needed instead) and owning a reliable and durable cutter. Let's see everything, step by step.
In this article...
1. What is a cutter: meaning, history, and definition
Before understanding when to use the cutter in neon flex and LED strips, it is worth clarifying what we are talking about, because there is a lot of terminological confusion surrounding this tool. A cutter is a manual cutting tool equipped with a sliding blade, generally breakable into segments, protected by a body that allows partial extraction. It is one of the most widespread tools in the world, present in every toolbox, every design studio, and every construction site. Yet, when it comes to cutting technical components like LED strips, not all cutters are the same, and not all of them are suitable.
What "cutter" means and how to pronounce it
The word cutter derives from the English to cut, meaning "to cut": literally, it means "cutter" or "that which cuts". It is pronounced "cutter" (with a short 'u' sound as in "cut"), and in Italian it is sometimes mistakenly written as "cuter" or "cutter" with a single t: the correct spelling has a double t. Asking "what does cutter mean in Italian" is more than legitimate, because the term coexists with several synonyms. In Italian, the cutter is also called "taglierino", and the two names are in fact interchangeable in common usage.
Cutter or utility knife: are they the same thing?
In practice, yes. When one wonders "what is a utility knife called in Italian" or "what is a cutter called in Italian", the answer is that cutter and utility knife refer to the same tool: a segmented sliding blade housed in a handle. "Taglierino" is the Italianized form, "cutter" the Anglicism that has entered technical and commercial use. A synonym for cutter, therefore, is precisely utility knife; in some contexts, you might also hear "taglierina", which more properly refers to the bench machine for cutting paper and not the manual tool. For those searching online for "professional cutter sales" or "professional utility knife", the product is the same: a high-quality professional cutter.
There is also a completely different and curious meaning of the term: in the nautical field, a cutter is a type of sailboat with a single mast and multiple jibs at the bow. It has nothing to do with the cutting tool, but it is worth knowing to avoid confusion in searches. Similarly, in cooking and pastry making, a "cutter" refers to a professional food processor (a kitchen robot with rotating blades) used for emulsifying, chopping, and kneading: in this case too, the name comes from the verb "to cut", but the object is entirely different. In this guide, we deal exclusively with the cutter as a manual cutting tool, the one that is truly needed when working with neon flex and LED strips.
Who invented the cutter and when the utility knife was born
The breakable blade cutter we all know has a relatively recent and curious history. It was invented in Japan in 1956 by Yoshio Okada, a printer who had the intuition to create a blade with breakable segments: when the tip wore out, it was enough to snap off the worn segment to reveal a sharp edge again. According to the story, the idea came to him by observing how chocolate bars broke and how American soldiers sharpened their knives on glass fragments. From that intuition was born the brand that is still synonymous with the breakable blade utility knife today. Knowing who invented the utility knife helps to understand the logic of the tool: the breakable blade serves precisely to always guarantee a sharp cut without having to replace the entire tool, a principle that, as we will see, is also decisive when cutting an LED strip or a neon flex.
2. What a cutter is used for: general and professional uses
Asking what a cutter is used for might seem trivial, but the answer changes greatly depending on the context of use. In general, a cutter is used to make clean and precise cuts on materials of limited thickness: paper, cardboard, carpet, sheaths, films, rubber, soft plastics, and indeed LED strips and neon flex tubes. Its strength is precision: unlike scissors, a cutter allows you to follow a line with extreme accuracy, to score without cutting completely, and to work in tight spaces. This is why it is loved by those who seek absolute control over the cut.
What a utility knife is used for in daily practice
In daily life, the utility knife is used by a huge variety of professions. Who uses a utility knife? Couriers and warehouse workers to open packages, graphic designers and architects to cut cardboard and models, upholsterers and installers for carpets and sheets, electricians to strip sheaths and cables, hobbyists and model makers for detailed work. In all these cases, the cutter meets the same need: a clean, controlled, and repeatable cut. When moving on to LED lighting, the cutter becomes the tool with which the length of an LED strip or a neon flex is adapted to the exact measurement of the installation. This is where a good cutter makes the difference between a professional job and a mess.
What a professional cutter is used for and how it differs from a common one
What is a professional cutter used for compared to a cheap stationery model? The difference lies in precision, blade stability, and safety. A professional cutter has a rigid body that does not flex, a solid blade locking mechanism (screw or automatic), a non-slip ergonomic grip, and quality steel blades that stay sharp longer. When cutting technical components (where a frayed or oblique edge can compromise a joint or waterproof seal), a professional cutter is not a luxury but a necessity. For cutting neon flex, in particular, there are dedicated cutters designed to guarantee a perfect perpendicular cut, as we will see later.
What the notch on the utility knife blade is used for
A detail that few know: the oblique lines engraved on the cutter blade (the "notches") are not decorative, they serve to safely break off the worn segment. When the tip becomes dull, you insert the blade into the special slot on the back of the body (or use pliers) and bend it at the notch: the segment snaps off cleanly along the predisposed fracture line, leaving a new sharp tip. This is the principle invented in 1956 and still today the secret to the cutter's practicality: the blade is not sharpened, it is renewed. Knowing what the notch on the utility knife blade is for is the first step to using it safely and economically.
3. What a cutter is made of and how it works
To use a cutter well, you need to know its anatomy. An apparently simple tool actually hides some ingenious solutions that determine its precision and durability. Understanding what a cutter is made of and how it works helps you choose the right model and avoid the most common mistakes when cutting an LED strip or a neon flex. Let's look at the components and the mechanism in detail.
Cutter anatomy: body, blade, and mechanism
A cutter is essentially composed of three elements. The body (or handle), made of rigid plastic or metal, houses the mechanism and provides the grip. The blade, made of carbon or stainless steel, slides along a guide and is the heart of the tool. The sliding cursor allows you to extend the blade to the desired length and, in the best models, to lock it in position. Professional cutters add a screw or automatic locking system, a pocket clip, and a rear slot for safely breaking the segments. The more rigid the body, the more precise the cut will be: handle flexing is the first enemy of precision.
What the cutter blade is called
The cutter blade is simply called a segmented blade or breakable blade, and is characterized by the oblique notches that allow the worn tip to be broken off. There are blades of different widths: the most common are 9 mm (for light and precision work) and 18 mm (for heavy-duty work), in addition to special blades for cutting specific materials. In the case of neon flex, the dedicated cutter does not use a segmented blade but a shaped blade that executes a clean and perpendicular cut to the tube. Choosing the right blade is an integral part of choosing the cutter.
How to change, flip, and break the cutter blade safely
One of the most frequent questions concerns blade maintenance, let's see what they are:
How to break the cutter blade
Extend the blade by one or two segments, insert the tip into the special rear slot (or grip it with pliers), cover it with a cloth, and bend it decisively along the notch: the segment will snap off cleanly.
How to flip the utility knife blade
To use the opposite, still-sharp end in models that allow it, completely remove the blade, rotate it 180°, and reinsert it.
How to change the cutter blade
When it is completely worn out, remove the old blade from the slider and insert a new blade of compatible width. All these operations must be carried out with maximum care: the blade is always sharp even when it looks worn.
How to lock the utility knife
Knowing how to lock the utility knife is essential for safety. In models with a screw lock, you extend the blade to the desired length and tighten the slider screw to immobilize it, while to store the tool you loosen the screw and completely retract the blade. In models with an automatic lock (auto-lock), the blade stays fixed in any position thanks to a click stop and retracts only by pressing the special lever. The lock is what distinguishes a safe cutter from a dangerous one: a blade that retracts under stress can cause cuts to both the workpiece and your fingers. For professional work, a good locking system is indispensable.
4. The cutter in the LED world: neon flex and LED strips
We arrive at the heart of the matter. In the world of LED lighting, where LED strips and neon flex are sold in rolls of several meters and then adapted to the exact measurement of the installation, the cutter is the tool that makes length customization possible. An LED strip for the ceiling, a profile for drywall, a luminous contour in neon flex: in all these cases, the product arrives long and must be cut to size. And it is precisely in how and where you cut that the success of the job is determined.
Why cutting is crucial in neon flex and LED strips
Unlike a simple sheet of paper, an LED strip and a neon flex are electrical circuits. This means they cannot be cut at just any point: there are predetermined cutting points, marked by a symbol (a pair of scissors or a line) and positioned at regular intervals along the product. Cutting outside these points damages the circuit and renders the segment unusable. Furthermore, the cut must be clean and perpendicular: an oblique or frayed edge prevents correct insertion into the connectors (in LED strips) or a hermetic seal with the end caps (in neon flex). This is why the cutter, and in particular the right cutter, is so important.
Ledpoint's dedicated cutter for 2nd generation Neon Flex
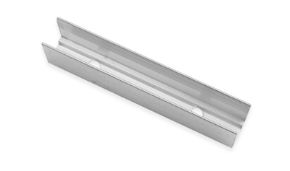
Ledpoint has developed a cutter for cutting 2nd generation Neon Flex (code NE6-TOOL), a tool specifically designed to cleanly and perpendicularly cut the 6 mm 2nd generation Neon Flex. Unlike a generic cutter, this dedicated cutter is shaped to accommodate the tube's profile and guide the blade exactly at the cutting point (every 2.5 cm), guaranteeing a clean edge that allows for proper closure with the caps and any joint. It is the perfect example of how, when cutting LED products, the specific cutter always beats the generic tool: it not only cuts better, but it protects the product's integrity and the final aesthetic result. Being a dedicated accessory, the NE6-TOOL cutter is designed to accompany the purchase of the reference neon flex.
5. When to use the cutter on LED strips
LED strips are perhaps the product in which the cutter is used most often. Every time an LED strip is installed on a ceiling, under a cabinet, in an aluminum profile, or to backlight a piece of furniture or a TV, it almost always needs to be shortened to the right size. Knowing when to use the cutter on LED strips, and above all where to cut, is therefore a basic skill for any installer. Let's look at the principles and the correct procedure.
LED strip cutting points: where you can cut
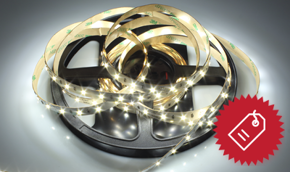
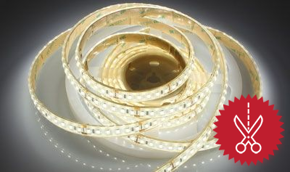
Every LED strip has marked cutting points along the circuit, usually a line with a scissors symbol, positioned between one group of LEDs and the next. The distance between one cutting point and another depends on the model: in denser LED strips it can be 2.5 cm, in others 5 cm, and in some even more. For example, among Ledpoint LED strips, we find models that can be cut every 2.5 cm (every few LEDs) and others every 5 cm: the technical data sheet of each product always indicates the exact interval. The cutter must be used exclusively on these marks: cutting in the middle of an LED group or at the wrong copper tracks renders the segment unusable. This applies to any LED strip, from 12V to 24V, from monochromatic to RGB.
How to cut LED strips with a cutter: step-by-step procedure
Here is the correct procedure for cutting an LED strip with a cutter, cleanly and without errors. Following it reduces waste to zero and guarantees perfect joints.
| Step | Operation | Professional's tip |
| 1 | Measure the required length and identify the nearest marked cutting point. | It is better to have a segment too long than to cut it too short: you cannot go back. |
| 2 | Place the strip on a flat and stable surface, with the LEDs facing upwards. | A cutting mat protects the surface and improves grip. |
| 3 | Position the cutter blade exactly on the cutting line, perpendicular to the strip. | Align the blade with the mark, not "by eye": precision is everything here. |
| 4 | Make a single, decisive cut, without sawing back and forth. | A single clean pass prevents fraying the copper tracks. |
| 5 | Verify that the edge is clean and that the contact pads are intact. | If the edge is irregular, the connectors will not make good contact. |
After cutting, the segment is ready to be connected via LED strip connectors or by soldering. A clean cut made with a good cutter is the premise of a joint that lasts over time. In this case, the cutter does not just cut the strip: it prepares the electrical contact.
Mistakes to avoid when cutting LED strips
The most common mistakes almost always derive from using an inadequate cutter or from rushing. Cutting outside the marks is the number one error and wastes an entire segment. Using a worn blade produces frayed edges that compromise the contact. Not keeping the blade perpendicular creates oblique cuts that do not fit into the connectors. Finally, cutting the strip while it is still powered is dangerous and must be absolutely avoided: cut first, then connect. A professional cutter with a sharp blade and a solid lock prevents most of these problems.
6. When to use the cutter on neon flex
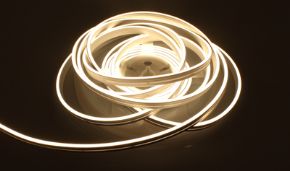
The neon flex (the flexible LED tube that mimics the effect of traditional neon with continuous lighting and no visible light points) requires even greater attention to cutting than LED strips. Being a solid and coated tube, the cut must be perfectly perpendicular to allow for a hermetic seal and maintain the aesthetic result. Understanding when to use the cutter on neon flex, and with which tool, is fundamental for a professional result. Let's see how to proceed with Ledpoint's 2nd generation Neon Flex.
The cutting notches of the 2nd generation Neon Flex
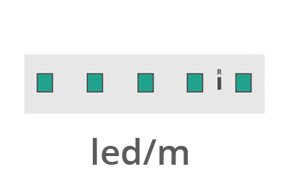
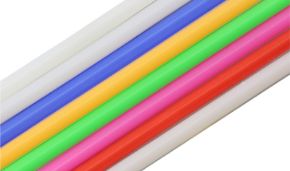
Ledpoint's 2nd generation Neon Flex also has predetermined cutting points, positioned every 2.5 cm, marked along the tube. The reference model - a 6 mm neon flex, 2835 chip, 12V, 7W/m, 120 led/m, available in white (3000K, 4000K, 6000K, 10000K) and colored versions (red, blue, green, yellow, pink) — must be cut exclusively on these notches. Cutting off-point interrupts the circuit and renders the section unusable. This is why cutting neon flex is not something to improvise: you need to locate the notch and use the right tool.
How to cut neon flex with a cutter: step-by-step procedure
To cut neon flex correctly, the dedicated Ledpoint cutter (NE6-TOOL) is the ideal tool because it guides the blade perpendicularly. Here is the recommended procedure.
| Step | Operation | Why it is important |
| 1 | Identify the cutting notch closest to the desired measurement (every 2.5 cm). | Only at these points does the circuit remain functional. |
| 2 | Insert the tube into the dedicated cutter, aligning the blade with the notch. | The shaped cutter guarantees a perpendicular cut to the tube. |
| 3 | Make a single, decisive, and complete cut. | A clean edge is essential for the seal of the end caps. |
| 4 | Clean the edge and verify perpendicularity. | An oblique cut compromises the hermetic seal and aesthetics. |
| 5 | Apply the end cap or connector, sealing if required. | Proper closure preserves the tube's protection rating. |
Cutter or router: when to use one or the other
For Ledpoint's 2nd generation Neon Flex, in addition to the dedicated cutter, there is also a 6 mm router (code NE6-CUT). What is the difference and when to use one or the other? The cutter is used for the transverse cut of the tube along the notches, that is, to shorten it to the desired length. The router, on the other hand, is used to make the opening necessary for the insertion of the connector or power cable, working in a targeted manner on the coating. In a complete installation, the two tools are complementary: the cutter gives the length, the router prepares the connection. Having both means being able to manage the entire workflow with professional precision.
7. How to choose a professional and durable cutter
If you work as an artisan, carpenter, electrician, or installer, the choice of cutter is not a detail: it is an investment in the quality of your daily work. A reliable and precise cutter allows you to make high-quality cuts, reduces waste, and increases efficiency. But how do you choose a resistant and durable cutter, capable of lasting over time without letting you down in the middle of an installation? Let's analyze the criteria that distinguish a professional cutter from an amateur one, with particular regard to the needs of those seeking absolute precision.
What are the characteristics of a professional cutter
The characteristics of a professional cutter are recognized at a glance and at the first grip. A professional cutter has a rigid and robust body, often made of metal or reinforced technopolymer, that does not flex under stress; a solid locking mechanism (screw or auto-lock) that immobilizes the blade at the chosen length; a non-slip ergonomic grip that reduces fatigue and improves control; and high-quality steel blades that stay sharp for a long time. In the case of dedicated cutters for neon flex, the decisive characteristic is the shaping that guides the cut perpendicularly. These are the characteristics that make a cutter truly professional and suitable for repeated precision work.
How to choose a resistant cutter that lasts over time
To choose a cutter that lasts over time, the rule is to prioritize materials and mechanics over price. A metal body lasts longer than a cheap plastic one; a smooth sliding mechanism without play wears out more slowly; easily available and high-quality replacement blades keep the tool efficient for years. A resistant cutter is also recognized by the quality of the finishing materials: screws that do not strip, springs that do not give way, clips that do not break. Investing in a robust professional cutter means not having to replace it continuously, with real savings in the long run. For cutting LED products, a dedicated and well-built tool pays for itself at the first successful installation without waste.
The precision cutter for detailed work
What is the most precise cutter for detailed work? For fine work (model making, graphics, but also the accurate cutting of small LED strip segments), a cutter with a thin blade (9 mm) is preferred, with an acute angle tip and a light but rigid body, which allows maximum control. The characteristics of a professional cutter for architects and designers are precisely these: lightness, millimetric precision, replaceable blade, and secure grip. For cutting neon flex, however, precision is entrusted to the shaping of the dedicated cutter rather than the thinness of the blade: each application has its ideal tool. The key is to understand what precision your work requires and choose the cutter accordingly.
How to distinguish a professional cutter from an amateur one
The difference between a professional cutter and an amateur one is especially noticeable in intensive use. The amateur model is fine for an occasional cut, but under frequent use it shows its limits: the blade locks poorly, the body flexes, the grip slips. The professional cutter, on the contrary, is designed to withstand hundreds of cuts while maintaining precision and safety. If the cutter is a work tool and not an occasional accessory, the professional choice is always the right one. In cutting LED products, this difference is even more marked, because what is at stake is not a sheet of paper but meters of product and the final quality of the installation.
8. Maintenance: how to keep the cutter in optimal condition
A good cutter lasts for years, but only if you treat it well. Maintaining a cutter is simple and takes a few minutes, but it makes a huge difference to the durability and precision of the tool. Knowing how to keep the cutter in good condition prevents imprecise cuts, sudden jams, and the need to replace it prematurely. Here are the best practices that every professional should know.
Cleaning, lubrication, and blade replacement
Basic cutter maintenance consists of three actions. Cleaning: after use, remove dust, adhesive residues, and dirt from the sliding mechanism, which otherwise compromise its fluidity. Lubrication: a drop of light oil on the slider keeps the sliding smooth and prevents rust. Blade replacement: as soon as the edge loses sharpness, break off the worn segment or change the entire blade. A sharp blade cuts with less force, more precisely, and more safely. You should never insist with a worn blade: it is the main cause of imprecise cuts and injuries.
How to prevent the cutter from wearing out too quickly
To prevent the cutter from wearing out too quickly, some golden rules apply. Never use the cutter as a lever or screwdriver: the breakable blade will snap and the mechanism will be damaged. Always retract the blade after use: you expose it to impacts and protect it from moisture. Store the tool in a dry place, away from dust and temperature fluctuations. Use the right blade for the right material: forcing a thin blade on a hard material ruins it quickly. Small attentions that greatly extend the life of the cutter and preserve its precision.
Which accessories are compatible with the cutter
The useful accessories for precision work with a cutter are mainly replacement blades (in the correct width, 9 or 18 mm for standard cutters), self-healing cutting mats that protect the work surface, metal rulers for guided cuts, and cut-resistant gloves for safety. In the case of dedicated cutters for neon flex, the complementary accessory is the router (NE6-CUT), which completes the processing by preparing the insertion of the connectors. Knowing which accessories are compatible with your cutter allows you to set up an efficient and complete workstation, reducing times and improving the quality of every cut.
9. Advantages and disadvantages of the cutter
Like any tool, the cutter has strengths and limitations. Knowing them helps to understand when the cutter is the right choice and when it is better to rely on another tool (scissors, wire cutters, a router). When cutting LED strips and neon flex, the balance is clearly in favor of the cutter, but it is worth analyzing the advantages and disadvantages honestly and comprehensively, because awareness is the foundation of any professional work.
| Advantages of the cutter | Disadvantages of the cutter |
| High precision: follows lines and marks with millimetric accuracy. | Requires attention: the exposed blade poses a cutting risk. |
| Clean and perpendicular cut, ideal for contacts and joints. | With a worn blade, results deteriorate rapidly. |
| Blade always sharp thanks to breakable segments. | Not suitable for cutting very thick or hard materials. |
| Economical, versatile, and easy to transport. | A cheap cutter flexes and loses precision under stress. |
| Works well in tight spaces and on flat surfaces. | For neon flex, a dedicated cutter is required, not a generic one. |
As you can see, most of the disadvantages of the cutter are eliminated by choosing a professional tool and using it correctly. For cutting LED strips and neon flex, the advantages of the cutter far outweigh the limitations, especially when you have the right cutter for the right product.
What can I use instead of a cutter?
Some wonder what to use instead of a cutter. For paper and cardboard, scissors may suffice; for cables, wire cutters and strippers are used; for repetitive industrial cuts, there are bench cutters. But for the precision cutting of LED strips and, even more so, neon flex, there is no real alternative to the cutter: scissors tend to crush and leave oblique edges, while the dedicated cutter guarantees the clean and perpendicular cut that the product requires. In this field, the cutter remains irreplaceable.
10. Safety: techniques for using the cutter without risks
The cutter is a tool as useful as it is potentially dangerous: the blade is always extremely sharp, and most injuries result from inattention or a poorly maintained tool. Adopting the best techniques to use a cutter safely is not just a matter of common sense, but a true professional skill. Here are the fundamental rules for working without risks, which apply to any cutter and in particular when cutting LED strips and neon flex.
The golden rules for safe cutter use
Safety in using the cutter is based on a few clear principles. Always cut away from your body, never towards your fingers or abdomen. Extend only the necessary portion of the blade: a blade extended too much will flex and break. Always lock the blade at the chosen length and retract it completely when storing the tool. Use a stable surface and, if possible, a cutting mat. Never force it: if the material resists, change the blade instead of increasing the pressure. And, in the case of LED strips, always cut with the product disconnected from the power supply. These techniques drastically reduce the risk of injury and also improve the quality of the cut.
Blade maintenance as a safety factor
It is worth reiterating: a sharp blade is safer than a worn blade. It may seem like a paradox, but it is true: with a dull blade, you tend to push harder, the tool can slip, and the risk of cutting increases. Keeping the cutter blade always sharp (by breaking off the worn segment or replacing the blade) is therefore the first rule of safety, as well as precision. Maintenance and safety go hand in hand with the cutter.
11. Where to buy a cutter and how much it costs
At this point, the practical question is: where to buy a quality cutter and how much does it cost? The market offers solutions for every need, but when it comes to cutting LED strips and neon flex, it is best to turn to those who truly know these products and offer the specific tool. Let's see how to navigate prices and purchase channels, and why for neon flex the choice of a dedicated cutter is the winning one.
How much does a cutter cost: from basic to professional solutions
How much a cutter costs depends greatly on the type. A stationery cutter costs a few euros, a branded professional cutter generally ranges between 5 and 25 euros depending on materials and mechanism, while dedicated tools (such as cutters and routers specific for neon flex) have a price linked to their specialization. The cost difference between a cheap cutter and a professional one is quickly amortized: a single meter of neon flex or LED strip wasted due to a wrong cut is often worth more than the entire cutter. From a professional perspective, the right cutter is always an investment, not an expense.
Where to buy the right cutter for neon flex and LED strips
For cutting LED products, the best place to buy a cutter is directly from the supplier of the product to be cut. Ledpoint, a specialist in LED strips, aluminum profiles, and neon flex, offers in its catalog the dedicated cutter for cutting 2nd generation Neon Flex, along with the complementary router and all necessary accessories. Buying the cutter from the same supplier as the neon flex guarantees full compatibility between tool and product: the cutter is designed exactly for that tube, with that shaping and those cutting points. It is the safest way to obtain perfect cuts from the very first installation.
Data and trends: why correct cutting matters (by the numbers)
In the LED lighting sector, length customization is now the norm: LED strips for ceilings, drywall, kitchens, bathrooms, outdoors, and neon flex contours are almost always custom-adapted on-site. This makes the cutting moment (and therefore the cutter) a critical point in the installation process. To give concreteness to the discussion, we report some operational reference values (indicative, based on installation practice) that help to frame the importance of a cut executed well with the right tool.
| Parameter | Indicative value | Practical impact |
| LED strip cutting point interval | every 2.5 – 5 cm (depending on the model) | Determines the precision achievable in adapting the measurement. |
| Ledpoint 2nd gen Neon Flex cutting points | every 2.5 cm | Allows fine adjustments while keeping the circuit intact. |
| Standard cutter blade widths | 9 mm (precision) / 18 mm (heavy-duty) | The right blade improves control and cut durability. |
| Indicative price of a professional cutter | approx. 5 – 25 € | Amortized at the first cut saved from error. |
| Average cuts per blade before replacement | variable, dozens of clean cuts | With a sharp blade, quality remains constant over time. |
| Waste reduction with dedicated tool | operational estimate: significant | Fewer ruined segments, more meters of product used. |
Note: the values reported are for illustrative and orientative purposes, the precise technical data (cutting intervals, power, voltage) are always those indicated in the technical data sheet of each Ledpoint product. The underlying message, however, is clear: every wrong cut is wasted product, and the right cutter is the most economical insurance against waste. In a sector where material has a cost per meter, the difference between an adequate cutter and a makeshift one is measured directly in euros.
The different types of cutters: a comparison guide
There is no single "cutter", but many types of cutters designed for different uses. Knowing the differences between the various types of cutters helps you choose the one most suitable for your work and avoids using the wrong tool, a frequent mistake especially with neon flex, where a generic cutter is not enough. Here is a comparative overview of the main types of cutters and their ideal use.
| Type of cutter | Characteristics | Ideal use |
| 9 mm breakable blade cutter | Thin segmented blade, light and manageable. | Precision work, detail, fine cutting. |
| 18 mm breakable blade cutter | Wide and robust blade, reinforced body. | Thick cardboard, carpet, heavy-duty use. |
| Professional metal cutter | Rigid body, solid lock, high durability. | Daily intensive use, artisans, and installers. |
| Precision cutter (pen style) | Very fine tip, pencil grip. | Model making, graphics, millimetric details. |
| Dedicated cutter for Neon Flex (NE6-TOOL) | Shaped for the tube, guided perpendicular cut. | Cutting Ledpoint 2nd generation Neon Flex. |
As emerges from the comparison, each type of cutter meets a specific need. For generic cutting of LED strips, a good professional cutter is more than sufficient; for neon flex, however, the dedicated cutter is the mandatory choice if you want a masterful cut. The rule remains simple: the right tool for the right material. This is how an artisan or carpenter obtains high-quality cuts and improves the efficiency of their daily work.
The artisan's questions: precision, durability, and reliability
Those who work with their hands, like the artisan, the carpenter, the installer, have very concrete needs when looking for a cutter. They are interested in a tool that cuts well, lasts, and does not let them down in the middle of a job. We collect here the most typical questions from these professionals and give practical answers, because the choice of the right cutter always stems from the right questions.
What is the best cutter for precision cutting of neon flex?
The best cutter for precision cutting of neon flex is the one dedicated to the specific neon flex model being installed. For the 6 mm Ledpoint 2nd generation Neon Flex, the NE6-TOOL cutter is designed exactly for that profile and guarantees a perpendicular and clean cut at the notches every 2.5 cm. A generic cutter, however professional, does not offer the same guidance and result on a solid tube like neon flex. For absolute precision, therefore, the dedicated cutter always beats the universal one.
How to choose a reliable cutter for daily work?
For daily work, a reliable cutter must have a rigid body, a secure blade lock, an ergonomic grip, and easily available replacement blades. These are the characteristics that allow high-quality cuts day after day and improve efficiency. An artisan who cuts tens of meters of LED strip or neon flex every week needs a cutter built to last: the choice of a professional tool, and for neon flex the dedicated one, pays off in precision, safety, and time saved.
Where cutting is needed: the most common applications of LED strips and neon flex
Understanding where and when to cut helps to understand why the cutter is such a present tool in installation work. LED strips and neon flex adapt to many contexts, and in almost all of them the length must be customized. Here are the most common applications, with their respective cutting needs: these are the situations in which, on the construction site, the cutter comes out of the toolbox most often.
Ceiling and drywall suspended ceiling LED strips require custom cuts to follow perimeters, luminous coves, and valances; here, a clean cut is the premise of a continuous line of light without visible interruptions. Kitchen LED strips, typically installed under cabinets to illuminate the work surface, must be cut to the exact length of the furniture. Bathroom and bedroom LED strips follow the same logic of customization. Outdoor LED strips, with a higher protection rating, must be cut carefully so as not to compromise the sealing. And TV and backlighting LED strips require short and precise segments. In all these cases, a clean cut at the right point is what distinguishes a professional installation from an approximate job.
Neon flex, for its part, finds use in luminous contours, lettering, signs, architectural profiles, continuous light coves, and decorative applications where the "neon" effect is desired without visible light points. Precisely because neon flex is often bent and shaped to follow forms and letters, cutting to the correct size is frequent and delicate, and must be strictly executed on the predisposed notches with the dedicated tool. The possibility of bending the tube horizontally or vertically expands creative possibilities, but makes a final clean and perpendicular cut even more important.
In all these applications, a common thread emerges: the quality of the installation depends directly on the quality of the cut. A good cutting tool, used correctly on the predetermined points, is the foundation of every successful lighting project, from the simplest under-cabinet LED strip to the most complex neon flex contour.
12. Frequently Asked Questions (FAQ) about the cutter
We collect here the most frequent questions about the cutter and its use with LED strips and neon flex. The answers are concise and designed to be immediately useful. Click on each question to open the corresponding answer.
What is a cutter?A cutter is a manual cutting tool with a sliding segmented blade housed in a body. It is used to make clean and precise cuts on paper, plastic, sheaths, and, in the LED field, on LED strips and neon flex. In Italian, it is also called "taglierino": cutter and utility knife are in fact the same tool. |
What is a cutter used for?The cutter is used to precisely cut materials of limited thickness. In the lighting field, it is used to adapt the length of LED strips and neon flex, cutting at the predetermined points for a clean edge and a reliable joint. |
How is "cutter" pronounced and what does it mean?Cutter is pronounced "cutter" (with a short 'u' sound) and derives from the English "to cut": it therefore means "cutter". The correct spelling has a double 't'. In Italian, the synonym is "taglierino". |
Are cutter and utility knife the same thing?Yes. "Cutter" is the Anglicism, "taglierino" the Italian form: they indicate the same sliding blade tool. The "taglierina", on the other hand, is the bench machine for cutting paper, which is different from the manual cutter. |
Who invented the cutter?The breakable blade cutter was invented in Japan in 1956 by Yoshio Okada, who devised the breakable segment blade to always have a sharp tip without replacing the entire tool. |
What is the notch on the utility knife blade used for?The oblique notches on the blade serve to safely break off the worn segment: by bending the blade along the notch, the worn tip snaps off cleanly, leaving a new sharp edge. |
How to cut LED strips with a cutter?Identify the marked cutting point closest to the desired measurement, place the strip on a flat surface, position the blade perpendicular to the mark, and make a single, decisive cut. Verify that the edge and contact pads are intact. |
How to cut neon flex?Neon flex is cut exclusively on the predetermined notches (every 2.5 cm in Ledpoint 2nd generation Neon Flex) using the dedicated cutter, which guides a perpendicular and clean cut necessary for proper closure with the end caps. |
What is the best cutter for precision cutting of neon flex?It is the cutter dedicated to the neon flex model in use. For the 6 mm Ledpoint 2nd generation Neon Flex, the NE6-TOOL cutter is shaped to guarantee a perpendicular and clean cut, superior to that of any generic cutter. |
How to choose a resistant and durable cutter?Prioritize a rigid body (preferably metal), a solid locking mechanism, an ergonomic grip, and quality, readily available replacement blades. These elements ensure precision and durability over time, even with intensive use. |
What are the characteristics of a professional cutter?Rigid body that does not flex, solid blade lock, non-slip grip, quality steel blades, and, for cutters dedicated to neon flex, shaping that guides the cut perpendicularly. |
How to keep the cutter in good condition?Clean the mechanism after use, lubricate the slider with light oil, replace the blade as soon as it loses sharpness, always retract the blade at the end of work, and store the tool in a dry place. |
Which accessories are compatible with my cutter?Replacement blades of the correct width, cutting mats, metal rulers, and cut-resistant gloves. For cutters dedicated to Ledpoint Neon Flex, the complementary accessory is the 6 mm router (NE6-CUT) for connector insertion. |
How to break or change the cutter blade safely?To break the segment: extend a segment, insert it into the special rear slot or grip it with pliers, cover it, and bend it decisively along the notch. To change the blade: slide the worn one out of the slider and insert a new compatible blade. |
How much does a cutter cost?A stationery cutter costs a few euros; a professional cutter generally between 5 and 25 euros depending on materials and mechanism. Dedicated tools for neon flex have a price linked to their specialization. In any case, the cost is amortized at the first cut saved from error. |
What can I use instead of a cutter?For paper and cardboard, scissors; for cables, wire cutters and strippers. But for the precision cutting of LED strips and especially neon flex, there is no alternative: only the cutter (dedicated for neon flex) guarantees the required clean and perpendicular cut. |
Where to buy a cutter for neon flex and LED strips?The best channel is the supplier of the product to be cut itself. Ledpoint offers the dedicated cutter for cutting 2nd generation Neon Flex, along with the router and accessories, guaranteeing full compatibility between tool and product. |
How to use the cutter: the correct technique, step by step
Knowing how to use a cutter seems like an instinctive gesture, but the difference between an approximate cut and a professional one lies entirely in the technique. Those who wonder how to use a cutter or how a utility knife works often make the same mistakes: blade extended too much, excessive pressure, non-perpendicular cut. Let's see then how to correctly use the utility knife, because good technique improves the result, extends the life of the tool, and reduces risks. These principles apply to any material and are even more important when working on technical products like LED strips and neon flex.
Posture and grip
It all starts with the grip. Hold the tool firmly but without rigidity, resting your index finger on the back to guide the direction. Keep your wrist aligned with your forearm so as not to lose control halfway through the cut. Always work on a flat and stable surface: the piece to be cut must not move. Correct posture is the premise of a precise and safe cut. Many imprecise cuts simply arise from an uncertain grip or an unstable support: correcting these two aspects immediately improves the quality of the work.
Angle and pressure
The cutting angle matters a lot. For a clean cut on an LED strip or neon flex, the blade must be perpendicular to the plane of the product, not tilted. As for pressure, the rule is counterintuitive: less force, more precision. With a sharp blade, moderate and constant pressure is enough; forcing it only increases the risk of slipping and fraying the edges. If you feel you have to push too hard, the blade is worn: change it. A single decisive pass, without sawing back and forth, is almost always the best way to get a clean edge.
Guided cutting
For cuts that require maximum precision, such as those on small LED strip segments, it is advisable to use a guide: a metal ruler or, in the case of neon flex, the shaping of the dedicated tool itself. The guide prevents the blade from deviating and guarantees an edge perfectly aligned with the cutting point. It is a simple technique that instantly elevates the quality of the result and that every professional should adopt when precision is critical. In repeated cutting, a guide saves time and significantly reduces waste.