





LED strip: watts and lumens by height and room
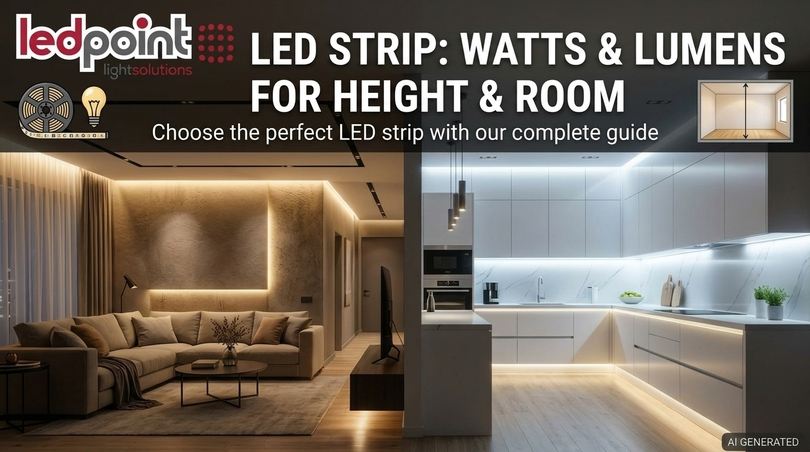
To choose the power and efficiency of an LED strip, start with the lux required by the environment, multiply by the surface area, and divide by the meters of strip that can be installed, taking into account losses due to height, profile, and walls. Indicatively, 600–1,200 lm/m are needed up to 1 m in height, 1,400–2,400 lm/m between 2.4 and 3 m, and over 2,500 lm/m above 3.5 m, preferring efficiencies of at least 130 lm/W.
Anyone who has installed an LED strip at least once knows the feeling: on paper the reel seemed incredibly powerful, but once mounted in the dropped ceiling cove, the room remains dim; or, conversely, the light under the kitchen cabinets dazzles and reflects on the glossy countertop like a spotlight. In both cases, the problem is not the quality of the product, but the fact that the choice was made by looking at watts, and not at the ratio between luminous flux, installation height, and room dimensions.
This guide stems from the daily experience of the Ledpoint technical team, which every week answers designers, installers, electricians, interior architects, and private individuals with the same question: how many watts per meter and how many lumens should my LED strip have? The correct answer is not a single number. It depends on how high you mount it, how many square meters you need to illuminate, what you will do in that room, the color of the walls, the profile you will use, and even the color temperature. In these pages, you will find the complete method, explained step by step, with reference tables, real calculation examples, and three interactive configurators that cross-reference your data with the LED strips actually present in the Ledpoint.it catalog.
In this article...
1. Why height and room size change the choice of LED strip
Before diving into the numbers, it is worth understanding the physical phenomenon underlying this entire guide. An LED strip emits a certain amount of light per meter of length, but that light does not arrive intact on the table, floor, or worktop: it spreads, disperses, bounces off the walls, and is partly absorbed. The farther the light source is from the surface to be illuminated, and the larger the surface, the more lumens are needed at the source to achieve the same result. This is why the same strip can be perfect under a cabinet and insufficient on the ceiling.
Distance: the inverse square law and the linear source
For a point source, like a light bulb viewed from a distance, the inverse square law applies: doubling the distance reduces the illuminance to a quarter. However, an LED strip is not a point, it is a line. As long as you are close to the strip, at a distance less than its length, the illuminance behaves more "gently" and drops approximately in inverse proportion to the distance: doubling the distance halves the light. When you move very far away, the line begins to behave like a point again, and the drop becomes quadratic once more.
Translated into practice: between 30 cm and 2 meters, the LED strip is a highly efficient source; beyond 3–4 meters, it rapidly loses effectiveness and requires high fluxes, multiple parallel lines, or dedicated fixtures. This is why industrial warehouses use projectors and floodlights, while in homes, ceiling LED strips have become the most widespread solution for general and atmospheric lighting.
An immediate numerical comparison
Let's take a strip with 2,000 lm/m and consider a 2-meter section mounted in a profile with an opal diffuser. The calculation for a Lambertian linear source, with the contribution of light-colored walls, gives these orders of magnitude on the vertical axis of the strip:
| Distance from surface | Indicative illuminance under the strip | Typical application |
|---|---|---|
| 0.5 m | approx. 1,250–1,450 lux | Kitchen under-cabinet, shelves, workbenches |
| 1.0 m | approx. 550–650 lux | Bathroom mirror, headboard, niches |
| 1.9 m (2.7 m ceiling above table) | approx. 220–300 lux | Residential general lighting |
| 3.0 m | approx. 100–140 lux | Stores, open spaces, high ceilings |
| 5.0 m | approx. 35–55 lux | Architectural effect only, not primary lighting |
The values are indicative and vary with the profile's optics and wall reflection, but they clearly illustrate the concept: the same strip, moving from 0.5 to 3 meters, provides less than a tenth of the light on the surface.
Room size: more square meters, more total flux
The second variable is the surface area. Illuminance, measured in lux, is the luminous flux falling on one square meter. If you want 200 lux on 10 m², you theoretically need 2,000 useful lumens; on 40 m², you need 8,000. The shape of the room matters as much as its surface area: a long, narrow corridor "wastes" much more light on the walls than a square room, which is why designers use the room index, which we will see in chapter 5.
Why the market is shifting to high-efficiency LED strips
The issue is not just technical. Market estimates indicate robust growth in the sector: according to an analysis by DIResearch, the global LED strip market is worth about $1.79 billion in 2025 and could exceed $4.5 billion by 2032, with an average annual growth of around 14%. Other institutes, which include the commercial segment as a whole, estimate even higher values: figures vary greatly from report to report, but they all agree on one point. The LED strip has evolved from a decorative element to a primary lighting source, and this requires sizing it with the same rigor as a traditional fixture.
Regulations are also pushing in the same direction: EU Regulation 2019/2020 on ecodesign and Delegated Regulation 2019/2015 on energy labeling have made the energy class mandatory even for light sources like LED strips. This is why every Ledpoint product datasheet reports, alongside lumens and watts, the energy class from A to G.
2. Lumens, lux, watts per meter, and luminous efficacy: the metrics that matter
The most frequent confusion arises from the fact that technical datasheets display different numbers measuring different things. It is worth fixing them once and for all, because the calculation method you will use in the following chapters combines all of them. If you understand the difference between lumens and lux, you have already solved half of the design problems with LED strips.
Lumens per meter (lm/m): how much light the strip emits
The lumen is the unit of luminous flux, i.e., the total amount of light emitted by a source. In LED strips, the value is expressed per linear meter: a strip with 2,000 lm/m, 5 meters long, emits a total of 10,000 lumens. This is the starting point for any sizing.
Lux (lx): how much light reaches the surface
The lux measures illuminance, i.e., the lumens falling on one square meter. It is the metric you perceive when you say "I can read well here" or "it's dark here". Technical standards, such as UNI EN 12464-1 for workplaces, set specific values in lux.
Watts per meter (W/m): how much energy it consumes
Watts per meter indicate the electrical power absorbed. In the Ledpoint catalog, strips are also organized by power, from 4.8 W/m up to over 24 W/m: for example, you will find categories like 14.4 W/m LED strips, 19.2 W/m LED strips, and 24 W/m and higher LED strips. However, watts do not tell you how much light you get: two 14.4 W/m strips can differ by 40% in lumens.
Luminous efficacy (lm/W): the true quality indicator
Luminous efficacy is the ratio between lumens and watts: how many lumens you get for every watt consumed. It is calculated by dividing lm/m by W/m. A strip with 2,000 lm/m and 14.4 W/m has an efficacy of about 139–155 lm/W depending on the declared measurement conditions; one with 1,410 lm/m at the same power stops at about 110 lm/W. For the same amount of light, higher efficacy means less consumption, less heat, smaller power supplies, and longer-lasting strips.
Other metrics to know
To complete the picture, you need four other parameters that you will encounter in every product datasheet: the color temperature in Kelvin, the Color Rendering Index (CRI), the IP protection rating, and the binning in MacAdam ellipse steps (the "3-step" labels in the catalog).
| Metric | Unit | What it measures | Typical LED strip values | Why it matters in sizing |
|---|---|---|---|---|
| Luminous flux | lm/m | Light emitted per meter | 400 – 2,800 lm/m | It is the starting point of the calculation |
| Illuminance | lux | Light reaching the surface | 100 – 750 lux required | It is the target to achieve |
| Power | W/m | Energy absorbed | 4.8 – 24 W/m | Determines consumption and power supply |
| Efficacy | lm/W | Light per watt | 105 – 155 lm/W | Converts lumens to watts |
| Color temperature | K | White tone | 2,700 – 6,500 K | Influences efficacy and perception |
| Color rendering | CRI / Ra | Color fidelity | Ra>80 – Ra>97 | High CRI costs a few lumens |
| Protection | IP | Resistance to water and dust | IP20 – IP67 | Coatings slightly reduce flux |
| Binning | MacAdam steps | Color uniformity between batches | 3 steps | Avoids tone differences between sections |
The basic formula to remember
Everything else in this article revolves around two simple steps. First: required lumens per meter = (desired lux × surface area) ÷ (meters of strip × utilization factor × maintenance factor). Second: watts per meter = lumens per meter ÷ luminous efficacy. In the following chapters, we learn how to estimate each term.
3. How many lux are needed in each environment
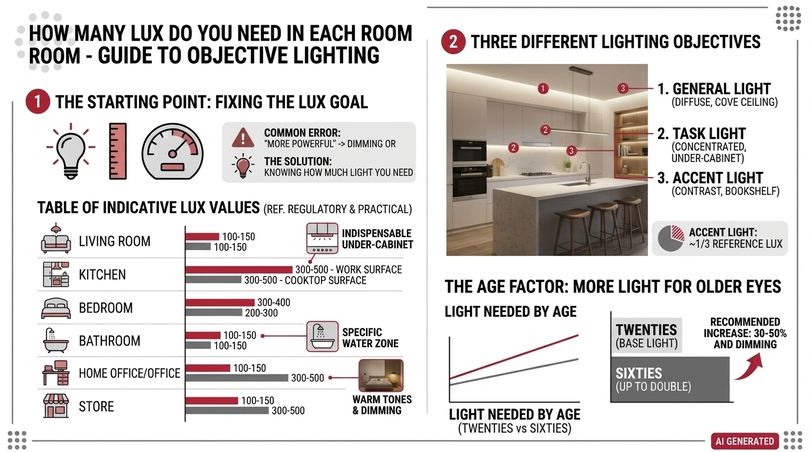
The starting point of any project is knowing exactly how much light is truly needed. It seems obvious, but it is the step most often skipped: people buy "the most powerful strip" and then dim it down, or they buy a decorative strip hoping it will illuminate the kitchen. Setting the target illuminance in lux allows you to avoid oversizing and ending up in the dark.
Regulatory references
For workplaces, the reference is the European standard UNI EN 12464-1, published in Italy by UNI, the Italian Organization for Standardization, which indicates the maintained average illuminance for each visual task. For homes, there is no strict obligation, but design practice refers to similar, slightly reduced values, and above all distinguishes between general light, functional light, and accent light.
| Environment or task | General light (lux) | Functional light (lux) | Design notes |
|---|---|---|---|
| Living room | 100 – 150 | 300 (reading) | Ideal to combine indirect cove and spotlights |
| Kitchen | 200 – 300 | 500 (worktop) | Under-cabinet lighting is essential to eliminate shadows |
| Bedroom | 50 – 100 | 200 – 300 (wardrobe, reading) | Warm tones, dimming recommended |
| Bathroom | 150 – 200 | 500 (mirror) | Adequate IP rating in areas near water |
| Hallway and landing | 75 – 100 | - | Perfect with a motion sensor |
| Stairs | 100 – 150 | - | Grazing light on steps for safety |
| Study and home office | 300 | 500 | Office values for prolonged work |
| Office (UNI EN 12464-1) | 500 | 500 – 750 | Pay attention to glare |
| Store, sales area | 300 – 500 | 750 – 1,000 (display) | High CRI to enhance products |
| Warehouse | 100 – 200 | 300 (picking) | Above 5 m, prefer projectors |
General, functional, and accent light: three different goals
A strip mounted in a perimeter cove that washes the ceiling produces mostly diffuse general light, pleasant and shadow-free, but it rarely reaches 300 lux in a kitchen on its own. A strip under a cabinet produces functional light concentrated where it is needed. A strip in a bookshelf niche produces accent light, whose purpose is to create contrast, not to illuminate the room. In the configurators in this guide, you can choose the light function: for accent light, the calculation uses a target of about one-third of the reference lux.
The age factor
A detail often forgotten: as we age, the eye needs more light. A sixty-year-old person may require up to twice the illuminance of a twenty-year-old for the same visual task. If you are designing for older adults, increase the target by 30–50% and always provide dimming, so you can adapt the light over time with an LED strip dimmer.
4. LED strip power based on installation height
This is the core of the guide. The installation height determines how much of the emitted light actually reaches where it is needed and what density of lumens per meter is necessary. We have divided installations into six bands covering almost all residential and commercial cases. For each band, you will find the recommended lumens per meter range, the corresponding watts per meter, and the most suitable strips from the Ledpoint catalog.
An important clarification: by "height" we mean the distance between the strip and the surface to be illuminated, not the height from the floor. If the strip is on a 2.70 m ceiling and you need to illuminate a table 75–85 cm high, the useful distance is about 1.85–1.95 m. For corridor floors, however, the distance coincides with the ceiling height.
| Distance from surface | Applications | Accent light (lm/m) | Functional or primary light (lm/m) | Indicative W/m (at 125–155 lm/W) |
|---|---|---|---|---|
| 0 – 0.3 m | Showcases, shelves, steps, baseboards | 200 – 500 | 500 – 900 | 4.8 – 7 W/m |
| 0.3 – 0.7 m | Kitchen under-cabinet, desk, counter | 400 – 700 | 900 – 1,600 | 7 – 14.4 W/m |
| 0.7 – 1.5 m | Bathroom mirror, headboard, niches, wardrobes | 500 – 900 | 1,200 – 1,800 | 9.6 – 14.4 W/m |
| 1.5 – 2.2 m (2.4–2.8 m ceilings) | Residential ceiling, coves, valances | 800 – 1,400 | 1,500 – 2,400 | 14.4 – 19.2 W/m |
| 2.2 – 3.0 m (3–3.8 m ceilings) | High ceilings, attics, lofts, stores | 1,200 – 1,800 | 2,200 – 2,800 or more lines | 19.2 – 24 W/m |
| Over 3 m (ceilings > 4 m) | Showrooms, halls, warehouses, facades | 1,800 – 2,800 | Multiple close lines or projectors | 22 – 24 W/m and above |
From 0 to 0.3 meters: showcases, shelves, steps, and baseboards
A few centimeters from the surface, the LED strip is extremely effective. The risk here is not a lack of light, but an excess: visible hotspots, glare, and reflections on glossy surfaces. Contained fluxes of 200 to 900 lm/m are needed, and above all, good uniformity, which is achieved with high LED density strips or COB technology, along with an opal diffuser. For these applications, look at the 4.8 W/m LED strips category and the COB LED strips range, ideal for the continuous line effect.
The case of steps and handrails
On steps, the strip is mounted 2–5 cm from the tread, in an angular profile or under the nosing. 300–600 lm/m is enough for safe courtesy light; higher values create an inelegant "runway" effect. A 16 mm angular aluminum profile directs the light at 45° toward the tread.
From 0.3 to 0.7 meters: kitchen under-cabinet and worktops
This is the most widespread application by far, and not surprisingly, "under-cabinet LED strip" is one of the most frequent searches in the sector. The worktop requires about 500 lux, the typical distance between cabinet and counter is 50–60 cm, and the depth to be illuminated is about 60 cm. With these data, as we will see in the chapter 14 example, about 700–900 effective lm/m on the counter are needed, which with a dimming margin become 1,000–1,600 lm/m. A 14.4 W/m strip with 1,410–1,600 lm/m, like the 3500K 3-step 2835 120 led/m 24V 14.4 W/m LED strip (1,600 lm/m, 125 lm/W), is the most balanced choice.
Where to position the strip under the cabinet
Mounting the strip toward the front edge of the cabinet, tilted 30–45° toward the backsplash, prevents the light from hitting the eyes directly and reduces reflections on the countertop. If the surface is glossy or polished stone, an opal diffuser is practically mandatory.
From 0.7 to 1.5 meters: mirrors, headboards, niches, and wardrobes
In this range, the strip illuminates vertical surfaces or faces. Around the bathroom mirror, 500 lux on the face is needed, distributed evenly to avoid shadows under the eyes and chin: two side lines or a perimeter frame of 1,200–1,800 lm/m in an opal profile yields a professional result. For a headboard or decorative niche, 500–900 lm/m is sufficient. Here, color rendering is crucial, because the light falls on skin, fabrics, and wood: it is worth considering the Sunled line, designed to reproduce the spectrum of natural light.
From 1.5 to 2.2 meters: the standard residential ceiling
With ceilings between 2.40 and 2.80 m, the distance between the strip and the work surface is about 1.6–2 meters. This is the realm of ceiling LED strips, drywall light coves, and perimeter valances in living rooms and bedrooms. Two very different scenarios:
Indirect light in a cove: the strip illuminates the ceiling, which bounces the light into the room. The ceiling acts as a large diffuser, but absorbs a significant portion of it. For a soft atmosphere, 800–1,400 lm/m is enough; if the cove must be the only light source in the room, it rises to 1,500–2,200 lm/m.
Direct light in a profile: the strip is in a recessed aluminum profile or a drywall profile and shines directly downward, creating so-called light cuts. For primary lighting, 1,500–2,400 lm/m is required. In this range, high-efficiency 19.2 W/m strips work brilliantly, such as the 3000K 3-step 2835 238 led/m 24V 19.2 W/m LED strip (2,345 lm/m, 135 lm/W) or the 4000K 3-step 2835 240 led/m 24V 19.2 W/m LED strip (2,210 lm/m, 130 lm/W).
From 2.2 to 3 meters: high ceilings, attics, exposed beams, and stores
When the ceiling exceeds 3 meters, as in lofts, historic homes, attics with exposed beams, and many stores, a single line of strip is rarely enough for primary lighting. There are two paths: increase the flux per meter up to 2,400–2,800 lm/m, or increase the number of lines by reducing the spacing. Almost always, the best solution is a combination of both. The 4000K 3-step 2835 238 led/m 24V 22 W/m LED strip, with 2,780 lm/m and 140 lm/W, is among the most high-performing in the catalog for these cases; in warm white, there is the 3000K 3-step 2835 120 led/m 24V 24 W/m LED strip at 2,440 lm/m.
Illuminating exposed wooden beams
With exposed beams, the strip is often hidden on the upper side of the beam to wash the boarding, or along the side to create grazing light. Wood absorbs a lot of light, especially if dark: calculate a low reflection factor and increase the flux by 20–30% compared to a white ceiling.
Over 3 meters: showrooms, halls, warehouses, and facades
Beyond this distance, the LED strip remains an excellent tool for architectural lighting, i.e., to highlight lines, coves, cornices, and facades, but becomes inefficient as primary light on a distant surface. Good illuminance can still be achieved with multiple close lines of 22–24 W/m and profiles with optics, but when the goal is to illuminate the floor of a 6-meter-high warehouse, a dedicated projector or light bar has a significantly higher yield. Ledpoint offers LED bars and the aforementioned floodlights for these cases.
5. Power based on room size: the total flux method
The height table is an excellent starting point, but a serious project must also consider the surface area and shape of the room. A 12 m² living room and a 45 m² open space with the same ceiling require completely different amounts of light, and the number of meters of strip you can install changes with the perimeter and layout. The total flux method, used by lighting designers, allows you to reliably convert lux to lumens per meter.
Step 1: calculate the required useful flux
The useful flux is simply target lux × surface area in m². A 5 × 4 m living room that needs to receive 150 lux requires 150 × 20 = 3,000 lumens to actually reach the useful plane.
Step 2: calculate the room index K
The room index describes the shape of the room relative to the useful height and is calculated as follows: K = (length × width) ÷ [useful height × (length + width)]. The useful height is the distance between the strip and the work surface. Wide, low rooms have a high K and utilize light well; narrow, tall rooms have a low K and waste much of it on the walls.
The utilization factor
Each K value corresponds to a utilization factor, i.e., the fraction of emitted light that reaches the plane. For strips in direct light profiles with light-colored walls, indicative values are:
| Room index K | Room type | Direct light utilization factor | Indirect cove light factor |
|---|---|---|---|
| < 0.8 | Hallways, narrow bathrooms, very tall rooms | 0.35 | 0.19 |
| 0.8 – 1.2 | Bedrooms, kitchens, medium bathrooms | 0.45 | 0.25 |
| 1.2 – 2.0 | Living rooms, studies, small stores | 0.55 | 0.30 |
| 2.0 – 3.0 | Open spaces, large meeting rooms | 0.62 | 0.34 |
| > 3.0 | Large surfaces with low ceilings | 0.68 | 0.37 |
These values derive from typical utilization tables for diffusing linear fixtures and are deliberately conservative. For medium-colored walls, multiply by 0.85; for dark walls or dark wood, multiply by 0.70.
Step 3: apply the maintenance factor
Every LED source loses flux over time and gets dirty. For quality strips, tested according to the LM-80 standard like most of those in the Ledpoint catalog, a maintenance factor of 0.80 is a prudent and realistic choice for indoor environments.
Step 4: consider diffuser transmission
If the strip is in a profile with a cover, some light is retained in the diffuser. A clear diffuser lets about 90% of the flux pass, a satin one 80–85%, and an opal one 65–75%. You can find all options in the profile diffusers category.
Step 5: divide by the meters of strip
The flux to be installed is useful flux ÷ (utilization × maintenance × reflection × transmission). Dividing this by the meters of strip you can lay gives you the required lumens per meter. Finally, dividing by the efficacy of the chosen strip gives you the watts per meter.
How many meters of strip you can install
For perimeter coves, the meters coincide, minus the corners, with the perimeter: in a 5 × 4 m living room, it is about 17.5 m. For ceiling light cuts, the rule of thumb is to keep a spacing between lines no greater than the useful height, to achieve uniform illumination; for a very homogeneous result, drop to 0.7–0.8 times the useful height.
Quick table for surface area and ceiling height
For those who want an immediate reference, here is the indicative total flux to install for primary direct light in an opal profile, light-colored walls, and a useful plane at 85 cm.
| Surface area | 2.7 m ceiling – 150 lux | 2.7 m ceiling – 300 lux | 3.5 m ceiling – 300 lux | 3.5 m ceiling – 500 lux |
|---|---|---|---|---|
| 8 m² (2 × 4 m) | approx. 5,700 lm | approx. 11,400 lm | approx. 11,400 lm | approx. 19,000 lm |
| 12 m² (3 × 4 m) | approx. 6,700 lm | approx. 13,300 lm | approx. 17,100 lm | approx. 28,600 lm |
| 20 m² (4 × 5 m) | approx. 9,100 lm | approx. 18,200 lm | approx. 22,200 lm | approx. 37,000 lm |
| 30 m² (5 × 6 m) | approx. 13,600 lm | approx. 27,300 lm | approx. 33,300 lm | approx. 55,600 lm |
| 50 m² (5 × 10 m) | approx. 22,700 lm | approx. 45,500 lm | approx. 45,500 lm | approx. 75,800 lm |
Divide the value by the meters of strip you plan to install to get the lumens per meter. Example: 18,200 lm over 20 m² distributed over 10 meters of light cuts means 1,820 lm/m, i.e., a 19.2 W/m high-efficiency strip. The full configurator in chapter 11 performs this calculation for you and directly proposes compatible Ledpoint strips.
6. Direct light, indirect light, recessed, and profiles: how much you lose along the way
The way you mount the strip is the variable that more than any other separates a professional result from a disappointing one. The same LED strip can provide 100% of its light toward the plane or less than a third, depending on whether it is free, enclosed in an opal profile, or hidden in a valance that illuminates the ceiling. Knowing these losses prevents you from choosing a strip that is too weak for a cove or too powerful for a light cut.
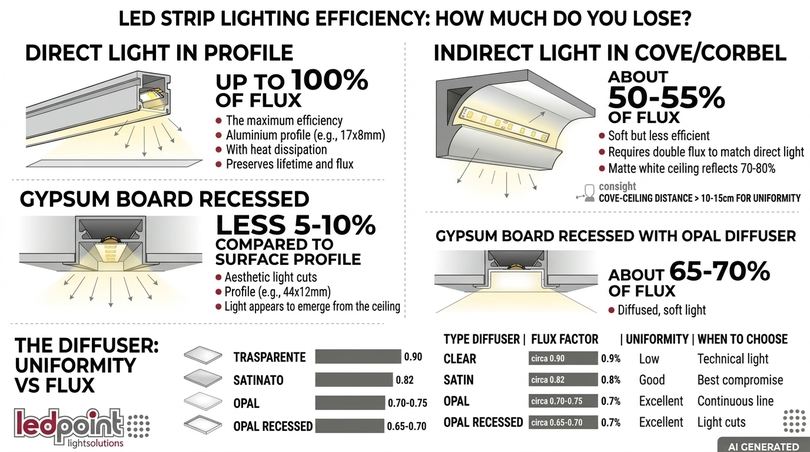
Direct light in a profile: maximum efficacy
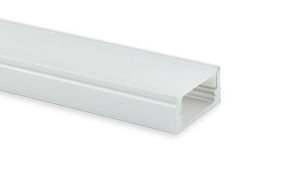
With direct light, the strip points toward the surface to be illuminated. It is the most efficient solution and the one on which the values in the chapter 4 table are based. Mounted in a 17 × 8 mm aluminum profile with diffuser, the strip also gains in longevity, because the aluminum dissipates heat: for strips of 14.4 W/m and above, an aluminum profile is not an aesthetic accessory, it is a condition for maintaining flux over time. You can find the entire range in the aluminum profiles for LED strips section.
Indirect light in a cove or valance: soft but more "expensive"
In indirect light, the strip illuminates a surface, almost always the ceiling or a wall, which in turn diffuses the light into the room. The result is shadow-free and glare-free, but the ceiling absorbs a significant portion of the flux: even a matte white ceiling reflects only about 70–80% of the light, and the bounced light distributes in all directions. In practice, indirect light requires about double the flux of direct light to achieve the same illuminance on the plane.
The distance between strip and ceiling in the cove
To avoid the classic luminous "spot" near the cove and achieve a long, uniform fade, the distance between the strip and the ceiling should be at least 10–15 cm, and the strip should be set back from the edge of the valance. The deeper and taller the cove, the more the light distributes over a wide portion of the ceiling. With reduced distances, under 5 cm, a more concentrated effect is achieved, interesting as a graphic sign but poorly suited as general light.
Recessed in drywall and light cuts
Light cuts in drywall, highly sought after in contemporary renovations, are effectively direct light, but the strip is set further back from the ceiling surface, and the profile can limit the emission angle. Consider an additional 5–10% loss compared to a surface-mounted profile. The aesthetic advantage is enormous: the light seems to emerge from the ceiling itself. Flush-mount drywall profiles, like the 44 × 12 mm model in the catalog, allow for perfectly integrated lines.
The diffuser: uniformity versus flux
The diffuser is a compromise between the uniformity of the light line and the amount of light transmitted. A clear diffuser lets you see the individual LEDs, an opal one hides them but retains a larger portion of the light. With high-density strips, from 238–240 LEDs per meter, or with COB strips, a satin diffuser is often sufficient for a continuous line.
| Installation type | Factor relative to free direct light | Line uniformity | When to choose it |
|---|---|---|---|
| Profile with clear diffuser | approx. 0.90 | Low with 120 led/m strip | Technical light, non-visible areas |
| Profile with satin diffuser | approx. 0.82 | Good | The best compromise in most cases |
| Profile with opal diffuser | approx. 0.70 – 0.75 | Excellent, continuous line effect | Visible strips, glossy surfaces, mirrors |
| Drywall recessed with opal diffuser | approx. 0.65 – 0.70 | Excellent | Ceiling and wall light cuts |
| Indirect cove toward white ceiling | approx. 0.50 – 0.55 | Excellent, no visible source | Atmospheric light, living rooms and bedrooms |
| Indirect cove toward colored ceiling or wood | approx. 0.35 – 0.45 | Excellent | Attics, exposed beams |
7. Luminous efficacy: why 155 lm/W changes the project and the bill
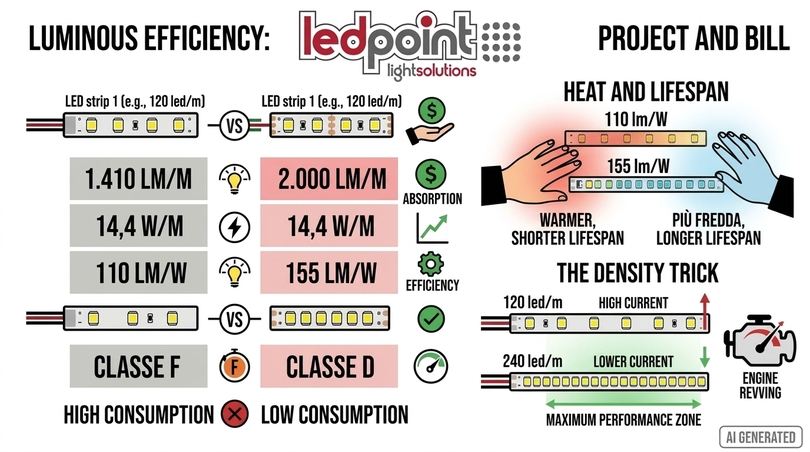
Once the required lumens per meter are established, the conversion to watts depends entirely on the strip's efficacy. This is where product differences become evident, and where the long-term competitiveness of an installation is decided. Two strips with the same flux can differ by up to 40% in consumption, and that 40% repeats every day for the entire life of the installation.
A real comparison between Ledpoint catalog strips
Let's take three 24V warm white 3000K strips from the catalog. The 3000K 3-step 120 led/m 14.4 W/m LED strip declares 1,410 lm/m and 110 lm/W. The 3000K 3-step 240 led/m 14.4 W/m LED strip, at the same power, declares 2,000 lm/m and 155 lm/W. The 3000K 3-step 120 led/m 24 W/m LED strip reaches 2,440 lm/m, but at 110 lm/W.
| Ledpoint Strip 3000K 24V | lm/m | W/m | Declared lm/W | lm/m ÷ W/m | Watts needed for 20,000 lm | Energy class in datasheet |
|---|---|---|---|---|---|---|
| 2835 120 led/m 14.4 W/m | 1,410 | 14.4 | 110 | 98 | approx. 204 W | F |
| 2835 238 led/m 19.2 W/m | 2,345 | 19.2 | 135 | 122 | approx. 164 W | E |
| 2835 240 led/m 14.4 W/m | 2,000 | 14.4 | 155 | 139 | approx. 144 W | D |
| 2835 120 led/m 24 W/m | 2,440 | 24 | 110 | 102 | approx. 197 W | F |
A methodological note: the efficacy declared in the datasheet and the simple ratio between lumens per meter and watts per meter may differ by a few points, because they are measured under different conditions. To estimate consumption and power supply, this guide always uses the lm/m ÷ W/m ratio, which is the more prudent value.
The data is eloquent: to obtain the same 20,000 lumens, the 155 lm/W strip consumes about 30% less than the 110 lm/W strip, requires a smaller power supply, and runs cooler. On an installation running 5 hours a day, the difference of about 60 W amounts to over 100 kWh per year.
Efficacy, heat, and longevity
The energy that does not become light becomes heat. An efficient strip runs cooler, and a cooler LED maintains its luminous flux and color longer. This is why the most efficient strips are also those that, over time, best preserve their declared performance. Choosing a 130–155 lm/W strip means designing an installation that will remain bright even in ten years.
The density trick: more LEDs, less current per LED
Why is the 240 led/m strip more efficient than the 120 led/m strip at the same wattage? Because it distributes the same power over twice the number of LEDs, each of which operates at a lower current, in the zone where the chip is most efficient. It is the same principle by which an engine running at medium load consumes less than one pushed to the max.
High-efficacy vs. high-power strips: how to choose
If you need a lot of light over a few meters, such as in light cuts in a store with a high ceiling, high-power 22–24 W/m strips are required. If, however, you can distribute the light over more meters, it is better to install more meters of a medium-power, high-efficacy strip rather than a few meters of a very powerful strip: you get the same light, more uniformly, with less consumption and less heat.
8. LED density, chips, and uniformity of the light line
The amount of light is not the only requirement: the light must also look good. A strip with few LEDs per meter, mounted visibly or reflected on a glossy surface, shows an inelegant sequence of bright dots. The LED density per meter and the type of chip determine the uniformity of the line, and their importance grows as the strip gets closer to the observer or the illuminated surface.
The most common chips: 2835, 3014, and COB
The 2835 chip, measuring 2.8 × 3.5 mm, is today the standard for professional lighting: efficient, reliable, and available in densities from 60 to 240 LEDs per meter. The smaller 3014 chip allows high densities on narrow strips. COB (Chip On Board) technology arranges hundreds of microchips covered by a continuous layer of phosphors, completely eliminating the dotted effect even without a diffuser. To delve deeper into the internal structure of LEDs, you can read our guide on how an LED diode works and how to recognize a quality strip.
| Density / technology | Minimum recommended distance from opal diffuser for continuous line | Ideal use based on height |
|---|---|---|
| 60 led/m | over 25 mm | Indirect light, non-visible strips |
| 120 led/m | 15 – 20 mm | Coves, under-cabinet with diffuser, ceiling |
| 204 – 240 led/m | 8 – 12 mm | Surface-mounted profiles, light cuts, mirrors |
| COB (320 – 840 led/m) | even without diffuser | Visible short-distance lines, furniture, showcases |
Uniformity and height: an inverse relationship
On a ceiling, 2.7 m from the observer, a 120 led/m strip in an opal profile already appears as a continuous line. Under a cabinet, 50 cm from a glossy surface, the same strip may reflect individual dots. The closer the strip, the more density is needed; the farther it is, the more flux is needed. It is a simple rule that guides the choice between high-density and high-power strips.
9. Color temperature and color rendering in relation to height
Color temperature is not just an aesthetic choice: it influences the perception of brightness and, to a lesser extent, the efficacy of the strip. Neutral or cool white strips are generally slightly more efficient than warm white ones, and at the same lux, a cooler light is perceived as more "brilliant". Choosing the right tone based on the environment and height is an integral part of sizing.
The Kruithof curve: more light, cooler tone
Kruithof's study showed that humans find warm lights pleasant at low illuminance levels and cooler lights at high levels. A 2700K light at 100 lux creates a cozy atmosphere; the same tone at 750 lux can feel unnatural. Conversely, a 6000K light at 50 lux appears gloomy and "hospital-like". In practice: 2700–3000K for living and night zones with low illuminance, 3500–4000K for kitchens, bathrooms, studies, and stores with high illuminance. We discuss this in depth in the guide to Kelvin degrees of LED strips.
| Color temperature | Sensation | Ideal illuminance | Recommended environments | Ledpoint category |
|---|---|---|---|---|
| 2700K | Very warm, intimate | 50 – 150 lux | Bedroom, evening living room, hotels | Warm white |
| 3000K | Warm, welcoming | 100 – 300 lux | Living room, restaurants, hallways | Warm white |
| 3500K | Neutral warm | 200 – 500 lux | Kitchen, bathroom, fashion retail | Warm white |
| 4000K | Neutral, active | 300 – 750 lux | Offices, stores, laboratories | Natural white |
| 5000 – 6500K | Cool, technical | over 500 lux | Warehouses, workshops, technical showcases | Cool white |
Tunable white: one strip for multiple scenarios
If the same environment needs to transition from daytime operational light to relaxing evening light, CCT tunable white LED strips are the ideal solution. There is also a particularly practical option: the 3000K or 4000K 2-wire LED strip at 14.4 W/m, which allows you to choose the tone simply by reversing the polarity of the wires, without a controller: useful when the light color has not yet been decided during the design phase. For lighting that follows the natural rhythm of the day, there is the Circadian Light line.
Color rendering: when it is worth spending a few lumens
A high CRI makes colors more faithful, but requires phosphors that "cost" a few points of efficacy. The comparison between two almost identical Ledpoint strips demonstrates this: the 4000K 238 led/m 22 W/m version with Ra>80 declares 2,780 lm/m and 140 lm/W, while the version with CRI Ra>90 declares 2,450 lm/m and 120 lm/W. About 12% less flux in exchange for decidedly more natural colors: a trade-off that is worthwhile in clothing stores, galleries, bathrooms with mirrors, kitchens, and anywhere light falls on people and premium materials.
10. 12V, 24V, or 48V: voltage, lengths, and power supply
After choosing the lumens and watts per meter, one aspect remains that directly impacts the quality of light along the entire strip: the supply voltage. A well-sized strip that is poorly powered will show weaker light and, in CCT versions, a different color at the end of the run. The choice of voltage and the correct placement of power injection points is the link between lighting calculation and electrical installation.
Voltage drop
Along the copper traces of the strip, current generates a voltage drop: the more current flows, the more the voltage drops as you move away from the power injection point. For the same power, doubling the voltage halves the current. This is why 24V LED strips are now the professional standard, while 12V LED strips remain suitable for short runs, campers, boats, and battery-powered systems, and 48V LED strips are the choice for long continuous runs.
| Voltage | Current for 5 m of 19.2 W/m | Typical length powered from one side | With power from both ends | When to choose it |
|---|---|---|---|---|
| 12V | 8 A | 2.5 – 5 m | 5 – 8 m | Furniture, vehicles, batteries |
| 24V | 4 A | 5 m | 10 m | Standard for home and store |
| 48V | 2 A | 10 – 20 m depending on the model | up to double | Long continuous runs, large environments |
The lengths are indicative and depend on the power per meter and the trace cross-section: the technical datasheet of each product always prevails. For high-power 24V strips over 5 meters, it is advisable to power from both ends or at multiple points, with adequately sized cables. There are also LED strips with constant current control, which maintain uniform brightness even over longer runs.
How to size the power supply
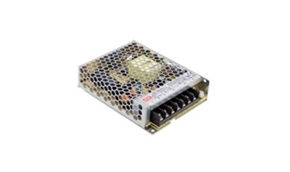
The rule is simple: power supply wattage = watts per meter × installed meters × 1.2. The 20% margin prevents the power supply from running at its limit, extends its life, and absorbs tolerances. For 12 meters of 19.2 W/m strip, 230 W of load is needed, so a power supply of at least 276 W, in practice a 300 W model or two smaller distributed power supplies. You can find 24V power supplies, 12V power supplies, and 48V power supplies in the catalog.
Safety: SELV extra-low voltage
12V, 24V, and 48V strips operate at Safety Extra-Low Voltage (SELV), a condition that makes installation intrinsically safer, especially in bathrooms and damp areas. Connecting the power supply to the 230V mains must always be entrusted to a qualified electrician. For those considering strips connectable directly to the mains, our technical guide to 220V LED strips explains the advantages and limitations. For bathrooms, showers, and outdoors, also read when to use a waterproof LED strip.
Dimmers, sensors, and control
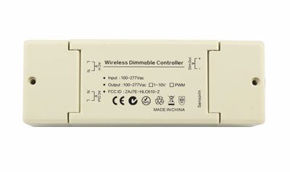
A strip sized with a 20–30% margin and connected to a dimmer allows you to adjust the light exactly to the desired level, compensating for calculation uncertainties and adapting the environment to different times of the day. For hallways, walk-in closets, and stairs, an LED strip motion sensor turns the light on only when needed. In professional smart home systems, DMX and DALI decoders are used.
11. The Ledpoint configurators: find the right strip in a few clicks
We have transformed the methods described so far into three interactive tools. The first gives you an immediate answer based solely on the installation height; the second performs the complete room lighting calculation using the total flux method; the third sizes the power supply, power injection points, and annual consumption. All three cross-reference the results with the LED strips actually available in the Ledpoint.it catalog and show you direct links to the product datasheets, where you can find specs, availability, and pricing.
The results are design estimates based on typical values: for professional installations, workplaces subject to UNI EN 12464-1, or complex geometries, the Ledpoint technical team can verify the project with a dedicated lighting calculation via the contact page.
Configurator 1 – Quick finder by installation height
Choose the distance of the strip from the surface to be illuminated and the type of light you need: you will get the range of lumens and watts per meter and the compatible Ledpoint strips.
Configurator 2 – Complete room calculator
Enter dimensions, height, and installation type: the calculator estimates the required flux, lumens per meter, watts, and proposes the most efficient Ledpoint LED strips for your project.
Configurator 3 – Power supply, injection points, and consumption
Already chosen the strip? Calculate the minimum power supply size, how many times to inject power along the run, and how much you will spend in a year.
12. Reference table of Ledpoint LED strips by lumens and watts
For those who prefer to consult the data directly, here is the reference table with the white light strips from the Ledpoint catalog used by the configurators, ordered by increasing lumens per meter. For each product, you will find flux, power, declared efficacy, real efficacy calculated as the lm/m ÷ W/m ratio, and the recommended application based on installation height. The data is as reported in the product datasheets: always refer to the updated datasheet for availability, reel lengths, and cut points.
| LED Strip | Color | Chip | LED/m | lm/m | W/m | Declared lm/W | lm/m ÷ W/m | CRI | IP | Voltage | Recommended use |
|---|---|---|---|---|---|---|---|---|---|---|---|
| 5m white 3900-4250K 2216 CRI Ra>90 240led/m 24V 5.5W/m LED strip, 3mm PCB | 4000K | 2216 | 240 | 510 | 5.5 | 105 | 93 | Ra>90 | IP20 | 24V | Shelves, showcases, steps, short-distance accent |
| 5m warm white 3000K 3step 2835 120led/m Honglitronic 12V 5.5W/m LED strip, 3mm PCB | 3000K | 2835 | 120 | 600 | 5.5 | 120 | 109 | Ra>80 | IP20 | 12V | Shelves, showcases, steps, short-distance accent |
| 5m warm white 3000K 3step 2835 156led/m Honglitronic 24V 6.6W/m LED strip, 5mm PCB | 3000K | 2835 | 156 | 695 | 6.6 | 115 | 105 | Ra>80 | IP20 | 24V | Shelves, showcases, steps, short-distance accent |
| 5m white 4000K 3step 2835 156led/m Honglitronic 24V 6.6W/m LED strip, 5mm PCB | 4000K | 2835 | 156 | 740 | 6.6 | 125 | 112 | Ra>80 | IP20 | 24V | Shelves, showcases, steps, short-distance accent |
| 5m warm white 3000K 3step 2835 60led/m Honglitronic 12V 8W/m LED strip, Zigzag PCB | 3000K | 2835 | 60 | 825 | 8.0 | 115 | 103 | Ra>80 | IP20 | 12V | Under-cabinet, niches, mirrors, atmospheric coves |
| 5m warm white 3000K 3step 2835 36led/m Honglitronic 24V 8.6W/m constant current control LED strip | 3000K | 2835 | 36 | 850 | 8.6 | 110 | 99 | Ra>80 | IP20 | 24V | Under-cabinet, niches, mirrors, atmospheric coves |
| 5m white 4000K 3step 2835 60led/m Honglitronic 12V 8W/m LED strip, Zigzag PCB | 4000K | 2835 | 60 | 900 | 8.0 | 125 | 112 | Ra>80 | IP20 | 12V | Under-cabinet, niches, mirrors, atmospheric coves |
| 5m white 4000K 3step 2835 36led/m Honglitronic 24V 8.6W/m constant current control LED strip | 4000K | 2835 | 36 | 920 | 8.6 | 115 | 107 | Ra>80 | IP20 | 24V | Under-cabinet, niches, mirrors, atmospheric coves |
| 5m white 4000K 2216pro CRI Ra>90 240led/m 24V 10.5W/m LED strip, 5mm PCB | 4000K | 2216 | 240 | 1,250 | 10.5 | 130 | 119 | Ra>90 | IP20 | 24V | Under-cabinet, niches, mirrors, atmospheric coves |
| 5m warm white 3000K 3step 2835 120led/m 24V 14.4W/m LED strip | 3000K | 2835 | 120 | 1,410 | 14.4 | 110 | 98 | Ra>80 | IP20 | 24V | Functional under-cabinet, mirrors, 2.4–2.7 m ceilings |
| 5m warm white 2900-3100K 2835 120led/m 24V 14.4W/m derated LED strip | 3000K | 2835 | 120 | 1,450 | 14.4 | 110 | 101 | Ra>80 | IP20 | 24V | Functional under-cabinet, mirrors, 2.4–2.7 m ceilings |
| 5m warm white 2700K 3step 2835 120led/m 24V 14.4W/m LED strip | 2700K | 2835 | 120 | 1,500 | 14.4 | 115 | 104 | Ra>80 | IP20 | 24V | Functional under-cabinet, mirrors, 2.4–2.7 m ceilings |
| 25m warm white 3000K 3step 2835 120led/m 24V 14.4W/m LED strip | 3000K | 2835 | 120 | 1,510 | 14.4 | 115 | 105 | Ra>80 | IP20 | 24V | Functional under-cabinet, mirrors, 2.4–2.7 m ceilings |
| 5m warm white 3500K 3step 2835 120led/m 24V 14.4W/m LED strip | 3500K | 2835 | 120 | 1,600 | 14.4 | 125 | 111 | Ra>80 | IP20 | 24V | Functional under-cabinet, mirrors, 2.4–2.7 m ceilings |
| 5m 3000K 3step or 4000K 3step 2-wire CCT 2835 240led/m Honglitronic 24V 14.4W/m LED strip | 3000K / 4000K | 2835 | 240 | 1,770 | 14.4 | 125 | 123 | Ra>80 | IP20 | 24V | Functional under-cabinet, mirrors, 2.4–2.7 m ceilings |
| 5m warm white 3000K 3step 2835 240led/m 24V 14.4W/m LED strip | 3000K | 2835 | 240 | 2,000 | 14.4 | 155 | 139 | Ra>80 | IP20 | 24V | Light cuts and primary ceiling light 2.4–3 m |
| 5m cool white 6000-6500K 3014 204led/m Honglitronic 24V 19.2W/m LED strip | 6000K | 3014 | 204 | 2,000 | 19.2 | 115 | 104 | Ra>80 | IP20 | 24V | Light cuts and primary ceiling light 2.4–3 m |
| 5m warm white 3000-3100K 3014 204led/m Honglitronic 24V 19.2W/m LED strip | 3000K | 3014 | 204 | 2,050 | 19.2 | 120 | 107 | Ra>80 | IP20 | 24V | Light cuts and primary ceiling light 2.4–3 m |
| 5m white 5000K 3step 2835 240led/m 24V 19.2W/m LED strip | 5000K | 2835 | 240 | 2,050 | 19.2 | 120 | 107 | Ra>80 | IP20 | 24V | Light cuts and primary ceiling light 2.4–3 m |
| 5m white 4000K 3step 2835 240led/m 24V 19.2W/m LED strip (F52-40s-240D22-R) | 4000K | 2835 | 240 | 2,130 | 19.2 | 125 | 111 | Ra>80 | IP20 | 24V | Light cuts and primary ceiling light 2.4–3 m |
| 5m white 4000K 3step 2835 240led/m Honglitronic 24V 19.2W/m LED strip | 4000K | 2835 | 240 | 2,150 | 19.2 | 125 | 112 | Ra>80 | IP20 | 24V | Light cuts and primary ceiling light 2.4–3 m |
| 5m white 4000K 3step 2835 240led/m Parylene IP65 24V 19.2W/m LED strip | 4000K | 2835 | 240 | 2,195 | 19.2 | 125 | 114 | Ra>80 | IP65 | 24V | Light cuts and primary ceiling light 2.4–3 m |
| 5m white 4000-4250K 3014 204led/m Honglitronic 24V 19.2W/m LED strip | 4000K | 3014 | 204 | 2,200 | 19.2 | 130 | 115 | Ra>80 | IP20 | 24V | Light cuts and primary ceiling light 2.4–3 m |
| 5m white 4000K 3step 2835 240led/m 24V 19.2W/m LED strip (F52-40s-240DF2) | 4000K | 2835 | 240 | 2,210 | 19.2 | 130 | 115 | Ra>80 | IP20 | 24V | Light cuts and primary ceiling light 2.4–3 m |
| 5m warm white 2700K 3step 2835 120led/m 24V 24W/m LED strip | 2700K | 2835 | 120 | 2,250 | 24.0 | 105 | 94 | Ra>80 | IP20 | 24V | Light cuts and primary ceiling light 2.4–3 m |
| 50m warm white 2700K 3step 2835 120led/m 24V 24W/m LED strip | 2700K | 2835 | 120 | 2,250 | 24.0 | 105 | 94 | Ra>80 | IP20 | 24V | Light cuts and primary ceiling light 2.4–3 m |
| 5m warm white 2900-3100K 2835 120led/m 24V 24W/m LED strip | 3000K | 2835 | 120 | 2,345 | 24.0 | 110 | 98 | Ra>80 | IP20 | 24V | Light cuts and primary ceiling light 2.4–3 m |
| 25m warm white 3000K 3step 2835 120led/m 24V 24W/m LED strip | 3000K | 2835 | 120 | 2,345 | 24.0 | 110 | 98 | Ra>80 | IP20 | 24V | Light cuts and primary ceiling light 2.4–3 m |
| 5m warm white 3000K 3step 2835 238led/m 24V 19.2W/m LED strip | 3000K | 2835 | 238 | 2,345 | 19.2 | 135 | 122 | Ra>80 | IP20 | 24V | Light cuts and primary ceiling light 2.4–3 m |
| 5m warm white 3000K 3step 2835 120led/m 24V 24W/m LED strip | 3000K | 2835 | 120 | 2,440 | 24.0 | 110 | 102 | Ra>80 | IP20 | 24V | High ceilings, stores, primary light with few lines |
| 5m white 4000K 3step CRI Ra>90 2835 238led/m 24V 22W/m LED strip | 4000K | 2835 | 238 | 2,450 | 22.0 | 120 | 111 | Ra>90 | IP20 | 24V | High ceilings, stores, primary light with few lines |
| 5m white 4000K 3step 2835 238led/m 24V 22W/m LED strip | 4000K | 2835 | 238 | 2,780 | 22.0 | 140 | 126 | Ra>80 | IP20 | 24V | High ceilings, stores, primary light with few lines |
How to read the table
The lumens per meter column tells you in which height band the strip works best; the real efficacy column allows you to compare consumption for the same amount of light. If two strips have similar fluxes, choose the one with the higher lm/m ÷ W/m ratio: it will consume less, run cooler, and require a smaller power supply. If you need a specific tone or protection, the full Ledpoint LED strips catalog offers many other variants, including silicone waterproof versions, RGB, RGBW, and RGB+CCT.
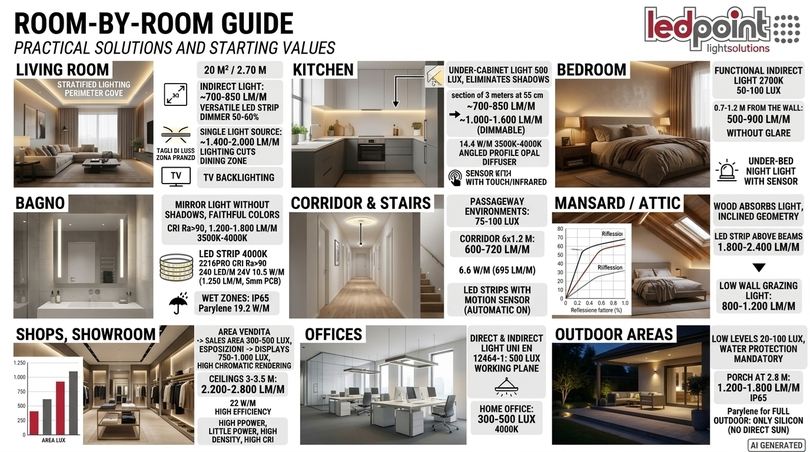
13. Room-by-room guide: living room, kitchen, bedroom, bathroom, store
Each environment has its own requirements, and the same calculation logic produces very different results depending on how the space is used. In this chapter, you will find practical indications for the most requested applications, with starting values and the most suitable Ledpoint strips. Use these indications as a base and refine the result with Configurator 2.
LED strips for living room ceilings
The living room is the realm of layered lighting. The perimeter drywall cove, one of the most sought-after solutions in the ceiling LED strip category, creates soft general light, which should then be complemented with reading lamps and accent spotlights. For a 20 m² living room with a 2.70 m ceiling and indirect light, about 700–850 lm/m around the entire perimeter is needed: a 14.4 W/m warm white 2700–3000K strip, dimmed to around 50–60%, is the most versatile solution. If the cove is the only light source in the room, aim for 1,400–2,000 lm/m and choose a high-efficacy strip like the 3000K 240 led/m at 14.4 W/m.
LED lighting ideas for the living room
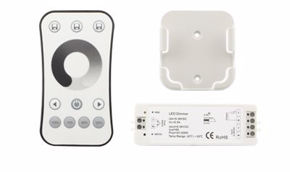
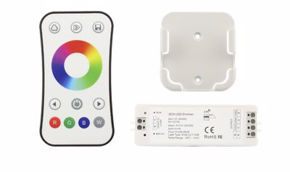
Besides the cove, light cuts highlighting the dining area, backlighting the TV wall with a low-power strip, and grazing light on textured stone or lime plaster walls work very well, enhancing textures with 1,000–1,500 lm/m at 10–20 cm from the wall. To regulate different scenes, you can combine receivers and remote controls for LED strips.
LED strips for kitchen and under-cabinet
In the kitchen, two levels of light are needed: general light of about 300 lux and functional light of 500 lux on the worktop. The under-cabinet strip is the most important component, as it eliminates the shadows cast by ceiling light when working with your back to it. For a 3-meter run at 55 cm from the surface, about 700–850 lm/m is needed, which with a dimming margin becomes 1,000–1,600 lm/m. A 14.4 W/m strip at 3500K or 4000K in an angular profile with an opal diffuser is the configuration we recommend most often.
Sensors and touchless activation
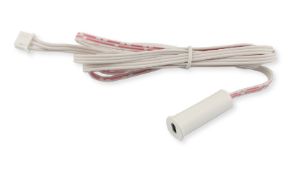
When hands are wet or dirty, a touch or infrared sensor integrated into the profile is a convenience appreciated every day. You can find compatible solutions in the LED strip sensors category.
LED strip for the bedroom
In the bedroom, light should accompany rest. 50–100 lux of general light is sufficient, preferably indirect and at 2700K, with more intense functional light for the wardrobe and reading. A strip behind the headboard, 0.7–1.2 m from the wall, with 500–900 lm/m, creates a warm atmosphere without glare. A dimmer is practically indispensable, and a small low-power strip under the bed, controlled by a sensor, serves as a courtesy night light.
LED strips for the bathroom and mirror
In the bathroom, mirror light is the most important: it must illuminate the face evenly, without shadows, and with faithful colors. Two vertical lines on the sides of the mirror or a perimeter frame about 1 meter from the face require 1,200–1,800 lm/m in an opal profile, with a color temperature of 3500–4000K and CRI Ra>90. The 4000K 2216pro CRI Ra>90 240 led/m 24V 10.5 W/m LED strip, with 1,250 lm/m and a PCB of only 5 mm, is perfect for thin profiles around the mirror. For areas exposed to splashes, consider the 4000K IP65 Parylene 19.2 W/m LED strip and consult the mirror dimmers category.
LED strips for hallway and stairs, with motion sensor
Hallways and landings are transit areas: 75–100 lux is sufficient. The hallway is also the typical case of a very low room index, because it is long and narrow and light disperses on the walls. For a 6 × 1.2 m hallway with a 2.70 m ceiling, about 600–720 lm/m on a central line is needed: a 6.6 W/m strip like the 3000K 156 led/m 24V 6.6 W/m LED strip (695 lm/m) is sufficient. LED strips with motion sensors are the ideal choice: the light turns on when passing and turns off by itself, with almost zero consumption.
Attic and exposed beams
In attics, the sloped and often wood-paneled ceiling completely changes the rules. Wood absorbs a lot of light, the sloped geometry places the strip at varying distances from the plane, and the lower part of the attic needs more illumination than the higher part. The most effective solution is a strip on the upper side of the beams or along the ridge, facing the boarding, at 1,800–2,400 lm/m with a low reflection factor in the calculation. For grazing light along the low walls, however, 800–1,200 lm/m is sufficient.
Stores, showrooms, and showcases
In retail, light sells. The sales area requires 300–500 lux, display areas up to 750–1,000 lux, and color rendering must be high to show products with faithful colors. With 3–3.5 m ceilings, multiple parallel lines of 2,200–2,800 lm/m are needed, and 22 W/m high-efficacy strips become the standard. In showcases and displays, a few centimeters from the product, the opposite is needed: low power, high density, and high CRI. For food showcases, there is a dedicated category of LED strips for food, with spectra designed to enhance meat, bread, fruit, and vegetables.
Offices and home offices
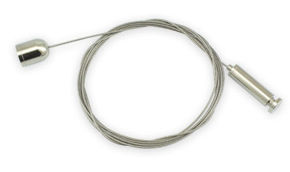
For computer work, UNI EN 12464-1 indicates 500 lux on the work surface, with attention to glare and screen reflections. Strips in suspended profiles with direct and indirect light are an elegant solution: the upward component illuminates the ceiling, the downward component the desk. For suspended profiles, you can find suspension cables in the catalog; for the home office, 300–500 lux at 4000K is the reference.
Outdoors: porches, gardens, and facades
Outdoors, the required illuminance levels are lower, from 20 to 100 lux for paths and porches, but distances are often greater and water protection becomes mandatory. Under a porch at 2.8 m, a 1,200–1,800 lm/m IP65 line is more than sufficient. For lighting effects on facades and cornices, the strip works as an architectural sign: the continuity of the line matters more than the quantity of lumens. Remember that strips with Parylene protection should not be exposed to direct sunlight: for full outdoor use, choose silicone versions.
14. Complete project examples, with numbers in hand
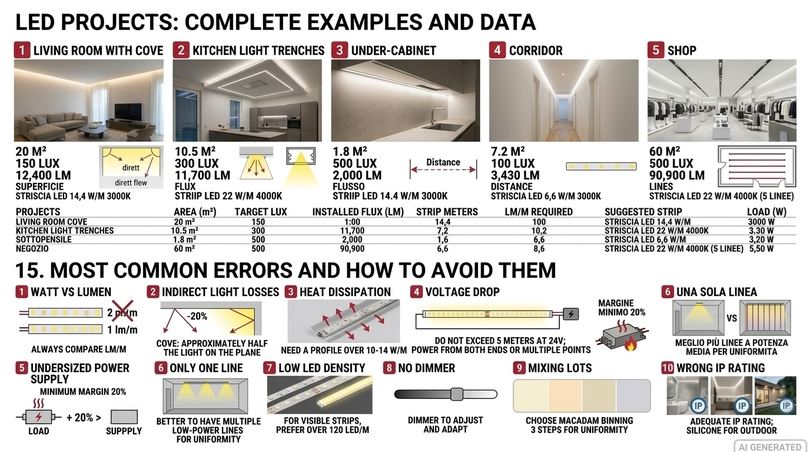
Theory becomes clear only when applied. Below you will find five typical projects developed with the total flux method and verified with Configurator 2 on this page, using Ledpoint strip datasheets. You can repeat each example in the configurator by entering the same data and then modify them to adapt to your case.
Example 1: 5 × 4 m living room with perimeter cove
Data: surface 20 m², ceiling 2.70 m, useful plane at 0.85 m, useful height 1.85 m, target illuminance 150 lux, indirect light in cove, light-colored walls. The room index is K = 20 ÷ (1.85 × 9) = 1.20, corresponding to a utilization factor of 0.55 for direct light and about 0.30 for indirect light. The flux to install is 150 × 20 ÷ (0.30 × 0.80) = approx. 12,400 lm. The useful perimeter is about 17.6 m, so about 700 lm/m, 850 lm/m with a 20% margin is needed.
Choice: a 14.4 W/m strip at 3000K, such as the 2900–3100K 120 led/m 24V 14.4 W/m LED strip (1,450 lm/m), which runs at around 50% with the dimmer and leaves ample margin for evenings when more light is needed. Total load approx. 253 W, power supply of at least 305 W, four 24V power injection points along the perimeter.
Example 2: 3.5 × 3 m kitchen with ceiling light cuts
Data: 10.5 m², ceiling 2.70 m, 300 lux general light, direct light in opal profile, light-colored walls. K = 10.5 ÷ (1.85 × 6.5) = 0.87, utilization factor 0.45. Flux to install: 300 × 10.5 ÷ (0.45 × 0.80 × 0.75) = approx. 11,700 lm. With spacing no greater than the useful height, 2 lines of 3.2 m are needed, i.e., 6.4 m of strip: approx. 1,820 lm/m, 2,190 lm/m with margin.
Choice: the 4000K 238 led/m 24V 22 W/m LED strip (2,780 lm/m) at 65–70% or, for those who prefer warmer light, the 3000K 238 led/m 24V 19.2 W/m LED strip (2,345 lm/m) at almost full power. Load approx. 141 W with the first solution, power supply of at least 170 W.
Example 3: 3 m under-cabinet at 55 cm from the surface
Data: 0.6 m deep surface, 1.8 m² area, 500 lux, strip near the cabinet edge with opal diffuser. Utilization factor 0.75, given the short distance. Flux: 500 × 1.8 ÷ (0.75 × 0.80 × 0.75) = 2,000 lm over 2.85 m of strip, i.e., approx. 700 lm/m, 840 lm/m with margin. A 14.4 W/m strip with 1,450–1,600 lm/m runs at around 45–50% and guarantees abundant light even when a demanding visual task is required. Load approx. 41 W, 60 W power supply.
Example 4: 6 × 1.2 m hallway
Data: 7.2 m², ceiling 2.70 m, 100 lux floor illuminance, direct light in opal profile. In this case, the surface to illuminate is the floor, so the useful height coincides with the ceiling: K = 7.2 ÷ (2.7 × 7.2) = 0.37, utilization factor 0.35. Flux: 100 × 7.2 ÷ (0.35 × 0.80 × 0.75) = approx. 3,430 lm over 5.7 m, so approx. 600 lm/m. A 6.6 W/m strip is sufficient: the total load is under 40 W, and with a motion sensor, the annual consumption becomes negligible.
Example 5: 10 × 6 m store with 3.5 m ceiling
Data: 60 m², 500 lux on the sales area, useful plane at 0.85 m, useful height 2.65 m, direct light in opal profile, light-colored walls. K = 60 ÷ (2.65 × 16) = 1.42, utilization factor 0.55. Flux: 500 × 60 ÷ (0.55 × 0.80 × 0.75) = approx. 90,900 lm. With three lines, this would exceed 3,100 lm/m, a value that surpasses any single strip. With four lines of 9.7 m (38.8 m total), about 2,340 lm/m is needed, and the 4000K 238 led/m 22 W/m strip runs at about 85%. If CRI Ra>90 is desired for displayed products, switch to five lines with the CRI 90 version at 2,450 lm/m. The load exceeds 850 W: the installation must be split across multiple power supplies, each located near its own group of lines.
| Project | Surface | Lux | Installed flux | Strip meters | Required lm/m | Suggested strip | Load |
|---|---|---|---|---|---|---|---|
| Living room with cove | 20 m² | 150 | 12,400 lm | 17.6 m | 700 – 850 | 14.4 W/m 3000K | approx. 253 W |
| Kitchen light cuts | 10.5 m² | 300 | 11,700 lm | 6.4 m | 1,820 – 2,190 | 22 W/m 4000K | approx. 141 W |
| Under-cabinet | 1.8 m² | 500 | 2,000 lm | 2.85 m | 700 – 840 | 14.4 W/m 3000–3500K | approx. 41 W |
| Hallway | 7.2 m² | 100 | 3,430 lm | 5.7 m | 600 – 720 | 6.6 W/m 3000K | approx. 38 W |
| Store | 60 m² | 500 | 90,900 lm | 38.8 m | 2,340 – 2,810 | 22 W/m 4000K | approx. 854 W |
15. The most common mistakes (and how to avoid them)
In years of technical support, the Ledpoint team has seen the same mistakes repeat themselves, almost all linked to a misjudgment of the relationship between power, height, and environment. Knowing them in advance saves you time, money, and having to open up drywall walls. Here are the ten most frequent errors and the solution for each.
Choosing the strip based on watts instead of lumens
Two 14.4 W/m strips can differ by 40% in light. The data to compare is always the flux in lm/m, along with efficacy. Watts are only used to size the power supply and consumption.
Forgetting the losses of indirect light
A cove that illuminates the ceiling provides the plane with about half the light of a direct light strip. Those who size the cove as if it were direct light end up with a dim room.
Mounting high-power strips without an aluminum profile
Above 10–14 W/m, heat must be dissipated. A strip glued directly to wood or drywall runs hot, loses flux more rapidly, and may change color over time.
Ignoring voltage drop
Runs that are too long and powered from one side show weaker light at the end. At 24V with high power, do not exceed 5 meters from one side; for long runs, power from both ends, from multiple points, or switch to 48V.
Undersizing the power supply
A power supply loaded to 100% runs hot, degrades, and may shut down. The minimum margin is 20%: for 200 W of load, a power supply of at least 240 W is needed.
Using a single line in wide rooms or with high ceilings
With spacing greater than the useful height, the light becomes uneven: bright zones under the strips and dark zones between lines. It is better to have multiple lines at medium power than a single very powerful line.
Choosing an LED density that is too low for visible strips
Under cabinets, on steps, and in showcases, individual LEDs are visible and reflected. At least 120 led/m with an opal diffuser is required, preferably 204–240 led/m or COB.
Not providing for dimming
Every calculation has a margin of uncertainty. A dimmer allows you to correct the result on-site and adapt the light to different times of the day, with the added benefit of reducing consumption.
Mixing strips from different batches or tones
Two "3000K" strips from different manufacturers or batches can have visibly different tones. Strips with 3-step MacAdam binning, like those in the Ledpoint catalog, guarantee uniformity even in case of subsequent additions.
Choosing the wrong IP rating
In bathrooms, near kitchen sinks, and outdoors, adequate protection is required. Coatings slightly reduce flux: take this into account in the calculation and, for outdoor exposure to sunlight, choose silicone, not Parylene.
16. Frequently asked questions
We have gathered the questions we receive most often about sizing LED strips based on height and environment. Click on each question to read the answer.
How many lumens per meter should a ceiling LED strip have?With ceilings between 2.4 and 2.8 meters, 800–1,400 lm/m is needed for indirect atmospheric cove light, and 1,500–2,400 lm/m for primary direct light in a profile. The exact value depends on surface area, number of lines, and wall color: the Ledpoint configurator calculates it based on your data. |
How many watts per meter are needed for an under-cabinet LED strip?For a worktop 50–60 cm from the cabinet, about 700–900 effective lm/m is needed, so a 1,000–1,600 lm/m strip. With Ledpoint 24V strips, this corresponds to 9.6–14.4 W/m. It is advisable to mount it in an angular profile with an opal diffuser and connect it to a dimmer or sensor. |
How do you calculate the lumens needed for a room?Multiply the required lux by the surface area in square meters, then divide by the utilization factor, which depends on the shape and height of the room, by the maintenance factor of 0.8, and by the diffuser transmission. Dividing the result by the installable meters of strip gives you the required lumens per meter. |
What is the difference between lumens, lux, and watts in an LED strip?Lumens measure the light emitted by the strip, lux measure the light arriving on one square meter of surface, and watts measure the energy consumed. The ratio between lumens and watts is luminous efficacy: the higher it is, the more light you get for the same consumption. When choosing a strip, lumens are always compared. |
Can an LED strip illuminate a 4 or 5 meter high ceiling?Yes, but as primary light it requires 2,400–2,800 lm/m strips, multiple close parallel lines, and profiles with optics. Beyond 4–5 meters, the LED strip is ideal primarily for architectural effects, while projectors and LED bars offer superior yield for illuminating the floor of large environments. |
Is a 12V, 24V, or 48V LED strip better?For home and store, 24V is the standard: at the same power, it halves the current compared to 12V and allows runs of about 5 meters powered from one side. 12V is suitable for short runs, vehicles, and batteries; 48V for long continuous runs with fewer power injection points. |
Why does my LED cove illuminate the room poorly?In indirect light, the ceiling absorbs and disperses about half the flux, so for the same strip, half the light of a direct light profile reaches the plane. About double the lumens per meter is needed, a distance of at least 10–15 cm from the ceiling, and light-colored walls to increase reflection. |
What luminous efficacy should a good LED strip have?For primary lighting, it is advisable to choose strips of at least 120–130 lm/W; the most efficient in the Ledpoint catalog reach 140–155 lm/W. High efficacy reduces consumption, heat, and power supply size, and maintains flux longer. Also check the energy class reported in the datasheet according to EU Regulation 2019/2015. |
17. The right light comes from a calculation, not an impression
Choosing the power and efficacy of an LED strip is not a matter of luck. Once you have established the lux you need, the surface to illuminate, the installation height, and the way the light will reach the plane, the result is predictable with good precision. The method is always the same: lux times surface area, divided by losses and by the meters of strip, divided by efficacy. The rest is choosing the tone, LED density, profile, and voltage most suitable for the project.
Use the configurators on this page for an initial assessment, consult the technical datasheets of Ledpoint 24V LED strips for the details of each product, and if the project is complex, contact our technical team: we will help you turn the numbers into light that truly works.
Recommended further reading on the Ledpoint blog: guide to Kelvin degrees of LED strips, how an LED diode works, when to use a waterproof LED strip, 220V LED strips: technical guide, and LED neon with strip and neon flex.
This article was developed with the support of artificial intelligence and subsequently reviewed, corrected, and validated by the Ledpoint.it technical team, which guarantees its reliability and compliance with official sources.